2
重要提示:
Important:
!
!
ႌҦ൛ඪམ܆ƥ࿀ඪç࣐ඪًಿఝçъܲ൛ѓఝᆭࡖƗൗႯ܆฿ཊᄤႌҦ൛ඪམ܄ቛϷනଃඇᇖƦ
Օනଃඇᇁ܉ႌҦ൛ඪམτሔཔܸୄಿè
ᄤϖս৭׀౼τሔ൏౯ቕ);6B;༩њሠࠎᆇ֙׀њሠ
τሔшڟލ֙׀њሠè
1. Functions of the concealed cistern: storage water, inlet and outlet calve vessel, frame of wall-hung toilet,
The function reflected in the actuator panel instructions.
2. This instruction manual only supports the installation of the concealed cistern.
3. For Australia, the installation has to be in accordance with AS/NZS 3500 series of Standards and/or local standards.
4. The installation has to be in accordance with the local standard.
务必遵循当地标准并将电源线牢固插入插座。
请勿使用本地标准以外的其他电源。
τሆၰൠརƓເτఖࡵƗ౯༇шቕ൶༶ൠརƔ
Safety Precautions (Be sure to follow them for safety sake.)
3
Ventilating fan or ventilation hole
Be sure to read through this installation manual before installation work and install the product properly according to
the descriptions of this manual. Be sure to follow the warnings and cautions for safety sake.
This indication means the case where there is a possible
danger which may result in death or serious injury if the
product is used improperly.
This indication means the case where there is a possible
damage which may result in injury or only physical
damage if the product is used improperly.
Symbol example
means the actions that must not
be performed—“Prohibited”
means the actions that must be
performed—“Forced”
WARNING
Be sure
to follow
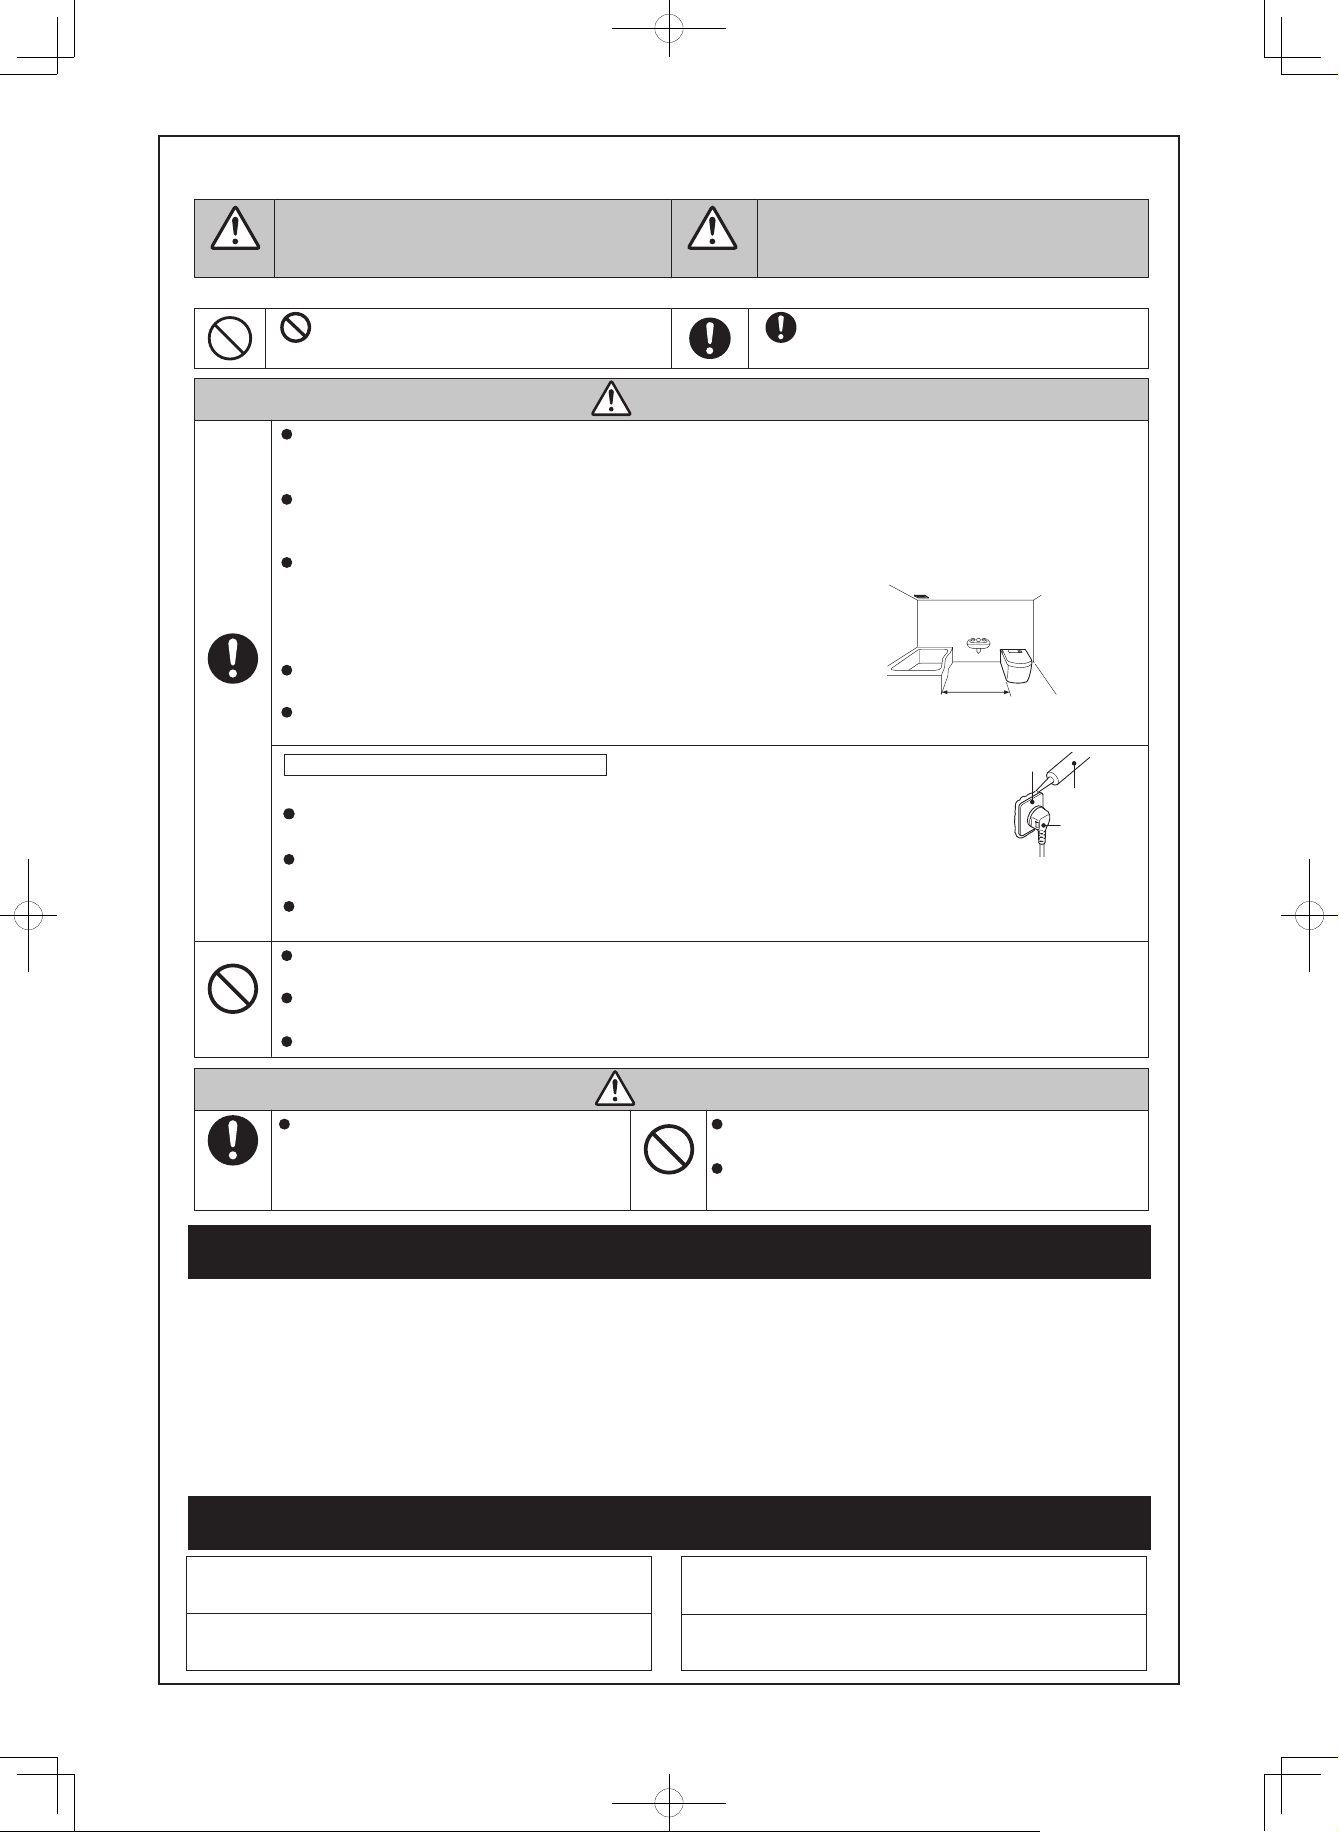
Do not install this product in a place exposed to water splash or humid place.
When using the product in the bathroom, provide a ventilating fan or ventilation hole so that air in the bathroom flows well. Install
the product more than 0.6m away from the bath tub.
Mount the outlet for electric wiring in the manner as follows: (Otherwise, fire or electric shock may be caused.)
a. Install a ground-fault interrupter or insulation transformer (higher than 1.5kVA, lower than 3kVA) in the outlet circuit.
* If the wiring work as shown in a. above has not been made, ask the installer for the work.
Connect the ground wire to the place where it can be connected securely. (If the ground
wire is not connected, electric shock may be caused in case of trouble or ground leakage.)
Note: For grounding, use copper wire having the diameter of more than 1.5mm and
grounding resistance of less than 100 ohm.
* If the ground wire has not been connected, ask the installer for the connection.
Be sure to follow the local standard and plug the electric cord firmly in the outlet.
(Otherwise, fire or electric shock may be caused.)
Be sure to connect this product to the cold water supply section.
(Otherwise, burn or trouble with equipment may be caused.)
CAUTIONWARNING
Install a ground-fault interrupter
or insulation transformer.
More than 0.6m
Power plug
Do not give direct impact to the product. Otherwise, the product may be broken, resulting in
injury, physical damage or water leak.
Be sure to hold the frame when carrying the product body, If you hold other part, the product may be broken,
resulting in injury, physical damage or water leak.
If it is not waterproofed, fire or electric shock may be caused.
* If it is not waterproofed, ask the installer for waterproof work.
Make sure that the electric plug is waterproofed by silicon rubber.
When using the product in the bathroom
CAUTION
Be sure
to follow
Perform the installation work surely and
properly according to the installation manual.
(Improper installation may cause water leak.)
Do not remove the water drain valve w/supply water filter while
the water shutoff valve is open. (Otherwise, water may gush out.)
Do not bend or crush the water supply hose.
(Otherwise, water leak may be caused.)
Do not install the product in open air, on slanted wall or in a place exposed to thumping vibration. Otherwise,
installation becomes unstable and the product may fall down to cause injury or death as the case may be.
Do not use other than tap water or well water (underground water) as supply water to the Washlet. (Otherwise, skin
irritation, etc. may be caused.)
Do not use other power supply than the local standard. (Otherwise, fire or electric shock may be caused.)
Prohibited
Prohibited
Panel
Silicon robber
ç౯ൗႯ౩ඪࠎ༕൫֬ᇖྦ౩ࢸ࠻Ɠ༨ࢸְ࣡Ɣҏൡދ౩ࢸඪམϷƗ؋Ⴏڱྦృ֬౩ࢸ࠻Ɠƥಇ
ٿç༕൫࠻çЭְƔࠎ๔ර࣐ྡྷҏൡƗၢ૮ڱѰ௬ߑϷ֬ૌܻè
Use water or dilute mild detergent (such as dishwashing detergent) to scrub and clean the surface, Never use strong
corrosive detergent (such as cleanser, paint thinner, benzene and so on) or wire ball to scrub, and to avoid corroding
the surface of the product.
çݛྺးٳఠЮӈƗ౯༆ࢃఊቛເ၉ϵഺࠊঞࠔয়Ɨ౯၎ᅽٌ݆ࣣႵ؆৲֬ߴ൳฿༩࣐ྡྷލ൨֬
য়ç߲ڶދߴ൳è
Please dispose of this product in accordance to the local waste disposal laws and regulations.
౩ࢸçٳ༅য়Cleaning and waste disposal
Table of contents
P. 4
···
简易故障判断及处理方式
Self diagnosis and troubleshooting
安全注意事项
Safety Precautions P. 2
···P. 5
···
安装说明
Installation instructions
P. 17
···
维修保养
Servicing procedures