manuals.online logo
Brands
  1. Home
  2. •
  3. Brands
  4. •
  5. Toto
  6. •
  7. Plumbing Product
  8. •
  9. Toto WH173BT Series User manual

Toto WH173BT Series User manual

WH173BT
series
WH172AST
series


PLEASE KEEP THE INSTRUCRION
MANUAL FOR LATER USER
請將說明書保留備用
WH173BT(系列)
WH172AST(系列)
致施工人員的重要通知
因安裝的衛洗麗不同,牆壁開孔位置有所差異。
詳細說明請參考說明書中第12頁內容。
󰭦󰥬󲗙
2
Important:
Caution: Neglecting this sign may result in misunderstanding of the installation instructions, which can
lead to injuries or damage to property.
Use water or dilute mild detergent (such as dishwashing detergent) to scrub and clean the surface, Never use strong
corrosive detergent (such as cleanser, paint thinner, benzene and so on) or wire ball to scrub, and to avoid corroding
the surface of the product.
Please dispose of this product in accordance to the local waste disposal laws and regulations.
1. Functions of the manual concealed cistern: storage water, inlet and outlet calve vessel, frame of wall-hung toilet,
The function reflected in the manual actuator panel instructions.
2. This instruction manual only supports the installation of the manual concealed cistern.
3. For Australia, the installation has to be in accordance with AS/NZS 3500 series of Standards and/or local standards.
Cautions
Cleaning and waste disposal
Table of contents
Cautions
Self diagnosis and troubleshooting
Installation instructions
Servicing procedures
2
重要提示:
提示:
Important:
Caution: Neglecting this sign may result in misunderstanding of the installation instructions, which can
lead to injuries or damage to property.
!
!
!
!
Use water or dilute mild detergent (such as dishwashing detergent) to scrub and clean the surface, Never use strong
corrosive detergent (such as cleanser, paint thinner, benzene and so on) or wire ball to scrub, and to avoid corroding
the surface of the product.
Please dispose of this product in accordance to the local waste disposal laws and regulations.
1. Functions of the manual concealed cistern: storage water, inlet and outlet calve vessel, frame of wall-hung toilet,
The function reflected in the manual actuator panel instructions.
2. This instruction manual only supports the installation of the manual concealed cistern.
3. For Australia, the installation has to be in accordance with AS/NZS 3500 series of Standards and/or local standards.
Cautions
Cleaning and waste disposal
Table of contents
P.3
· · ·
P.4
· · ·
注意事项
Cautions
简易故障判断及处理方式
Self diagnosis and troubleshooting
安装说明
Installation instructions
P.2
· · ·
P.16
· · ·
维修保养
Servicing procedures
注意事項
󰘺󰰋󰅇
󰲮





1.隱蔽式水箱功能:儲水、進水器、排水閥、壁掛式馬桶支架,使用功能記載於隱蔽式水箱面板說明書中。
2.此說明書只提供隱蔽式水箱安裝相關內容。
3.在澳洲地區安裝時請遵守AS/NZS3500系列標準或者當地標準。
1.請使用清水或稀釋過的中性清潔劑(如洗碗精等)擦拭和清潔水箱面板,杜絕使用腐蝕性強的清潔劑(如去汙
 粉、塗料稀釋劑、苯等)或鐵絲球進行擦拭,以免腐蝕並破壞面板的美觀。
2.如果您需要廢棄本產品,請勿將其作為一般生活垃圾處理,請依照法規經由合格業者進行合適的處理、恢
 復和回收。
清潔、廢物處理





󰍸󰀵
󰥬󲗙





目錄
3
温馨提示:
Note:
!
!
Users may fix the problems on their own if the corrective action is to be taken by the user according to the chart below.
Non-professionals are prohibited from disassembling and repairing the product. Please contact the relevant professionals
for futher troubleshooting to avoid aggravating the problem.
Common faults
Water does not
flow into the tank
Water is
constantly
running into
the bowl.
Possible causes Corrective actions
1Household water supply has not been turned
on or has been cut off.
2. Angle valve has not been turned on.
3. Residuums in the inlet valve causing the float
device to not operate properly.
4. None of the above.
1. Flush valve seal is not completely closed due
to residuums around the outlet of the cistern
and flush valve (sand or debris lodged in
during installation).
2. The exposed part of the panel's adjust screw
is too long, which resulting the rubber of flush
valve can not fixed in a certain position and
can not sealed.
3. The part of panel's adjusting screw in the
cistern is too long, which may get stuck in the
soft pipe or cistern body and unable to return
sometimes.
1. Turn on the household water supply or
contact the relevant personnel (To be
done by the user).
2. Turn on the angle valve
(To be done by professionals only).
3. Check the fill valve and remove the
residuum (To be done by
professionals only).
4. Change the inlet valve
(To be done by professionals only).
1. Remove the residuums in the cistern
(To be done by professionals only).
2. Adjust the position of the panel's screw
(To be done by professionals only).
3. To cut back the adjust screw
(To be done by professionals only).
Selfdiagnosis and troubleshooting
3
Note:


Users may fix the problems on their own if the corrective action is to be taken by the user according to the chart below.
Non-professionals are prohibited from disassembling and repairing the product. Please contact the relevant professionals
for futher troubleshooting to avoid aggravating the problem.
Common faults
Water does not
flow into the tank
Water is
constantly
running into
the bowl.
Possible causes Corrective actions
1Household water supply has not been turned
on or has been cut off.
2. Angle valve has not been turned on.
3. Residuums in the inlet valve causing the float
device to not operate properly.
4. None of the above.
1. Flush valve seal is not completely closed due
to residuums around the outlet of the cistern
and flush valve (sand or debris lodged in
during installation).
2. The exposed part of the panel's adjust screw
is too long, which resulting the rubber of flush
valve can not fixed in a certain position and
can not sealed.
3. The part of panel's adjusting screw in the
cistern is too long, which may get stuck in the
soft pipe or cistern body and unable to return
sometimes.
1. Turn on the household water supply or
contact the relevant personnel (To be
done by the user).
2. Turn on the angle valve
(To be done by professionals only).
3. Check the fill valve and remove the
residuum (To be done by
professionals only).
4. Change the inlet valve
(To be done by professionals only).
1. Remove the residuums in the cistern
(To be done by professionals only).
2. Adjust the position of the panel's screw
(To be done by professionals only).
3. To cut back the adjust screw
(To be done by professionals only).
Self diagnosis and troubleshooting
簡易故障判斷及處理方法
溫馨提示:
以下表格的問題點的處理方法內有註明(針對用戶)的,用戶可以參照後自行解決。如果解決不了,嚴禁未經
指定的非專業人員進行自行拆解和維修,請立即聯繫相應的專業人員解決,避免問題擴大化或產生不必要的
麻煩和損失。
常見故障 原因 處理方法
水箱無法進水
水箱有水不斷
流到馬桶裡
1.進水總閥未打開或停水。
2.水箱三角凡而未打開。
3.進水器浮筒有異物卡住或進水器傳動部件導致
浮筒無法正常作動。
4.排除以上原因,依然無法進水。
1.打開進水總閥或聯繫業者解決
(針對用戶)
2.打開水箱三角凡而
(針對專業的維修人員)
4.更換進水器
(針對專業的維修人員)
3.檢 進水器並排除異物
(針對專業的維修人員)
1.清理水箱內部的異物
(針對專業的維修人員)
3.剪短面板調節螺桿
(針對專業的維修人員)
2.調整面板調節螺桿的位置
(針對專業的維修人員)
3.在水箱裡面的面板調節螺桿偏長,頂到水箱
內部的軟管或其水箱箱體,導致無法復位。
2.面板調節螺桿外露部份偏長,面板裝上後造
成排水閥橡膠圈固定在某一位置上,無法密
閉。
1.水箱出水口、排水閥底座周圍有異物(砌牆時
不小心掉入的砂漿、小石塊等),造成排水閥
無法完全密合。
4
Important:
1. Please read through this Instructionscarefullyprior to
installation,and our company shall not be responsible
for any loss caused by not installating according with
this Instructions. Lubricants are provided for the
installation.
2. Please confirm the FFL according to the overall indoor
fitment method. Line out the FFL on the wall and
always regard FFL as datum line of 0 height.
(refer to Figure 1)
3. Please confirm the wall is the main wall, the
thickness exceed 80mm and it can bear more
than 300kgf strength when the strength act on
the front of toilet bowl.
1. Please install the frame before paving the tiles.
The dimensional unit is millimeter.
2. As the parts images are for illustrative
purposes only, please refer to the actual
product if it varies from the parts images.
Note:
FFL =
0FFL of finish face, all dimension is
millimeter
FFL =
0
FFL
0
3KN
󰄘
Fig. 1
INSTALLATION INSTRUCTION FOR MANUAL CONCEALED CISTERN
Accessories List:
󰥬󰖉
Main wall
4
重要提示: Important:
! !
! !
! !
1. Please read through this Instructionscarefullypriorto
installation,and our company shall not be responsible
foranylosscaused by not installating according with
this Instructions. Lubricants are providedfor the
installation.
2. Please confirm the FFL according to the overall indoor
fitment method. Line out the FFL on the wall and
always regard FFL as datum line of 0 height.
(refer to Figure 1)
3. Please confirm the wall is the main wall, the
thickness exceed 80mm and it can bear more
than 300kgf strength when the strength act on
the front of toilet bowl.
1. Please install the frame before paving the tiles.
The dimensional unit is millimeter.
2. As the parts images are for illustrative
purposes only, please refer to the actual
product if it varies from the parts images.
注: Note:
FFL =完成面地坪.
0FFL of finish face, all dimension is
millimeter
FFL =
0
FFL
0
3KN
图1
Fig. 1
INSTALLATION INSTRUCTION FOR MANUAL CONCEALED CISTERN
Accessories List:
安装墙
Main wall
安裝說明
注意事項:
 
 
 

1.安裝前請仔細閱讀說明書,本公司不承擔因安裝
 人員未依照說明書要求施工所造成的損失,產品
 中包含潤滑劑,可以在安裝馬桶時使用。
2.在支架安裝前,應先確認安裝位置,並根據室內
 裝修的總體策劃確定裝修完成後的地坪面FFL,
 在安裝牆上劃出FFL線,並以此作為高度0的基
準線。(見圖1)
3.在支架安裝前,請確認所安裝牆壁為承重牆
 ,牆壁厚度在80mm以上,且當300kgf
 以上的力施加於完工後的馬桶前端時,牆壁
 需能承受這股拉力。
注意:1.請於貼瓷磚前安裝本產品;所有的尺寸單
位為毫米(mm)。
   2.圖示零件若與實物不符,請以實物為準。
配件一覽表
5
Check to make sure you have all these parts from the package:
Parts in Bag 2
Parts in Bag 4
Parts in Bag 5
Parts in Bag 3
In Wall Tank (Carrier)
Threaded
Mounting Stud (2)
Threaded
Mounting Stud (2)
Lower
Bracket
Anchor (6)
釘
Lag Screw (6)
Bolt (4)
Angle Fixture Angle Valve
Bolt (4)
Nut (4)
Nut (2)
Cap (2)
Washer(2) Stud Bolt Flange (2)
Flange Pipe
Lubricated Sponge
Push Plate Rough InPush Plate Rough In
Installation
Manual
Parts in Bag 1
Outlet Pipe
Mud Guard
Inlet Pipe
Mud Guard
Installation Template
Outlet Pipe
Branch Pipe
Upper Bracket
Plug Bolt (3)
Inlet Pipe
Seal Gasket
Included Parts
5
Check to make sure you have all these parts from the package:
Parts in Bag 2
Parts in Bag 4
Parts in Bag 5
Parts in Bag 3
In Wall Tank (Carrier)
Threaded
Mounting Stud (2)
Threaded
Mounting Stud (2)
Lower
Bracket
Anchor (6)
Lag Screw (6)
Bolt (4)
Angle Fixture Angle Valve
Bolt (4)
Nut (4)
Nut (2)
Cap (2)
Washer (2) Stud Bolt Flange (2)
Flange Pipe
Lubricated Sponge
Push Plate Rough InPush Plate Rough In
Installation
Manual
Parts in Bag 1
Outlet Pipe
Mud Guard
Inlet Pipe
Mud Guard
Installation Template
Outlet Pipe
Branch Pipe
Upper Bracket
Plug Bolt (3)
Inlet Pipe
Seal Gasket
Included Parts
包裝確認
三角凡而牆腳固定塊螺母(4)
螺栓(4)
螺栓(4)
󲙤󰥬
󲙤󰥬
󲙤󰥬 󲙤󰥬
󲙤󰥬
分歧管 堵頭 螺栓(3)
螺母(2)
裝飾蓋(2)
墊片(2) 螺栓法蘭(2)
潤滑海綿
法蘭管 進水直管
密封套
排汙管 上管夾 螺絲(6)
下管夾 塑膠子(6)全螺牙螺栓(2)
排汙管
擋泥堵頭
進水管
擋泥堵頭
保護框
施工板
牆內水箱(支架)
安裝說明書
󰥬󰳂
6
Dimensions and Supply Pipe-laying
580
40
R1/2
Before Installation
1180
180
230
320
1000
650
1165
220 100 35
FFL
0
35(15~135)
152 134
0110
Main wall
20~60
40
110
Main wall
Visual confirmation required.
Horizontal confirmation required.
Vertical confirmation required.
Wrap the sealing tape.
Horizontal
Vertical
Sealing Tape
Symbols and their meanings
Mark the location.
Mark
Installation procedure
70~130
200~220
180~220
155~215
135~195
70~90
70~110
70~130
70~130
130
110
85
65
◯
◯
-
-
135~220
45° swinging
410
Please make sure W is between 70 to 130.
Refer to page 8 for Installation Procedure
6
Dimensions and Supply Pipe-laying
580
40
R1/2
Before Installation
1180
180
230
320
1000
650
1165
220 100 35
FFL
0
35(15~135)
152 134
0110
安装墙
Main wall
20~60
40
110
安装墙
Main wall
Visual confirmation required.
Horizontal confirmation required.
Vertical confirmation required.
Wrap the sealing tape.
Horizontal
Vertical
Sealing Tape
符号和意思
Symbols and their meanings
Mark the location.
Mark
Installation procedure
70~130
200~220
180~220
155~215
135~195
70~90
70~110
70~130
70~130
130
110
85
65
◯
◯
-
-
135~220
摆动45度*
45° swinging*
410
要求排水管中心到安装墙面的距离
(W)在70~130之间.
Please make sure W is between 70 to 130.
* 参见第8页“安装方法"
* Refer to page 8 for Installation Procedure
安裝前的注意事項
安裝方法
󰣳
󰥬󰖉
󰥬󰖉
󰩻
󰥬󰖉

 󰂊󰥬







󰔿󰈖

󰔿󰈖



7
Horizontal
Vertical
FFL
0
220
D
Installation procedure
B
A
A
C
A
B
C
D
安装排水管:
Install the discharge pipe
170: Bolt length of 75 mm
170: Bolt length of 120 mm
安装墙脚固定块、调整地板固定支架:
Install Angle Fixture and adjust floor-fixing bracket
安装分歧管。
Install the branch pipe.
调整地板固定支架。
Adjust floor-fixing bracket.
安装墙脚固定块。
Install Angle Fixture.
Sealing Tape
7
Horizontal
Vertical
FFL
0
220
D
Installation procedure
B
A
A
C
A
B
C
D
:
Install the discharge pipe
170: Bolt length of 75 mm
170: Bolt length of 120 mm
Install Angle Fixture and adjust floor-fixing bracket
Install the branch pipe.
Adjust floor-fixing bracket.
Install Angle Fixture.
Sealing Tape


󰔿󰈖
安裝方法
󰥬
󰥬󰖉󳲟
󰥬󳆻

󰥬󰖉󳲟


8
110/130
Install the upper bracket
130mm
B
110mm
A
85mm
B
65mm
A
Position 2 Position 2 Position 1 Position 1
Note: The drainage function may be affected when the installation
angle of drainage pipe exceed 45°
8
110/130
安装上支架:
Install the upper bracket
130mm
B
110mm
A
85mm
B
65mm
A
位置2
Position 2 位置2
Position 2 位置1
Position 1 位置1
Position
提示 : 排污管侧向安装角度一般不超过 45°,
否则很可能会影响排污效果。
Note: The drainage function may be affected when the installation
angle of drainage pipe exceed 45°
󰥬󰅥

  󲤄󰥬
󰉘󲤄󰍩
  
9
2.
1
3
2
4
5
6
1165
0
FFL
490
152 134
650
Horizontal
Vertical
1.
10mm
深60mm
Depth 60 mm
B
A A
C
B
C
As shown on picture:
1. Drill 10*60;
2. Insert anchor;
膨胀螺栓的使用方法:
0
0
0
调节支架的水平和垂直,并锁紧螺栓:
Adjust horizontally and vertically, and tighten lag screw
Draw on the main wall and floor Install Anchors
在主墙和地板上标记:( 10X深60)
9
2.
1
3
2
4
5
6
1165
0
FFL
490
152 134
650
Horizontal
Vertical
1.
10mm
Depth 60 mm
B
A A
C
B
C
As shown on picture:
1. Drill 10*60;
2. Insert anchor;
0
Adjust horizontally and vertically, and tighten lag screw
Draw on the main wall and floor Install Anchors

󰥬󰖉 󰠝

󲏫󰯽󲗙
󰬯
󰥬󰠝


10
1
19
2
3
1
1
2
1
2
“Click”
“Click”
3
Sealing Tape
Sealing Tape
“Click’’“Click’’
“Click’’“Click’’
Install the Angle valve
B
C
D
E
A
Install the water supply pipe
󰥬
󰥬
󰔿󰈖
󰔿󰈖
11
Install Plug
For the fixing of the long screw, there
are two groups of screw holes on the
bracket which are of different distance.
Please choose the right position
according to the size of the toilet bowl.
Important remind: When the concealed tank fixed completely, it is
important to test leaking with water upon 12 hours before fixing wall.
Sketch of installed frame
“Click’’“Click’’
󰥬󰇶󰥬

󰇄󰏩󳭹

󰍇󰍊󰥬
󰥬󰙼󰖉
󰑟󰔘




󰥬󰄘
12
The positions of the holes to drill in the wall vary depending on WASHLET being installed.
For WASHLET with an attached outlet
plug, proceed to page 13.
For WASHLET with the above plug
attached, proceed to page 14.
Power plug shape may vary by
country. Please confirm which
Power plug shape you have for
correct installation.
12
因安装的卫洗丽不同,墙壁开孔位置有所差异。
The positions of the holes to drill in the wall vary depending on WASHLET being installed.
如果是配有插座插头的卫洗丽,
请前往第13页。
For WASHLET with an attached outlet
plug, proceed to page 13.
如果是配有上述插头的卫洗丽,
请前往第14页。
For WASHLET with the above plug
attached, proceed to page 14.
电源插头形状可能随国家/地
区不同而有差异。请确认现
有的电源插头的形状能否保
证正常安装。
Power plug shape may vary by
country. Please confirm which
Power plug shape you have for
correct installation.
󰥬󰖉
󰌯󰌯

󰌯󲏌󰄔
󰁵
󰌯󲏌
󰧞󰥬
󰌯

13
!
!
Installation
Template
详细尺寸可在第18页确认。
Refer to 18 page for more
detail dimensions.
请前往第15页。
Proceed to page 15.
装修墙厚度范围20~60mm
(从固定支架外面算起,到贴砖后完成面)
The thickness of fixed wall is 20~60mm
(measured from the front of frame to the finished tile surface)
It is forbidden to use
unsustainable, ductile or
light-weight material to fix the
covering. Such as foam board
etc.
20-60mm
610mm
320mm
0
FFL
180mm
推板 226mm
Push Plate 226mm
140mm
排水管孔
Outlet Drain Hole
接线盒孔
Electrical Box Hole
卫洗丽用进水管孔
WASHLET Water Supply Hole
进水管孔
Inlet Drain Hole
马桶安装孔
Toilet
Mounting
Holes
进水管挡
泥堵头
Inlet Drain
mud guard
排水管挡泥堵头
Outlet Drain
Mud Guard
预留推板
Push Plate
Rough-In
螺纹安装柱
Threaded
Mounting
Stud
20~60mm
最大3mm
max.3mm
最大3mm
max.3mm
13
Installation
Template
Refer to 18 page for more
detail dimensions.
Proceed to page 15.
The thickness of fixed wall is 20~60mm
(measured from the front of frame to the finished tile surface)
It is forbidden to use
unsustainable, ductile or
light-weight material to fix the
covering. Such as foam board
etc.
20-60mm
610mm
320mm
0
FFL
180mm
Push Plate 226mm
140mm
Outlet Drain Hole
Electrical Box Hole
WASHLET Water Supply Hole
Inlet Drain Hole
Toilet
Mounting
Holes
Inlet Drain
mud guard
Outlet Drain
Mud Guard
Push Plate
Rough-In
Threaded
Mounting
Stud
20~60mm
max.3mm
max.3mm




󰥬󰖉󰄕
󰉛󰚖



󲤄


󰥬

󳓋
󲤄󳓋
󰏞

󰌯󰙌


󰥬󰖉󰄂󰩫
󰍴
󰘺󰸒
14
Installation
Template
Refer to 19 page for more
detail dimensions.
The thickness of fixed wall is 20~60mm
(measured from the front of frame to the finished tile surface)
It is forbidden to use
unsustainable, ductile or
light-weight material to fix the
covering. Such as foam board
etc.
20-60mm
610mm
320mm
0
FFL
180mm
Push Plate 226mm
140mm
Outlet Drain Hole
Inlet Drain Hole
Toilet
Mounting
Holes
Inlet Drain
mud guard
Outlet Drain
Mud Guard
Push Plate
Rough-In
Threaded
Mounting
Stud
20~60mm
WASHLET Water Supply
Hole
WASHLET Power Supply Hole
When working on the wall using mortar or the like, be sure
to cover the cable so that it is not fixed in place.
max.3mm
max.3mm
14
!
!
Installation
Template
详细尺寸可在第19页确认。
Refer to 19 page for more
detail dimensions.
装修墙厚度范围20~60mm
(从固定支架外面算起,到贴砖后完成面)
The thickness of fixed wall is 20~60mm
(measured from the front of frame to the finished tile surface)
It is forbidden to use
unsustainable, ductile or
light-weight material to fix the
covering. Such as foam board
etc.
20-60mm
610mm
320mm
0
FFL
180mm
推板 226mm
Push Plate 226mm
140mm
排水管孔
Outlet Drain Hole
进水管孔
Inlet Drain Hole
马桶安装孔
Toilet
Mounting
Holes
进水管挡
泥堵头
Inlet Drain
mud guard
排水管挡泥堵头
Outlet Drain
Mud Guard
预留推板
Push Plate
Rough-In
螺纹安装柱
Threaded
Mounting
Stud
20~60mm
卫洗丽用进水管孔
WASHLET Water Supply
Hole
卫洗丽用电源孔
WASHLET Power Supply Hole
在墙壁上涂覆砂浆或类似材料时,请务必覆盖
电缆以避免将其固定。
When working on the wall using mortar or the like, be sure
to cover the cable so that it is not fixed in place.
最大3mm
max.3mm
最大3mm
max.3mm



󰥬󰖉󰄕
󰉛󰚖



󲤄



󰥬

󳓋
󲤄󳓋
󰏞



󰥬󰖉󰄂󰩫
󰍴
󰘺
󰖉󰔗
󰞬󰇂
15
L1+3mm
L1 L2
L2+3mm
Nut (2)
Cap (2)
Washer(2)
Stud Bolt Flange (2)
Lubricated Sponge
安装坐便器:
Install the toilet
Mark
1. 2. 3.
Set Straight Pipes into Flush Bend and
Drain Bend properly, and marks lines.
4. 5.
8. 9.
6.
L1 is the distance of two marks on Flush Straight
Pipe, and L2 is that of two marks on Drainpipe
Straight Pipe.
Cut Straight Pipe just as shows.
Mark lines as shows.
Add lubricant onto the Rubber Gaskets of
two Straight Pipes and set them into Bowl.
Take out the sponge with silicon oil and smear it on
connecting edges of Straight Pipe and Bends.
Chamfer and trim the cutting edges
on the shortened Straight pipes (as
shows).
Toilet bowl type
Proceed to step 9.
Install according to the Installation
Guide enclosed with the toilet bowl.
The parts are used for installing toilet
bowl. Please see the installation
manual of toilet bowl.
15
L1+3mm
L1 L2
L2+3mm
Nut (2)
Cap (2)
Washer (2)
Stud Bolt Flange (2)
Lubricated Sponge
Install the toilet
Mark
Set Straight Pipes into Flush Bend and
Drain Bend properly, and marks lines.
L1 is the distance of two marks on Flush Straight
Pipe, and L2 is that of two marks on Drainpipe
Straight Pipe.
Cut Straight Pipe just as shows.
Mark lines as shows.
Add lubricant onto the Rubber Gaskets of
two Straight Pipes and set them into Bowl.
Take out the sponge with silicon oil and smear it on
connecting edges of Straight Pipe and Bends.
Chamfer and trim the cutting edges
on the shortened Straight pipes (as
shows).
Toilet bowl type
Proceed to step 9.
Install according to the Installation
Guide enclosed with the toilet bowl.
The parts are used for installing toilet
bowl. Please see the installation
manual of toilet bowl.
󰥬
  
 


 
󰄘

󲤄
󰄘
󰇂󰀘
󰄘󰪲
󰈖󰠝󰁕󰠼󰉊
󰀵󰠝󰁕


󲏫󰯽
󰈖󲗙
󰥬
󰥬󰂊
󰥬󲗙
 󳏎
󰥬
󰇂󰌯󲤄

󰀘󰠝󰄓
󰌯

16
❷
❶
❸
❷
❶
Servicing procedures
Replacing the Flush Valve

Remove the splash guard and pull it out.


Remove the hold-down bracket by pulling on the tab indicated.

Close the shutoff valve in the tank, and then push the button on the
actuator to flush the water.


Pull the flush valve up, and rotate the rods.
Push on the tab to remove the actuator.

Rotate the whole unit as you pull it out.
Tilt the two pull-up rods of the flush valve to the right.

At the other end of the flush valve, the rubber piece can be
removed for cleaning or to be replaced.

To install the parts back into the tank, do the reverse order.
16
❷
❶
❸
❷
❶
维修保养
Servicing procedures 更换冲水阀
Replacing the Flush Valve
1.
Remove the splash guard and pull it out.
2.
5.
Remove the hold-down bracket by pulling on the tab indicated.
3.
Close the shutoff valve in the tank, and then push the button on the
actuator to flush the water.
4.
6.
Pull the flush valve up, and rotate the rods.
Push on the tab to remove the actuator.
7.
Rotate the whole unit as you pull it out.
Tilt the two pull-up rods of the flush valve to the right.
8.
At the other end of the flush valve, the rubber piece can be
removed for cleaning or to be replaced.
9.
To install the parts back into the tank, do the reverse order.


󰌆󰌏󳆶
󰭌󰯴󰫤

󰅌󰌏󰌆󰯴 󰇂󰀘󰌏󰏩
󰌏󰌏󰄘󰌆
󰌏󰩻
󰌏󰩻󰌏󰏩
󰠼󲏫󰯽󰇂󰥬
󰠝󰄓󰌆
17
清洁进水阀滤嘴
Cleaning the Filter of the Fill Valve
1. Close the water shutoff valve, and then remove the fill valve as
described above.
2. As shown in the figure, disassemble the fill valve, and then either
clean the filter with water or use a brush to clean any dirt from it.
3. To install, follow the procedure in reverse to return the fill valve to
its original position.
17
Cleaning the Filter of the Fill Valve
1. Close the water shutoff valve, and then remove the fill valve as
described above.
2. As shown in the figure, disassemble the fill valve, and then either
clean the filter with water or use a brush to clean any dirt from it.
3. To install, follow the procedure in reverse to return the fill valve to
its original position.
󰕅󰃰
󰭌󰌆
󰄘󰌆󰕅
󳧝󲤄
󰠼󲏫󰯽󰇂󰥬

18
FFL
180mm
Ø19mm
Ø40mm
Ø114mm
Ø19mm
Ø64mm
78mm
35mm
100mm
260mm
320mm
Electrical Box
Hole
305mm
340mm- 460mm
min.340mm-max.460mm
Detail dimensions for wall Panel.
18
FFL
180mm
Ø19mm
Ø40mm
Ø114mm
Ø19mm
Ø64mm
78mm
35mm
100mm
260mm
320mm
接线盒孔
Electrical Box
Hole
305mm
最小340mm-最大460mm
min.340mm-max.460mm
墙壁面板详细尺寸。
Detail dimensions for wall Panel.
󰖉
󰌯󰙌
 
19
FFL
180mm
Ø19mm
Ø24mm
Ø40mm
Ø114mm
Ø19mm
Ø64mm
78mm
35mm
90mm
100mm
260mm
320mm
Detail dimensions for wall Panel.
墙壁面板详细尺寸。
19
FFL
180mm
Ø19mm
Ø24mm
Ø40mm
Ø114mm
Ø19mm
Ø64mm
78mm
35mm
90mm
100mm
260mm
320mm
Detail dimensions for wall Panel.
󰖉

Other manuals for WH173BT Series

2

This manual suits for next models

1

Other Toto Plumbing Product manuals

Toto TBW02004U4 Installation instructions

Toto

Toto TBW02004U4 Installation instructions

Toto Keane TB211DD Installation instructions

Toto

Toto Keane TB211DD Installation instructions

Toto Nexus TL794DDLQ Installation instructions

Toto

Toto Nexus TL794DDLQ Installation instructions

Toto NEOREST ABF992X#01DCP User manual

Toto

Toto NEOREST ABF992X#01DCP User manual

Toto EGO II User manual

Toto

Toto EGO II User manual

Toto TLE0150 Series User manual

Toto

Toto TLE0150 Series User manual

Toto TTLA101 User manual

Toto

Toto TTLA101 User manual

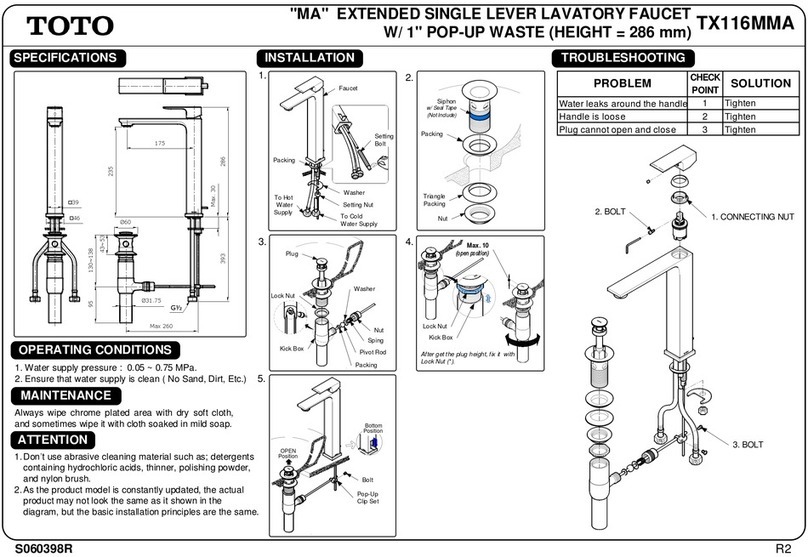
Toto TX116MMA User manual

Toto

Toto TX116MMA User manual

Toto TLP02309 User manual

Toto

Toto TLP02309 User manual

Toto TX445SEC User manual

Toto

Toto TX445SEC User manual

Toto Connelly TS221T Installation instructions

Toto

Toto Connelly TS221T Installation instructions

Toto TBW01004U4 Installation instructions

Toto

Toto TBW01004U4 Installation instructions

Toto REAH03B1U Installation instructions

Toto

Toto REAH03B1U Installation instructions

Toto TS960C User manual

Toto

Toto TS960C User manual

Toto RYOHAN TEL3GMY User manual

Toto

Toto RYOHAN TEL3GMY User manual

Toto REI S User manual

Toto

Toto REI S User manual

Toto Soiree TB960S Installation instructions

Toto

Toto Soiree TB960S Installation instructions

Toto TLP01701U Installation instructions

Toto

Toto TLP01701U Installation instructions

Toto WH053 Instruction Manual

Toto

Toto WH053 Instruction Manual

Toto DLE424SMAE User manual

Toto

Toto DLE424SMAE User manual

Toto Vivian TS220P1 Installation instructions

Toto

Toto Vivian TS220P1 Installation instructions

Toto GUINEVERE TL970DDLQ Installation instructions

Toto

Toto GUINEVERE TL970DDLQ Installation instructions

Toto WASHLET SW584 User manual

Toto

Toto WASHLET SW584 User manual

Toto SK322 Instruction sheet

Toto

Toto SK322 Instruction sheet

Popular Plumbing Product manuals by other brands

Moen EVA 6400 Specifications

Moen

Moen EVA 6400 Specifications

Bristan Vantage VTX 1/2 C installation instructions

Bristan

Bristan Vantage VTX 1/2 C installation instructions

oventrop Regusol Installation and operating instructions for the specialised installer

oventrop

oventrop Regusol Installation and operating instructions for the specialised installer

Hans Grohe Talis S 32841 Series manual

Hans Grohe

Hans Grohe Talis S 32841 Series manual

VIGO VGRA3018SF manual

VIGO

VIGO VGRA3018SF manual

WESTBRASS D-272 Installation

WESTBRASS

WESTBRASS D-272 Installation

American Standard Heritage Wall Mount Kitchen Faucet 7292... installation instructions

American Standard

American Standard Heritage Wall Mount Kitchen Faucet 7292... installation instructions

Intra IND01N Instructions for use

Intra

Intra IND01N Instructions for use

Sanela SLU 43B Instructions for use

Sanela

Sanela SLU 43B Instructions for use

Hans Grohe AXOR Montreux 16800 Series Instructions for use/assembly instructions

Hans Grohe

Hans Grohe AXOR Montreux 16800 Series Instructions for use/assembly instructions

Hans Grohe Shower Select S 15741000 Instructions for use/assembly instructions

Hans Grohe

Hans Grohe Shower Select S 15741000 Instructions for use/assembly instructions

KWC K.38.H4.70.931A17 Features

KWC

KWC K.38.H4.70.931A17 Features

Sanela SLZA 20PT Instructions for use

Sanela

Sanela SLZA 20PT Instructions for use

Grohe Atrio 31 000 manual

Grohe

Grohe Atrio 31 000 manual

DURAVIT Happy D 71 19 Series Mounting instruction

DURAVIT

DURAVIT Happy D 71 19 Series Mounting instruction

BELLOSTA 7700/E installation instructions

BELLOSTA

BELLOSTA 7700/E installation instructions

saunalife X6 installation manual

saunalife

saunalife X6 installation manual

Lefroy Brooks K1-1031 Installation, operating,  & maintenance instructions

Lefroy Brooks

Lefroy Brooks K1-1031 Installation, operating, & maintenance instructions

manuals.online logo
manuals.online logoBrands
  • About & Mission
  • Contact us
  • Privacy Policy
  • Terms and Conditions

Copyright 2025 Manuals.Online. All Rights Reserved.