Tower Top Smart Battery Charger User manual
3142026

Intended Use 1
Important Safety Information 2
Main Parts of Product 8
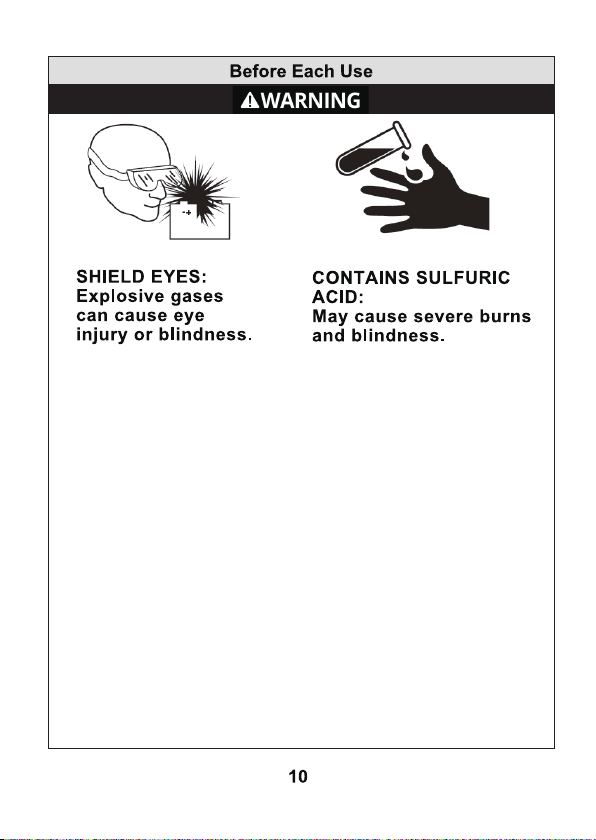
Before Each Use 10
Operating Instructions 11
Maintenance 20
Troubleshooting 20
PLEASE SAVE THESE INSTRUCTIONS
WARNING: Read carefully and understand all ASSEM-
BLY AND OPERATION INSTRUCTIONS before operating.
Failure to follow the safety rules and other basic safety precau-
tions may result in serious damage.
Should you have any questions or need any support, please

This battery charger is suitable for 12V Lead-acid batteries,
including GEL, AGM and STD. This battery charger will
quickly and easily charge the vehicle battery and keep the
battery performing at its optimal while lasting longer.
This battery charger has an interactive LCD display showing
charging rate, battery type, error message in words and
icon. It also has eight stages charging to keep batteries fully
charged and four different charging rates for charging variety
of batteries with a push of a button. This battery charger also
has safety features such as automatic shutdown, over heat
protection and reverse polarity indicator to protect the user
from harm and the charger from damage.
BC0253
120V AC/ 60Hz, 9A
12V DC, 2A/10A/25A/Automatic
32° F (0°C) - 104°F (40°C)
PROTECTION FEATURES
Overheat Protection - If the charger is overheating, the
charger will automatically shut off and will automatically resume
when the charger has cooled down.
Reverse Polarity - If the cables connected are reversely
connected, the charger will not work, and LCD screen tells you
to correct polarity.

Overtime Charging Protection - If the battery cannot be
fully charged within 24 hours, charger will stop charging
automatically.
Short Circuit Protection - If the cables connected suffer
from short circuit when the charger works, charger will stop
charging automatically.
• Risk of Explosive Gases, Electric Shock or Fire.
• Keep out of reach of children.
• To reduce the risk of personal or property damage, read and
understand all directions and warnings prior to use this
battery charger.
• Do not use in wet conditions or near combustible materials.
Keep away from flames, smoke or sparks while charging.
Never smoke in the area of the battery or engine.
• To reduce the risk of electric shock, connect to only properly
grounded outlets. Use of an extension cord is not recom
mended and could result in fire.
• Do not operate if cords or wires are frayed or defective, or if
charger base is defective in any way. Do not attempt to open
the charger as this could result in electric shock.
• Use only on lead acid batteries. Do not use this charger for
charging dry cell batteries, as this could result in personal
injury or property damage due to battery explosion.
• Do not charge a frozen battery.

• Make sure you have adequate space to use this charger.
Position the charger as far away from the battery as permit
ted by DC Cable.
• Never place the charger directly above the battery that is
being charged; as this may cause the charger to be
damaged by gases expelled from the battery.
• Never set a battery or any other object on the charger.
• Use only in a well-ventilated area.
• Never allow battery acid to drip on the charger when reading
electrolyte specific gravity or filling battery.
• Do not operate charger in a closed-in area or restrict
ventilation in any way.
3
• Use of an attachment not recommended or sold by the
battery charger manufacturer may result in a risk of fire,
electric shock, or injury to persons.
• Do not operate charger if it has received a sharp blow, been
dropped, or otherwise damaged in any way; take it to a
qualified serviceman.
• To reduce risk of electric shock, unplug charger from outlet
before attempting any repairs or cleaning. Turning off controls
will not reduce this risk.

• Make sure that someone is within range of your voice to c
ome to your aid if needed while you work with or are near a
lead-acid battery.
• Wear complete eye and clothing protection when working
with lead-acid batteries.
• Avoid touching your eyes while working with a battery. Have
plenty of fresh water and soap nearby for use in case battery
acid contacts your eyes, skin or clothing. If this happens,
wash immediately with soap and water, then get medical
attention.
• Take care not to drop any metal tool or object onto the
battery. This may result in a spark or short circuit across the
battery or another electrical device that may cause an
explosion.
• Remove all personal metal items, such as rings, brace lets,
necklaces, and watches from your body while working with a
lead-acid battery. A battery can produxce a short circuit
current high enough to weld such objects to metal, causing a
severe burn.
• Never overcharge a battery.

5
• Never alter AC cord or plug provided. If it does not fit the
outlet, have a proper outlet installed by a qualified electrician.
Improper connection can result in a risk of fire or electric
shock.
• Do not operate charger with damaged cord/plug - replace
the cord/plug immediately.
• "Warning: Changes or modifications to this unit not
expressly approved by the party responsible for compli
ance could void the user's authority to operate the
equipment."
• "NOTE: This equipment has been tested and found to
comply with the limits for a Class B digital device, pursuant to
Part 15 of the FCC Rules. These limits are designed to
provide reasonable protection against harmful interference in
a residential installation. This equipment generates uses and
can radiate radio frequency energy and, if not installed and
used in accordance with the instructions, may cause harmful
interference to radio communications.
• However, there is no guarantee that interference will not
occur in a particular installation. If this equipment does
cause harmful interference to radio or television reception,
which can be determined by turning the equipment off and
on, the user is encouraged to try to correct the interference
by one or more of the following measures:
• Reorient or relocate the receiving antenna.
• Increase the separation between the equipment and
receiver.

• Connect the equipment into an outlet on a circuit different
from that to which the receiver is connected.
• Consult the dealer or an experienced radio/TV techni cian
for help."
• NOTE: If using this battery charger/maintainer for a
marine battery, the battery must be removed and charged
on shore unless you have purchased special equipment
designed for marine use to allow for onboard charging.
• Check the polarity of the battery posts. Note: The
positive(+) post is usually larger in diameter than the
negative (-) post.
• The length of the cord external to the battery charger and
including the attachment plug shall not be less than 6 feet
(1.8m) as measured from the face of the attach ment plug
to the point of attachment or entry.
• Connect the red positive(+) charger clip to the positive (+)
battery post.

• Place the free end of the battery cable as far away from the
battery to be charged as the cable will allow and then
connect the black negative (-) charger clip to the free end of
the cable. NEVER face the battery when making the
connection.
• When disconnecting the charger/maintainer, always use the
reverse order from the connection process, staying as far
away as possible from the battery.
AC POWER CORD/PLUG CONNECTIONS AND
PROPER GROUNDING
• This battery maintainer is designed for use on a 120V circuit.
Always plug the AC power cord/plug into a properly
grounded outlet that follows all local ordinances.
• NEVER change or alter the AC power cord or plug pins.

LCD Display Window - shows charging status, charging
current, voltage, battery type, start aid and error
information in words and icon.
Start Button - press the “START” button to start charging
after your settings. Press the “START” button again to
make the smart charger in a standby mode. (NOTE: You
need to first press “START” button to stop working if you
would like to change settings or switch to other modes.)
Charging Amp Selection Button - press to select the
charging rate from 2A,10A,25A,and automatic charging
rate.
Battery Type Selection Button - press to select the battery
type from AGM, GEL, and Standard battery.
2
3
4
6
7
1
8
5

Winter Mode Button - press the “Winter Mode” first and
then “START” button to start it. The corresponding pattern
will be displayed on the LCD screen. Press the “Winter
Mode” button again to stop the mode.
Recondition Button - press the “Recondition” button first
and then “START” button to start the repair mode. Press
the “Recondition” button again to stop the mode.
Desulfation Mode - press the “Pulse Desulfation” button
first and then “START” button to start the desulfation.
Press the “Pulse Desulfation” button again to stop the
mode. (NOTE: During the charging process, you can also
press “Desulpation” button to switch the interface from
“Original Interface” to “8-Stage-Program Interface”.)
Engine Start Button - press the “Engine Start” button first
and then “START” button to start the engine, with LCD
display guiding how to gradually operate. Press the
“Engine Start” button again to stop the mode.
If it is necessary to remove the battery prior to charging, always
remove the grounded terminal first. Ensure all electrical
accessories are off prior to charging.
It is best to clean the battery terminals prior to charging. Using a
battery terminal brush is a good way to remove corrosion.
When charging a lead-acid battery that is not sealed, it may be
necessary to add distilled water into battery so the battery acid
solution reaches the level as specified by manufacturer. Careful
do not overfill the battery.
Read individual precautions and warnings outlined by the
battery manufacturer relative to charging / maintaining. Ensure
that charger clips make a tight connection.
NEVER smoke or allow a spark or flame in the vicinity of the
battery or engine. Use charger for charging LEAD-ACID
batteries only.
NEVER charge a frozen battery.

SELECT CHARGING RATE
This smart charger has an optimal function (defaulted setting). If
you don't want to use the best settings, you can select your
expected battery type, charging rate, and other modes
manually. The smart charger has three additional charging rate
options. Press the "AMPS" button to choose the desired
charging rate.
2A- Can be used for little-capacity battery or slow charging.
10A - Can be used for medium-capacity automobile battery or
quick charging.
25A - Can be used for large-capacity or rapid charging.
Note: If you want your battery to sustain a longer life, slowly
charge it. Slow charging will take longer time but will charge
your battery more thoroughly. If your battery needs to charge in
a short amount of time, use the rapid charge setting.
BATTERY RECONDITIONING
When your battery has been unused for long periods of time,
the battery will be in a deep discharged state. The battery
reconditioning function is for recovering the battery from deep
discharge and help the battery last longer.

CHARGING TIME
Charging time may vary depending on some factors listed below
stop the process.
* Battery State
Depending on the voltage of your battery, it may take up to 10
hours to charge. Batteries with higher voltage can usually be
charged in a few hours.
* Battery Rating
A higher rated battery will take longer to charge than a lower
rated battery under the same conditions. A battery is rated in
ampere-hours (Ah), reserve capacity (RC) and cold-cranking
amps (CCA).
* Charge Rate
The charge rate is measured in amps. A battery charged at a
lower rate will take longer time than a battery charged at a higher
rate. However, smaller batteries can be easily damaged by
charging at a rate which is too high for the capacity of the battery.
* Temperature
Cold temperature will affect a battery's ability to accept a charge.
Charging in cold temperatures will increase the amount of time
required to charge a battery.
DESULFATION
If the battery is left discharged for an extended period, the battery
could become sulfated. A sulfated battery will not accept a
normal charge.
12

1. Desulphation: Pulse charges the battery to break down the
buildup of lead sulphate crystals. Lead sulphate crystals can occur
when a battery has been discharged or left unused for a period of
time, seriously affecting the performance and lifetime of the battery.
2. Soft Start: A slow steady buildup of the charging process that
limits the power supplied to protect the battery.
3. Constant Current:Will charge according to the set current full,
is the main part of the charging process.
4. Constant Voltage: The battery is fully charged by slowly
lowering the charging rate, allowing the battery to absorb more
energy.
5. Analysis: Automatically test the state of the battery after
charging if the battery is abnormal, it will enter the repair stage, if
the battery is normal, it will enter the floating charging stage.
6. Recondition: Unique charge state to recover deeply
discharged batteries.After repair, return to the constant current
stage to continue charging. If repair fails, an error will be reported.
7. Float: Trickle charge and nearly get your battery 100% fully
charged during this stage.
13
8-STAGE CHARGING

8. Pulse: Keep the battery charged at 100% without overcharg-
ing or damaging the battery, allowing smart charger to be
connected all the way to the battery.Suitable for intermittent use of
batteries, such as seasonal use of vehicles, including vintage
cars, motorcycles.
First, the clamp and battery are connected according to the
positive and negative poles, and then the smart charger is
connected to AC power supply. If the battery connection fails, the
LCD will show the sign, the clip image will flash and the screen
will show"PLEAESE PUT THE CLAMPS ON";
14

After the battery is connected normally, it enters the standby
interface. At this time, press the "AMPS" button to select the
current range (Auto/2A/10A/25A), press the "BatteryType" button
to select the BatteryType (STD/GEL/AGM), press the "Winter
Mode" button to select the Winter Mode (snowflake symbol). The
LCD displays the voltage and current parameters. The battery
SOC and the battery level both represent the current battery level.
Press the "START" button to start charging.
Note: if you do not select the current gear, battery type and
"START" button, the charger will count down for 30s according to
the parameters set last time and start charging automatically.
CHARGING PROGRESS
At the beginning of charging, the LCD will first display the
interface of the current charging stage, and automatically switch
to the charging interface after 5s. At this time, the battery pattern
will realize the horse racing effect. Of course, you can also press
the "recondition" button to see which charging stage is currently
in.
15

RECONDITION DISPLAY
In the standby interface, press the "Recondition" button to select
the repair mode, and then press the "START" button to start the
repair. The LCD displays "BATTERY IN REPAIR NOW".
16

When the repair is completed, the LCD displays "REPAIR
COMPLETED".
BATTERY DESULFATION
In the standby interface, press the "Pulse Desulfation" button to
select the desulfation mode, and then press the "START" button
to start the mode. The LCD displays "BATTERY IN DESULFA-
TION NOW".
17

When the desulfation is completed, LCD displays "DESULFA-
TION COMPLETED".
ENGINE START DISPLAY
In the standby interface, press the "engine start" button to select
the engine mode, and then press the "START" button to wait for
100s countdown.The first countdown is 100s,the second is
60s,the third is 30s. The LCD displays "Wait for 100s countdown".
Display 5s engine output at the end of each countdown . The
LCD displays "PLEASE START YOUR ENGINE" or "PLEASE
ENGINE START BUTTON AGAIN". And exiting the engine mode
while the third time finished. If opening fails, you can start it again.
Be careful not to start it more than 3 times. This may damage
charge and battery life.
18
Start engine output.
Table of contents
Popular Batteries Charger manuals by other brands

KUSSMAUL
KUSSMAUL 091-12VHO instruction manual

Clarke
Clarke Start-N-Charge BC120C Operation & maintenance instructions

WeTech
WeTech WTC2115 user manual

Opus
Opus PowerFocus BT-C3100 operating instructions

Fisher-Price
Fisher-Price POWER WHEELS H7455 manual

Moshi
Moshi ProGeo 4-Port USB Wall Charger quick start guide


Associated Equipment
Associated Equipment BC-91305 Operator's manual

La Crosse Technology
La Crosse Technology BC700 instruction manual

ZENS
ZENS ZEDC02B user manual

Siemens
Siemens VersiCharge 8EM1310-F.0 Series operating instructions

Freeloader
Freeloader SIXER FL5060 user manual

Loxit
Loxit Lapbank CB 10 quick start guide