TowMate Power-Link PLC-RX (4L-500) User manual

TowMate, LLC. : 15827 Serenity Point Ln. : Rogers, AR 72756 : Phone (800) 680-4455 : Fax (479) 925-3494
By:
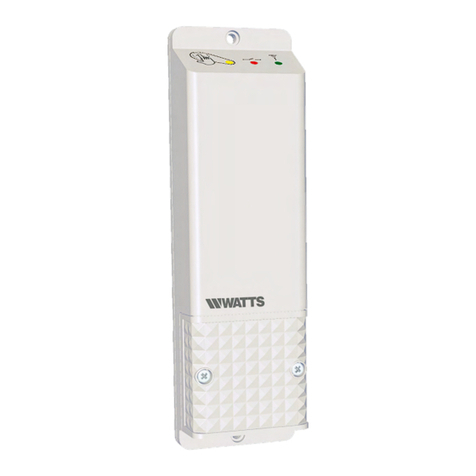
PLC-RX (4L-500) Power-Link Receiver Switch
Thank you for purchasing a Power-Link receiver card. This card is
intended to operate with a Power-Link control such as the PLC-
TX6, PLC-TX, or PLC-TXSW and can bring the Power-Link
advantage to any existing light, supporting up to 3-amps per
channel.
System Features:
Your complete system should include:
oPLC-RX 2-channel receiver card
oMagnet for programing.
Installs easily!
oOur breakthrough technology allows you to gain complete control over the
lighting on your truck with minimal wiring time or effort

TowMate, LLC. : 15827 Serenity Point Ln. : Rogers, AR 72756 : Phone (800) 680-4455 : Fax (479) 925-3494
Several modes to choose from
oPass-thru power for markers/Strobe (variable speeds)/Alternating strobe
(between the two channels, also variable speed)/On-Off
Lifetime Warranty
oIf ever the unit fails to get a signal, TowMate will replace the defective
component at no cost.
Installation Instructions:
*Be sure to connect the red and white wires last to prevent any shorts from
inadvertently occurring during installation.
**Do not overload the individual channels with too many lights. (3 amps maximum
per channel/combine channels to support up to 6 amps)
***Multiple receivers (PLC-RX’s) can be used within the same 12V system without
effect on the systems functionality.
****An automotive relay can also be set up to be triggered by the PLC-RX thus
allowing non-LED lights to be powered with minimal wiring as well.
1. Determine which lights you would like to control using your PLC-RX.
2. Connect the lights to one of the outputs on the receiver (blue wires are power
and white are ground).
a. If you would like to utilize the alternating strobe function, keep in mind that
only channel #1 can be programmed to create this effect but that you must
connect some lights to both channels in order for it to actually alternate.
3. Choose a power source and connect the red wire to 12V+.
a. Connect the red wire “upstream” of the lights you are manipulating and the
blue wire from the given channel “downstream” towards the lights.
b. In the case you are using the card to control your marker lights, simply
wire the card in line of the marker lights.
i. Keep in mind the card will only be operational when it is receiving
power, so the markers would have to be on all of the time in order
to keep it active all of the time.
Configuration Instructions:
*Once you have successfully connected to the 12V system and have
communication with the Power-Link control (PLC-TX/PLC-TX6/PLC-TXSW), a

TowMate, LLC. : 15827 Serenity Point Ln. : Rogers, AR 72756 : Phone (800) 680-4455 : Fax (479) 925-3494
red and green LED under the ‘tallest’ part of the molding will begin to flash
indicating successful connection. This flash is also referred to as the
“heartbeat”of the system.
-After about two minutes of inactivity (i.e. no button/function being selected on
the control) the card will go into a standby mode and the heartbeat will stop.
Simply press a button/function on the control to bring it back into the active
mode. Keep this in mind when installing the receiver if the control was installed
first.
**The configuration of the Power-Link receiver is essentially a three step
process: marker on/off (pass-thru power on/off), button/switch linking,
function/pattern selection.
1. To choose whether to allow pass-thru power on a given channel so that it
allows power through the circuit board even with no button on the control
selected, take a magnet and wave it over channel #1 or channel #2 (or both)
as shown in fig. 1.
a. A red LED on the board represents what the light you are controlling
will be doing and should simply cycle between on and off during this
step according to your action with the magnet.
2. To link a given channel to the PLC controller, activate the button/switch you
would like the unit to respond to before you wave the magnet over the
channel you intend to activate on the receiver.
3. Once the channel is linked, you can select how it responds by waving the
magnet over the chosen channel once again and cycling through the various
modes.
4. Repeat this process for each channel you program.
(Fig. 1)
Channel #1 Channel #2

TowMate, LLC. : 15827 Serenity Point Ln. : Rogers, AR 72756 : Phone (800) 680-4455 : Fax (479) 925-3494
Warranty/Service:
1. As with all TowMate products, there is a lifetime warranty on the electronics and
LED’s.
2. If you have any questions, or think you may require service, please call (800)
680-4455, and we will be happy to help.
Also check out our other Power-Link lighting options
Features:
Connects to any power and ground on the truck and is
compatible/controllable with the PLC controller.
Choose between marker modes and up to 11 flash patterns on some models.
Optional multi-colored LED’s with clear lens versions.
These modules have several programmed patterns that can be chosen with
the wave of a magnet over one end of the lens upon setup.
All Power-Link products eliminate the need to run wires all the way from a
central controller to the unit you wish to operate. Instead, tie into power and
ground on the same circuit from either component and you’re done!
Made in USA
Lifetime Warranty
Table of contents

