manuals.online logo
Brands
  1. Home
  2. •
  3. Brands
  4. •
  5. Leica
  6. •
  7. Receiver
  8. •
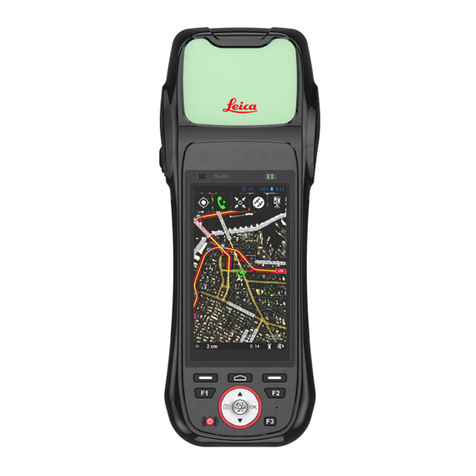
  9. Leica GS16 User manual

Leica GS16 User manual

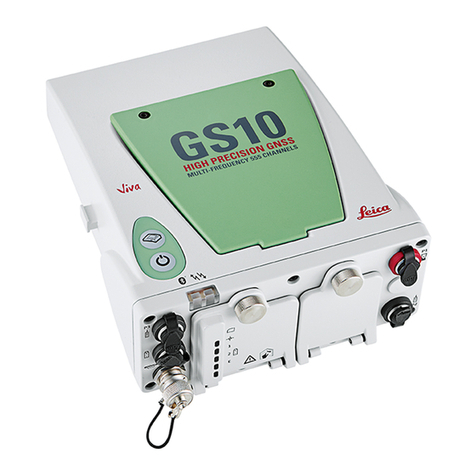
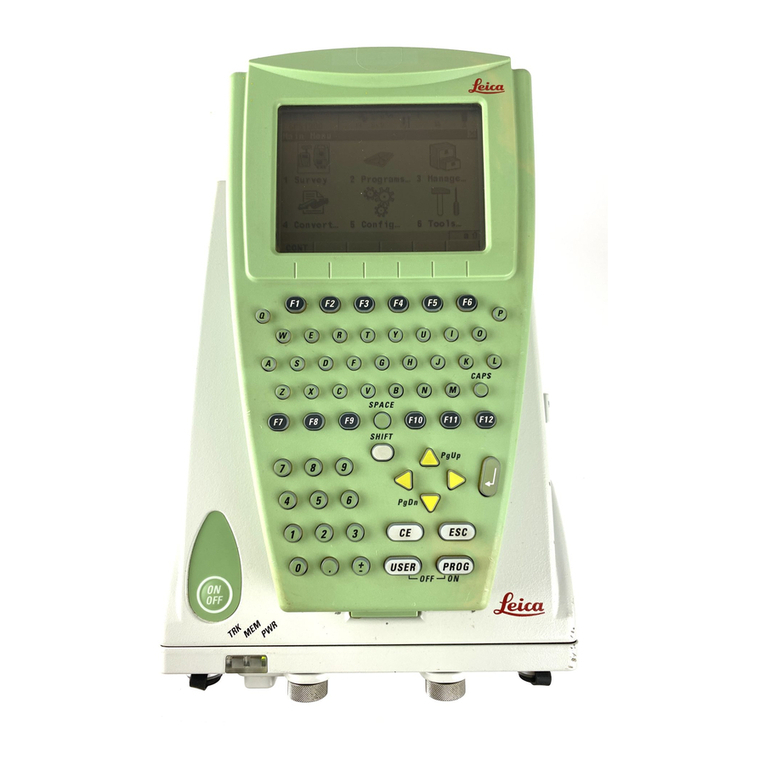
Leica GS16 GNSS Receiver + CS20 Data
Controller with Captivate Software
RTK Rover Wizard: NYSDOT –NYSNet RTN
Maine Technical Source –November, 2017
MTS - GS16 + CS20 –RTK Rover Wizard: NYSDOT –NYSNet RTN v1.2
MTS –November 2017 2/11
Leica Geosystems Captivate Software
This Quick Guide outlines the steps within the Leica Captivate Software, from the
Settings > Connections > RTK Rover Wizard to create a new Profile for Network
RTK Surveying using the GS16 GNSS Receiver and CS20 Data Controller with a
Cellular Internet connection to the NYSDOT, NYSNet RTN, (Real-Time Network).
The end user must register for a Free, (No Charge), RTK Rover Account, create their
Username and Password Credentials with NYSDOT; then activate their RTK Rover
account on the NYCORS Spider Business Center web page, before the RTK Rover
Account can be used in the field.
The following link is provided for the NYSDOT, NYSNet –RTN, (Real-Time Network),
Home page, http://cors.dot.ny.gov/spiderweb/frmIndex.aspx
For RTK Rover account registration on the NYSDOT, NYSNet –RTN, (Real-Time Network):
http://corsaccounts.dot.ny.gov/sbc/Account/Register
Typically, the NYSDOT CORS Account Team will send the Registered User an Email link for
the Spider Business Center, the End User clicks on this link to activate their RTK and Rinex
Products, the following link for the Spider Business Center Login page is provided:
http://corsaccounts.dot.ny.gov/sbc
Step 1- From the Captivate Software
Main Menu, Job Carousel, Select any
current Job,
MTS - GS16 + CS20 –RTK Rover Wizard: NYSDOT –NYSNet RTN v1.2
MTS –November 2017 3/11
Step 2- From the Apps Carousel,
Select Settings > Connections,
Step 3- From the Connections
panel,
Select RTK rover wizard
Select F1 OK
Step 4- From the RTK Rover Wizard
panel, One or more RTK profiles
already exist. What would you like to
do?
Panel, select the option,
(•) Create a new profile
Select F6 Next
Step 5- From the RTK Rover Wizard
What type of connection do you want
to use Panel, select the option:
(•) Internet (eg NTRIP)
Select F6 Next
MTS - GS16 + CS20 –RTK Rover Wizard: NYSDOT –NYSNet RTN v1.2
MTS –November 2017 4/11
Step 6- From the RTK Rover Wizard
Which port is the RTK device con-
nected to? Panel, select the option:
(•) CS 3.5G modem port
Select F6 Next
Step 7- From the RTK Rover Wizard
Which RTK device is being used?
If you are using AT&T, or T-Mobile
Cellular Service with a SIM card in
the CS20 Data Controller, select the
option
(•) GSM/GPRS/UMTS device
Select F6 Next
Step 8- From the RTK Rover Wizard
Which RTK device is being used?
If you are using Verizon Wireless
Cellular Service (No SIM card) in the
CS20 Data Controller, select the op-
tion
(•) CDMA device
Select F6 Next
Step 9- From the RTK Rover Wizard
Enter PIN & PUK codes of the SIM
card, panel
Leave the Defaults, Do Not Change,
Do Not Enter ANY Information here,
Select F6 Next
MTS - GS16 + CS20 –RTK Rover Wizard: NYSDOT –NYSNet RTN v1.2
MTS –November 2017 5/11
Step 10-
From the RTK Rover Wizard
How is the device connecting to the
Internet, select the option,
(•) Using GPRS/CDMA Internet
Connection
Select F6 Next
Step 11-
From the RTK Rover Wizard
Enter the APN for your Internet
connection
Enter the APN value
The APN is required if using SIM card,
For AT&T: isp.cingular or broadband
For T-Mobile: epc.tmobile.com
Select F6 Next
Step 12-
From the RTK Rover Wizard
Additional optional Internet connection
settings, panel
Leave these options Unchecked,
Select F6 Next
Step 13-
From the RTK Rover Wizard
A RTK server is required.
What would you like to do?
(•) Create a new server
Select F6 Next
MTS - GS16 + CS20 –RTK Rover Wizard: NYSDOT –NYSNet RTN v1.2
MTS –November 2017 6/11
Step 14-
From the RTK Rover Wizard
Enter new server details
Server name: NYSNET RTN
Address: 170.3.245.18
Port: 8080
Use NTRIP with this server [√ ]
Enter your NTRIP user ID
Enter your NTRIP password
Select F6 Next
Step 15-
From the RTK Rover Wizard
A mountpoint is required.
What would you like to do?
(•) Select mountpoint from source
table
Select F6 Next
Step 16-
From the RTK Rover Wizard
Choose a mountpoint.
From the Mountpoint drop-down
menu, Browse the list, select a
Mountpoint, The Identifier, Format,
Solution and System details, describe
the Mountpoints, or RTK Data Product.
Select F6 Next
MTS - GS16 + CS20 –RTK Rover Wizard: NYSDOT –NYSNet RTN v1.2
MTS –November 2017 7/11
Step 17-
From the RTK Rover Wizard
Enter the RTK network details
Receive RTK Corrections from RTK
[√ ]
network
Network type [Nearest ]
If you selected a Nearsite Mountpoint,
You MUST select/match the Network
type: [ Nearest ]
Select F6 Next
The Network type Nearest = Single Baseline RTK
Corrections from the Closest Network RTK Base,
Based on the RTK Rover’s position.
Step 18- (Other mountpoint options)
From the RTK Rover Wizard
Choose a mountpoint
From the Mountpoint drop-down
menu, Browse the list, select a
Mountpoint, The Identifier, Format,
Solution and System details, describe
the Mountpoints, or RTK Data Product.
Select F6 Next
Step 19-
From the RTK Rover Wizard
Enter the RTK network details
Receive RTK Corrections from RTK
[√ ]
network
Network type [ MAX ]
If you selected a MAX Mountpoint,
You MUST select/match the Network
type: [ MAX ]
Select F6 Next
The Network type MAX = Network RTK
Corrections from Multiple Network RTK Base
Stations, based on your RTK Rover’s position.
The RTK Rover computes the MAX Network solution.
MTS - GS16 + CS20 –RTK Rover Wizard: NYSDOT –NYSNet RTN v1.2
MTS –November 2017 8/11
Step 20- (Other mountpoint options)
From the RTK Rover Wizard
Choose a mountpoint
From the Mountpoint drop-down
menu, Browse the list, select a
Mountpoint, The Identifier, Format,
Solution and System details, describe
the Mountpoints, or RTK Data Product.
Select F6 Next
Step 21-
From the RTK Rover Wizard
Enter the RTK network details
Receive RTK Corrections from RTK
[√ ]
network
Network type [ i-MAX ]
If you selected a i-MAX Mountpoint,
You MUST select/match the Network
type: [ i-MAX ]
Select F6 Next
The Network type i-MAX = Individual MAX Network
RTK Corrections from Multiple Network RTK Base
Stations, based on the RTK Rover’s position.
The Network RTK Server computes these i-MAX RTK
Corrections, sends them to the Network RTK Rover.
Step 22- (Other mountpoint options)
From the RTK Rover Wizard
Choose a mountpoint
From the Mountpoint drop-down
menu, Browse the list, select a
Mountpoint, The Identifier, Format,
Solution and System details, describe
the Mountpoints, or RTK Data Product.
Select F6 Next
The Network type Nearest MSM = Single Baseline
RTK; MSM = Multiple Satellite Measurements,
Corrections from the Closest Network RTK Base,
Based on the RTK Rover’s position.
MTS - GS16 + CS20 –RTK Rover Wizard: NYSDOT –NYSNet RTN v1.2
MTS –November 2017 9/11
Step 23-
From the RTK Rover Wizard
Enter the RTK Network details
Receive RTK Corrections from RTK
[√ ]
network
Network type [Nearest ]
If you selected a Nearsite Mountpoint,
You MUST select/match the Network
type: [ Nearest ]
Select F6 Next
The Network type Nearest = Single Baseline RTK
Corrections from the Closest Network RTK Base,
Based on the RTK Rover’s position.
Step 24-
From the RTK Rover Wizard
Enter the RTK Network details
RTK data format [RTCM v3 ]
Sensor at Base [ Automatically detect ]
Antenna at Base [ADVNULLANTENNA ]
Select F6 Next
Step 25-
From the RTK Rover Wizard
The Wizard is complete. Would you like
to test your connection?
(•) Yes, Test my connection
This tests/verifies the New Servers IP
Address, Port and User’s Credentials…
Select F6 Next
MTS - GS16 + CS20 –RTK Rover Wizard: NYSDOT –NYSNet RTN v1.2
MTS –November 2017 10/11
Step 26-
From the RTK Rover Wizard,
RTK rover wizard finished
Select F6 Finish
Step 27-
The User is returned to the Captivate
Main Menu
Step 28-
To Start the RTK Data Stream,
(1) Using the Stylus, Tap on the
Cellphone icon on the Top-
Row Task Bar,
(2) Then Select/Tap Start RTK
Stream,
This will Start the RTK Data Link, the
RTK Rover will iterate from an
Autonomous/Navigated GNSS Solution
to a RTK Float Solution, then to a RTK
Fixed Solution, so the RTK user can
Start Measuring, or Staking Out Points.
MTS - GS16 + CS20 –RTK Rover Wizard: NYSDOT –NYSNet RTN v1.2
MTS –November 2017 11/11
Step 29-
To Stop the RTK Data Stream,
(1) Using the Stylus, Tap on the
Cellphone icon on the Top-Row
Task Bar,
(2) Then Select/Tap Stop RTK
Stream, This will stop the RTK Data
Link.
If you need technical assistance configuring the Internet Connection;
configuring the Cellular Modem Device in the Leica CS20 Data Controller, or the Cellular
Modem device in the Leica GS16 GNSS receiver; there are PDF Quick Guides available on
the MTS Blog page, that provide detailed instructions for Configuring the Data Controller,
or GNSS Receiver’s internal Cellular Data Modems using AT&T GSM/GPRS cellular net-
work, or Verizon Wireless CDMA cellular Networks for Network RTK Rovers.
blog.mainetechnical.com
Filename: GS16-CS20-RTK Rover Wizard_NYSDOT Quick Guide_Rev1.1

This manual suits for next models

1

Other Leica Receiver manuals

Leica GGo4 Instruction Manual

Leica

Leica GGo4 Instruction Manual

Leica Zeno 20 3.75G Android User manual

Leica

Leica Zeno 20 3.75G Android User manual

Leica GS14 User manual

Leica

Leica GS14 User manual

Leica GR30 Reference guide

Leica

Leica GR30 Reference guide

Leica GS10 User manual

Leica

Leica GS10 User manual

Leica GPS1200 Series User manual

Leica

Leica GPS1200 Series User manual

Leica GR10 Quick start guide

Leica

Leica GR10 Quick start guide

Leica GR10 User manual

Leica

Leica GR10 User manual

Leica TPS400 Series User manual

Leica

Leica TPS400 Series User manual

Leica GR30 User manual

Leica

Leica GR30 User manual

Leica RVL100 User manual

Leica

Leica RVL100 User manual

Leica GS14 User manual

Leica

Leica GS14 User manual

Leica GRX1200 series User manual

Leica

Leica GRX1200 series User manual

Leica iCON gps 70 User manual

Leica

Leica iCON gps 70 User manual

Leica GMX902 GG User manual

Leica

Leica GMX902 GG User manual

Leica GMX902 GG User manual

Leica

Leica GMX902 GG User manual

Leica GPS1200 Series User manual

Leica

Leica GPS1200 Series User manual

Leica Zeno 10 User manual

Leica

Leica Zeno 10 User manual

Leica Viva GNSS User manual

Leica

Leica Viva GNSS User manual

Leica GS15 User manual

Leica

Leica GS15 User manual

Leica GS18 User manual

Leica

Leica GS18 User manual

Leica GM30 User manual

Leica

Leica GM30 User manual

Leica GS15 User manual

Leica

Leica GS15 User manual

Leica GPS900 Series Product manual

Leica

Leica GPS900 Series Product manual

Popular Receiver manuals by other brands

Kenwood VR-50RS instruction manual

Kenwood

Kenwood VR-50RS instruction manual

Sennheiser EK 500 G2 Instructions for use

Sennheiser

Sennheiser EK 500 G2 Instructions for use

SCHUNK RSS R1 Assembly and operating manual

SCHUNK

SCHUNK RSS R1 Assembly and operating manual

Onkyo HT-RC160 instruction manual

Onkyo

Onkyo HT-RC160 instruction manual

Omega ZW-REC user guide

Omega

Omega ZW-REC user guide

Yaesu FT-1000 operating manual

Yaesu

Yaesu FT-1000 operating manual

EnviroTech Group Palintest Kemio quick start guide

EnviroTech Group

EnviroTech Group Palintest Kemio quick start guide

Onkyo HT-RC270 instruction manual

Onkyo

Onkyo HT-RC270 instruction manual

DEVA Broadcast DB7007 Maintenance and operation instruction manual

DEVA Broadcast

DEVA Broadcast DB7007 Maintenance and operation instruction manual

Magenta MULTIVIEW 250A Quick reference & setup guide

Magenta

Magenta MULTIVIEW 250A Quick reference & setup guide

JVC RX-DP9VBK instructions

JVC

JVC RX-DP9VBK instructions

Sherwood RD-8108 user guide

Sherwood

Sherwood RD-8108 user guide

Grundig WR 5408 PLL user guide

Grundig

Grundig WR 5408 PLL user guide

Onkyo HT-R494 Basic Manual

Onkyo

Onkyo HT-R494 Basic Manual

Sony STR-DH800 Specifications

Sony

Sony STR-DH800 Specifications

Sony STR-K900 - Fm Stereo/fm-am Receiver Service manual

Sony

Sony STR-K900 - Fm Stereo/fm-am Receiver Service manual

SWIT Electronics FLOW2000T Series user manual

SWIT Electronics

SWIT Electronics FLOW2000T Series user manual

Sony STR-DA5500ES Quick setup guide

Sony

Sony STR-DA5500ES Quick setup guide

manuals.online logo
manuals.online logoBrands
  • About & Mission
  • Contact us
  • Privacy Policy
  • Terms and Conditions

Copyright 2025 Manuals.Online. All Rights Reserved.