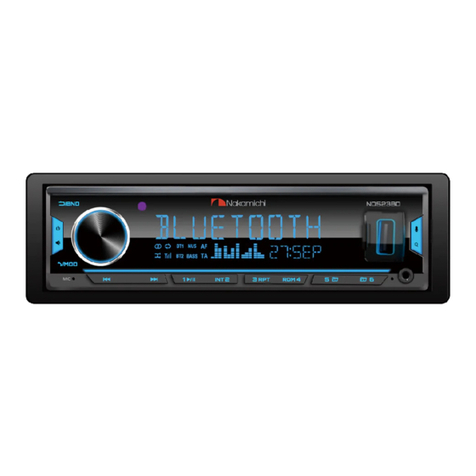
Nakamichi NAM1630 User manual

NAM1630
NAM1630

Output Channel Adjustment Area
Warning & Precaution
Featuress
Accessory List
Wire Connection
Home Page Operation
Radio Operation
Radio Interface
Radio Area Selection
Automatic Search
Rds Function
Bluetooth Operation
Bluetooth Pairing
Call Interface
Call Record
Phone Book
Bluetooth Music Playback
Phone Mirror Link Operation
Mirrorlink Interface
Music Playback
Multimedia Operation
Video Playback
Picture Playback
DSP Setting
DSP Setting
DSP Setting
Delay Settings
EQ And Sound Effect Settings
Focus Adjustment
Bass EQ Settings
PC Professional Debugging
PC Software Operation Introduction
Main Menu Edit Section
Channel Equalixer Editing Area
Channel Diveder Editing Area
Settings
Key Lights Settings
Time Settings
Display Settings
Steering Wheel Learning
Truble Shooting
Specificagion
1 EN
2 EN
3 EN
3 EN
5.1 Channel
Two Frequency
Three Frequency
DSP Setting
12 EN
12 EN
13 EN
13 EN
Delay Horn Diagram
11 EN
Remote Control Operation 4 EN
Panel Operation 4 EN
5 EN
6 EN
6 EN
6 EN
6 EN
6 EN
7 EN
7 EN
7 EN
7 EN
7 EN
7 EN
8 EN
8 EN
8 EN
9 EN
9 EN
9 EN
10 EN
11 EN
11 EN
12 EN
DSP Setting 11 EN
12 EN
14 EN
14 EN
14 EN
14 EN
15 EN
15 EN
16 EN
16 EN
16 EN
17 EN
17 EN
18 EN
19 EN
19 EN
19 EN
19 EN
19 EN
20 EN
21 EN
Position Settings

1 EN

2 EN
1024 x 600 HD display
in professional DSP

3 EN
WIRE CONNECTION
USB computer debug port
GND
ACC
Reverse
SWC1
FR-
FR+
FL-
FL+
B+
ILL
SWC2
ANT
RL-
RL+
RR+
RR-
13
14
15
16
1
2
3
4
5
6
7
8
9
10
11
12
Yellow
Yellow
Yellow
Yellow
Red
White
Video input
Auxiliary left speaker input
Video output
Video output
Reverse camera Input
Auxiliary right speaker input
A
Channel1 audio output
Channel2 audio output
Channel3 audio output
Channel4 audio output
Channel5 audio output
Channel6 audio output
Channel7 audio output
Channel8 audio output
Red
White
White
Red
Blue
Brown
White
Red
CH1
CH2
CH3
CH4
CH5
CH6
CH7
CH8
SWI MIC
Black
Red
Purple/
White
Brown
Grey
Grey/
Black
White/
Black
White
Yellow
Orange
Brown/
Black
Blue
Green/
Black
Green
Purple/
Black
Purple

4 EN
NAM1630

5 EN
DSP

6 EN

7 EN
Name: NAM1630
1630

8 EN
3
4
Adroid phone Mirrorlink
MUSIC PLAYBACK

9 EN

10 EN
Bass EQ
1. Click [ CH1~CH8 ] to switch the corresponding channel. There are 8 channels
in total.
3. In the professional setting interface, can set 5.1 channel, two frequency
division,three frequency division, connection and phase of the opposite phase
Settings.
4. Click [ LINK ] to connect two adjacent channels.
5. Click [ 180° ] to select positive or inverse phase Settings.
6. For each channel, can set the filter type of high-pass and low-pass slope, can
adjust the frequency and volume as required.
7. Select link_ril, bessel, butt_W filter type, click [ < ] or [ > ] can switch.
8. The adjustable frequency range is 0~20600Hz, click [ < ] or [ > ] it can be
adjusted up or down.
9. Slope can choose: 6 db, 12 db, 18 db, db, 30 db, db, 42 db, 48 db and OFF,
click [ < ] or [ > ] can toggle selection.
10. Click [ Mute ] to turn on the Mute mode, and click again to turn off the Mute
mode, click on the [ < ] or [ > ] can adjust the volume, or slide the volume
display lever left and right to adjust the volume. The adjustable volume ranges
from 0 ~ 60.
2. Click [ << ] to display " CH1~CH4 " channel click [ >> ] to display " CH5~CH8 "
channel.
DSP proessional instruction:
Click [ DSP ] to enter the DSP professional setting interface.

11 EN
5.1 Channel
2-Way
3-Way
Note: When 5.1 channels, 2 frequencies, or 3 are selected on the of DSP output
frequency division, please install speaker according to the corresponding location
of speaker distribution, and note that the audio output of RCA line defines socket
docking (for the definition of RCA line , please refer to "AUDIO OUTPUT: Extension"
of line connection in the manual).
Example: On the interface of DSP output frequency division, select the three-
frequency division, and press to install the speaker according to the distribution
map of three-frequency division, and set the position of each speaker . The output
audio is different. When connecting the RCA line interface, note meaning see the
label content of the 16-pin RCA line interface 3-way to define the output. Verify
that the loudspeaker output is consistent with the RCA interface definition before
interconnecting with the loudspeaker.
FL-Full FR-Full
RL-Full RR-Full
Subwoofer
CENTER
Subwoofer
CENTER
FL-Tweeter FR-Tweeter
RL-Full RR-Full
FL-MID&WF FR-MID&WF
Subwoofer
CENTER
FL-Tweeter FR-Tweeter
FL-MID FR-MID
FL-Woofer FR-Woofer

12 EN
Delay Settings Click [ Manual ] to enter the manual delay
settings interface.
Click [-] or [+] corresponding to the horn to
set the corresponding horn delay time.
Delay range:
Ms range: 0.00~20.00, Cm range: 0~692.
Unit switch:
Click [MS] to switch milliseconds.
Click [CM] to switch CM units.
Delay Horn Diagram
2. Determines the center of the currently set listening position as the reference point.
3. Measure the distance from the reference point to the horn.
4. Calculate the distance difference between the farthest speaker and the others.
5. Set the DTA value for each speaker step by step.
6. Adjust the gain of a single speaker.
Note: First confirm that the EQ is the standard
mode, the listening position, output volume,
and output crossover are the factory defaults.
Balance adjustment of the left and right
channels to output separately, and confirm
the consistency of the tweeter and midrange
speakers. The left and right channels must be
consistent, otherwise the delay It was chaotic.
Measure the distance of each speaker:
1. Determine the value of the listening bit, If you specify the distance from the
center of the currently set listening position to each speaker, the delay time is
calculated and set automatically.
Position Settings
Click [ ] to enter the auto delay settings
interface.
Click the seat icon on the right to set the
corresponding horn position.

13 EN
Note:
Click [ ] to enter EQ and sound Settings
screen.
2. EQ curve adjustment of corresponding output channel (Band, Freq, Gain and
Q values) .
1. Click [ CH1~CH8 ] to switch the corresponding channel, There are 8 channels
in total.
3. BAND: This machine has a total of 14 bands, the numbers [ 1-14 ] each
represent a band, click [ << ] in this interface to display "1-7" band, click [ >> ] to
display "8-14" band.
4. Freq: Select the frequency of the corresponding band of the output channel,
and then click [+] or [-] to increase or decrease the selected frequency.
Adjustable frequency range: 0~20600Hz.
EQ equalizer can choose user1, user2, flat,
bass, jazz, pop, classic, rock 8 sound modes.
5. Gain:Select the gain of the corresponding band of the output channel, and
then point [+] or [-] to increase or decrease the gain value. The gain value can
be adjusted from -20.0 ~ 20.0.
6. Q value: Select the Q value of the corresponding band of the output
channel, and click [+] or [-] to increase or decrease the Q value.
Q value range: 0.404 ~ 28.852 .
1. Choose flat, bass, jazz, pop, classic, rock sound, will not be able to change
the corresponding frequency, gain and Q value.
2. Select user 1 or user 2 to adjust the frequency, gain, and Q values.
EQ operation instructions:

14 EN
Focus Adjustment
Bass EQ Settings
PC SOFTWARE OPERATION INTRODUCTION
(PC can be downloaded from the official
website(Http://www.nakamichicaraudio.
com,Downloads)
Computer Configuration Requirements:
Scren resolution higer than 1280x768,
otherwise the software UI is incomplete,
only suitable for windows operation system
laptop, desktop and pades.
Click [ ] to enter the audio and video
setting interface.
Click [ NUS OFF ] to turn NUS on or OFF.
In this interface can adjust the main channel
sound image, central sound image, surround
sound image.
The adjustment range is 0~16, click [ - ] or
[ + ] to adjust.
Bass EQ frequencies can choose: 40Hz, 60Hz, 100Hz, 150Hz, 200Hz, 250Hz,
300Hz, 400Hz.
The value of bass EQ level ranges from -10~10. Click [-] or [+] to adjust, or
slide the display bar left and right to adjust.
Click [ ] to enter the bass EQ setting
interface.
Select the speaker you want to adjust and
click the [ ] icon corresponding to the
speaker to adjust the frequency and sound
level of the speaker.

PC PROFESSIONAL DEBUGGING
Main features:
Save,Memory,Option,Mixer, Audio,NUS, SeakerNull and unconnected operations.
Click on the " Memory " popup
window and select Load machine
Preset Scene or Save as Preset
Scene or Load PC Presets File or
Save PC Presets File or Load
Machine Scene and Save
Machine Scene.
4. Click " Mixer " to enter the mixing
interface, where the corresponding
mixing input source can be entered
by switching. The high level interface
is as follows.
5. Click on the "Audio " window to
select flat, bass, classical, jazz,
pop and rock sounds.
3.Click "Option" to select Chinese
and English switch, noise door,
about and restore factory Settings.
简体中文
繁體中文
English
Noise Gate
About(A)
FLAT
BASS
CLASSCI
JAZZ
POP
ROCK
1. Click "Save" to save the currently
set frequency parameters
Main Menu Edit Section
Load PC Presets File
Save PC Presets File
15 EN
Save
Option Mixer Audio
NUS
SpeakerNull
unconnected
Memory
2.

PC PROFESSIONAL DEBUGGING
8. Click the "Unconnected" button
to connect to the PC.
Channel equalizer editor area Main
function configuration:
6. Click the "NUS" pop-up window to
open/close NUS SW and CEN SW;
Adjustable main channel, middle
channel, surround channel.
7. Click the "speakerNull" pop-up
window, you can select two
frequency, three frequency,
5.1 channel.
2-way
3-way
5.1
Current output channel equalization
design, 14 frequency band
equalization adjustable frequency,
Q value (response bandwidth), gain
( increase or decrease the frequency
response amplitude near the
frequency point).
Channel Equalizer Editing Area
16 EN
Unconnected Connected
NUS SW
CEN SW
Main image:
Cen image:
SRS image:
0
0
0
Main function Settings of channel
distributor editing area: setting of
channel high and low pass filter.
Tunable filter type, frequency point
and Q value (gradient or slope).
When the slope is 6dB/Oct, the type
is butter-w.
Channel Diveder Editing Area
High-pass filter
Freq:
Type:
Oct:
OFF
butter_w
18db/Oct
Low-pass filter
Freq:
Type:
Oct:
20000Hz
butter_w
18db/Oct

PC PROFESSIONAL DEBUGGING
2. "Reset EQ" button: lt is used to restore the parameters
ofthe 14-band equalizer to the original pass-through
mode (thefrequency of the equalizer, the value and
the gain are restored to the initial value).
3. "Restore EQ" button: Switch between the currently designed equalizer state
parameters and the pass - through mode (the gain of all equalization points
is restored to OdB, the frequency and value are unchanged).
1. " GEQ " button: lick to select graphie ealization or
parametic equalization.
Output channel adjustment region, positive and negative phase of each
channel. volume adjustment, mute, joint adjustment, etc.
Output Channel Adjustment Area
17 EN
GEQ
Reset EQ
Restore EQ
Click the speaker button to mute the main volume.
1. Main volume adjust zone
Adjustment Range: ON/OFF,-59dB~6dB.

PC PROFESSIONAL DEBUGGING
8. "Delay Unit" button: Select the
delay unit by clicking the
left or right arrow, availablein
milliseconds, centimeters, and
inches.
2. Sound adjustment: slid the scroll up
and down to adjust the sound level
of the channel, or input the value
or scroll the mouse wheel in the
sound input box to adjustthe sound
size.Click the horn button to switch
between mute.
6. Lock output type: Locking for the
current output channel type is not
customizable.
5. Reset output configuration:
Customizable for channel type.
4. Delay: set the delay value by
scrolling the mouse wheel in the
delay input box,orenter the value
to set the delay value.
3. Positive phase adjustment: Click
[ 0° ] or [ 180° ] to switch between
positive phase and reverse phase.
18 EN
Ms
Delay unit
Ms
Cm
Inch
7. Out left and right joint
adjustment: The joint of the
left and right channel data
of the output channel can
be copied from left right,or
from right to left.
Table of contents
Other Nakamichi Receiver manuals

Nakamichi
Nakamichi DELTA 10B User manual

Nakamichi
Nakamichi NAM1700r User manual

Nakamichi
Nakamichi NA2750 User manual

Nakamichi
Nakamichi NA3020 User manual

Nakamichi
Nakamichi 530 User manual

Nakamichi
Nakamichi NA 1800 User manual

Nakamichi
Nakamichi NAM6700r User manual

Nakamichi
Nakamichi NAM5420 User manual

Nakamichi
Nakamichi NA1650 User manual

Nakamichi
Nakamichi NA1850 User manual