Tracer PED Series User manual

Date: 20 September 2021
Document Reference: MN1010 Rev. I
User Manual
Personal Electronic Dosimeter (PED)

2of 25
MN1010 Rev. I
Table of Contents
1Tracerco PEDs...............................................................................................4
1.1 Overview ................................................................................................. 4
1.2 PEDs ....................................................................................................... 4
1.3 Interface.................................................................................................. 5
2Functional Description ..................................................................................6
2.1 Readings screen ....................................................................................... 6
2.2 Dose and dose rate measurement ............................................................... 7
2.3 Dose rate overload .................................................................................... 7
2.4 Alarms..................................................................................................... 7
2.4.1 Dose alarms .......................................................................................... 8
2.4.2 Dose rate alarms ................................................................................... 8
2.4.3 Default alarm levels ............................................................................... 8
2.4.4 Alarm messages (PED+ and PED-ER+) ..................................................... 9
2.4.5 Dose rate overload................................................................................. 9
2.5 Data logging............................................................................................. 9
2.6 Tasks .................................................................................................... 10
2.7 Discrete mode ........................................................................................ 10
2.8 Handheld mode (PED+ and PED-ER+) ....................................................... 11
2.9 GPS logging (PED+ and PED-ER+) ............................................................ 11
2.9.1 Data points ......................................................................................... 12
2.10 Bluetooth (PED+ and PED-ER+)................................................................ 12
2.11 Battery life ............................................................................................. 13
2.11.1 PED Blue, PED-ER, and PED-IS .............................................................. 13
2.11.2 PED+ and PED-ER+ ............................................................................. 13
3Operation ...................................................................................................14
3.1 Setting up the PEDs ................................................................................ 14
3.2 Start up and shut down ........................................................................... 14
3.3 Navigating the menus.............................................................................. 15
3.3.1 Main menu .......................................................................................... 15
3.3.2 Settings menu ..................................................................................... 16
3.4 Wearing PEDs ......................................................................................... 17
3.5 Working with tasks.................................................................................. 17
3.6 Working in the discrete mode ................................................................... 17

3of 25
MN1010 Rev. I
3.7 Using a PED+ or PED-ER+ in handheld mode ............................................. 18
3.8 Pop-up messages.................................................................................... 19
3.9 Warning messages .................................................................................. 19
3.9.1 Non-critical warnings ............................................................................ 19
3.9.2 Critical errors ...................................................................................... 20
4Maintenance ...............................................................................................22
4.1 Upgrading the firmware ........................................................................... 22
4.2 Battery Care........................................................................................... 22
4.2.1 Charging the battery ............................................................................ 22
4.2.2 Charging the battery wirelessly (PED+ and PED-ER+ models T414-2 & T414-4
ONLY) ......................................................................................................... 23
4.2.3 Tips to maintain good battery health ...................................................... 23
4.3 Cleaning ................................................................................................ 23
4.4 Calibration ............................................................................................. 24
4.5 PED-IS repairs ........................................................................................ 24
4.6 Accessories ............................................................................................ 24

4of 25
MN1010 Rev. I
1Tracerco PEDs
1.1 Overview
Tracerco’s Personal Electronic Dosimeters (PEDs) measure and record both accumulated dose and
dose rate. PEDs measure the radiation equivalent dose Hp(10), accumulated in X-ray and gamma
ray radiation, which is the equivalent dose at 10 mm below surface of the upper body. Therefore,
PEDs must be worn on the upper body.
DoseVision™ transfers dose and dose rate data from the PEDs to a local computer. Data must be
transferred periodically to clear the memory on PEDs. DoseVision™ displays data graphically and
allows users to set alarm levels and other settings on PEDs.
DoseVision™ Live is a smart phone app that can connect with up to seven PEDs simultaneously using
Bluetooth.
Attention: The PED-IS is certified for use in potentially explosive atmospheres (hazardous areas).
Therefore, the PED-IS must be operated in accordance with the information contained in the
document MN1004 Essential Safety Information.
1.2 PEDs
PEDs measure dose rates in the range 0 to 100 mSv/h (0 to10 rem/h), with extended range PED
variants also available to measure dose rates in the range 0 to 1.0 Sv/h (0 to 100 rem/h). The
Tracerco PEDs are as follows:
PED Blue and PED-ER (extended range)
The PED Blue is our standard personal dosimeter packed with features as standard.
PED-IS
The PED-IS is an intrinsically safe version of the PED Blue.
PED+ and PED-ER+ (extended range)
The PED+ range have additional features such as:
•Bluetooth connection for use with DoseVision™ Live.
•Built-in GPS monitoring for logging location information along with dose data.
•Wireless battery charging.
•Pop-up alarm messages which are customisable for individual user scenarios.
•Handheld mode that allows the PED+ and PED-ER+ to be used as a portable survey meter.
PED Blue and PED-ER
PED-IS
PED+ and PED-ER+
5of 25
MN1010 Rev. I
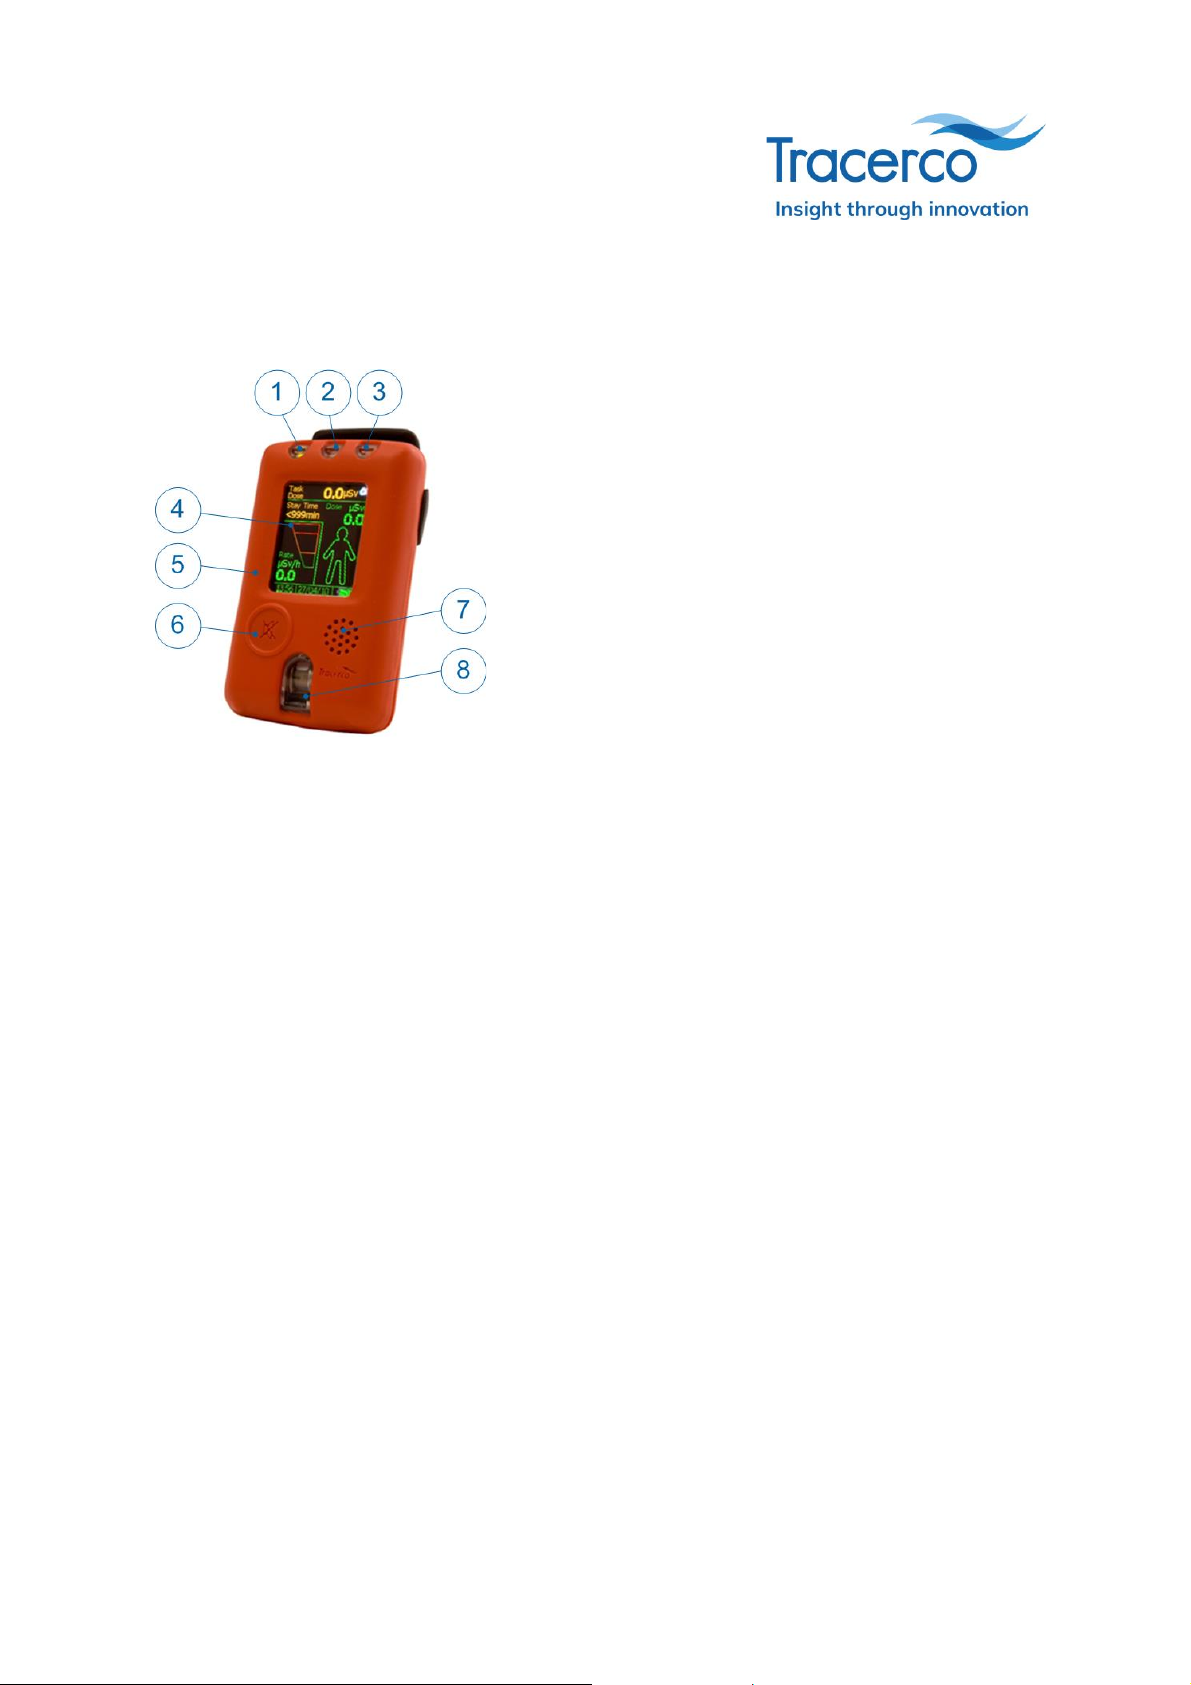
1.3 Interface
The key interface features are as follows:
1. System check: Flashes green periodically while the
PED is functioning correctly. The LED flashes red if the
instrument is in a critical status.
2. Dose rate alarm: Flashes amber while the amber
dose rate alarm is exceeded. Flashes red while the red
dose rate alarm is exceeded.
3. Dose alarm: Flashes amber or red for active dose
alarms and continues to flash until the data has been
transferred to DoseVision™.
4. Readings screen: The screen can be programmed to
customise the displayed information using
DoseVision™.
5. Case: The case is a robust and durable polymer case.
6. Button: PEDs use a single button for navigation and
selection. A long press is used to turn on the PED, open
the menu system and to make selections. A short press
is used to scroll. The button is also used to silence
alarms
7. Speaker: The speaker is used for audible alarms.
8. Geiger Müller tube window: The Geiger Müller tube
has a small window to allow increased low energy
response.

6of 25
MN1010 Rev. I
2Functional Description
2.1 Readings screen
PEDs have the following display modes:
•Combined dose and dose rate (this is the default screen layout)
•Dose rate only (includes peak dose rate)
•Dose only (includes stay time).
PEDs also have an option to flip the screen. The display modes show as follows:
Combined
Dose rate only
Dose only
The readings screens show the following information depending on which display mode is selected:
Peak reading
The highest dose rate, µSv/h or mrem/h, detected since the last time the readings were transferred
to DoseVision™.
Stay time
An estimate of the time left at current dose rate, until you reach the next dose alarm. The stay time
is displayed in minutes with a range of 0 to 999 minutes.
Dose
The total dose of radiation, µSv or mrem, received since the last readings were transferred to
DoseVision™.
Dose body
Graphical display of accumulated dose level. The body fills from the bottom as dose is accumulated.
Yellow, orange, red and crimson dose alarm thresholds are displayed on the figure depending on the
alarm configuration.
Bar graph
Graphical display of current dose rate (linear scale). Orange and red dose rate alarm thresholds are
displayed on the bar graph.
Rate
Current dose rate in µSv/h or mrem/h.

7of 25
MN1010 Rev. I
Status bar
Displays time, date and battery capacity. Alternates with PED status and warning messages, if any
are current.
Attention: For the PED+ and PED-ER+, the status icons for Bluetooth or GPS features are shown
alternating with the battery symbol if enabled.
2.2 Dose and dose rate measurement
PEDs measure and record the following:
Dose equivalent
Radiation equivalent dose Hp(10), accumulated in X-ray and gamma rays radiation in the energy
range of 33keV to 3MeV (standard range) or 48keV to 3MeV (extended range), and is the equivalent
dose at 10 mm below surface of the upper body. Alarms can be set for dose.
Dose rate
Dose rates up 100 mSv/h (10 rem/h) or 1 Sv/h (100 rem/h) for the extended range. Alarms can be
set for dose rate.
Attention: The accuracy of measured dose rates cannot be guaranteed above 100 mSv/h (10
rem/h) or 1 Sv/h (100 rem/h) for the extended range. See the section Dose rate overload.
2.3 Dose rate overload
PEDs operate accurately for dose rates up to 100 mSv/h (10 rem/h), or 1 Sv/h (100 rem/h) for the
extended range. The accuracy of measured dose rates cannot be guaranteed above the dose rate
limit. Therefore, there is potential for inaccuracies in subsequent accumulated dose values from the
time of overload until the data has been cleared and a new accumulation started.
During the dose rate overload, the top of the readings screen show Overload and dose rate is
displayed as >100mSv/h or >1 Sv/h, or the equivalent in rem/h. The dose values are still
displayed, but flash to indicate possible inaccuracies. The status bar shows a warning symbol and
the Dose Error? message. An alarm sounds continuously until the button is pressed.
Attention: The actual measured dose rate values are still recorded and readable when transferred
to DoseVision™.
2.4 Alarms
PEDs have two configurable dose rate alarms and up to four dose alarm levels. The alarm settings
can be viewed on the alarm levels screen. However, the alarm settings can only be changed with
DoseVision™.
PEDs alert users to alarm conditions as follows:
Dose rate alarms
For dose rate alarms, the dose rate LED flashes amber when the first alarm is reached and red for
the second alarm. The alarm continues until the dose rate drops below the alarm level.

8of 25
MN1010 Rev. I
Dose alarms
For dose alarms, the dose LED flashes amber when the first two alarms are reached and red for the
higher two alarms. For the highest set dose alarm (red or crimson) the dose alarm LED stays on
constantly. The PED also makes a loud beeping noise as an audible alarm. The alarm continues until
the total dose history has been transferred to DoseVision™.
If the PED button is pressed during an alarm, the audible alarm is silenced and the vibrating stops.
However, the relevant LED will remain activated.
Attention: Devices in the PED+ range allow alarm messages to be configured so that, when an
alarm is triggered, a message related to the specific alarm is displayed.
2.4.1 Dose alarms
PEDs have up to four adjustable levels for dose. Alarms are set in ascending order with the ordering
of yellow, amber, red, crimson. Alarm levels are checked every second. The alarm levels are set
using DoseVision™.
Alarm
Sounder and vibration
Dose alarm LED
Yellow
Short pulse, low frequency
Short amber flash
Amber
Medium pulse, low frequency
Long amber flash
Red
Medium pulse, low frequency
Long red flash
Crimson
Long pulse, high frequency
Constant red
2.4.2 Dose rate alarms
PEDs have two adjustable alarm levels for dose rate. Alarms are set in ascending order with the
ordering of amber and red. Alarm levels are checked every second. The alarm levels are set using
DoseVision™.
Alarm
Sounder and vibration
Dose alarm LED
Amber
Medium pulse, low frequency
Long amber flash
Red
Medium pulse, high frequency
Long red flash
2.4.3 Default alarm levels
It is possible to have specific alarm levels set by Tracerco when purchasing a new PED. If this is not
requested, alarms will be set at the following default levels:
•Amber Dose Alarm at 100μSv
•Red Dose Alarm at 2000μSv
•Amber Dose Rate Alarm at 7.5μSv/h
•Red Dose Rate Alarm at 100μSv/h

9of 25
MN1010 Rev. I
2.4.4 Alarm messages (PED+ and PED-ER+)
The PED+ range allow alarm messages to be configured so that when an alarm is triggered, a
message related to the specific alarm is displayed as shown below. Messages can be used to help
the user make important decisions based on their measured radiation exposure.
2.4.5 Dose rate overload
Alarms alert to dose rate overload as follows:
•Top of the readings screen shows Overload
•Dose rate is displayed as >100mSv/h or >1 Sv/h. (or equivalent in rem/h).
•Dose values are still displayed, but flash to indicate possible inaccuracies.
•Status bar shows a warning symbol and Dose Error? message.
•Alarm sounds continuously until the button is pressed.
Once the dose rate falls below 100 mSv/h (10 rem/h) or 1 Sv/h (100 rem/h), the top of the screen
returns to the standard display and the dose rate returns to live values. However:
•The total dose values continue to flash.
•The status bar continues to show a warning symbol and the Dose Error? message.
•The alarm continues to sound until the button is pressed.
On transferring the data to a computer running DoseVision™:
•The total dose values stop flashing.
•The Dose Error? message is cleared.
2.5 Data logging
Dose and dose rate data is recorded in the following modes:
Periodic logging
In periodic logging mode, PEDs record the accumulated dose periodically in 60s, 30s, 10s, or 5s
intervals. The default is 60s. Periodic logging at 5s intervals is used for logging GPS location data.
The memory of PEDs can store up to 125,000 data points. Therefore, the memory stores around
2000 hours of operation with a 60s interval and 167 hours with a 5s interval. Tracerco
recommends using periodic logging if PEDs are deployed in areas where dose rates are
consistently above background or rapid dose rate fluctuations are not anticipated.
10 of 25
MN1010 Rev. I
Intelligent logging
In intelligent logging mode, PEDs record the accumulated dose for every 0.01 μSv change in dose.
In normal circumstances, intelligent logging uses the memory most efficiently. Intelligent logging
is the default logging mode.
A status warning message alerts the user when the memory is 70% full, meaning that around 600
hours of operation remain. When the memory is 95% full, a critical malfunction warning is displayed.
If the memory is completely full, PEDs continue to measure and display the true current accumulated
dose. However, new date and time information is not recorded.
Data should be regularly downloaded from PEDs to the Tracerco DoseVision™ software. After
downloading the data, the memory is cleared.
Attention: The memory of PEDs is non-volatile. Therefore, data is not lost in the event of the battery
running out of charge.
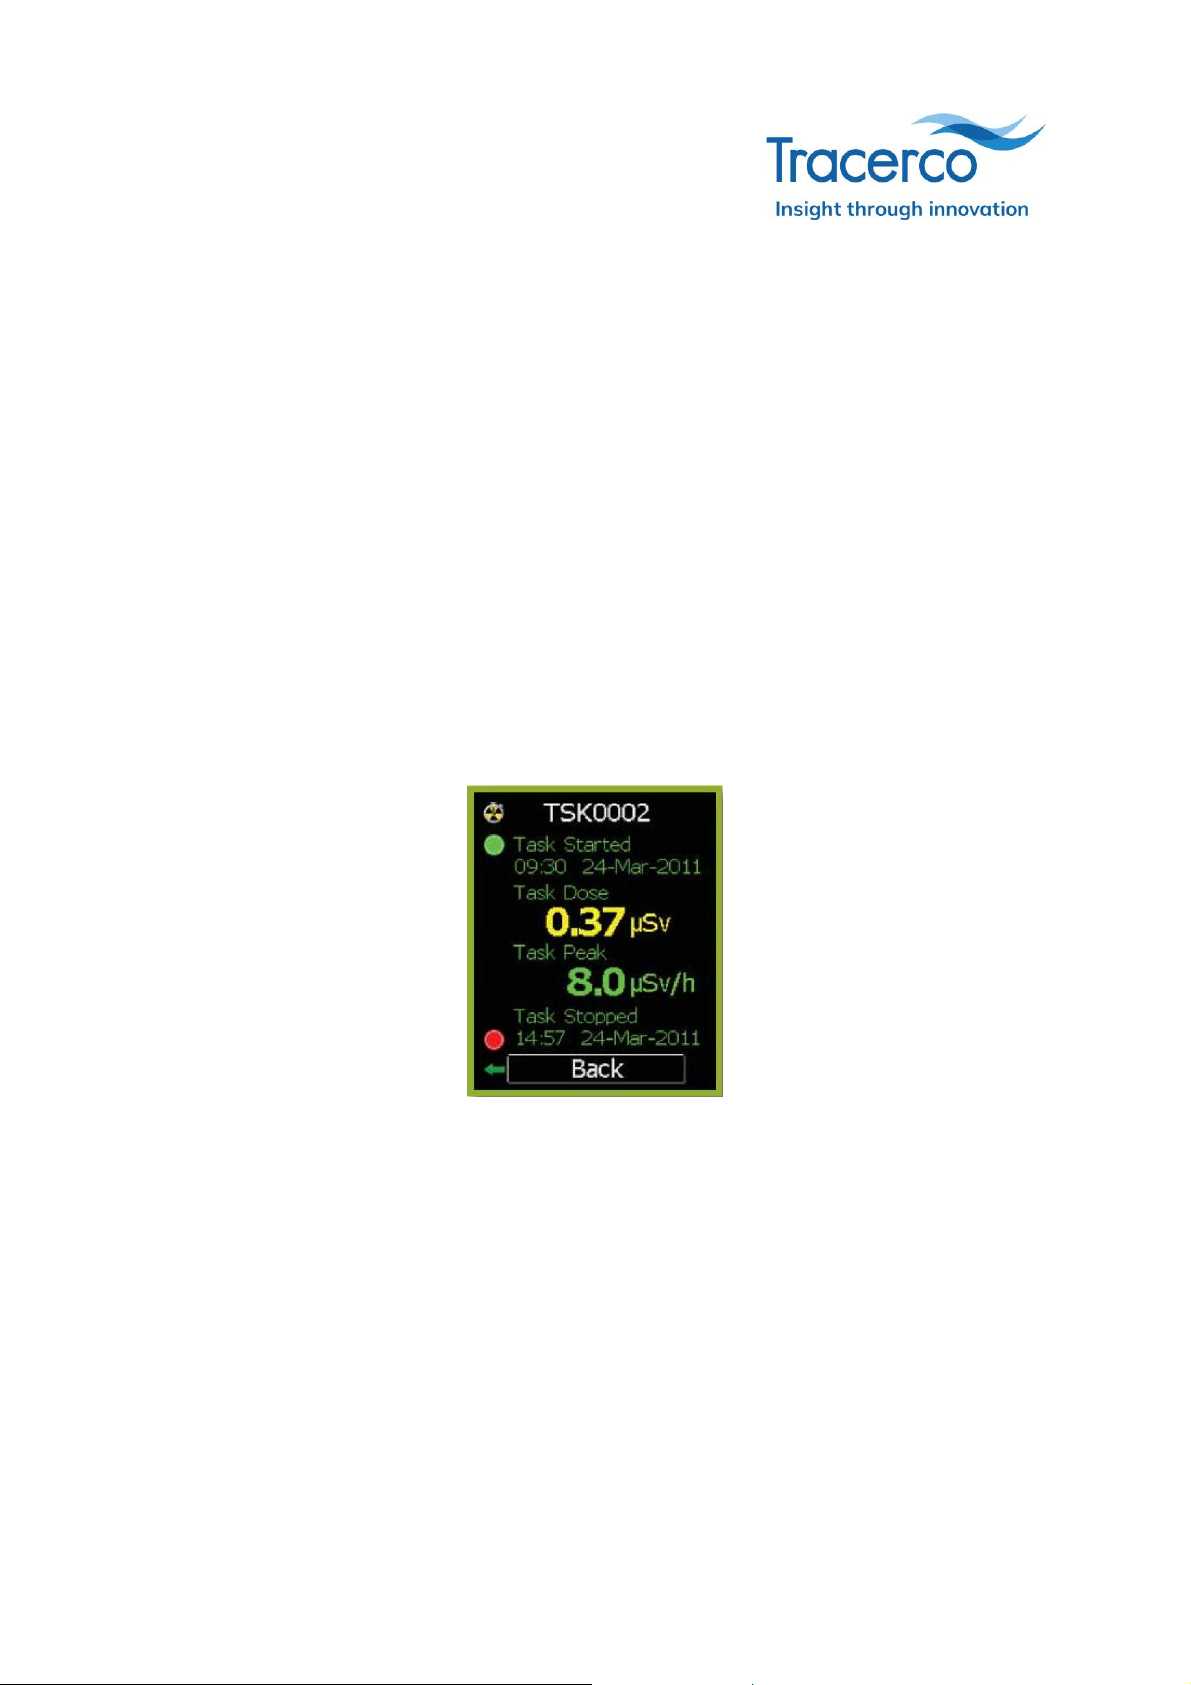
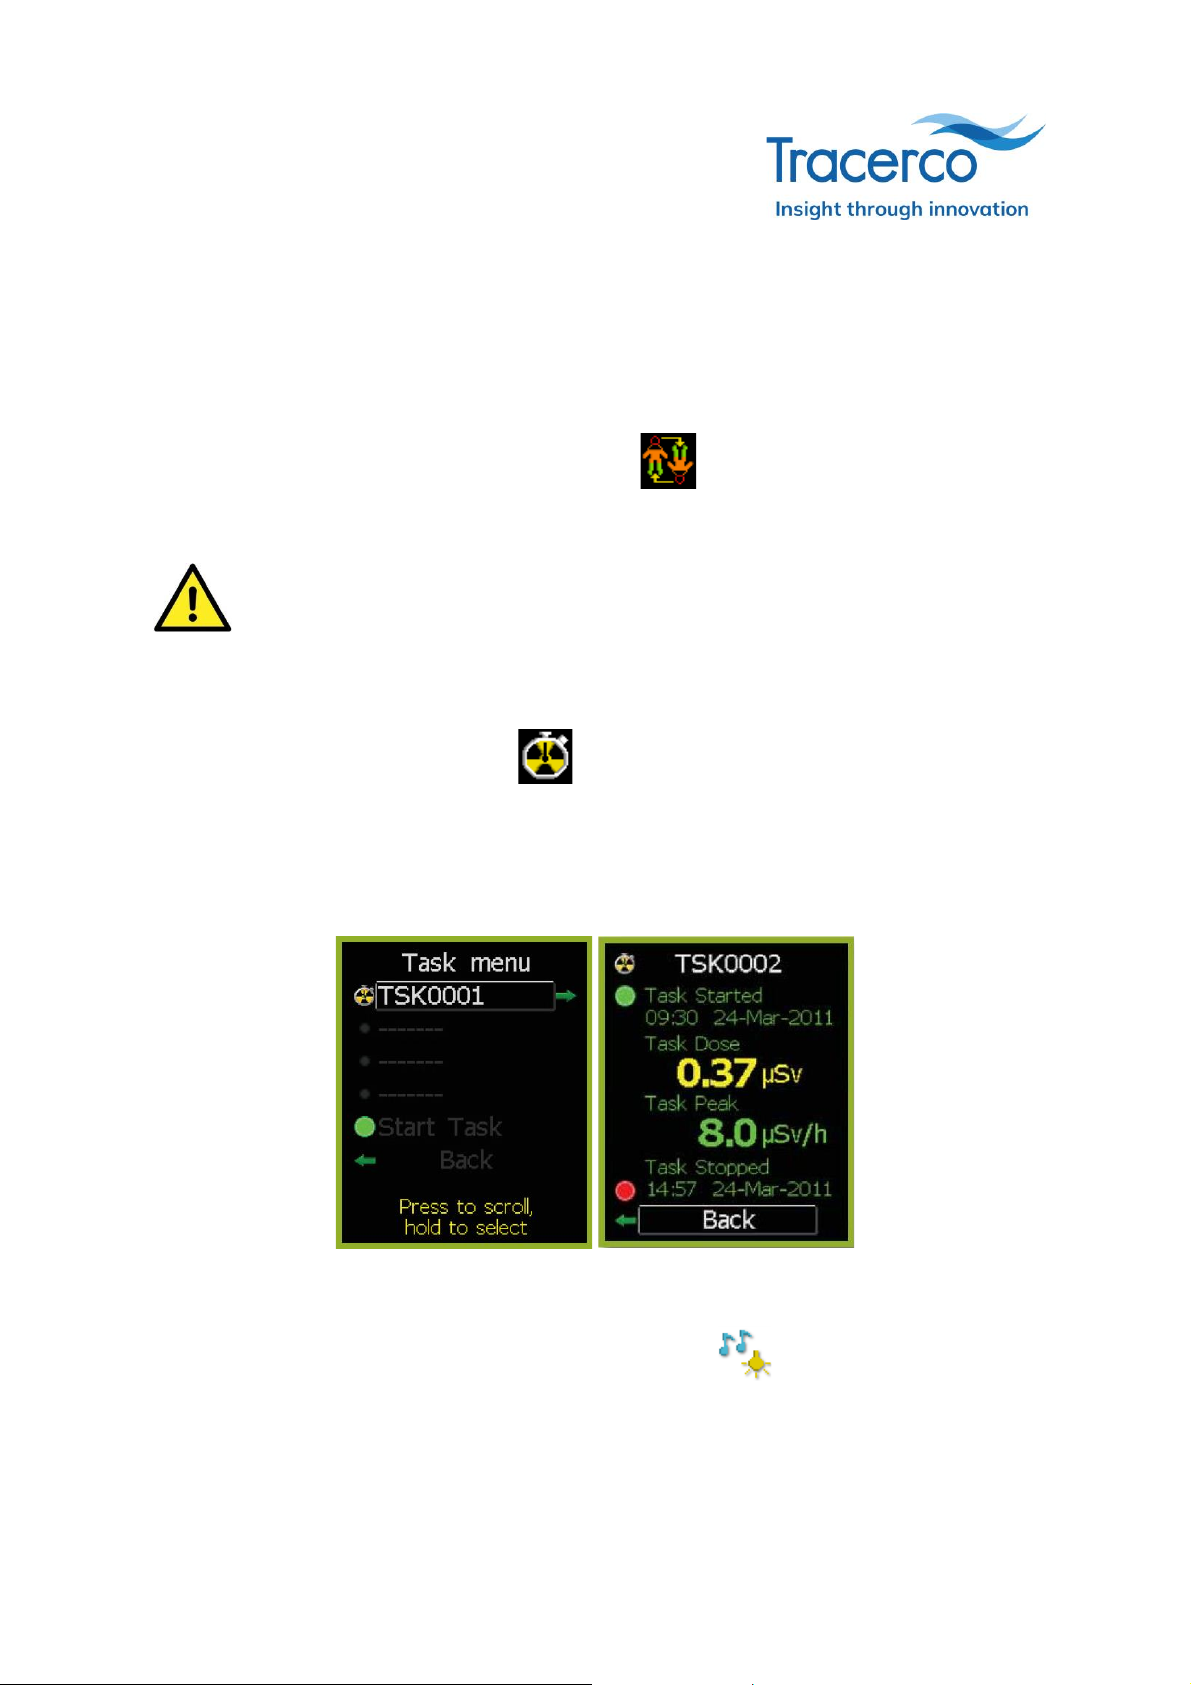
2.6 Tasks
Tasks monitor the dose and peak dose rate for a specified time or task. Tasks are started and
stopped manually. When a task is running, the readings screen shows the current dose accumulated
since the task started as shown below.
PEDs can record up to 9999 tasks. The four most recent tasks can be reviewed through the task
details screen.
Attention: All task data logging periods may be displayed when data is viewed in DoseVision™.
Task details can be cleared from PEDs after data has been transferred to DoseVision™.
2.7 Discrete mode
The discrete mode disables the audible and visual warnings of alarm conditions. For example, to
avoid situations which may cause distress to others or could draw unwanted attention. In the discrete
mode, all the LEDs are permanently switched off and the sounder is de-activated so that audible
alarms are never activated. The screen is also set to a dimmer setting. However, the vibration alert
still activates, and on-screen indications are still shown.
Attention: If the screen-saver feature is switched on when using discrete mode, the screen wakes
on an alarm in a dimmed state.
11 of 25
MN1010 Rev. I
The discrete mode must be enabled using DoseVision™. Once enabled, the discrete mode icon is
shown in the main menu. When the discrete mode is switched on, a cross is added to the icon.
2.8 Handheld mode (PED+ and PED-ER+)
When set in handheld mode, the PED+ and PED-ER+ can be used as a survey meters. The PED is
effectively measuring H*(10) dose rate and therefore cannot be considered to be measuring personal
dose. Therefore, personal dose is not accumulated while in the handheld mode.
In handheld mode, the PED+ and PED-ER+ provide a measurement of dose rate
which compensates for the fact that the device is no longer being worn on the body.
Therefore, the device should be held away from the body whenever possible when
in this mode. In handheld mode the PED is effectively measuring H*(10) dose rate
and as a result cannot be considered to be measuring personal dose. Personal dose
is NOT accumulated while in the handheld mode.
The PED+ automatically flips the screen when switching to the handheld mode to encourage the
user to hold the device with the GM-tube window facing forwards or towards the radiation area.
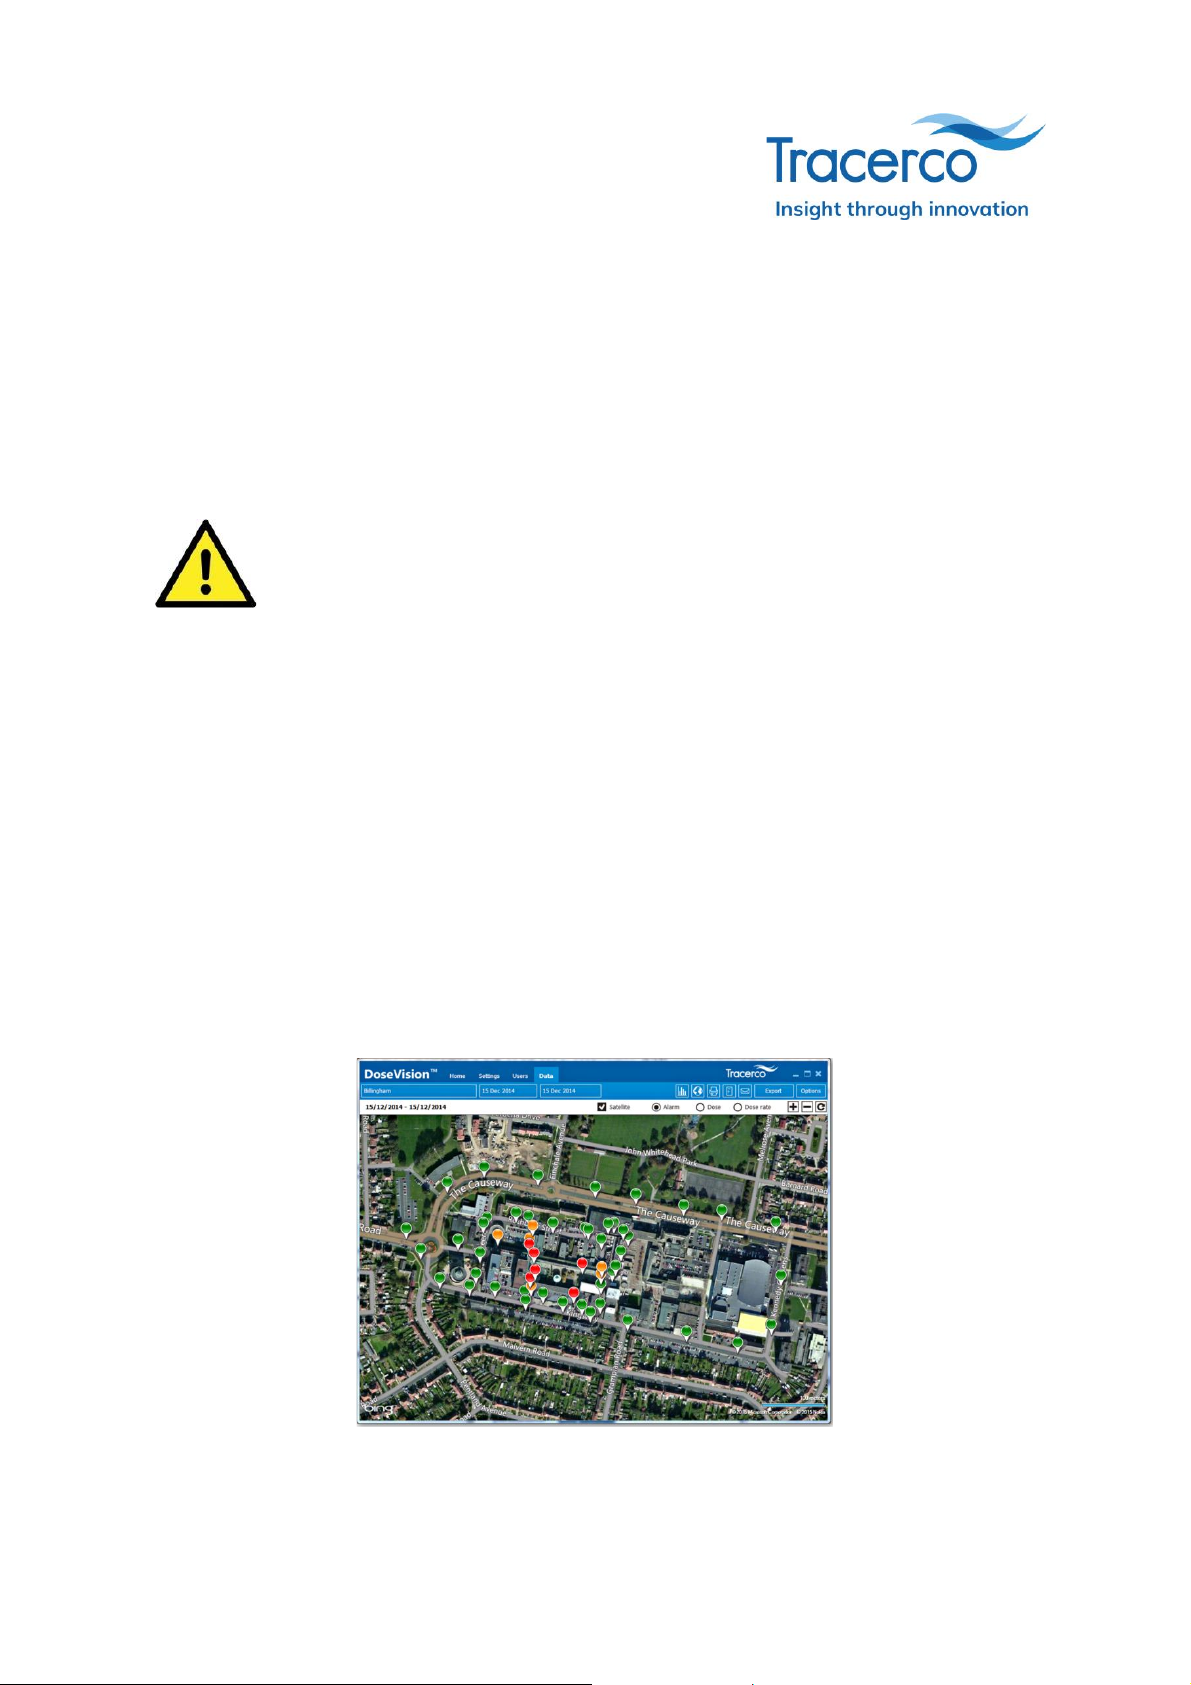
2.9 GPS logging (PED+ and PED-ER+)
When the built-in GPS is enabled and a location lock has been achieved, the PED+ is able to log user
location alongside measurement data. DoseVision™ can then model dose and dose rate data on
maps as shown below. Note that the status of alarms is also logged as shown by the green, orange,
and red data points. To switch the GPS feature on, navigate to the “Bluetooth/GPS” menu within the
settings menu and ensure that the GPS option is checked.
If the GPS feature is switched on, the GPS icon will be shown alternating with the battery symbol on
returning to the main readings screen. Initially the GPS symbol will be shown coloured grey to show
that GPS is enabled. When a location lock is achieved, the GPS symbol will turn green to show that
location logging is in progress. If no location lock can be achieved, then the dose data will still be
logged normally without location data.

12 of 25
MN1010 Rev. I
2.9.1 Data points
Each time the PED+ logs a dose point (see section 3.7.6 for data logging options) the location, dose
rate and the status of any alarms are also logged. The DoseVision™ map shows a data point for
each individual log. Each data point can be inspected by hovering the mouse pointer over the data
point. This displays a hovercard which includes the date and time at which the point was logged, as
well as measurement values specific to the display mode selected from the map options bar.
Alarms
Each data point is shown coloured with the highest priority alarm colour of all of the alarms
active at the point when the data was logged. The hovercard for this mode displays both
the dose and the dose rate logged at the location.
Dose rate
Each point is coloured according to the dose rate logged at the location. All of the points
shown are colour-graded from lowest to highest dose rate with the lower dose rates being
coloured grey and the higher dose rates being coloured pink. The hovercard for this mode
displays the dose rate logged at the location.
Dose
Each point is coloured according to the dose logged at the location. All of the points shown
are colour-graded from lowest to highest dose with the lower dose being coloured grey and
the higher dose being coloured blue. The hovercard for this mode displays the dose logged
at the location.
Attention: The GPS detection is limited by the constraints of GPS technology. To achieve a good
signal lock the PED+ must be able to detect signals from GPS satellites. In most circumstances this
means that the user must be outside to get a suitable location lock. Sometimes, a lock can be
achieved when indoors near to external windows or doors. The ability to log location data is subject
to a number of environmental factors, meaning Tracerco cannot guarantee that location data will be
logged in all scenarios. The accuracy of the location logs is also affected by the quality of the satellite
signal received and the number of satellites which can be detected. The accuracy of the location logs
can typically be to within 3.5m of the actual location, though this may be extended if GPS signal is
poor.
2.10 Bluetooth (PED+ and PED-ER+)
In order to use the DoseVision Live software with the PED+ the Bluetooth feature must be turned
on. If the Bluetooth feature is turned off then the DoseVision Live software will not be able to detect
the PED+ device.
To switch on the Bluetooth function, navigate to the “Bluetooth/GPS” menu within the settings menu
and ensure that the Bluetooth option is checked. If the Bluetooth feature is switched on, the
Bluetooth icon will be shown alternating with the battery symbol on returning to the main readings
screen. When a connection is made to the device by DoseVision Live, the Bluetooth icon will be
shown coloured blue. If there is no active connection to the device then the icon will be shown
coloured grey.
13 of 25
MN1010 Rev. I
2.11 Battery life
Tracerco PEDs contain high capacity batteries which allow for long periods of use between charges.
However, the battery life is affected by how PEDs are used. The key factors that can reduce battery
life are as are as follows:
•Keeping the display on. That is, having the screen saver switched off.
•Keeping the PED in elevated radiation fields. That is, higher than background dose rates.
•Enabling and connecting through Bluetooth (PED+ and PED-ER+).
•Enabling the GPS feature (PED+ and PED-ER+).
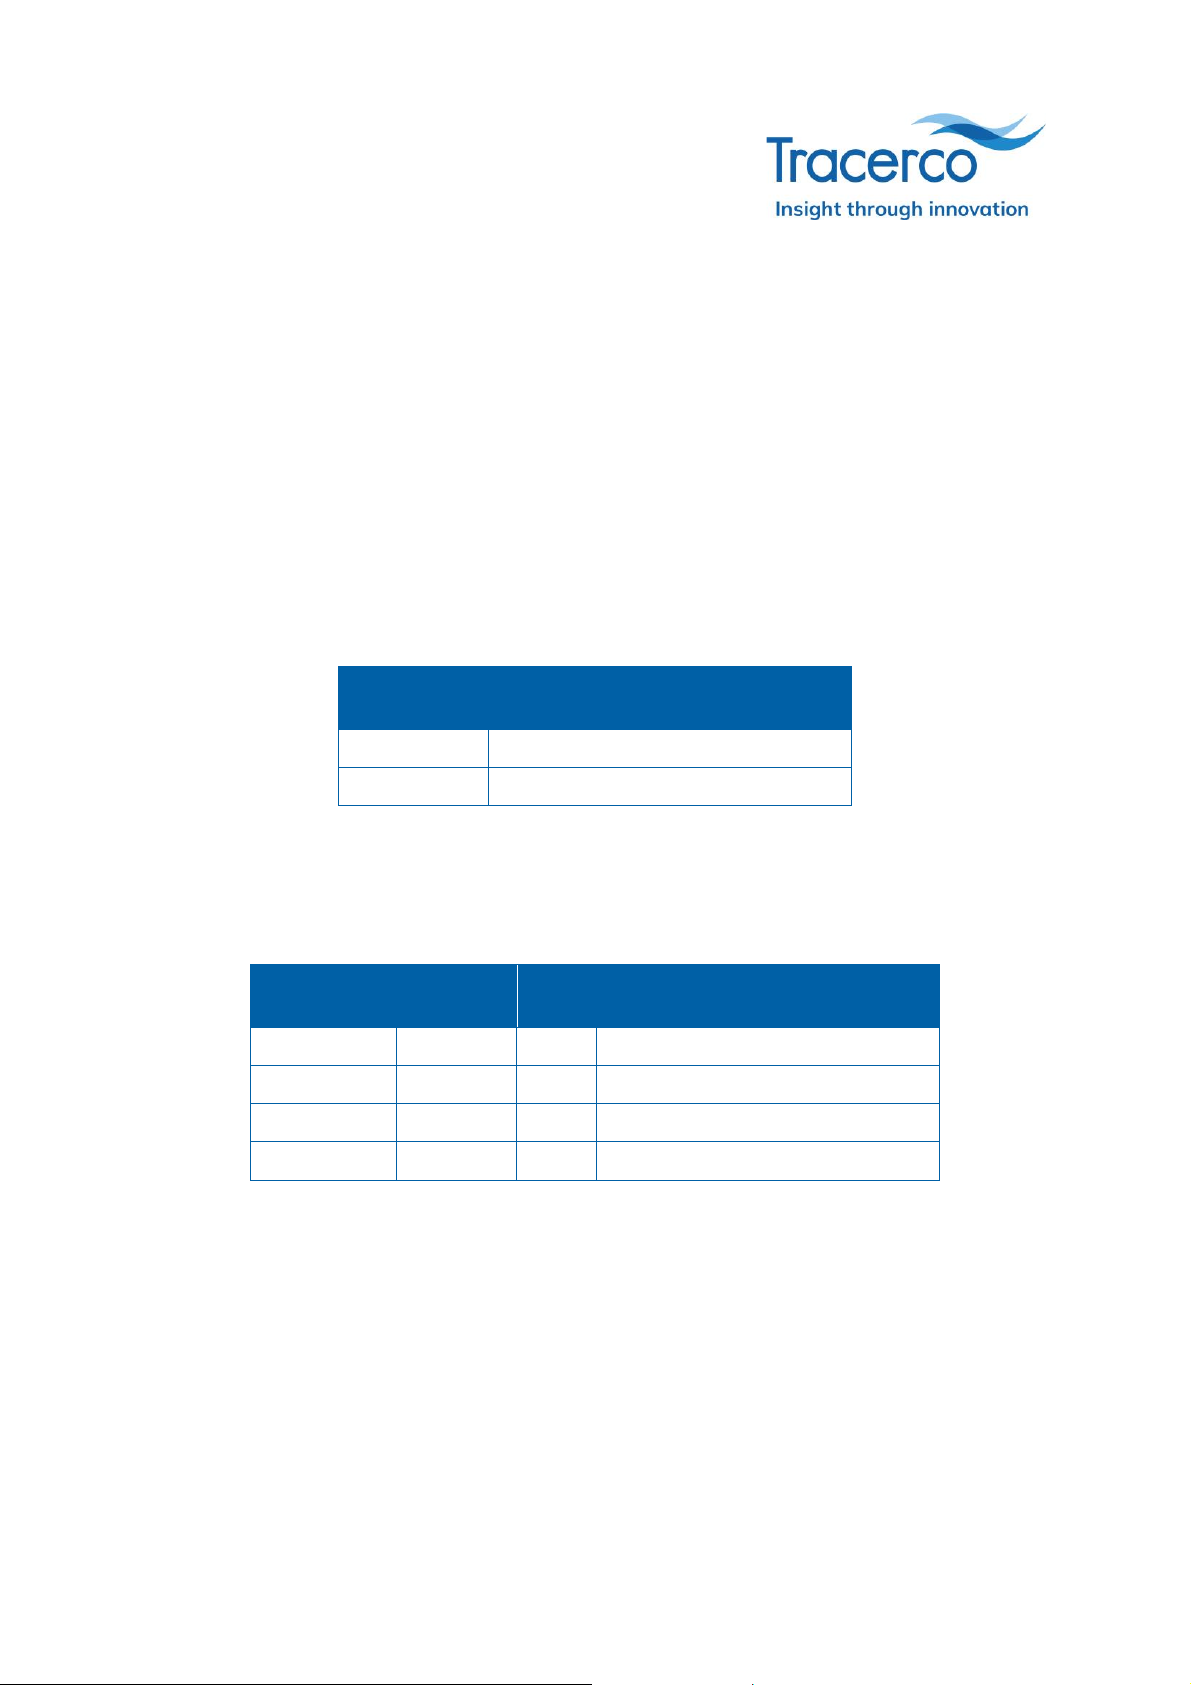
2.11.1 PED Blue, PED-ER, and PED-IS
For the PED Blue and PED-IS variants, Tracerco recommends using the screensaver whenever
possible. The table below gives estimates for the battery life when working at background radiation
levels:
Screensaver
Battery life expected from fully
charged
On
300 hours (approx.)
Off
70 hours (approx.)
2.11.2 PED+ and PED-ER+
For the PED+ variants, Tracerco recommends using the screensaver whenever possible and
switching off Bluetooth and GPS when not required. The table below gives estimates for the battery
life when working at background radiation levels.
Screensaver
Bluetooth
GPS
Battery life expected from fully
charged
On
Off
Off
300 hours (approx.)
On
On
Off
80 hours (approx.)
Off
Off
Off
70 hours (approx.)
Off
On
On
20 hours (approx.)
14 of 25
MN1010 Rev. I
3Operation
Attention: The PED-IS is certified for use in potentially explosive atmospheres (hazardous areas).
Therefore, the PED-IS must be operated in accordance with the information contained in the
document MN1004 Essential Safety Information.
3.1 Setting up the PEDs
Before using your PED, set the alarm levels, logging options, units and assign users using the
DoseVision™ software.
The devices can then be configured with following user preferences on the Settings menu:
Language
Language of the displayed text.
Activity sounder
Typical background radiation will produce approximately 12 counts per minute. The divide options
allow the user to manage the ‘click’ event interval.
Selecting ÷ 1 means that a ‘click’ is generated every time a radioactive particle is detected.
Selecting ÷ 30 will give a ‘click’ interval of about 2.5 minutes in background radiation.
Time zone
It is possible to change the displayed time to current local time through the time zone selection in
the time zone screen.
3.2 Start up and shut down
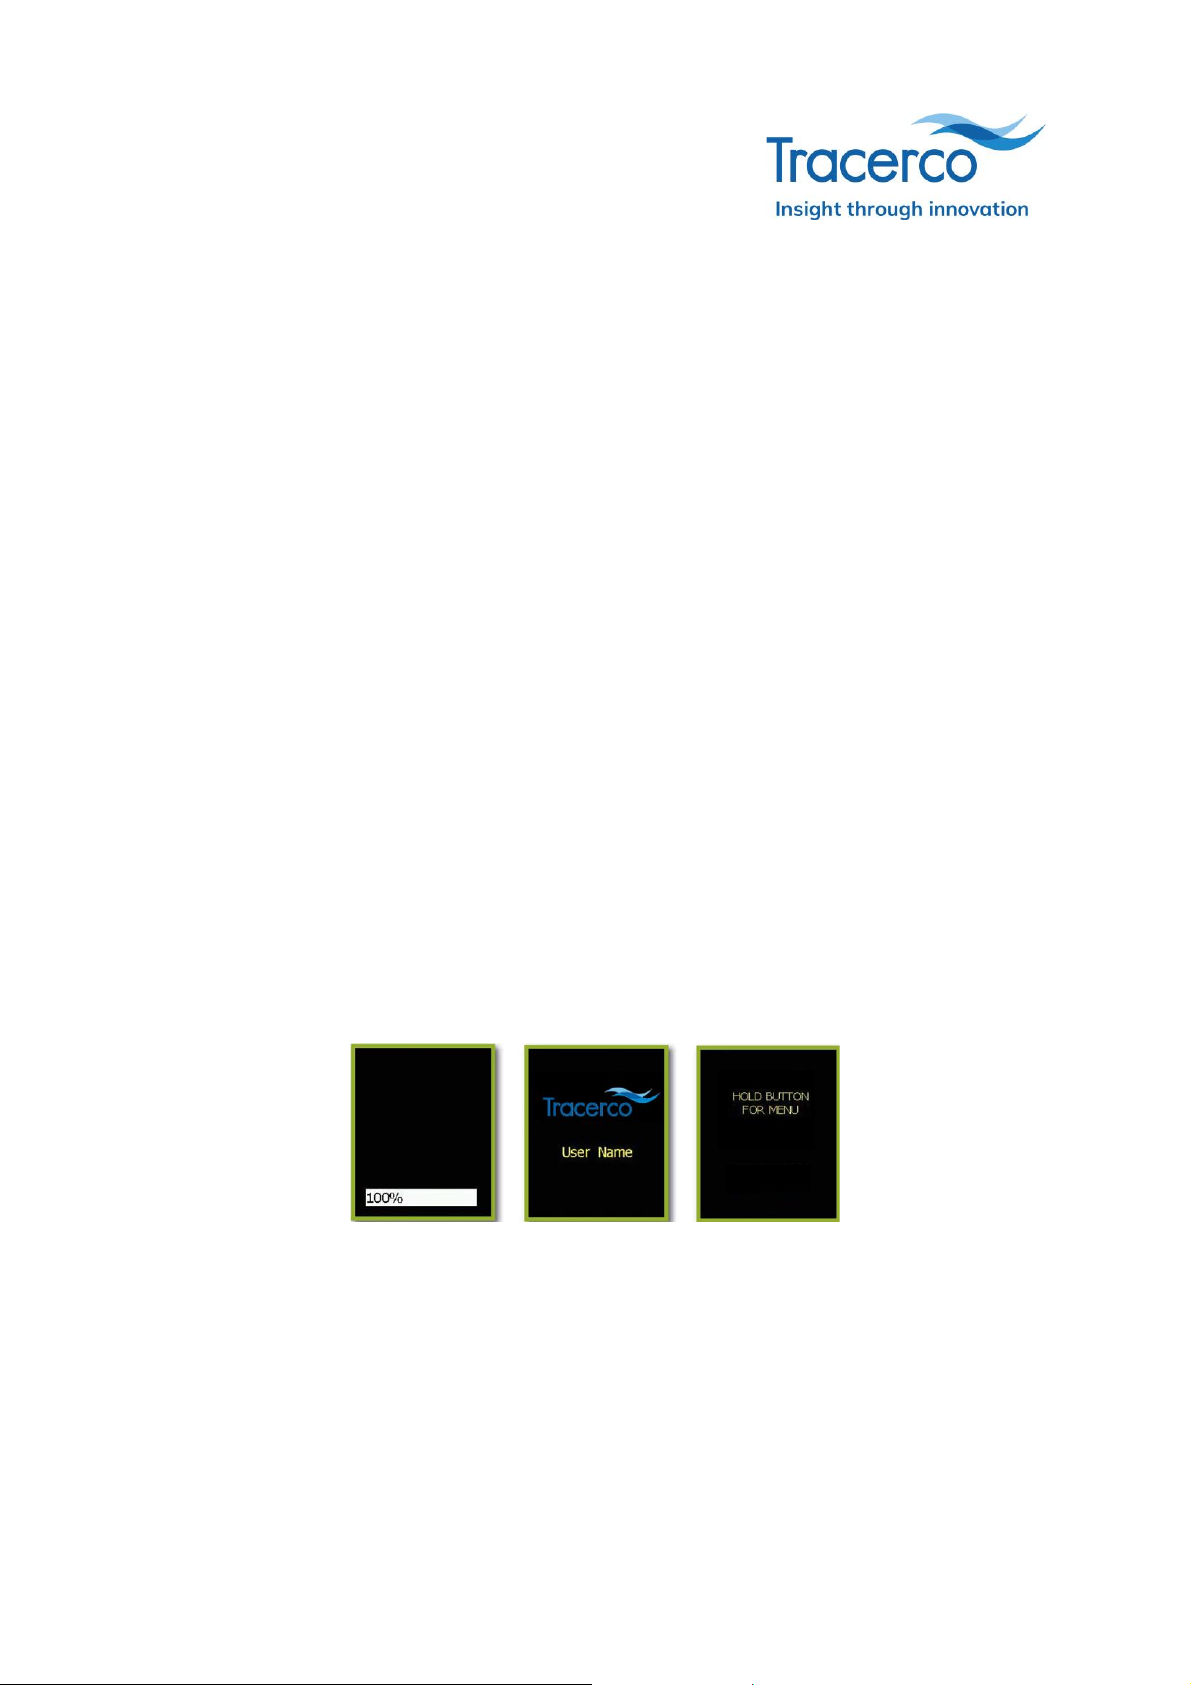
To start the PED, press and hold the button for a few seconds until the status bar shows 100% as
shown below (left).
During the start-up, the screen shows the assigned user, assuming there are no alarms or warnings
present, followed by a button operation message. The alarms are tested when the PED is starting
up, so the PED should flash, vibrate and make a loud beep sound. The readings screen is displayed
after start-up.
Attention: If the dose stored on the PED is higher than the dose alarm level, the PED bypasses the
start-up screens to show the readings screen and sound the alarm.
Shut down the PED by selecting Switch off in the main menu.

15 of 25
MN1010 Rev. I
3.3 Navigating the menus
Holding the PED button opens the Main menu. The Settings menu is then opened from the main
menu.
3.3.1 Main menu
Icon
Description
Alarm levels
Displays the amber and red alarms levels for the dose and dose rate.
Note that the alarm levels are set in DoseVision™.
Tasks
Opens the tasks screen.
Flip screen
Flips the screen to rotate the screen through 180 degrees.
Screen saver
By default, the screensaver activates after 30 seconds. You can set
the period before the screensaver activates. Tracerco recommends
that the time for screensaver activation is as short as practical. Long
periods of screen activity reduce the life of the screen and deplete the
battery quickly.
Settings menu
Opens the settings menu.
Exit menu
Return to dose readings screen.
Discrete mode (if enabled in DoseVision™)
Disables the audible and visual warnings of alarm conditions.
Handheld mode (PED+ and PED-ER+)
The PED+ should be held away from the body where possible when in handheld mode.
If a constant personal dose measurement is required, set the device to the personal
mode.
Switch off

16 of 25
MN1010 Rev. I
3.3.2 Settings menu
The table below details the Settings menu.
Icon
Description
Power status
Fully charged PEDs can be expected to last for more than 300 hours
in normal operating conditions before recharging is required. A low
battery warning is displayed when only eight hours is remaining.
Monitor details
The monitor details screen shows various useful pieces of information about the
Tracerco PED and its status. Calibration contact details can also be found here.
Time zone
Sets the local time zone on the display to show the local current time.
The time zone for the PED data is set on DoseVision™. Therefore, to ensure that the
dose history data is secure, you cannot change the time and date stored on the PED.
Language
Sets the locale of the displayed text.
Activity sounder
If enabled, the PED produces approximately 12 audible ‘clicks’ for a typical background
radiation of around 12 counts per minute.
You can configure the number of audible clicks for the radioactive particle detected. For
example, selecting divide by one (÷ 1) generates an audible click for each radioactive
particle detected and selecting divide by 30 (÷ 30) generates audible click every 2.5
minutes for a typical background radiation.
Display type select
Sets the display to combined, dose rate only, or dose only mode.
Reset logs (if enabled in DoseVision™)
Clears logs from the memory.
Bluetooth and GPS (PED+ and PED-ER+)
•If Bluetooth is enabled, the device can connect to the DoseVision™ Live
app (Android only).
•If GPS is enabled and a location lock has been achieved, location data
will be logged every time dose data is logged.
Back to main menu
17 of 25
MN1010 Rev. I
3.4 Wearing PEDs
PEDs must be worn on the upper body, with the screen facing outwards, to function correctly as a
personal dosimeter. For best performance, wear the PED on the outer layer of clothing for easy
readings and to make sure alarm lights are visible. A clip may be used to fix the PED to a belt or
some other area of clothing.
If required, you can flip the screen on the Main menu .
Attention: The PED+ variants may also be used as a handheld survey meter.
Caution
Tracerco PEDs have undergone rigorous EMC testing. However, care must be taken
when using PEDs near medical devices such as pacemakers.
3.5 Working with tasks
Start a task on the Main menu > Tasks .
When a task is running, the readings screen shows the current dose accumulated since the task
started on the top bar of the readings screen, alternating with the top bar information as shown
below. The current tasks are highlighted by a green light. A trefoil/stop watch icon shows completed
tasks. Current and completed task details may be viewed by selecting that task. The four most
recent tasks may be reviewed through the task details screen
3.6 Working in the discrete mode
Enter the discrete mode on the Main menu > Discrete mode .
In the discrete mode, all the LEDs are permanently switched off and the sounder is de-activated so
that audible alarms will not sound. Also, the screen is set to a dimmer setting. However, the vibration
alert still activates and on-screen indications are still shown.
18 of 25
MN1010 Rev. I
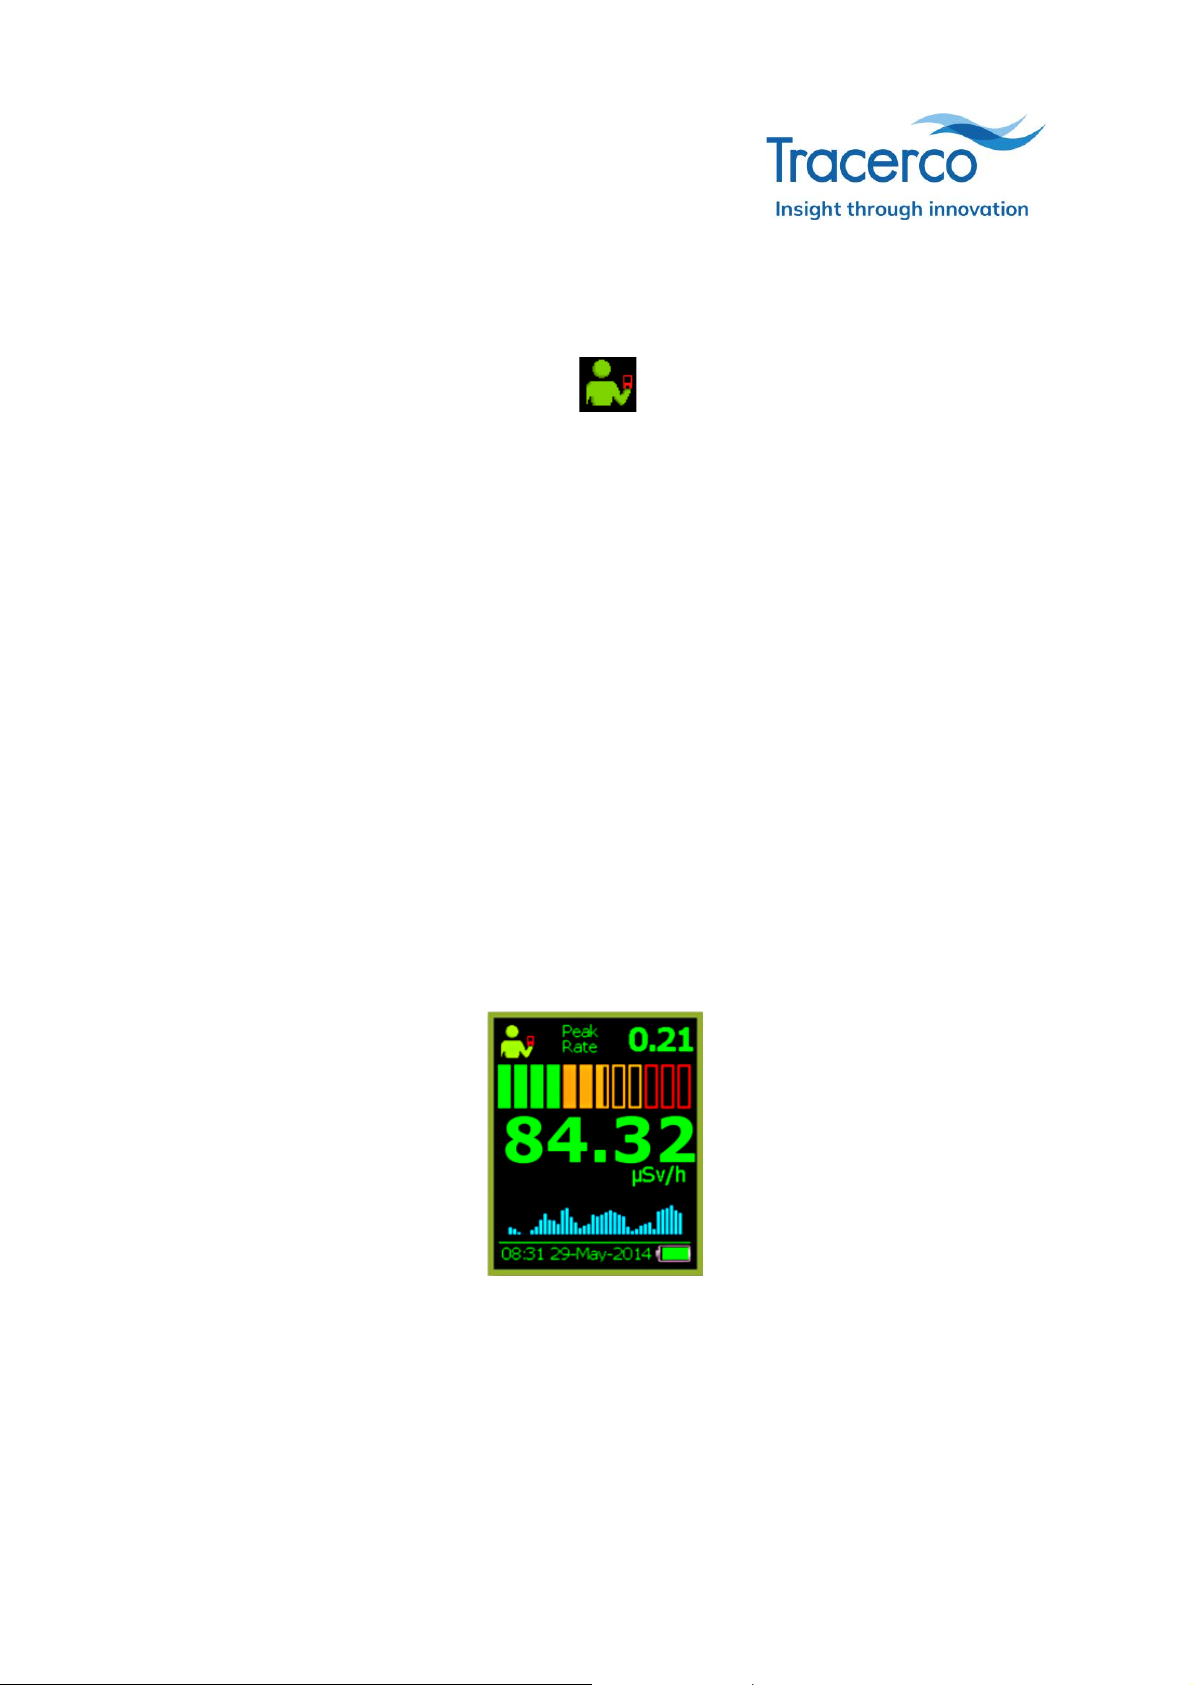
3.7 Using a PED+ or PED-ER+ in handheld mode
Use a PED+ or PED-ER+ in the handheld mode as follows:
1. On the Main menu > Handheld mode .
Attention: If the menu item is not available, enable the feature in DoseVision™.
2. Hold the PED+ or PED-ER+ so that the GM tube window is facing forwards or in the direction
of the area being measured.
3. View the readings screen that shows the following:
Handheld mode icon
Indicates that device is in the handheld mode.
Peak dose rate
Peak dose rate experienced since the device was last reset using DoseVision™.
Dose rate bar graph
Bar graph representing the current dose rate.
Dose rate reading
Current dose rate measurement. The measurement is compensated for the device being
worn away from the upper body. The value is filtered to provide a stable reading.
Activity graph
Activity graph to help detect quick changes in radiation fields. The activity graph shows a
rolling 30 second chart of the activity. Each bar represents the number of counts detected
within the last second.

19 of 25
MN1010 Rev. I
3.8 Pop-up messages
The PED+ and PED-ER+ can display pop-up messages for specific alarms. Messages can contain
instructions to help you make decisions based on your measured radiation exposure.
To clear the sounder, press the PED button once. To clear the message, press and hold the PED
button.
3.9 Warning messages
PEDs show non-critical warning and critical error messages in the status bar of the main display.
3.9.1 Non-critical warnings
Non-critical warning messages require action, but you can be confident that the device will still
operate. The image below shows a PED with the non-critical warning Calibration Due.
The table below details possible warning message and the appropriate actions to take.
Non-critical
warning
Description
Action
Battery low
The remaining battery life is approximately
eight hours at background radiation levels and
less than eight hours at higher radiation levels.
Charge the battery as
soon as practical.

20 of 25
MN1010 Rev. I
Non-critical
warning
Description
Action
Calibration due
More than one year has elapsed since the last
calibration. Tracerco recommends yearly
calibration.
Return the PED to
Tracerco.
Default Cal data
The default calibration values (factory setting)
are set.
Return the PED to
Tracerco.
Memory low
The memory is more than 70% full.
Transfer data to
DoseVision™ as soon as
practical.
Warning
Undefined warning.
Return the PED to
Tracerco.
3.9.2 Critical errors
Critical errors indicate problems that prevent accurate operation, other than dose rate overloads as
described in 2.4.5. If the PED is switched on when a malfunction occurs, the PED indicates the error
as follows:
Audible alarm
An alarm sounds. The malfunction alarm sound is shorter and less frequent beep than the
radiation alarm beeps.
Dose –last reading
The dose rate area of the readings screen is replaced with a white cross on a red square
background, as shown below, and the error stated. The label Stay Time is replaced with the label
Last Reading to indicate that displayed dose is the final dose reading before the critical malfunction
occurred.
The image below shows a PED with the critical error Battery Low.
If a critical malfunction occurs while the PED is switched off, the device does not perform a full
restart when switching on. Pressing the button causes the relevant malfunction message to be
displayed on the opening screen. When the button is released (or after one second for a dead
battery), the PED screen switches off.
The following table details possible critical error messages and the appropriate actions to take.
This manual suits for next models
4
Table of contents
Other Tracer Industrial Equipment manuals

Popular Industrial Equipment manuals by other brands


Viessmann
Viessmann 4184 H0 Operation manual

Rittal
Rittal SK 3209. Series Assembly and operating instructions

Novexx Solutions
Novexx Solutions DPM operating instructions

Stahl
Stahl SolConeX 8573/14 Series operating instructions

ZIEHL-ABEGG
ZIEHL-ABEGG ZA top SM200.15D Assembly instructions

BAYKAL
BAYKAL APHS Series user manual