Tracer X111 User manual
Alkoma t X111
Instrukcja obsługi
Alcoh ol te s ter X111
Instructions for use
PL
EN

Model: X111
Model: X111
1
2
4a
4b
4c

3
Instrukcja obsługi Alkomat
X111 PL
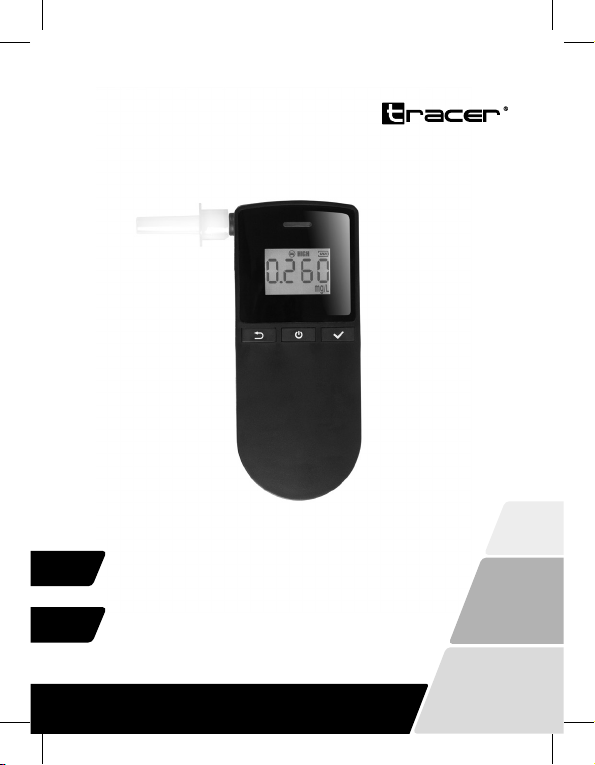
Schemat produktu (rys. 1)
1 – ustnik
2 – dioda sygnalizująca pracę
3 – wyświetlacz
4a – historia pomiarów/wybór dostępnej opcji
4b – on/o/zmiana trybu
4c – OK
Schemat wyświetlacza (rys. 2)
1 – odczyt pomiaru
2 – polecenie: poczekaj (przygotowanie urządzenia do testu)
3 – polecenie: dmuchaj (przeprowadzenie testu)
4 – alarm (nietrzeźwość)
5 – poziom baterii
6 – jednostka pomiarowa
Uwagi wstępne
Przed pierwszym użyciem urządzenia należy dokładnie zapoznać się z
jego instrukcją obsługi. Instrukcję należy zachować na przyszłość, do
ewentualnego wglądu oraz w celu zaplanowania regularnej kalibracji
urządzenia. Urządzenie przeznaczone jest wyłącznie do użytku
indywidualnego, nie może być stosowane do celów lekarskich bądź
diagnostycznych. Nie stanowi materiału dowodowego.
Alkomat mierzy stężenie alkoholu w wydmuchiwanym powietrzu.
Urządzenie nie powinno być używane jako jedyne źródło służące
do określenia stopnia zatrucia alkoholowego oraz jako czynnik
rozstrzygający, czy prowadzenie pojazdu mechanicznego, obsługa
maszyny bądź wykonywanie innych czynności wymagających

4
Instrukcja obsługi
PL Alkomat
X111
zwiększonej koncentracji są bezpieczne. Reakcje ludzkiego organizmu
na spożywany alkohol bywają różne, a podany wynik podaje jedynie
orientacyjną wartość stężenia alkoholu w wydychanym powietrzu, a nie
całkowity stan organizmu.
Niezależnie od wskazania alkomatu należy pamiętać, że każda ilość
spożytego alkoholu wywiera wpływ na szybkość reakcji i umiejętność
koncentracji.
Ogólne zasady pomiaru stężenia alkoholu we krwi
1. Nie używaj alkomatu do testu bezpośrednio po spożyciu alkoholu.
Należy odczekać minimum 15-20 minut. Duże stężenie oparów
alkoholu w ustach oraz przełyku może uszkodzić czujnik lub
rozkalibrować alkomat i otrzymywane wyniki nie będą prawidłowe.
2. Pamiętaj, że stężenie alkoholu we krwi i wydychanym powietrzu
zmienia się w czasie. Dla zapewnienia wiarygodności pomiarów
i potwierdzenia stanu organizmu, wykonaj ponowną próbę po upływie
15 minut.
3. Nie używaj alkomatu do testu bezpośrednio po spożyciu posiłku,
wypiciu płynu lub paleniu. Zaleca się odczekanie 15-20 minut przed
przeprowadzeniem pomiaru.
4. Nie dokonuj pomiarów na silnym wietrze, w klimatyzowanym
pomieszczeniu lub też w środowisku narażonym na działanie smogu
i innych zanieczyszczeń powietrza.
5. Upewnij się, że poziom baterii pozwala na swobodną pracę
urządzenia, gdyż może to mieć wpływ na wydajność alkomatu
i wiarygodność pomiarów.
6. Odbijanie się, czkawka czy też chrząknięcia powodują uwalnianie się

5
Instrukcja obsługi Alkomat
X111 PL
gazów żołądkowych, trawiennych, które mogą zawyżać wyniki. Krew
w ustach (może pochodzić z niewyleczonych zębów, skaleczonego
dziąsła, przygryzionego języka) i zawarty w niej alkohol może
zafałszować pomiary. Osoby z zaburzeniami metabolizmu cukrów
mogą otrzymywać dodatnie lub zawyżone wyniki, pomimo nie
spożywania alkoholu.
7. W komorze pomiarowej mogą pozostawać opary alkoholu
pochodzące z poprzedniego pomiaru. Możemy ją oczyścić, wciągając
powietrze.
Warunki przechowywania i użytkowania alkomatu
1. Produkt powinien być przechowywany w suchym pomieszczeniu, nie
należy go narażać na silne nasłonecznienie czy napromieniowanie.
2. Produkt powinien być przechowywany w temperaturze 0-50ºC.
3. Pomiary alkomatu powinny być przeprowadzane w temperaturze
10-40 ºC.
4. Dopuszcza się czyszczenie produktu za pomocą suchej lub zwilżonej
ściereczki bez użycia detergentu.
5. W przypadku długotrwałego niekorzystania z alkomatu, zaleca się
wyjęcie baterii z komory.
6. Zapobiegaj wstrząsom i zarysowaniom.
Zalety sensora elektrochemicznego
Czujnik elektrochemiczny (inaczej sensor elektrochemiczny) rozpoznaje
molekuły alkoholu zawarte w wydychanym powietrzu. Urządzenia
w niego wyposażone wyróżniają się na tle innych rodzajów alkomatów
swoją niezawodnością i dokładnością. Sensory elektrochemiczne mają

6
Instrukcja obsługi
PL Alkomat
X111
bardzo precyzyjnie dobraną czułość i wykorzystuje je nawet policja.
Żywotność takiego sensora jest również nawet do 5x dłuższa niż
w przypadku sensora półprzewodnikowego.
Obsługa urządzenia
Uwaga! Przed użyciem należy umieścić w komorze baterii 2 baterie
alkaliczne AAA.
A. Pomiar stężenia alkoholu we krwi
1. Załóż ustnik w wyznaczonym miejscu.
2. Wciśnij i przytrzymaj przycisk 4b, aby uruchomić urządzenie. Alkomat
rozgrzewa się przez 10 sekund, a na ekranie następuje odliczanie.
3. Gdy na ekranie pojawi się symbol , należy rozpocząć dmuchanie
w ustnik. Przeciągły dźwięk urządzenia wskaże moment zakończenia
pomiaru.
4. Jeśli na wyświetlaczu pojawi się komunikat Err0, oznacza to, że
badany dmucha zbyt płytko i należy dostosować siłę wydmuchu
powietrza.
5. Urządzenie wyświetli wynik pomiaru. Jeśli wynik jest dopuszczalny,
wyświetlacz zaświeci na zielono, jeśli przekroczona została norma,
zaświeci na czerwono wraz z towarzyszącym alarmem.
Norma domyślna alkomatu to: 0,250 mg/L, 0.50%BAC.
6. W celu powtórzenia pomiaru należy wcisnąć przycisk 4c.
B. Przegląd historii pomiarów
1. Alkomat magazynuje ostatnich 10 pomiarów.
2. Aby przejrzeć historię pomiarów, należy przy włączonym i gotowym

7
Instrukcja obsługi Alkomat
X111 PL
do pracy alkomacie wcisnąć przycisk funkcyjny 4a i kolejno powtarzać
tę czynność dla odczytania najstarszych wyników zapisanych w
urządzeniu.
C. Zmiana ustawień alarmu
1. Podczas rozgrzewania się alkomatu do pracy, należy wcisnąć przycisk
funkcyjny 4a, a następnie 4b.
2. Wciśnij ponownie przycisk 4a kilkakrotnie, aby ustawić poszczególne
cyfry w polu wartości alarmu, a po ustawieniu odpowiedniej cyfry,
potwierdź przyciskiem 4c. Powtórz czynność aż do pełnego
ustawienia pożądanej wartości i potwierdź przyciskiem 4c.
3. Wciśnij przycisk 4b, aby powrócić do historii pomiarów.
Uwaga: zmiana progu normy resetuje historię pomiarów.

8
Instrukcja obsługi
PL Alkomat
X111
Kalibracja
Warunkiem prawidłowej pracy urządzenia i utrzymania wiarygodności
pomiarów jest regularne przeprowadzanie kalibracji. Czas, temperatura,
warunki przechowywania, duża liczba wykonanych pomiarów, mogą
wpływać na czułość sensora, jednak z uwagi na zaawansowanie
technologiczne tego rodzaju czujnika, wykwalikowany serwis może
ustawić ponownie sensor alkomatu tak, by wskazywał prawidłowe
i rzetelne wyniki. Kalibracja to proces mający na celu takie ustawienie
alkomatu, aby podawał możliwie dokładne wyniki.
Alkomat TRACER X111 wymaga kalibracji co ok. 500 użyć lub co 12
miesięcy.
Kalibracja urządzenia w okresie 12 miesięcy od daty zakupu jest
bezpłatna. Więcej informacji znajdziesz pod wskazanym adresem:
www.tracer.eu/TRAINN46396
UWAGA: zachowaj numer seryjny urządzenia oraz dowód zakupu.
SN:

9
Instructions for use EN
Alcohol tester
X111
Product scheme (scheme 1)
1 – Blowing tube
2 – Signalling LED
3 – Display
4a – Measurement history / option selection
4b – ON / OFF / Mode change
4c – OK
Display scheme (scheme 2)
1 – Measurement reading
2 – Command: wait (preparing the device for testing)
3 – Command: blow (run the test)
4 – Alert (intoxication)
5 – Battery level
6 – Measurement unit
Introductory remarks
Before using the device for the rst time, carefully read this user manual.
Keep this manual for future reference and to plan regular calibration of
the device. This device is intended for individual use only; it can not be
used for medical or diagnostic purposes. It does not constitute evidence.
The breathalyser measures alcohol concentration in exhaled air. This
device should not be used as the only means to determine the degree of
alcohol intoxication or as a determining factor whether driving a vehicle,
operating a machine or performing other activities that require increased
concentration, is safe. The reaction of the human body to the consumed
alcohol may vary, and the result gives only an approximate value of the

10
Instructions for use
EN Alcohol tester
X111
alcohol concentration in exhaled air, not the complete condition of the
organism.
Regardless of the value indicated by the breathalyser, remember that
any amount of alcohol consumed has an impact on the speed of reaction
and the ability to concentrate.
General rules for measuring breath alcohol concentration
1. Do not use the breathalyser immediately after drinking alcohol. Wait
at least 15-20 minutes before starting the test. High concentrations
of alcohol vapours in the mouth and the esophagus can damage the
sensor or recalibrate the breathalyser, and lead to incorrect test results.
2. Remember that the concentration of alcohol in the blood and
in exhaled air changes over time. To ensure the reliability of
measurements and conrmation of the body’s condition, repeat the
test after 15 minutes.
3. Do not use the breathalyser immediately after eating a meal, drinking
any liquids or smoking. It is recommended to wait 15-20 minutes
before carrying out the measurement.
4. Do not test in high wind, in air-conditioned rooms or in an environment
exposed to smog and other air pollutants.
5. Make sure that the battery level allows free operation of the device, as
this may aect the performance of the breathalyser and the reliability
of measurements.
6. Burping, hiccups or grunts cause the release of gastric and digestive
gases, which can lead to falsely raised results. Blood in the mouth
(it can come from unhealed teeth, cut gums, bitten tongue) and the
alcohol it contains can falsify the measurements. People with glucose

11
Instructions for use EN
Alcohol tester
X111
metabolism disorders can get positive or falsely raised results despite
not consuming alcohol.
7. The measuring chamber may contain alcohol vapours from a previous
measurement. You can clean it by sucking in the air.
Storage and use conditions
1. The product should be stored in a dry location, it should not be
exposed to strong sunlight or radiation.
2. The product should be stored at 0-50ºC.
3. The tests should be carried out at 10-40ºC.
4. The product can be cleaned with a dry or damp cloth without using
any detergent.
5. If the breathalyser is left unused for a prolonged time, it is
recommended to remove the battery from the battery compartment.
6. Avoid shocks and scratches.
The advantages of an electrochemical sensor
The electrochemical sensor recognizes alcohol molecules contained in
exhaled air. Devices equipped with the electrochemical sensor stand out
compared to other types of breathalysers in terms of their reliability and
accuracy. Electrochemical sensors have very high sensitivity and are
used by the police. The durability of such sensor is also up to 5x longer
than in the case of a semiconductor sensor.
Operation
Warning! Before use, place 2 AAA alkaline batteries in the battery
compartment.

12
Instructions for use
EN Alcohol tester
X111
A. Measurement of breath alcohol concentration
1. Place the blowing tube in the designated inlet.
2. Press and hold the 4b button to start the device. The breathalyser
warms up for 10 seconds; the time is counted down on the display.
3. When the symbol appears on the screen, start blowing air into the
blowing tube. A long beep will indicate the end of the measurement.
4. If Err0 message appears on the display, it means that the tested
person blows too lightly; adjust the force of the air blown.
5. The device will display the reading. If the result is within the set limit,
the display will turn green; if the limit has been exceeded, it will light
up in red and an alarm will go o.
The default limit of the breathalyser is: 0.250 mg / L, 0.50% BAC.
6. To repeat the measurement, press the 4c button.
B. Overview of the measurement history
1. The breathalyser stores the last 10 measurements.
2. To view the measurement history, press the 4a function button when
the device is on and ready for use; press the button repeatedly in
order to read the oldest results stored in the device.
C. Changing the alert settings
1. When the breathalyser is warming up, press the 4a and then the 4b
function button.
2. Next, press the 4a button several times to set individual digits in the
alert value eld; after setting up a given digit, conrm with 4c. Repeat
these steps until the desired value is fully set and conrm with 4c.
.

13
Instructions for use EN
Alcohol tester
X111
3. Press the 4b button to return to the measurement history.
Note: changing the limit resets the measurement history.
Calibration
The condition of proper operation of the device and maintaining the
reliability of measurements is regular calibration. Time, temperature,
storage conditions, and large number of measurements may aect the
sensitivity of the sensor. However, due to the technological advancement
of this type of sensor, a qualied service technician can reset the
breathalyser sensor to show correct and reliable results. Calibration is
a process aimed at setting the breathalyser to give the most accurate
results possible.

14
Instructions for use
EN Alcohol tester
X111
The TRACER X111 breathalyser must be calibrated every 500 uses or
every 12 months.
Calibration of the device within 12 months from the date of purchase is
free of charge. More information can be found at the address indicated:
www.tracer.eu/TRAINN46396
ATTENTION: keep the serial number of the device and the receipt.
SN:

Symbol of electronic and electrical equipment
waste (WEEE – Waste Electronic and Electrical
Equipment).
Using the WEEE symbol means that this product
cannot be treated as household waste. By providing
appropriate recycling you help to save the natural environment.
In order to get more detailed information about the recycling of
this product, contact the local authority representative, waste
treatment service provider or the store in which the product has
been purchased.
Producent:
Megabajt Sp. z o.o., ul. Rydygiera 8, 01-793 Warszawa
This manual suits for next models
2
Table of contents
Languages:
Popular Test Equipment manuals by other brands


Gossen MetraWatt
Gossen MetraWatt DUSPOL analog 1000 operating manual

Cirris
Cirris easy-wire CR manual

JDS Uniphase
JDS Uniphase OneExpert DSL user guide

Platinum Tools
Platinum Tools VDV MapMaster 2.0 instruction sheet

LSI
LSI ECT Series user manual

Amptec Research
Amptec Research 620ES Operation & maintenance manual