Traffic Logix SafePace EV11 User manual
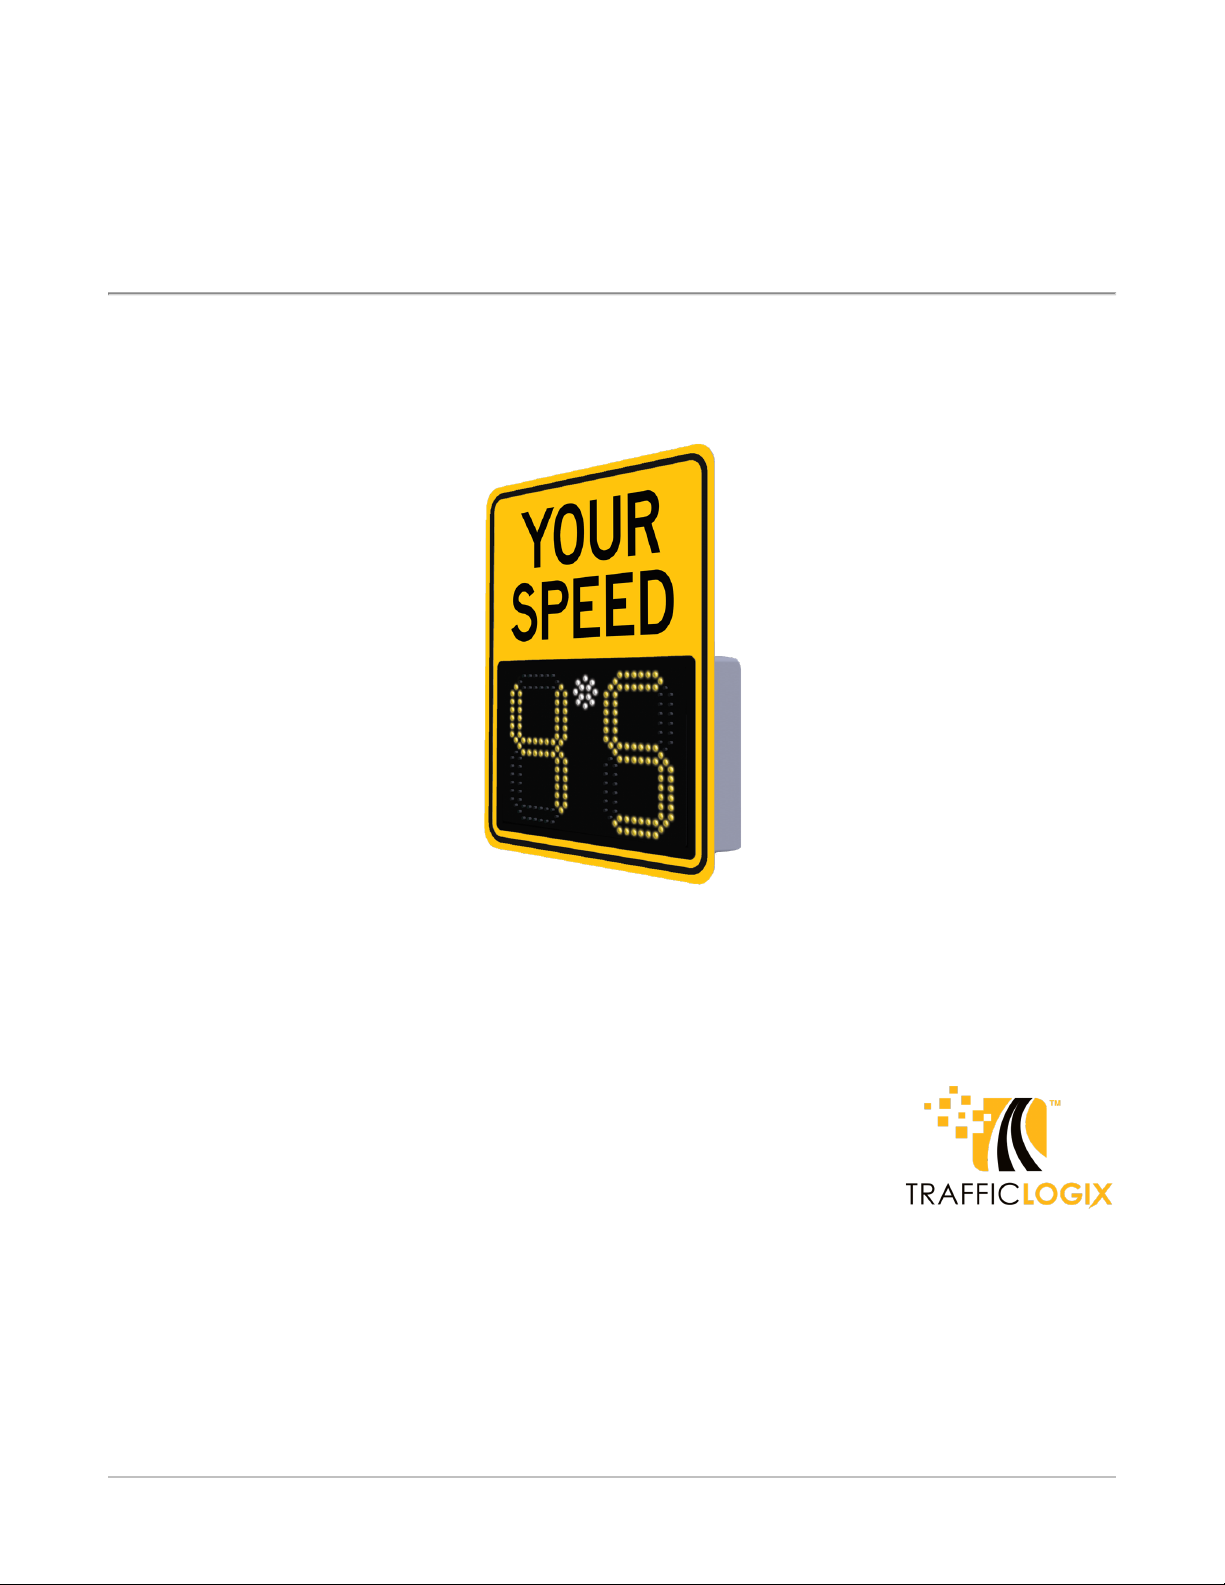
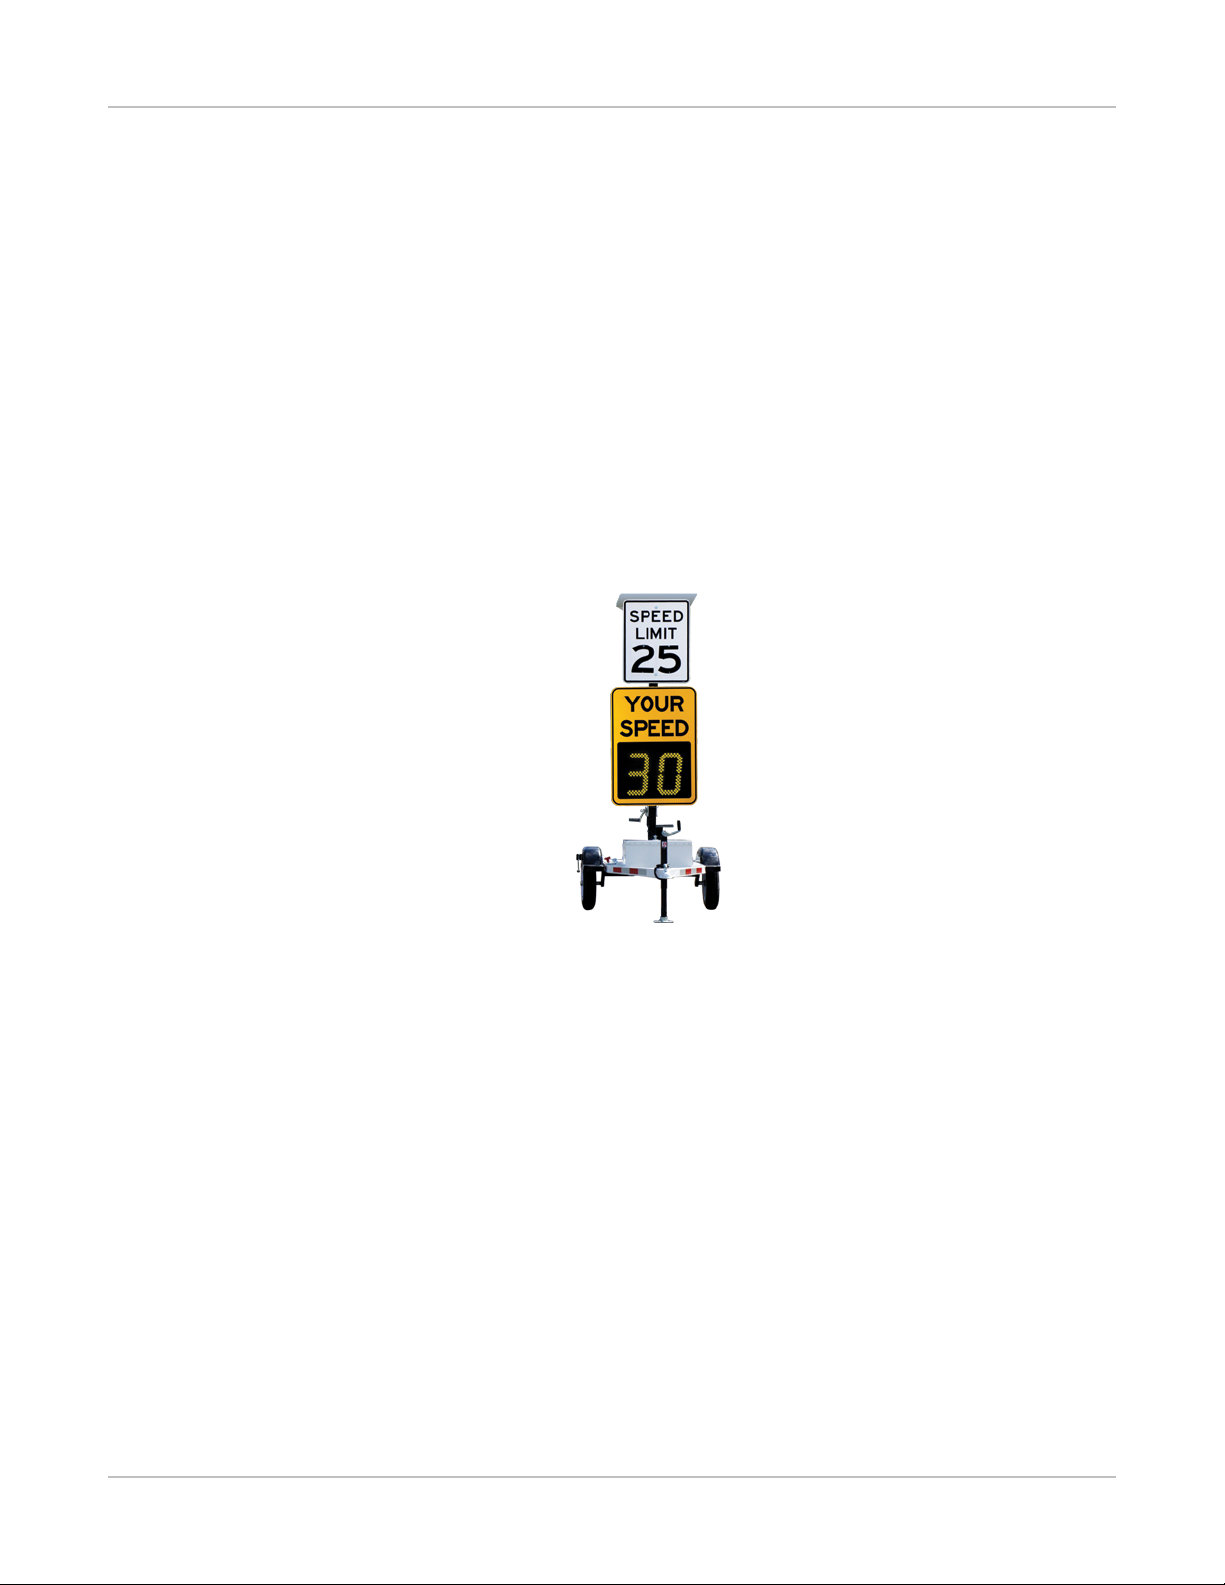
TRAFFIC LOGIX®
SAFEPACE® EVOLUTION11 INSTALLATION GUIDE
Radar Sign Specifications
Copyright © 2018 Traffic Logix Corporation All rights reserved.

SafePace® Evolution11 Installation Guide
Copyright © 2018 Traffic Logix Corporation. All rights reserved.
This manual may not be copied in whole or in part, nor transferred to any other media or language, without the express
written consent of Traffic Logix Corporation.
This document is supplied as a guide for the SafePace Evolution11 product. Reasonable care has been taken in
preparing the information it contains. However, it is possible that this document contains omissions, technical
inaccuracies, or typographical errors. Product specifications are subject to change without notice and should not be
considered commitments by Traffic Logix Corporation. Traffic Logix Corporation does not accept responsibility of any
kind for customers’ losses due to the use of this document.
Trademarks
Traffic Logix® and SafePace® are registered trademarks of Logix ITS Inc. All other product and company names are
trademarks or registered trademarks of their respective owners.
This document may contain confidential and proprietary information of Traffic Logix Corporation and/or other third
parties which is protected by copyright, trade secret and trademark law and may not be provided or otherwise made
available without prior written authorization.
Document created: 2:54 PM on Thursday, May 10, 2018
Document version: 1.1
Traffic Logix Corporation
3 Harriet Lane
Spring Valley, NY
USA 10977
Tel: 1 (866) 915-6449
Fax: 1 (866) 995-6449
Web: www.trafficlogix.com
Email: info@trafficlogix.com
SafePace® Evolution11 Installation Guide p. 2

TABLE OF CONTENTS
Chapter 1 4
Introduction 4
Description 5
Sign Portability and Add-ons 5
About this Manual 7
Documentation Conventions 7
Contacting Technical Support 8
Chapter 2 9
Installing the SafePace EV11 9
Selecting a Site for the Sign 10
Choosing a Position for the Sign 11
Mounting the Sign 12
Using the Standard Pole Banding Mounting 12
Using the Universal Mounting Bracket System (Optional) 13
Chapter 3 18
Power Options for your Sign 18
AC Power 19
Solar Power 20
Mounting the Solar Panel 20
Wiring the Solar Panel to the Sign (1-wire EZ connector) 21
Battery Power 23
Installing Lithium Batteries in SafePace Evolution signs 23
Installing Lead Acid Batteries in SafePace Evolution Signs 24
Chapter 4 26
Sign Operation and Maintenance 26
Opening and Closing the Sign Latches 27
Operating Your Sign 29
Resetting the Sign 29
Replacing Key Components 31
Warranty 32
SafePace® Evolution11 Installation Guide p. 3

Chapter 1
INTRODUCTION
SafePace® Evolution11 Installation Guide p. 4

Description
Description
The SafePace EV11 sign is a compact, lightweight, entry-level radar speed sign intended for private
communities or local roads. It is an MUTCD compliant speed sign that features a two-digit speed display.
Sign Portability and Add-ons
The SafePace EV11 radar sign is a very lightweight sign. When used in conjunction with the optional
Universal Mounting Bracket, it is quite portable. At just around 21-25 lbs (varies based on power solution
chosen), the lightweight sign is easy to transport and can be mounted in minutes.
Portable Speed Control Option
The SafePace EV11 radar sign can also be mounted to the SafePace® Cruiser LT. A speed limit sign with
changeable numbers ensures that your SafePace EV11 Cruiser LT is ready to slow motorists, no matter
what the speed limit.
Figure 1: SafePace Cruiser LT
School Zone Option
The SafePace EV11 sign can also be combined with the SafePace Beacons to create a complete School
Zone System.
SafePace® Evolution11 Installation Guide p. 5

Sign Portability and Add-ons
Figure 2: Complete School Zone System
For more information on the above options, please contact your Sales representative or call Technical
Support.
SafePace® Evolution11 Installation Guide p. 6

About this Manual
About this Manual
This manual describes the installation of the SafePace EV11 sign, along with an optional solar panel, to the
side of a pole. This manual also describes the wiring specifications for AC powered, and combined
solar/battery powered configurations.
Documentation Conventions
This document uses the following formatting conventions:
Format Description
Bold Gray Used in procedures to indicate menu commands, interface controls
and dialog box options.
Italics Used to place emphasis on certain words.
Monospace text Used for code samples and any information that the user enters.
Italicized
monospace text
Used to indicate text that you should replace with your own. For
example: In the Save As text box, enter c:\filename.ext where
filename.ext is the name of the file you want to save.
> Used to indicate a sequence of commands (and sub commands) to be
carried out in the displayed order. For example File > Exit means to
open the File menu then choose the Exit command. This applies to
menus from the main menu bar, context menus that appear when you
right-click on the interface, and tiles in a tiled interface.
NOTE: Notes are used as reminders or to provide information of interest that supplements or
emphasizes important points of the main text.
TIP: Tips are used to suggest alternative methods, workarounds and/or shortcuts that are not essential
but that you may find useful in a given situation.
CAUTION: Cautions are used to advise users of specific actions that could result in a loss of data.
WARNING: Warnings are used to advise users of specific actions that could result in personal physical
injury or damage to equipment.
SafePace® Evolution11 Installation Guide p. 7

Contacting Technical Support
If you have questions or comments regarding this document or SafePace Evolution11, please feel free to
contact our technical support center by phone: 1 (866) 915-6449, or by email: support@trafficlogix.com
SafePace® Evolution11 Installation Guide p. 8

Chapter 2
INSTALLING THE SAFEPACE EV11
There are several methods and hardware options available for the installation of the SafePace EV11 sign. It
can be mounted with either a pole bracket or a universal sign bracket.
SafePace® Evolution11 Installation Guide p. 9

Selecting a Site for the Sign
The site you select for the sign may vary with the application in which the SafePace EV11 radar sign is being
used. However, you should generally adhere to the following guidelines:
»Choose a location where the line of sight from the radar sign to the vehicle will be uninterrupted. Give
consideration to how the location may develop with time. The following types of questions should be
considered:
•Will any trees grow directly in the line of vision?
•Is it likely that road traffic signs will be erected in a position that could obstruct the field of view?
•For solar-powered signs, are the solar panels likely to be blocked by any trees or other structures?
»Install the radar sign directly adjacent to the lane of traffic being targeted since an interfering lane of
traffic may cause inaccurate speed readings.
»Mount the radar sign to a stable and firm structure. Avoid structures that are likely to be affected by
wind or rain. We suggest that you use a 4-inch to 5-inch diameter circular metallic pole, ideally, or a 4-
inch × 4-inch wooden pole. For ‘Telespar’ poles, we strongly recommend that you use the 2-inch variety.
SafePace® Evolution11 Installation Guide p. 10

Choosing a Position for the Sign
Similar to other road signs, the SafePace EV11 radar sign should be installed near the closest lane of traffic,
although off the actual road. The recommended height of the lower edge of the radar speed sign is
approximately 7 feet above the surface of the road. The display should be turned towards oncoming traffic
so that it is clearly visible to approaching drivers.
Figure 3: Example of Sign Location
Figure 4: Zone of Detection
SafePace® Evolution11 Installation Guide p. 11

Mounting the Sign
Mounting the Sign
The SafePace EV11 sign and optional solar panel should optimally be mounted on a 12-foot to 14-foot
pole. You can install the sign using either of the following methods and hardware options:
»Standard Pole Banding Mounting
»Universal Mounting Bracket System
Using the Standard Pole Banding Mounting
The SafePace EV11 sign comes with a Standard Pole Banding Mounting system. As this is a standard type of
mounting it requires no special knowledge to easily install the sign.
NOTE: The banding straps included are long enough for use with a 5-inch pole. If you want to use a
larger pole, you will need to obtain longer banding straps.
To install the sign using the standard pole banding mounting system:
1. Attach the supplied banding brackets to the top and bottom of the rear of the sign with the supplied
tamper-proof, M6 security screws as shown below.
Figure 5: Attaching the banding bracket to the sign
Figure 6: Standard banding brackets mounted directly to a sign with M6 tamper-proof screws
2. Insert the stainless steel banding strap into the bracket and fasten the sign to the pole.
SafePace® Evolution11 Installation Guide p. 12

Using the Universal Mounting Bracket System (Optional)
3. Tighten the strap with a nut driver until secure. See Figure 7: below.
Figure 7: Sign Secured to a Pole with Banding Strap
Using the Universal Mounting Bracket System (Optional)
The SafePace EV11 sign comes with an optional Universal Mounting Bracket System that allows you to
quickly and easily mount the sign to virtually any type of pole or surface in a secure manner.
There are two parts to the bracket: one for the sign (the sign bracket) and the other (the pole bracket) for
the pole. The sign bracket needs to be attached to the back of the sign. Attach the pole bracket to the pole
or structure where you want to mount the sign. This allows you to easily slide the sign onto the pole bracket
where it can be locked into place with the included key. You can just as easily remove it from the bracket
once it is unlocked.
The quick mount and dismount feature of this bracket allows you to easily move the sign from one location
to another with relative ease and convenience.
Installing the Sign Bracket
To install the Sign Bracket:
»Attach the Sign Bracket to the backside of the sign using the included hardware.
Figure 8: Attaching the sign bracket.
SafePace® Evolution11 Installation Guide p. 13

Using the Universal Mounting Bracket System (Optional)
Figure 9: Backside of sign bracket attached.
Installing the Pole Bracket
The Pole Bracket can be secured to any type of standard pole or Telespar type pole by a choice of banding
straps, lag screws, or bolts and nuts.
TIP: We recommend that you install the bracket on a 2-inch Telespar pole.
Figure 10: Pole bracket mounted to a circular pole
Figure 11: Pole bracket mounted to a 2-inch Telespar pole
To install the Pole Bracket on a Telespar Pole:
»Use the supplied 2.5-inch stainless steel security bolts and nuts to secure the Pole Bracket to the 2-inch
Telespar pole.
SafePace® Evolution11 Installation Guide p. 14

Using the Universal Mounting Bracket System (Optional)
NOTE: It is very important that the head of the bolt be placed on the Telespar pole (see Figure
12: below) and that the nuts be placed on the inside part of the bracket (see Figure 13: below).
Figure 12: Pole bracket with bolts on the Telespar pole
Figure 13: Pole bracket with nuts placed on the inside of the sign bracket
To install the Pole Bracket using the supplied banding straps:
1. Thread the banding straps through the banding strap holes as shown.
NOTE: The banding straps included are long enough for use with a 5-inch pole. If you want to use a
larger pole, you will need to obtain longer banding straps.
2. Use additional screws and/or bolts to further prevent theft and vandalism.
SafePace® Evolution11 Installation Guide p. 15

Using the Universal Mounting Bracket System (Optional)
Mounting and Dismounting the Sign
Once you have installed the mounting brackets, you can easily mount the SafePace EV11 sign by sliding it
down onto the Pole Bracket. Once mounted, you should lock the sign into place.
To mount the sign:
1. Position the sign above the bracket.
2. Slide the sign down the bracket.
SafePace® Evolution11 Installation Guide p. 16

Using the Universal Mounting Bracket System (Optional)
3. Use the supplied key to lock the sign in place.
To dismount the sign:
1. Unlock the sign.
2. Slide the sign up and off of the Pole Bracket.
SafePace® Evolution11 Installation Guide p. 17

Chapter 3
POWER OPTIONS FOR YOUR SIGN
The SafePace EV11 sign is offered in several powering models. Depending on what model you have
purchased, powering the sign will vary. The available power options are as follows:
»AC powered
»Solar powered (uses one or more rechargeable batteries for backup)
»Battery powered (includes one or more rechargeable batteries)
NOTE: The warranty on the batteries is limited to 1 year — please contact Technical Support
for more details (see Contacting Technical Support on page 8).
SafePace® Evolution11 Installation Guide p. 18

AC Power
AC Power
The SafePace EV11 sign is equipped to accept 100-240 volts of AC power. For these signs (standard
model), the regulated power supply comes already pre-wired, and your sign is ready to operate once it is
mounted and wired to the incoming power supply. The Line (BLACK) and Neutral (WHITE) wires of the
incoming power supply should be connected to the marked terminals. The Ground wire should be connected
to the GREEN/YELLOW terminal (see Figure 15: below).
Figure 14: AC power supply terminal block Figure 15: Close-up view of AC power
connectors
WARNING: ELECTRICAL SHOCK HAZARD. To avoid serious injury or even death, all electrical wiring
should be performed by a qualified and professional electrician in accordance with local electrical
codes. Mishandling of electrical wiring may also result in damage to the unit and may void product
warranty.
WARNING: Should you need to drill holes in the sign for the AC power wiring, drill from the inside/out
as opposed to outside/in. This is to reduce the possibility of metal filings damaging the internal
components of the sign.
WARNING: It is vitally important, whenever you close the sign, that you close and lock all of the latches
properly to avoid water infiltration as this could damage the sign and void your warranty.
SafePace® Evolution11 Installation Guide p. 19

Solar Power
Solar Power
The Solar powered model of the SafePace EV11 sign includes a solar panel and mounting bracket, one or
more rechargeable batteries, and a solar charger. The solar panel powers the sign when exposed to sunlight
while at the same time charging the batteries to provide a power backup for night-time and cloudy day use.
The solar panel is quick to install and should suffice in most installations.
Figure 16: Solar panel
Mounting the Solar Panel
You need to mount the solar panel at the highest point on the pole, optimally 10-12 feet high. Use the
supplied solar panel bracket (see Figure 17: below) and follow the instructions provided by the manufacturer
(included in the bracket’s packaging).
Figure 17: Solar panel mounting bracket
The two-part bracket allows for full adjustment in order to best position the panel towards the sun. It is
optimal to position your solar panel towards due Solar South (not magnetic South), if you are in the
northern hemisphere and towards due Solar North (not magnetic North) if you are in the southern
hemisphere.
Regardless of whether you are in the northern or southern hemisphere, Solar North/South is the position of
the sun in the sky at exactly the midpoint between sunrise and sunset.
SafePace® Evolution11 Installation Guide p. 20
Table of contents
Other Traffic Logix Industrial Electrical manuals
Popular Industrial Electrical manuals by other brands

LEGRAND
LEGRAND LCS 0 337 50 installation instructions

Murata
Murata GJM1555C1H1R5BB01 Series Reference sheet

Murata
Murata GRT155R60J225KE01 Series Reference sheet

Murata
Murata GRM0335C1E3R6BA01 Series Reference sheet

Murata
Murata GRM186R60G226ME15 Series Reference sheet

Murata
Murata GRM1885C1H6R5CA01 Series Reference sheet