manuals.online logo
Brands
  1. Home
  2. •
  3. Brands
  4. •
  5. Trane
  6. •
  7. Thermostat
  8. •
  9. Trane 3518-7064 User manual

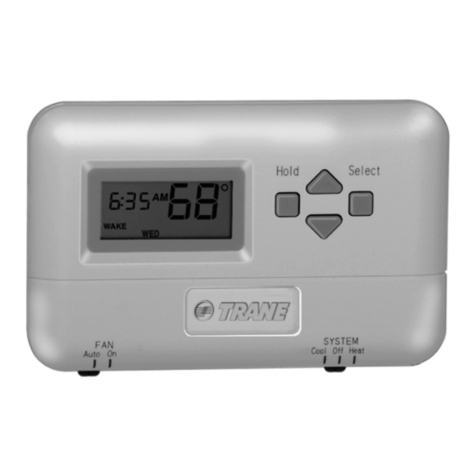
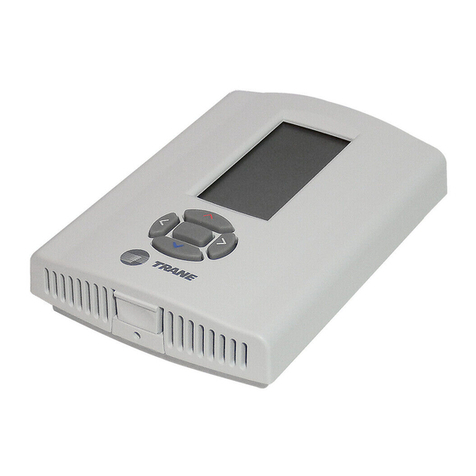
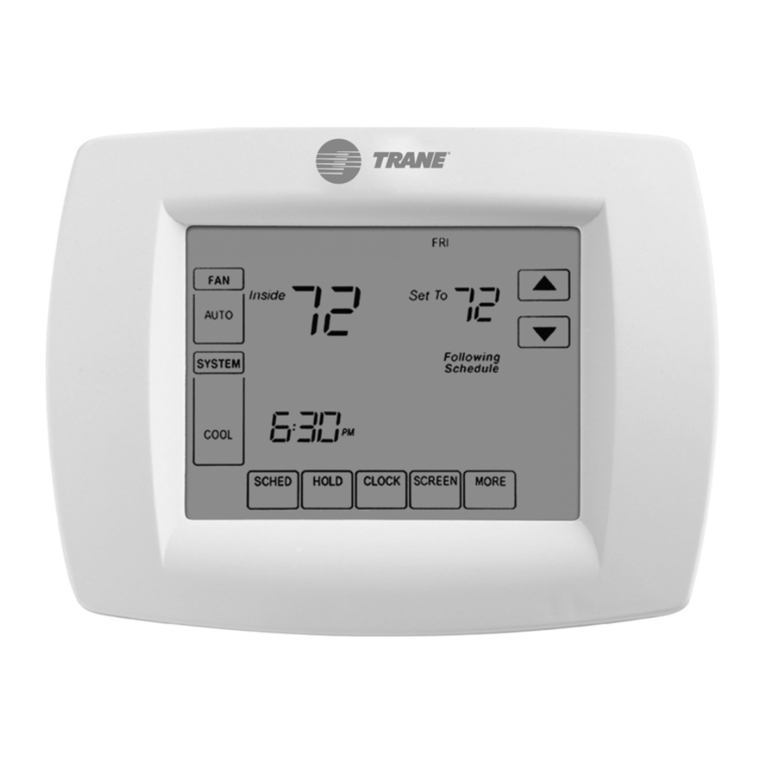
Trane 3518-7064 User manual

Unit Mounted 2 or 4 Pipe
Fan Coil Thermostat, 3 Speed
Configuration Mode
The conguration mode is used to set the thermostat to match your heating/cooling system.
To congure the thermostat, perform the following steps:
1. Verify the thermostat is in the OFF mode. Press the SYS button until off mode displays.
2. Press the CONFIG button for 5 seconds while the thermostat is in OFF mode.
Press the up or down button to change settings within each screen.
Press the CONFIG button to advance to the next screen.
Note: Pressing the
SYS
button will return you to the previous screen.
To exit conguration mode, press the CONFIG switch for 5 seconds.
FAN
SYS
CONFIG
Down
button
Up
button
2 – Temperature Scale
This thermostat can function in Fahrenheit or Celsius.
F = Fahrenheit (Default)
C = Celsius
3 – Valve Type
This thermostat operates with Normally Open or Normally Closed valves. Select the correct valve
type for your system.
no = Normally Open (Default)
nc = Normally Closed
Configuration Mode Settings
1 – System
Select the type of operation you require.
1. Heat Only is for a system with only heating.
2. Cool Only is for a system with only cooling.
3. 2-Pipe Manual Changeover is for a 2 pipe system that handles both heating and cooling. The user
selects whether the system will be set to heating or set to cooling.
4. 2-Pipe Seasonal Changeover is for a 2 pipe system that handles both heating and cooling. The
thermostat selects whether the system will be set to heat or set to cool based on the pipe sensor
temperature. (Default)
5. 2-Pipe Manual Changeover with Auxiliary is for a 2 pipe system that handles both heating and
cooling. The user selects whether the system will be set to heat or set to cool. If set to heat and the
pipe sensor indicates there is not heat, the auxiliary output will be turned on.
6. 4-Pipe Manual Changeover is for a 4 pipe system. The user selects whether the system will be set
to heat, cool or off.
7. 4-Pipe Auto Changeover is for a 4 pipe system. The user selects whether the system will be set to
heat, cool, heat & cool or off.
4 – N/A
5 – N/A
• 2-pipe systems
• 4-pipe systems
• Pipe sensor compatible
•Congurable
•Largedisplaywithbacklight
• Selectable Fahrenheit or
Celsius
• Relay outputs (minimum
voltagedropinthermostat)
•Remotesensing
6 – Pipe Sensor (Y/N) (for 2 pipe system only)
Select whether you are using a pipe sensor to monitor the pipe temperature.
n = No Pipe Sensor Connected
y = Pipe Sensor Connected (Default)
7–PipeSensorCooling
Pipe temperature below this setting is considered to be cooling. If pipe sensor temperature is
above this selected temperature for more than the Pipe Sensor Delay Time the cool valve will be
turned off.
Changes setting between 50ºF and 65ºF (10.0ºC and 18.5ºC) Default: 60
8–PipeSensorHeating
Pipe temperature above this setting is considered to be heating. If pipe sensor temperature is
below this selected temperature for more than the Pipe Sensor Delay Time the heat valve will be
turned off.
Changes setting between 70ºF and 90ºF (21.0ºC and 32.0ºC) Default: 80
Auto Changeover
18-30 VAC
Hardwired
3518-7064
Proper Field Wiring and Grounding Required!
Failure to follow code could result in death or serious injury. All eld wiring MUST be performed by qualied
personnel. Improperly installed and grounded eld wiring poses FIRE and ELECTROCUTION hazards. To avoid
these hazards, you MUST follow requirements for eld wiring installation and grounding as described in NEC
and your local/state electrical codes.
WARNING
Personal Protective Equipment Required!
Installing/servicing this unit could result in exposure to electrical, mechanical and chemical hazards. Before
installing/servicing this unit, technicians MUST put on all Personal Protective Equipment (PPE) recommended
for the work being undertaken. ALWAYS refer to appropriate MSDS sheets and OSHA guidelines for proper PPE.
When working with or around hazardous chemicals, ALWAYS refer to the appropriate MSDS sheets and OSHA
guidelines for information on allowable personal exposure levels, proper respiratory protection and handling
recommendations. If there is a risk of arc or ash, technicians MUST put on all necessary Personal Protective
Equipment (PPE) in accordance with NFPA70E for arc/ash protection PRIOR to servicing the unit. Failure to
follow recommendations could result in death or serious injury.
WARNING
Follow EHS Policies!
Failure to follow instructions below could result in death or serious injury.
All Trane personnel must follow the company’s Environmental, Health and Safety (EHS) policies when
performing work such as hot work, electrical, fall protection, lockout/tagout, refrigerant handling, etc. Where
local regulations are more stringent than these policies, those regulations supersede these policies.
Non-Trane personnel should always follow local regulations.
WARNING
Warnings, Cautions, and Notices
Read this manual thoroughly before operating or servicing this unit. Safety advisories
appear throughout this manual as required. Your personal safety and the proper operation
of this machine depend upon the strict observance of these precautions.
• This thermostat is for 18-30 VAC applications only; do not use on voltages over 30 VAC
• Use this thermostat only as described in this manual
Installation Guide
ACC-SVN223B-EN
©2020 TRANE
AUGUST 2020
Onlyqualiedpersonnelshouldinstallandservicetheequipment.Theinstallation,starting
up,andservicingofheating,ventilating,andair-conditioningequipmentcanbehazardous
andrequiresspecicknowledgeandtraining.Improperlyinstalled,adjustedoraltered
equipmentbyanunqualiedpersoncouldresultindeathorseriousinjury.Whenworkin9
ontheequipment,observeallprecautionsintheliteratureandonthetags,stickers,and
labelsthatareattachedtotheequipment.
SAFETY WARNING
The two types of advisories are dened as follows:
WARNING Indicates a potentially hazardous situation which, if not
avoided, could result in death or serious injury.
Indicates a situation that could result in equipment or
property-damage only accidents.
NOTICE
Important Environmental Concerns
Scientic research has shown that certain man-made chemicals can affect the earth’s
naturally occurring stratospheric ozone layer when released to the atmosphere. In
particular, several of the identied chemicals that may affect the ozone layer are
refrigerants that contain Chlorine, Fluorine and Carbon (CFCs) and those containing
Hydrogen, Chlorine, Fluorine and Carbon (HCFCs). Not all refrigerants containing these
compounds have the same potential impact to the environment. Trane advocates the
responsible handling of all refrigerants-including industry replacements for CFCs such as
HCFCs and HFCs.
Important Responsible Refrigerant Practices
Trane believes that responsible refrigerant practices are important to the environment, our
customers, and the air conditioning industry. All technicians who handle refrigerants must
be certied according to local rules. For the USA, the Federal Clean Air Act (Section 608)
sets forth the requirements for handling, reclaiming, recovering and recycling of certain
refrigerants and the equipment that is used in these service procedures. In addition, some
states or municipalities may have additional requirements that must also be adhered to for
responsible management of refrigerants. Know the applicable laws and follow them.
Wiring Diagrams
System 1
Heat Only
Remote Sensor
Pipe Sensor
Fan High
Heat
Fan Low
(Optional)
Purple
Yellow
Gray Gray
Orange/White
Red/White
Blue/White Blue/White Blue/WhiteBlue/White
Red
White
Black
24
VAC
Fan Medium
System 2
Cool Only
Remote Sensor
Pipe Sensor
Fan High
Cool
Fan Low
(Optional)
Purple
Blue
Yellow
Orange/White
Red/White
White
Black
24
VAC
Fan Medium
System 3
2-PipeManualChangeover
Remote Sensor
Pipe Sensor
Fan High
Heat/Cool
Fan Low
(Optional)
Purple
Yellow
Gray
Orange/White
Red/White
Red
White
Black
24
VAC
Fan Medium
System 4
2-PipeSeasonalChangeover
Remote Sensor
Pipe Sensor
Fan High
Heat/Cool
Fan Low
(Required)
Purple
Yellow
Gray
Orange/White
Red/White
Red
White
Black
24
VAC
Fan Medium
System 5
2-PipeManualChangeover
with Auxiliary
Remote Sensor
Pipe Sensor
Fan High
Auxiliary
Heat/Cool
Fan Low
(Required)
Purple
Yellow
Gray
Orange/White
Red/White
Blue
Red
White
Black
24
VAC
Fan Medium
System 7
4-PipeAutoChangeover
Fan High
Cool
Heat
Fan Low
Purple
Yellow
Gray
Blue
Red
White
Black
24
VAC
Fan Medium
System 6
4-PipeManualChangeover
Fan High
Cool
Heat
Fan Low
Remote Sensor
Purple
Yellow
Gray
Blue/WhiteBlue/White
Red/White
Blue/White
Red/White
Blue
Red
White
Black
24
VAC
Fan Medium
C
W1
Y1
GH
GL
PS
SC
RS
R
GM
C
W1
Y1
GH
GL
PS
SC
RS
R
GM
C
W1
Y1
GH
GL
PS
SC
RS
R
GM
C
W1
Y1
GH
GL
PS
SC
RS
R
GM
C
W1
Y1
GH
GL
PS
SC
RS
R
GM
C
W1
Y1
GH
GL
PS
SC
RS
R
GM
C
W1
Y1
GH
GL
PS
SC
RS
R
GM
Remote Sensor
Wire Designator
Descriptions
R – 24 VAC Hot Black
C – 24 VAC Common White
W1 – Heat Red
Y1 – Cool Blue
GH – Fan High Purple
G M – Fan Medium Yellow
GL – Fan Low Gray
PS – Pipe Sensor (optional) Orange/White
RS – Remote Sensor Red/White
SC – Sensor Common Blue/White
Specifications
Electricalrating: 18-30 VAC, 2 amp maximum per output
Temperaturecontrolrange:45°F to 90°F (7°C to 32°C)
Accuracy: ± 1°F (± 0.5°C)
Timing: Backlight Operation: 10 seconds
Terminations: R, C, W1, Y1,GH, GM, GL, PS, RS, SC
Package Contents/Tools Required
Packageincludes: 3518-7065 thermostat on base, thermostat
cover, screws and wall anchors, Installation
guide.
Tools required for installation: Drill with 3/16” bit, hammer,
screwdriver
Icon Descriptions
Heating operation
icon
Cooling operation
icon
COOLHEAT
Fan
Auto
Fan
operation
icon
9–PipeSensorDelayTime
This is the time that the valve will be open to verify the pipe temperature before the valve is turned
off. This gives time for circulation through the system.
Changes setting between 0 and 5 minutes at 1 minute intervals Default: 5
LIAF265
Mode of Operation
Testing the Thermostat
Once the thermostat is congured, it should be thoroughly tested.
Note: If using pipe sensors, verify pipe sensor is within range to output. Check pipe
temperature by pressing the UP and DOWN buttons simultaneously.
Heat Test (For systems with heat)
1. Press SYS button until heat mode is displayed.
2. Adjust the set temperature so it is 5 degrees above the room temperature.
3. Heat should come on within a few seconds.
4. Adjust the set temperature 2 degrees below the room temperature and the heat should turn off.
There may be a fan delay on your system.
Cool Test (For systems with cooling)
1. Press SYS (left) button until cool mode is displayed.
2. Adjust set temperature so it is 5 degrees below room temperature.
3. Cooling should come on within a few seconds.
4. Adjust the set temperature 2 degrees above the room temperature and the cool should turn off.
There may be a fan delay on your system.
Fan Test (System off)
1. Press FAN button to toggle between Fan Off, Fan Hi, Fan Med or Fan Low.
Operating Modes
There are four possible operating modes for the thermostat. OFF, Cool, Heat, and Cool & Heat
modes are accessed by pressing the SYS button.
Note: The modes you can access are based on your conguration.
OFF Mode
• In this mode, the thermostat will not turn on the heating or cooling devices
Note: The fan (when congured as continuous fan) can be turned on manually in off mode by
pressing the FAN button. The word FAN shows on the display and the fan icon appears
when the fan operates.
Heat Mode
• In this mode, the thermostat controls the heating system. When the heat outputs, the ame icon
appears on the display.
Cool Mode
• In this mode, the thermostat controls the cooling system. When the cooling outputs, the snowake
icon appears on the display.
Heat & Cool Mode
• In this mode, the thermostat can automatically turn on heat or cool as needed. AUTO appears on
the display with the heat set point and cool set point.
Fan Mode
• In this mode, the user can select between continuous fan speeds of H, M, L or auto fan. When auto
fan is selected, the fan speed is determined by the number of degrees the room temperature differs
from the set point.
11 – Dead Band
Dead band is the minimum number of degrees allowed between heat set point and cool set point in
auto changeover operation.
Select setting between 2ºF and 9ºF (1ºC and 4.5ºC) Default: 4ºF
Note: Only appears when system is set to 7
12–MinimumSetPointCooling(LowerLimit)
The minimum cooling set point can be limited so the cooling cannot be set too low.
Adjust setting between 45ºF and 90ºF (7.0ºC and 32.0ºC) Default: 45ºF
Note: Will not appear when system is set to 1
13–MaximumSetPointHeatingUpperLimit)
The maximum heating set point can be limited so the heating cannot be set too high.
Adjust setting between 45ºF and 90ºF (7.0ºC and 32.0ºC) Default: 90ºF
Note: Will not appear when system is set to 2
14 – Temperature Calibration
The room temperature can be offset to display a different temperature. Example: 70F room
temperature with -2 setting displays 68F.
Changes displayed room temperature between -9ºF and 9ºF (-4.5ºC and 4.5ºC) Default: 0ºF
15–LockFeature
Thermostat can be locked so temperature, congurations and mode cannot be changed.
Thermostat must be locked for this setting to take affect (see Lockout Feature)
0-9 - number of degrees that can be adjusted, mode cannot be changed
Cool-Heat – can adjust up to max heat and min cool but cannot change mode Default: 0
16 – Temperature Display
Select whether to display room temperature only, set point temperatures only or both.
“S” Display set point only
“r” Display room temperature only
“rS” Display set point and room temperature Default: “rS”
17–ValvePurge
Select time to open valves during inactivity period. This feature purges the lines so water does not
become stagnant and helps keeps valves from sticking.
“0” Disabled (Default) “1” 1 minute every 24 hours “3” 3 minutes every 24 hours
10–1st-StageDifferential
Differential is the number of degrees between the set point temperature and the turn on
temperature.
Changes setting between d1ºF and d6ºF (d0.5ºC and d3.0ºC) Default: d1ºF
The fan coil thermostat can be used for two pipe or four pipe systems. It can control heat only, cool
only or heat & cool systems. A pipe sensor can be used for two pipe systems to verify the system is
operating or automatically change to the correct operating mode. The thermostat is congurable for
all fan coil systems. The conguration setup is used to match the thermostat to your system and turn
on the features you want to utilize.
The thermostat can be setup for continuous fan or automatic fan. Continuous fan operates on the
fan speed that you have selected. You can turn the fan off in OFF mode when in continuous fan.
Automatic fan adjusts to the appropriate fan speed based on the set temperature and the room
temperature. The further the room temperature is away from the set point temperature the faster the
fan will operate.
A lock feature can be enabled so the setting can not be tampered with. A valve purge feature can be
used to cycle the valve so water does not become stagnant and to stop valves from sticking.
Lockout Feature
The thermostat has a button lockout feature so the mode cannot be
changed and the temperature adjustment is limited. Select the appropriate
lockout from Conguration Mode Settings (Setting 15) of this guide.
To activate the LOCK feature:
1. Press the SYS button in, then press the CONFIG button in also. Hold
both in for 10 seconds
2. will display and the lockout function will be enabled.
To deactivate the LOCK feature, repeat steps 1 and 2 above.
Troubleshooting
Down
button
Up
button
Button Functions
UP– Used to increase the set temperatures and to adjust
conguration settings.
DOWN– Used to decrease the set temperatures and to adjust
conguration settings.
SYS – Used to change from OFF, HEAT, COOL and AUTO
changeover modes.
CONFIG – Used to enter conguration and advance to the next conguration screen.
FAN – Used to turn the fan on and off. Also used to cycle through fan speeds
SYS then CONFIG – Held in simultaneously for 10 seconds to lock and unlock the thermostat.
UpandDown– Pressed simultaneously to display pipe sensor temperature if pipe sensor is
connected.
FAN
SYS
CONFIG
Symptom Remedy
No display Check for voltage at thermostat; display is blank when
voltage is not present
System fan does not come on
properly
Verify wiring is correct, check connections are correct
Thermostat turns on and off too
frequently
Adjust temperature differential
(see Conguration Mode Setting 10)
Room temperature is not correct Calibrate thermostat (see Conguration Mode Setting 14)
Check remote sensor connections
Displays when any button is
pressed
Thermostat has the button lockout function activated
(see Lockout Feature and Conguration Mode Setting 15)
- - On display instead of room
temperature
Check remote sensor connections
Heat or Cool not coming on
(No pipe sensor)
Verify wiring is correct, gently pull on each wire to verify
there is a good connection, verify conguration settings
Heat or Cool not coming on
(Pipe sensor connected)
Check pipe sensor temperature by pressing up and down
buttons in – if out of range, outputs may not turn on
(see Conguration Mode Settings 6-9)
ACC-SVN223B-EN 21 Aug 2020
Supersedes ACC-SVN223A-EN (Dec 2019)
Trane - by Trane Technologies (NYSE: TT), a global climate innovator - creates
comfortable, energy efcient indoor environments for commercial and residential
applications. For more information, please visit trane.com or tranetechnologies.com.
Trane has a policy of continuous product and product data improvement and reserves
the right to change design and specications without notice. We are committed to using
environmentally conscious print practices.
©2020 TRANE

Other Trane Thermostat manuals

Trane TZONE950AC52ZA User manual

Trane

Trane TZONE950AC52ZA User manual

Trane XT500C User manual

Trane

Trane XT500C User manual

Trane TAYSTAT 540 User manual

Trane

Trane TAYSTAT 540 User manual

Trane XL824 User manual

Trane

Trane XL824 User manual

Trane TZONE940AC52Z Troubleshooting guide

Trane

Trane TZONE940AC52Z Troubleshooting guide

Trane BAYSENS924 Manual

Trane

Trane BAYSENS924 Manual

Trane TZEMT500AB32MAA User manual

Trane

Trane TZEMT500AB32MAA User manual

Trane TZEMT400BB32MMA User manual

Trane

Trane TZEMT400BB32MMA User manual

Trane THT02775 User manual

Trane

Trane THT02775 User manual

Trane Link UX360 User manual

Trane

Trane Link UX360 User manual

Trane X13511537-01 User manual

Trane

Trane X13511537-01 User manual

Trane XR203 User manual

Trane

Trane XR203 User manual

Trane X13511537-01 Manual

Trane

Trane X13511537-01 Manual

Trane Thermostats Operational manual

Trane

Trane Thermostats Operational manual

Trane TAYSTAT 375 User manual

Trane

Trane TAYSTAT 375 User manual

Trane Schlage LiNK TZEMT400BB32MAA Assembly instructions

Trane

Trane Schlage LiNK TZEMT400BB32MAA Assembly instructions

Trane TAYSTAT 370 User manual

Trane

Trane TAYSTAT 370 User manual

Trane THS04 User manual

Trane

Trane THS04 User manual

Trane Z WAVE TZEMT400AB32MAA User manual

Trane

Trane Z WAVE TZEMT400AB32MAA User manual

Trane THS-02 User manual

Trane

Trane THS-02 User manual

Trane Z WAVE TZEMT400AB32MAA User manual

Trane

Trane Z WAVE TZEMT400AB32MAA User manual

Trane TCONT802AS32DA User manual

Trane

Trane TCONT802AS32DA User manual

Trane ZSASSMAL012 Assembly instructions

Trane

Trane ZSASSMAL012 Assembly instructions

Trane ComfortLink II XL1050 User manual

Trane

Trane ComfortLink II XL1050 User manual

Popular Thermostat manuals by other brands

Honeywell VisionPRO TH8000 Series installation guide

Honeywell

Honeywell VisionPRO TH8000 Series installation guide

Seeley magiq owner's manual

Seeley

Seeley magiq owner's manual

hager EK570 instructions

hager

hager EK570 instructions

Siemens RDJ100 Operating and installation instructions

Siemens

Siemens RDJ100 Operating and installation instructions

Daikin homecontrols EKRRVATU1BA Installation and operation manual

Daikin

Daikin homecontrols EKRRVATU1BA Installation and operation manual

Unical KTsmart Instruction on Installation and Use

Unical

Unical KTsmart Instruction on Installation and Use

MyPlace ADVANTAGE AIR installation manual

MyPlace

MyPlace ADVANTAGE AIR installation manual

Home Automation Omnistat RC-100B owner's manual

Home Automation

Home Automation Omnistat RC-100B owner's manual

LUX TX500E Installation and operating instructions

LUX

LUX TX500E Installation and operating instructions

Sinope TH1500WF installation guide

Sinope

Sinope TH1500WF installation guide

Thermostats 5260 installation guide

Thermostats

Thermostats 5260 installation guide

TERMA TT-IR manual

TERMA

TERMA TT-IR manual

Atag One Zone quick start guide

Atag

Atag One Zone quick start guide

ENGO CONTROLS SIMPLE quick guide

ENGO CONTROLS

ENGO CONTROLS SIMPLE quick guide

CTC Union 43103 owner's manual

CTC Union

CTC Union 43103 owner's manual

WarmYourFloor SunTouch P-3285 instructions

WarmYourFloor

WarmYourFloor SunTouch P-3285 instructions

Danfoss FP975 user guide

Danfoss

Danfoss FP975 user guide

FIBARO Heat Controller Quick Manuals. Warranty Terms

FIBARO

FIBARO Heat Controller Quick Manuals. Warranty Terms

manuals.online logo
manuals.online logoBrands
  • About & Mission
  • Contact us
  • Privacy Policy
  • Terms and Conditions

Copyright 2025 Manuals.Online. All Rights Reserved.