trans LOD-509 series User manual
OVERVIEW INSTALLATION NOTES
Risque de choc électrique -
Débranchez l'alimentation avant l'entretien.
Ne PAS toucher la fenêtre carrée de capteur infrarouge sous
l'ensemble de l'objectif.
The sensor is more sensitive to the movements
“crossing” the detection zones than “toward” or
“away” the sensor unit. To obtain better sensitivity,
avoid placing the sensor in line with occupant path,
if possible.
The closer the movement is to the sensor, the more
sensitive the sensor is. The higher the sensor is
installed, the larger movement is required to be
detected.
Ensure to place the sensor at least at 1.5m (5 ft.)
away from air supply ducts as rapid air flow may
cause false activations.
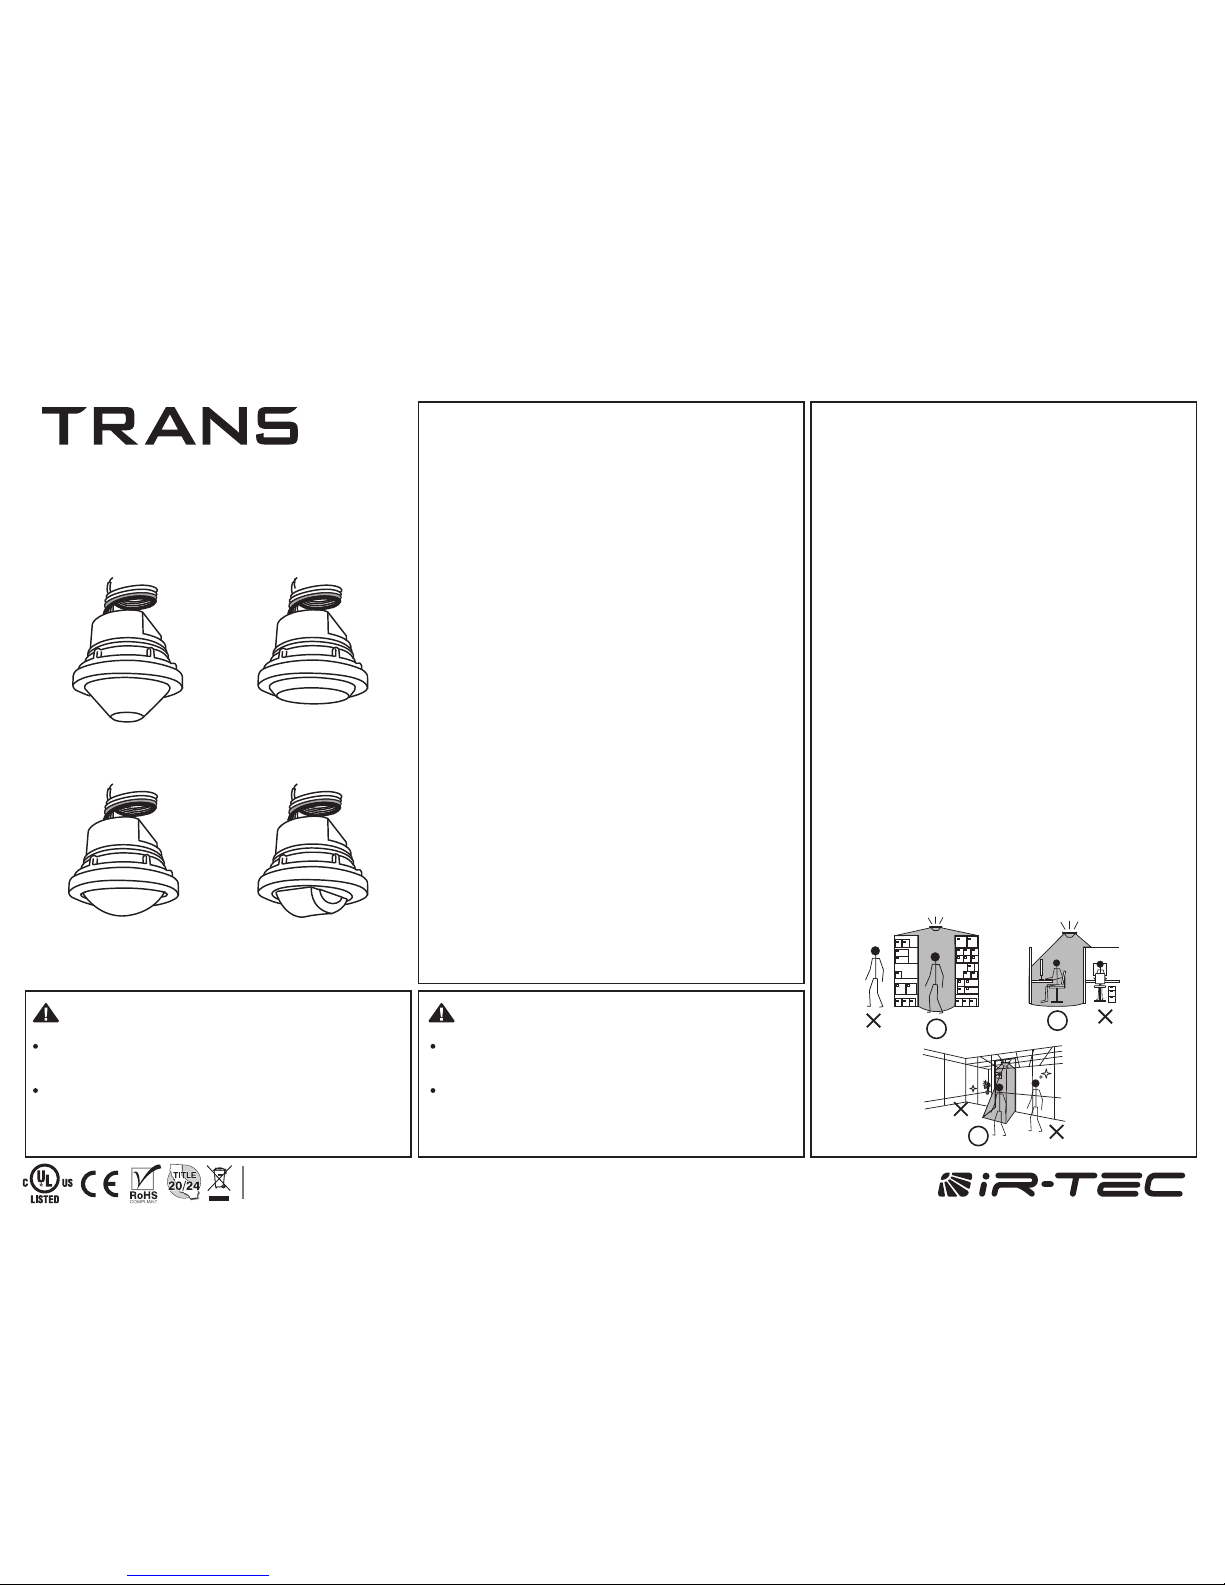
The sensor cannot “see” the movements behind
obstacles, such as furniture, shelf, glass or
partitions. As a general rule, each occupant should
be able to clearly view the senor unit.
For open office areas with partition which could
block the sensor view to occupant movements, it is
best to place the sensors over the intersection of
multiple workstations. For large areas of open office
or space, place multiple sensors so that there is
overlap coverage with each adjacent sensor.
1.
2.
3.
4.
5.
Ouvrir Type commutateurs optoélectroniques
Risk of Electric Shock - Disconnect power supply before
servicing.
Do NOT touch the square window of infrared sensor under
the lens assembly.
Open Type Photoelectric Switches.
The LOD-509 series member of the TRANS family is a line
voltage occupancy sensor featuring SmartDIM control to the
lighting with 0-10V dimmable ballast or driver. SmartDIM is a
state-of-the-art continuous dimming control technology
developed by IR-TEC, which is capable of maintaining the
overall ambient light level with the preset range through a
smooth continuous dimming control to the connected
lighting. The LOD-509 is designed to provide multi-mode
occupancy sensing based continuous dimming control, ease
of use, and the simplest installation.
This sensor will turn on the connected lighting to the preset
SmartDIM level when it detects the presence of an occupant
or vehicle, and switch off or to 1/2 of SmartDIM level (as per
mode selected) after the area is vacant for a period of time.
The LOD-509 offers 8 selectable control modes via a rotary
DIP switch setting. Additionally, 7 different delay times can
be easily and accurately set via Accu-Set digital potentiom-
eter. The SmartDIM level can be manually adjusted to
provide consistent lighting as required. An exclusive Hybrid
Switching technology makes this sensor ideal to control
lighting with exceptionally high inrush current (HIC) while
switching on, such as multiple LED or CFL lights connected
in parallel.
Like all sensors in the TRANS family, the LOD-509 series is
available with various mounting options and interchangeable
lenses. This provides a second-to-none design and complete
installation flexibility. The sensor is designed to operate in
the coldest of environments, down to -40°C/°F.
P/N: 058-50905-004 Printed in Taiwanwww.irtec.com
This product may be covered by one or more U.S. patents or patent applications.
Please visit www.irtec.com for more information.
CAUTION PRUDENCE
Line Voltage SmartDIM Occupancy Sensor
LOD-509 series
INSTALLATION INSTRUCTIONS
w/Lens A/B/C w/Lens D
w/Lens Gw/Lens F

WIRING DIAGRAM
SPECIFICATIONS
www.irtec.com
LOD-509
DIM
L N
Neutral
Line
DIM
DIM N L
Gray
Violet
Red
White
Black
LIGHT SOURCE
BALLAST
LED DRIVER
The LOD-509 series features 8 different control modes for
selection via rotary DIP switch. Please refer to the following
table for selecting the control mode.
MODE (Control mode selection)
TESTING
The SmartDIM level of each sensor is factory set at maximum
position. If necessary, the SmartDIM level can be decreased
by adjusting the potentiometer (DIM) counterclockwise. To
achieve proper lighting level, avoid setting the SmartDIM
when the space is having abundant daylight.
NOTE: If the ambient light level exceeds 2X of SmartDIM level
for more than 20 minutes, the sensor may switch off the light
even under occupancy.
SmartDIM setting
The sensor provides 7 different times via pointing the TIME
potentiometer to different positions (as above table). It is
the time period that sensor will activate SmartDIM control to
the connected light, starts from detecting the presence of
an occupant and ends if no movement is detected before
the time elapsed.
TIME setting
Remove the lens. Set the arrow of TIME potentiometer
pointing at position “1” (TEST) and MODE switch at the
desired control mode.
Walk within the expected range* at normal speed. The
sensor will switch ON (ALS and SmartDIM disabled) the
light for 10 seconds whenever sensor detects the
movement, and then switch OFF or dim to 1/2 output for 10
seconds as per the selected mode. The LED of sensor will
also blink to indicate every motion detected.
After testing complete, ensure to set the TIME
potentiometer to the position of desired time. NOTE: The
sensor will automatically control the light as per the
selected mode with factory set time delay (10 minutes) if
the TIME potentiometer has NOT been set to other position.
1.
2.
3.
*
The coverage may vary with the lens type and mounting height
applied. Refer to the attached LENS DATASHEET for more details.
SENSOR SETTINGS
MODE
AB
C
G
F D
E
H
T 3’ 5’ 10’ 15’ 30’20’
TIME
1 2
3
4 5 6 7
POS.
MODE
AB
C
F D
E
G
H
TIME DIM
45
1
26
7
3
(Factory set)
TIME
(10 minutes) (Max)
DIM
(OSLATO)
45
1
26
7
3
Factory Set
NOTE:
1. The driver/ballast MUST be 0-10V dimmable to achieve
dimming control.
2. Ensure connection of LINE and NEUTRAL are not reversed
to avoid damaging the sensor.
3. Ensure TOTAL isolation between DIM+/DIM- and GROUND
to avoid damaging the sensor.
4. Conduct test with GROUND connected.
To verify sensor control function normal, please proceed with
the instructions as below to conduct test;
Mode Sensor Control Description
A
(ON/OFF)
1. Ambient light sensor is disabled.
2. Turn the light to full-ON as per TIME set under occupancy.
3. Turn off the light after the delay time elapsed.
B
(OSO)
1. Ambient light sensor is disabled.
2. SmartDIM controls whenever sensor detects occupancy.
3. Dim to 1/2 of SmartDIM level after delay time elapsed.
C
(OSLA)
1. ALS inhibits lighting while ambient light > 50 lux.
2. Dim the light to 1/2 of SmartDIM if ambient light < 20 lux.
3. SmartDIM control as per TIME set under occupancy.
D
(OSMA)
1. ALS inhibits lighting while ambient light > 80 Lux.
2. Dim the light to 1/2 of SmartDIM if ambient light < 50 lux
3. SmartDIM control as per TIME set under occupancy.
E
(OSHA)
1. ALS inhibits lighting while ambient light > 130 lux.
2. Dim the light to 1/2 of SmartDIM if ambient light < 80 lux
3. SmartDIM control as per TIME set under occupancy.
F
(OSLATO)
1. ALS inhibits lighting while ambient light > 50 lux.
2. SmartDIM control as per TIME set under occupancy if
ambient light < 20 lux. Dim the light to 1/2 of SmartDIM level
for 10 min. as Time Off.
3. Turn to SmartDIM control as per TIME set if sensor detects
occupancy during Time Off. Turn off the light if no occupancy
detected during TO.
G
(OSMATO)
1. ALS inhibits lighting while ambient light > 80 lux.
2. SmartDIM control as per TIME set under occupancy if
ambient light < 50 lux. Dim the light to 1/2 of SmartDIM level
for 10 min. as Time Off.
3. Turn to SmartDIM control as per TIME set if sensor detects
occupancy during Time Off. Turn off the light if no occupancy
detected during TO.
H
(OSHATO)
1. ALS inhibits lighting while ambient light > 130 lux.
2. SmartDIM control as per TIME set under occupancy if
ambient light < 80 lux. Dim the light to 1/2 of SmartDIM level
for 10 min. as Time Off.
3. Turn to SmartDIM control as per TIME set if sensor detects
occupancy during Time Off. Turn off the light if no occupancy
detected during TO.
Power supply
Infrared sensor
Photo sensor
HIC protection
Dim control
Detectable speed
Mounting height
Detection range
Delay time setting
Time-off delay
Op. humidity
Op. temperature
Dimensions
100/120/230/277VAC, 50/60 Hz
Omni-directional quad element pyroelectric
Digital ambient light sensor
Max. 80A for 16.7msec.
0-10V, non-isolated, max. 25 mA
0.15 ~ 3 m/sec. (0.5~10 ft./sec.)
Subject to the lens applied
As per lens applied and mounting height
T/3/5/10/15/20/30 min., T: 10 sec.
10 min., OSxATO modes only
Max. 95% RH
-40°C~70°C (-40°F~158°F)
Ø60 x H37mm (Ø2.36”x H1.45”)
*Max load for operating temperature at 55°C~70°C (131°F~158°F)
100-120VAC
800/*500W(VA)
800/*500W(VA)
540/*500VA
5A
5A
5A
230VAC
1200/*750W(VA)
1200/*750W(VA)
1200/*750VA
277VAC
Maximum Load
-Incandescent/Halogen
-Fluorescent Ballast/CFL
-Ballast Electronic (LED)
NOTE: Ensure to set the DIP switch at “click” position while
setting the control mode.
Table of contents
Other trans Accessories manuals


