Trantec S3.2 User manual

Specifications:
RF Frequency: Single Fixed Frequency between 165 and 230MHz
on a 25kHz spacing
Transmitter:
RF Output Impedance 50Ω
Modulation: Direct FM
Beltpack Audio Input: 4 Pin Lemo Connector, Input level adjustable by user gain control
Pin 1 Ground; Pin 2 +9v; Pin 3 Audio/+9v; Pin 4 Audio
Handheld Head Type: Dynamic
Battery: 9v PP3 Alkaline, Life Expectancy > 10 Hours
Receiver:
RF Sensitivity: < 1µV for 12dB/Sinad
IF Bandwidth: 100kHz (IF 10.7MHz)
Audio Output: Unbalanced on 0.25” Jack, -∞ to -4dBm (Variable), Impedance 10kΩ
Power Supply: 12-18v DC, 250mA via external AC power adaptor
Guarantee:
All Trantec products are guaranteed for a period of one year from date of purchase against defects in
materials and workmanship. In the event of a claim under guarantee the system should be returned to your
dealer in its original packaging and with proof of purchase. Defects caused by modification, misuse or
accident are not covered by the guarantee.
Due to our continual policy of research and development we reserve the right to alter specifications without
prior notice.
Trantec Systems Tel: +44 (0)20 8330 3111
BBM Electronics Group Ltd Fax: +44 (0)20 8330 3222
Kestrel House
Morden Web: www.trantec.co.uk
Surrey
SM4 4LP
© BBM Electronics Group 2000
S3.2 Diversity
Radio Microphone Systems
Operating Instructions
General Operating Guidelines:

Thank you for purchasing your Trantec S3.2 diversity system. The set up procedure for the system is
detailed in these instructions and if followed will ensure your complete satisfaction with the product.
Always try to locate the receiver as close as possible to the transmitter, as this minimises the chance of
there being any drop out. Although this is most unlikely with a diversity system, the greater the transmitting
range, the greater the chance of problems. Always try to ensure a line of sight signal path between the
transmitter and receiver - obstacles such as walls can significantly reduce the radio signal strength. If you
are using more than one system simultaneously, ensure they are all on different frequencies. It is wise to
avoid placing the receiver near to computer or mobile telephone equipment, as this can create unwanted
radio interference. As emphasised in these instructions, always operate any radio microphone system with
its antennas fully extended. Always test a radio microphone system in the location where it is to be used
by doing a ‘walk test’. This is where the system is tested as the transmitter is walked around the area in
which it is to be used. This will normally show up any problem areas, allowing you to try a new receiver
location. By adjusting the location of the receiver, or even just the alignment of its antennas, it should be
possible to obtain trouble free operation over the desired area, provided that it is not too large to exceed the
transmitter’s range, which is typically around 100m.
Handheld Transmitter:
Setting Up:
To insert a battery, slide the microphone’s collar round and slide down the body to reveal the battery
compartment. Insert the battery observing the correct polarity.
Switch on the microphone using the switch on its base. The LED will light up if the battery is good. Note
that the LED will extinguish when the battery needs replacing.
Beltpack Transmitter:
Setting Up:
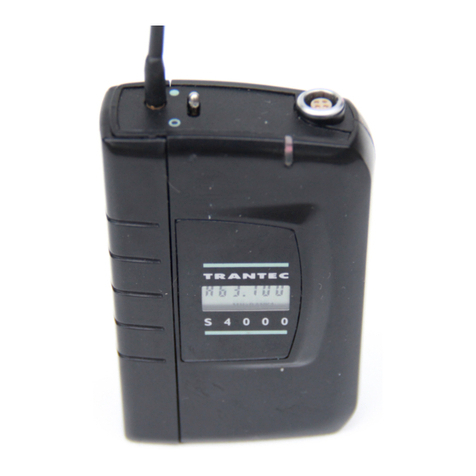
Attach the external antenna and lapel microphone to the top of the beltpack.
To insert a battery, slide the side of the beltpack up and place the battery in the compartment observing
the correct polarity.
Switch on the beltpack using the switch on the top. The LED will light up if the battery is good. Note that
the LED will extinguish when the battery needs replacing.
If necessary slide down the side of the beltpack and locate the audio gain control. Adjust this to set the
audio gain as required, using the AF PEAK indicator on the receiver as guide.
Diversity Receiver:
Setting Up:
Fully extend the two attached antennas, and if possible set them with an angle of 90 degrees between
them, giving an angle of 45 degrees between each antenna and the horizontal.
Connect the power adapter to the rear panel and link the audio output to your mixer or PA system.
The POWER LED will light up. If you have a transmitter on the same frequency as the receiver, then more
LEDs may light up. These are explained in more detail in the next section.
An Explanation of the Front Panel:
When the receiver is muted, only the POWER LED will light up. When receiving, more LEDs are lit up as
follows:
RF LEVEL The strength of the received RF signal is indicated on these 4 LEDs.
AThis LED will be lit when the receiver is using antenna A to receive.
BThis LED will be lit when the receiver is using antenna B to receive.
AF PEAK This LED will be lit to indicate that the level of the received audio signal is
above +3dB.
Setting The Mute Level:
The mute level can be adjusted if the receiver is picking up unwanted radio signals (due to intermodulation
and other FM signals). In order to make this adjustment, the transmitter must be switched off. The
receiver should now be muted. If it is not, then slowly adjust the MUTE LEVEL control until all unwanted
signals are muted. Once you have done this, switch the transmitter back on and check its operation.
Optimising the Gain of your system:
In order to achieve the best possible audio performance from your radio system, it is worth spending a few
minutes setting the optimum gain level. If using a beltpack system then first adjust the gain of your
transmitter. The optimum setting for this will be found by first adjusting the transmitter gain so that the AF
PEAK LED on the receiver just illuminates for the loudest signal that is likely to be transmitted. The gain
should then be decreased slightly so that the LED never lights in normal operation. If the LED is lit, then
distortion is likely. The optimum setting will vary according to who is using the microphone and how close
the microphone is placed to the mouth. Note that the transmitter gain for the handheld transmitter is
factory optimised.
Once the transmitter gain is optimised, it is necessary to match the receiver’s output gain to your mixing
desk or PA system. Adjust the GAIN control to give the optimum level for your system. Adjusting this too
high may cause distortion.
Other Trantec Receiver manuals


