©2011TranzeoWirelessTechnologies.Allrightsreserved.TR2063Rev.1.0
ForTechnicalSupport,pleasecallourToll‐Freenumber1‐888‐460‐6366inNorthAmerica,or+1‐604‐460‐6002outsideof
North
America.Ourtechnicalsupportteamis
alsoavailablevia
onlineLiveChatorbyemailat[email protected].MX55Series
QuickInstallaonGuide
3.Installaon
a.Unpacktheboxandensurethatallitemslistedonthe
previouspageareincluded.Ifanyoftheitemsismissing
ordamaged,pleasecontactyourlocaldealerforsupport.
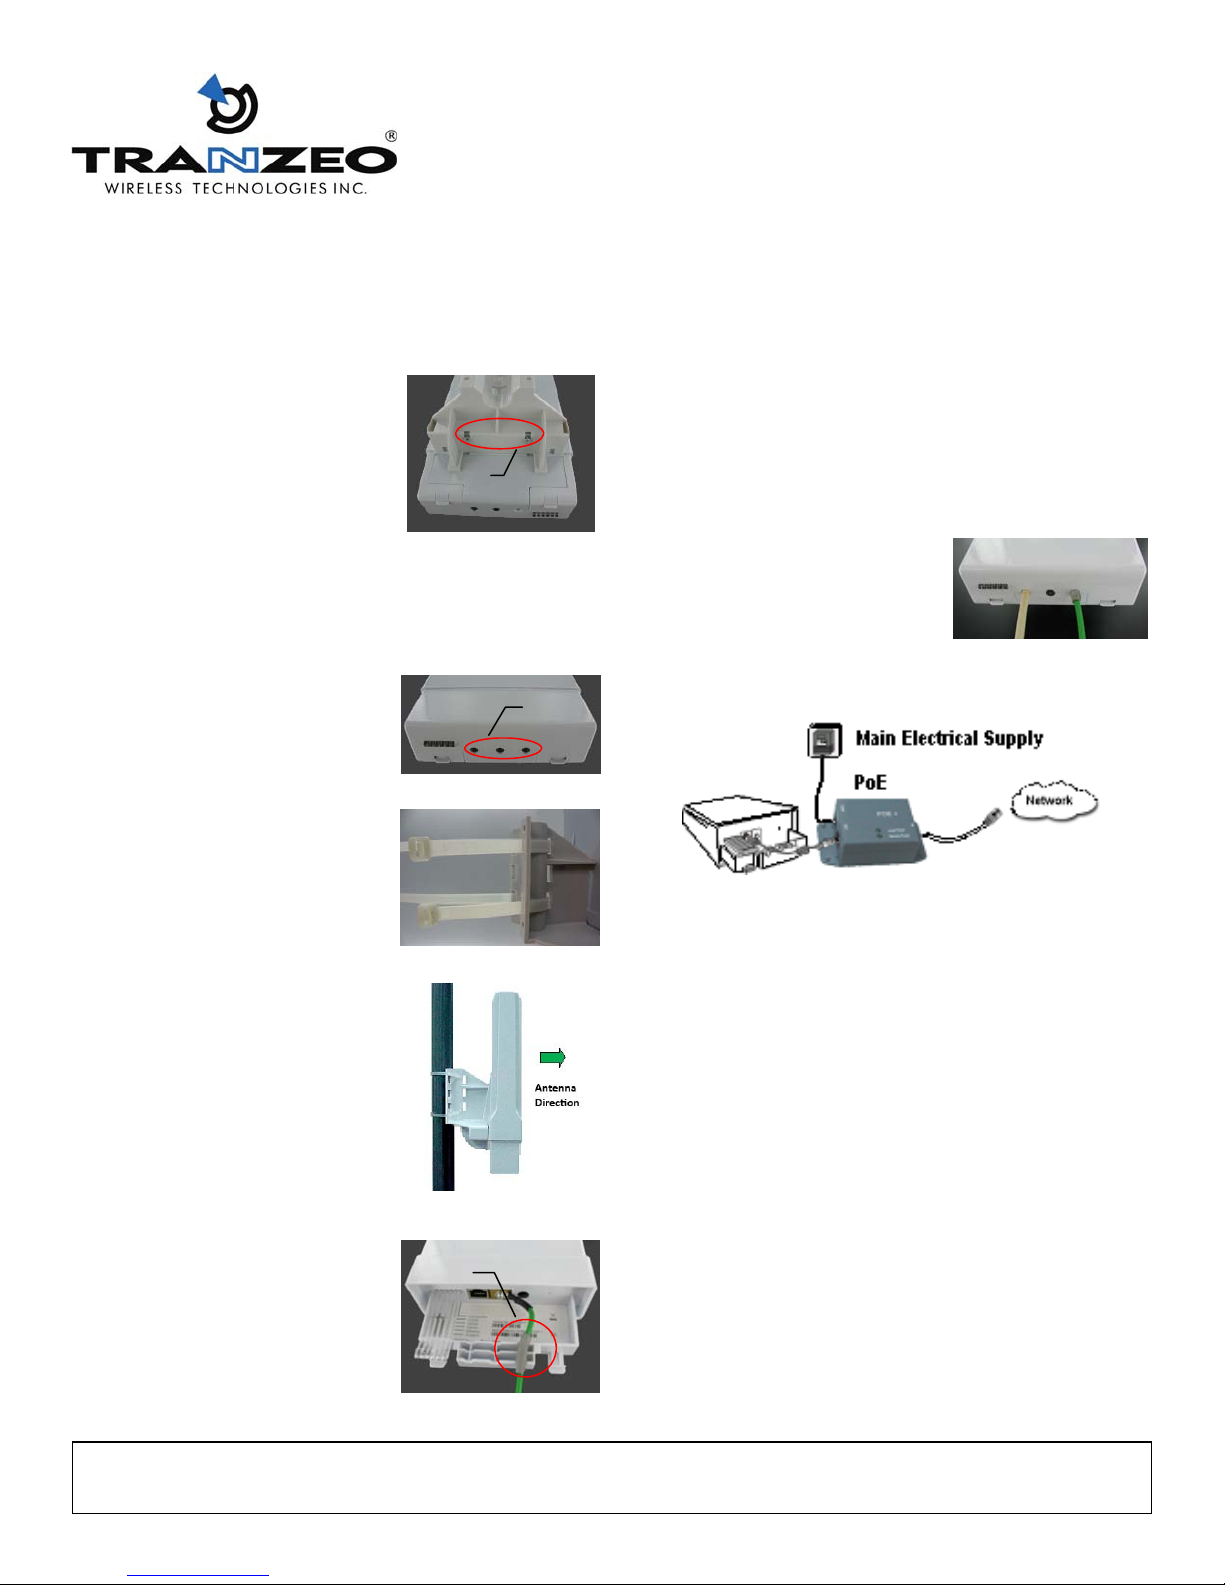
b.Snapinmounngbracketand
secureusingtheprovidedtwo
screwsasshowninthepicture
c.Carefullyremovetheboomcoverbyreleasingboth
latchesattheboomofthecoverwithyourindexfingers
simultaneously,whileslidingthecoverdownwithyour
thumbs.
IMPORTANT:Keepthe3rubber
plugsinasafeplace,soyoucould
usethemlatertosealunused
cableopeningswhencompleng
theinstallaon.
d.Loopthe2nylonzipesthrough
thetopandboomslotsofthe
mounngbracketasshowninthe
picture.
e.Posiontheradiointheupright
posionagainstthepoleand
pointitintheproperdirecon,
thenwrapthezipesaround
poleandghten.
NOTE:Usethesignalstrength
LED’sorRSSIreadingintheweb
interfacelatertofinetune
antennaalignment.
f.Connect12AWGwirefromground
terminaltoearthground.
IMPORTANT:Wraponelayerof
self‐galvanizingtapearoundthe
groundwiretosealtheopening
whenusingasmallergaugewire.
Plugs
Screws
Tape
g.ConnectoneendoftheEthernetcabletotheradio’s
Ethernetport,andtheotherendtotheOUTportofthe
PoEinjector.
NOTE:EnsurethatthetotallengthoftheEthernetcable
betweentheradioandthePCornetworkdoesn’texceed
100m(300).
h.ConnecttheINportofthePoEinjectortoyourPCor
network.
i.Placetherubberplugsinunused
openings,thengentlyslidethe
coverbackonunlitsnapsinto
place.
J.ConnectthePoEinjectortothepowersupplyusingthe
suppliedDCadapter.
4.WebAccess
a.EnterthedefaultIPaddressintheaddressbarofyourweb
browser,thenpressenter.
DefaultAPaddress:192.168.168.1
b.Whenprompted,enterthedefaultusernameand
password.
Defaultusername:admin
Defaultpassword:password
NOTE:YoumayneedtochangetheIPsengsonyour
PC,soit’sonthesamesubnetasthedefaultIPaddressof
thedevice.SetyourPC’sIPaddresstoanyvalueinthe
rangeof192.168.168.1to192.168.168.254(except
192.168.168.1)andnetmaskto255.255.255.0.
c.PleaserefertotheUser’sManualfordetailsonhowto
configureyourdeviceusingthewebinterface.


