TrekStor i.Gear lumio User manual

DE
SE
IT
EN
ES
FR
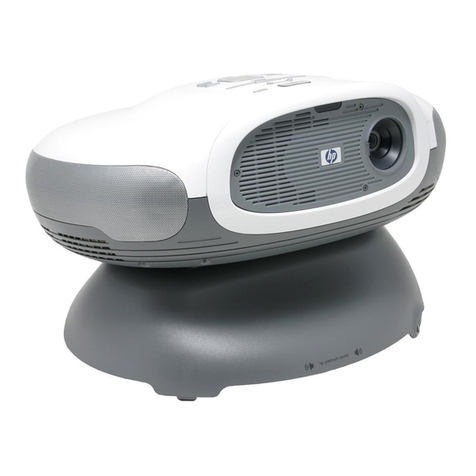
i.Gear lumio
Mini Projector for iPhone®
4
|
4S

INDEX
DE ………………………………………………………………… 4
EN ………………………………………………………………… 8
IT ………………………………………………………………… 12
ES ………………………………………………………………… 16
SE ………………………………………………………………… 20
FR ………………………………………………………………… 24

CHARGE OFF/ON
FOCUS
A
BH
C
D
E F G

DE 4
bBEDIENUNGSANLEITUNG
Wir gratulieren Ihnen zum Kauf des TrekStor i.Gear lumio und sind
sicher, dass Sie viel Freude mit diesem Produkt haben werden. Bitte
lesen Sie die folgenden Abschnitte aufmerksam durch, damit Sie die
Funktionen dieses Produkts und seine Bedienung kennenlernen.
Aktuelle Produktinformationen finden Sie auf der TrekStor Website
www.trekstor.de.
Lieferumfang
• TrekStor i.Gear lumio
• USB 2.0-Kabel (USB-A auf mini-USB)
• Bedienungsanleitung
1) Bedienelemente und Anschlüsse des TrekStor
i.Gear lumio
A) Linse
B) Fokussierrad zur Scharfstellung
C) Lautstärkeregelung (, /;)
D) 30-Pin-Anschluss
E) Lade- bzw. Ein-/Ausschalter
F) LED-Anzeige
G) USB-Anschluss
H) Lautsprecher
2) Bedienung des TrekStor i.Gear lumio
Laden des TrekStor i.Gear lumio
a) Schließen Sie den i.Gear lumio über das mitgelieferte USB-Kabel
an einen USB-Anschluss Ihres Computers an.
b) Die LED-Anzeige leuchtet rot, wenn der i.Gear lumio gerade
geladen wird. Ist das Gerät vollständig geladen, leuchtet die
LED-Anzeige grün.
c) Wenn der Akku schwach ist und der i.Gear lumio geladen werden
muss, blinkt die LED-Anzeige blau.

DE
5
iSie können den i.Gear lumio auch über einen geeigneten USB-Adapter
(z. B. TrekStor USB-Charger e.m) laden (nicht im Lieferumfang enthalten).
iLaden Sie vor der ersten Benutzung den i.Gear lumio komplett auf
(Ladedauer zwischen 3 und 5 Stunden).
iDie maximale Akkulaufzeit wird erst nach ca. 10 Ladezyklen erreicht.
Verbinden des TrekStor i.Gear lumio mit dem iPhone® 4/4S
Schieben Sie das iPhone® 4/4S mit der Anschlussseite nach unten
vorsichtig von oben nach unten auf den 30-Pin-Anschluss des
i.Gear lumio.
Einschalten des TrekStor i.Gear lumio
a) Nachdem Sie die Geräte miteinander verbunden haben, können Sie
nun den i.Gear lumio einschalten, indem Sie den Ein-/Ausschalter
nach rechts schieben und so lange gedrückt halten, bis die
LED-Anzeige blau leuchtet. Gleichzeitig wird das voreingestellte
Projektionsbild über die Projektorlinse ausgegeben.
b) Wählen Sie an Ihrem iPhone® 4/4S das gewünschte Video oder
Bild, das Sie zeigen möchten, aus und spielen dieses wie gewohnt
ab. Der i.Gear lumio projiziert nun automatisch das Bild auf die
Fläche, auf die er gerichtet ist.
aSchauen Sie nicht direkt in das Objektiv des eingeschalteten Projektors,
um Augenverletzungen zu vermeiden. Richten Sie das Projektionsbild
auch nicht in das Gesicht anderer Personen.
aFassen Sie nicht direkt auf die Linse, um Verschmutzungen zu
vermeiden.
iUm die beste Projektionsqualität zu erreichen, positionieren Sie den
i.Gear lumio in einer dunklen Umgebung gerade ausgerichtet auf eine
möglichst helle, ebene Wand.
iBitte beachten Sie, dass nicht alle Dateiformate, die Sie über Ihr iPhone® 4/4S
anschauen/abspielen können, auch über den i.Gear lumio ausgegeben
werden können. Die Anzeige von Power Point Präsentationen über den
i.Gear lumio ist mit speziellen Programmen (Apps) möglich.

DE 6
Einstellen der Lautstärke
Vergewissern Sie sich, dass die Lautstärke Ihres iPhone® 4/4S auf die
höchste Stufe gestellt ist. Anschließend können Sie die Laustärke am
i.Gear lumio über die Tasten , bzw. ;weiter einstellen.
Einstellen der Bildschärfe
Drehen Sie so lange am Fokussierrad, bis Sie den gewünschten
Schärfegrad erreicht haben.
iAchten Sie bitte darauf, dass Sie das Fokussierrad nur bis zum Anschlag
in eine Richtung drehen können.
Ausschalten des TrekStor i.Gear lumio
Zum Ausschalten des i.Gear lumio schieben Sie erneut den Ein-/Ausschalter
nach rechts. Halten Sie den Schalter so lange gedrückt, bis sich das
Gerät abschaltet bzw. die blaue LED erlischt.
Laden des iPhone® 4/4S über den TrekStor i.Gear lumio
iSie können den i.Gear lumio als Aufladestation für Ihr iPhone® 4/4S
benutzen.
iStellen Sie sicher, dass Sie den i.Gear lumio vollständig aufgeladen
haben.
a) Schieben Sie Ihr iPhone® 4/4S in den i.Gear lumio.
b) Schieben Sie anschließend den Ein-/Ausschalter nach links in die
"CHARGE"-Position.
c) Während das iPhone® 4/4S geladen wird, leuchtet die LED-Anzeige
des i.Gear lumio rot.

DE
7
Sicherheits- und Verwendungshinweise:
dTechnische Arbeiten an dem Produkt dürfen nur von entsprechend qualifizierten
Personen durchgeführt werden. Das Produkt darf weder geöffnet werden noch
dürfen Änderungen daran vorgenommen werden. Die Komponenten können
nicht vom Nutzer gewartet werden.
eSetzen Sie das Gerät niemals Feuchtigkeit, Kondenswasser und Nässe aus.
jSchützen Sie das Gerät vor extrem hohen und niedrigen Temperaturen und
Temperaturschwankungen.
mStellen Sie das Gerät nicht in der Nähe einer Wärmequelle auf und schützen
Sie es vor direkter Sonneneinstrahlung.
hAchten Sie bei der Verwendung und Lagerung des Geräts auf eine möglichst
staubfreie Umgebung.
gDie Reinigung der Oberfläche des Geräts darf niemals mit Lösungsmitteln,
Farbverdünnern, Reinigungsmitteln oder anderen chemischen Produkten erfolgen,
nutzen Sie stattdessen ein weiches, trockenes Tuch bzw. einen weichen Pinsel.
Achtung LED der Klasse 2! Optische Strahlung. Nicht in den Strahl blicken!
EN 62471:2008.Bitte blicken Sie niemals direkt in die LED und richten Sie den
Lichtstrahl nicht direkt auf Menschen oder Tiere um Verletzungen der Augen zu
Vermeiden. Die Blinkfunktion der Taschenlampe darf nicht in Gegenwart von
Personen, die unter Reflex-Epilepsie (Fotosensibilität) leiden, benutzt werden.
iPhone is a trademark of Apple Inc., registered in the U.S. and other countries.
Der Hersteller behält sich das Recht vor, das Produkt ständig weiter zu entwickeln.
Diese Änderungen können ohne direkte Beschreibung in dieser Bedienungsanleitung
vorgenommen werden. Informationen in dieser Bedienungsanleitung müssen somit
nicht den Stand der technischen Ausführung widerspiegeln.
Der Hersteller garantiert nur die Eignung für die eigentliche Bestimmung dieses
Produktes. Weiter ist der Hersteller nicht für Beschädigungen oder Verlust von Daten
und deren Folgeschäden verantwortlich.
Copyright © 2011 TrekStor GmbH. Alle Rechte vorbehalten. Bei weiteren erwähnten
Produkt- oder Firmenbezeichnungen handelt es sich möglicherweise um Warenzeichen
oder Markennamen der jeweiligen Inhaber.

EN 8
bUSER MANUAL
Thank you for buying the TrekStor i.Gear lumio. We are confident that
this product will be the source of much enjoyment. Please read the
following instructions carefully so that you can become acquainted
with the functions of this product and its use.
Current product information can be found at the TrekStor Website
www.trekstor.de.
Package contents
• TrekStor i.Gear lumio
• USB 2.0 cable (USB-A to mini-USB)
• User manual
1) Controls and connections of the TrekStor i.Gear lumio
A) Lens
B) Fine-tuning focus wheel
C) Volume control (, /;)
D) 30-pin connector
E) Charge/Power button
F) LED indicator light
G) USB port
H) Loudspeaker
2) Operating the TrekStor i.Gear lumio
Charging the TrekStor i.Gear lumio
a) Connect the i.Gear lumio via the included USB cable to a USB port
of your computer.
b) The LED indicator lights red to indicate that the i.Gear lumio is
currently loaded. The LED light reverts to green when the i.Gear
lumio is fully charged.
c) The LED display will rapidly flash blue when the battery of the
i.Gear lumio is low.

EN
9
iYou may also charge the i.Gear lumio via a suitable USB adapter
(e. g. TrekStor USB-Charger e.m) (not included in the delivery).
iFully charge the battery of the i.Gear lumio before its first use
(approx. 3 to 5 hours).
iThe maximum operating time can be reached only after
approximately 10 battery charging cycles have been completed.
Connecting the TrekStor i.Gear lumio with the iPhone® 4/4S
Slide your iPhone® 4/4S with the connection side facing down carefully
straight down onto the 30-pin connector of the i.Gear lumio.
Switching on the TrekStor i.Gear lumio
a) After you have connected both devices, you can now power on
the i.Gear lumio by pushing the power switch to the right and
hold until the LED display illuminates blue. Simultaneously, the
preset projection image is emitted from the projector's lens.
b) You may now choose the video or picture you would like to view
from the menu on your iPhone® 4/4S and play it as you normally
would. The i.Gear lumio automatically projects the picture onto
the surface to which it is directed.
aDo not look directly into the lens of the projector when it is turned on,
in order to prevent eye injuries. Do also not point the projected image
on the face of other people.
aDo not touch directly on the lens to avoid contamination.
iTo achieve the best projection quality, position the i.Gear lumio in
a dark environment precisely aligned to a bright, flat wall.
iPlease note, that not all file formats, which you can play-back with
your iPhone® 4/4S, can as well be emitted via the i.Gear lumio.
The display of Power Point presentations over the i.Gear lumio
is possible with special programs (apps).

EN 10
Adjusting the volume
Ensure that the volume of your iPhone® 4/4S is set at its highest setting.
Then adjust the volume on the i.Gear lumio via the buttons ,or ;.
Adjusting the focus
Roll the focus wheel to fine-tune the picture.
iPlease note, that you roll the focus wheel only until it stops.
Switching off the TrekStor i.Gear lumio
To switch off the i.Gear lumio, push again the power switch to the
right. Hold the button until the device switches off resp. until the blue
LED turns off.
Charging the iPhone® 4/4S via the TrekStor i.Gear lumio
iYou can use the i.Gear lumio as charging station for your iPhone® 4/4S.
iMake sure, that the i.Gear lumio is fully charged.
a) Slide your iPhone® 4/4S inside the i.Gear lumio.
b) Slide the power switch to the left into the "CHARGE" position.
c) While the iPhone® 4/4S is charged, the LED display of the i.Gear lumio
illuminates red.

EN
11
Instructions for safety and use:
dOnly qualified persons may perform technical work on the product. The product
may not be opened or changed. The components cannot be serviced by the user.
eNever expose the device to moisture, condensation and liquids.
jProtect the device from extremely high and low temperatures and temperature
fluctuations.
mNever place the device close to a source of heat, and protect it from direct
sunlight.
hMake sure that the surroundings are as dust-free as possible when you use and
store the device.
gNever clean the surface of the device with solvents, paint thinners, cleansers or
other chemical products. Instead, use a soft, dry cloth or soft brush.
Caution LED class 2! LED radiation! Don’t stare into beam. EN 62471:2008.
Please do not look directly into the LED and direct the light beam not directly at
people or animals in order to avoid violations of the eyes. The flash function of
the flashlight should not be used in the presence of persons suffering from reflex
epilepsies (Photosensitivity).
iPhone is a trademark of Apple Inc., registered in the U.S. and other countries.
The manufacturer retains the right to continually improve the product. These changes
may be made without being directly described in these operating instructions. For this
reason, the information provided in these operating instructions may not reflect the
current state of the art.
The manufacturer only guarantees suitability for the product's intended purpose.
In addition, the manufacturer is not responsible for damages or loss of data and
subsequent consequences.
Copyright © 2011 TrekStor GmbH. All rights reserved. Other cited product or company
names may be trademarks or brand names of the respective owner.

IT 12
bMANUALE DELL'UTENTE
Congratulazioni per l'acquisto del TrekStor i.Gear lumio. Siamo sicuri
che vi divertirete a usare questo prodotto. Si prega di leggere
attentamente le seguenti sezioni in modo da conoscere le
funzioni di questo prodotto ed il suo uso.
Per informazioni aggiornate sul prodotto fare riferimento al sito web
TrekStor www.trekstor.de.
Contenuto della confezione
• TrekStor i.Gear lumio
• Cavo USB 2.0 (da USB-A a mini-USB)
• Manuale dell'utente
1) Controlli e connettori del TrekStor i.Gear lumio
A) Lente
B) Manopola per la regolazione della nitidezza
C) Regolazione del volume (, /;)
D) Connettore a 30 pin
E) Interruttore di caricamento, accensione e spegnimento
F) Indicatore a LED
G) Porta USB
H) Altoparlante
2) Comando del TrekStor i.Gear lumio
Caricare il TrekStor i.Gear lumio
a) Collegare il i.Gear lumio con il cavo USB fornito in dotazione alla
porta USB del vostro computer.
b) L'indicatore di LED si illumina di rosso, per indicare che il i.Gear lumio
è in ricarica. Quando l'apparecchio è completamente ricaricato,
l'indicatore di LED si illumina di verde.
c) Se la batteria è quasi scarica e il i.Gear lumio deve essere ricaricato,
l'indicatore LED lampeggia di blu.

IT
13
iL'i.Gear lumio può essere ricaricato anche con un adattore USB adatto
(ad es. TrekStor USB-Charger e.m) (non fornito in dotazione).
iÈ preferibile caricare completamente il i.Gear lumio prima dei primi
utilizzi (tempo di caricamento tra 3 e 5 ore).
iLa durata massima della batteria si raggiunge solo dopo 10 cicli
di ricarica.
Collegare il TrekStor i.Gear lumio con l'iPhone® 4/4S
Inserire l'iPhone® 4/4S con cautela con il connettore rivolto verso il
basso da sopra a sotto sul connettore a 30 pin del i.Gear lumio.
Accensione del TrekStor i.Gear lumio
a) Dopo aver collegato gli apparecchi l'uno all'altro è possibile
accendere il i.Gear lumio, spostando l'interruttore di accensione
e spegnimento a destra tenendo premuto fin quando l'indicatore
led lampeggi di blu. Contemporaneamente l'immagine
preimpostata viene proiettata sulla lente del proiettore.
b) Scelga sul suo iPhone® 4/4S il filmato o immagine desiderato
da mostrare e lo riproduci come di solito. Il i.Gear lumio proietta
adesso automaticamente l'immagine sulla superficie su cui
e puntato.
aÈ pregato di non guardare direttamente nell'obiettivo del proiettore
in funzione per evitare lesioni agli occhi. Non punti l'immagine del
proiettore in faccia ad altre persone.
aNon tocchi direttamente la lente per evitare che si sporchi.
iPer ottenere la massima qualità di proiezione, posizionare il i.Gear
lumio in un ambiente buio puntandolo direttamente su un muro
possibilmente chiaro e piano.
iNoti che non tutti i formati di file che possono essere visti/riprodotti
con l'iPhone® 4/4S possono essere riprodotti anche con il i.Gear lumio.
La presentazione dei file di Power Point con il i.Gear lumio è possibile
solo con programmi specifici (applicazioni).

IT 14
Regolare il volume
Assicurarsi che il volume dell'iPhone® 4/4S sia impostato sul livello più
alto. Infine è possibile regolare ancora il volume con il i.Gear lumio
utilizzando i tasti ,ossia ;.
Regolare la nitidezza dell'immagine
Girare la manopola di messa a fuoco fino a raggiungere il grado di
nitidezza desiderato.
iFare attenzione a poter girare la manopola di messa a fuoco solo
fino all'arresto in una direzione.
Spegnimento del TrekStor i.Gear lumio
Per spegnere il i.Gear lumio spingere nuovamente il pulsante di
accensione e di spegnimento a destra. Tenere premuto l'interruttore
fino a quando l'apparecchio si spegne, ossia si spegne il led blu.
Caricare l'iPhone® 4/4S attraverso il TrekStor i.Gear lumio
iIl i.Gear lumio può essere utilizzato anche come ricaricatore per
l'iPhone® 4/4S.
iAssicurarsi che il i.Gear lumio sia stato completamente ricaricato.
a) Inserire l'iPhone® 4/4S nel i.Gear lumio.
b) Premere infine il pulsante di accensione e di spegnimento
a sinistra in posizione "CHARGE".
c) Mentre l'iPhone® 4/4S si ricarica, l'indicatore a led del i.Gear lumio
è acceso di rosso.

IT
15
Indicazioni di sicurezza ed istruzioni per l'uso:
dLe eventuali operazioni sul presente prodotto possono essere eseguite solamente
da personale qualificato. Il prodotto non deve essere aperto né modificato.
I componenti non possono essere riparati da parte dell'utente.
eNon esporre mai l'apparecchio a umidità, condensa e liquidi.
jProteggere l'apparecchio da temperature particolarmente elevate o basse e
dalle variazioni di temperatura. Utilizzare l'apparecchio solo a una temperatura
ambiente compresa tra 10º C e 40º C.
mNon posizionare l'apparecchio in prossimità di fonti di calore e proteggerlo dalla
luce diretta del sole.
hUtilizzare e conservare l'apparecchio in un ambiente il più possibile libero da polveri.
gPer la pulizia della superficie dell'apparecchio non utilizzare mai solventi, diluenti,
detergenti o altri prodotti chimici, bensì un panno morbido e asciutto o un
pennello morbido.
Attenzione, LED classe 2! Emana radiazioni LED! Non fissare il fascio laser.
EN 62471:2008. Non guardare direttamente il LED e non dirigere la luce del fascio
laser verso persone e animali, per evitare danni agli occhi. La funzione torcia non
deve essere utilizzata in presenza di persone affette da epilessia (fotosensibilità).
iPhone is a trademark of Apple Inc., registered in the U.S. and other countries.
Il produttore si riserva il diritto di effettuare ulteriori operazioni di miglioramento del
prodotto in modo costante. Tali modifiche possono essere apportate senza fornirne
una descrizione diretta all'interno delle presenti istruzioni per l'uso. Le informazioni
contenute nelle presenti istruzioni per l'uso non corrispondono necessariamente allo
stato della versione tecnica.
Il produttore garantisce esclusivamente l'idoneità all'uso previsto. Il produttore non è
tenuto a rispondere di eventuali danni o perdite di dati, né di danni secondari da essi
derivanti.
Copyright © 2011 TrekStor GmbH. Tutti i diritti riservati. Per quanto riguarda eventuali
riferimenti a prodotti o aziende, si tratta di marchi di fabbrica o di nomi dei marchi dei
rispettivi proprietari.

ES 16
bMANUAL DE USARIO
Le felicitamos por la compra del TrekStor i.Gear lumio y estamos
convencidos de que estará contento con este producto. Por favor, lea
detenidamente los siguientes capítulos para que se familiarizarse con
las funciones del producto y su manejo.
Encontrará la información actual sobre el TrekStor Liro Color en la
página web www.trekstor.de.
Artículos incluidos
• TrekStor i.Gear lumio
• Cable USB 2.0 (da USB-A en mini-USB)
• Manual de usario
1) Componentes y conectores del TrekStor i.Gear lumio
A) Lente
B) Rueda de enfoque para controlar la nitidez
C) Control de volumen (, /;)
D) Conector de 30 pins
E) Botón de encendido, apagado y carga
F) Indicador LED
G) Conector USB
H) Altavoz
2) Utilización de TrekStor i.Gear lumio
Cargar el TrekStor i.Gear lumio
a) Conecte el i.Gear lumio a una entrada USB de su ordenador
mediante el cable USB suministrado.
b) El indicador LED se pondrá en rojo para mostrar que el i.Gear
lumio se está cargando. Cuando el aparato esté completamente
cargado, el indicador LED se pondrá verde.
c) Cuando le quede poca batería y se deba cargar el i.Gear lumio,
el indicador LED parpadeará en azul.

ES
17
iTambién puede cargar el i.Gear lumio mediante un adaptador USB
apropiado, por ejemplo, TrekStor USB-Charger e.m (no incluido en el
material suministrado).
iAntes de utilizarlo por primera vez, cargue el i.Gear lumio por completo
(tiempo de carga entre 3 y 5 horas).
iLa capacidad máxima de la batería se alcanzará tras 10 ciclos de carga.
Conectar el TrekStor i.Gear lumio con el iPhone® 4/4S
Deslice cuidadosamente el iPhone® 4/4S (lado del conector boca abajo)
de arriba hacia abajo sobre el conector de 30 pins del i.Gear lumio.
Encender el TrekStor i.Gear lumio
a) Tras haber conectado los dispositivos, puede encender el i.Gear
lumio deslizando el botón de encendido/apagado hacia la derecha
y manteniéndolo presionado hasta que el indicador LED esté en
azul. A la vez, la imagen de proyección predefinida saldrá por la
lente del proyector.
b) Seleccione en su iPhone® 4/4S el vídeo o imagen que quiere
mostrar y reprodúzcala del modo habitual. El i.Gear lumio proyectará
automáticamente la imagen sobre la superficie hacia la que esté
orientado.
aNo mire directamente el objetivo del proyector encendido para evitar
daños oculares. Tampoco oriente la imagen de proyección sobre la
cara de otras personas.
aNo toque directamente la lente para evitar que se ensucie.
iPara lograr la mejor calidad de proyección, sitúe el i.Gear lumio en un
entorno oscuro y oriéntelo en perpendicular a una pared tan lisa y
clara como sea posible.
iTenga en cuenta que mediante el i.Gear lumio no se podrán ver todos
los formatos de archivo que el usuario puede reproducir/ver con su
iPhone® 4/4S. Las presentaciones en Power Point se pueden visualizar
mediante el i.Gear lumio con programas especiales (Apps).

ES 18
Definir el volumen
Asegúrese de que el volumen de su iPhone® 4/4S esté al máximo.
A continuación, podrá definir el volumen en el i.Gear lumio mediante
los botones de ,o ;.
Configurar la nitidez
Gire la rueda de enfoque hasta conseguir la nitidez deseada.
iTenga en cuenta que la rueda de enfoque sólo se puede girar en una
dirección hasta el tope.
Apagar el TrekStor i.Gear lumio
Para apagar el i.Gear lumio, vuelva a deslizar el botón de encendido/
apagado hacia la derecha. Mantenga presionado el botón hasta que
se apague el dispositivo o el LED azul.
Cargar el iPhone® 4/4S mediante el TrekStor i.Gear lumio
iPuede utilizar el i.Gear lumio como estación de carga del iPhone® 4/4S.
iAsegúrese de que el i.Gear lumio esté completamente cargado.
a) Deslice el iPhone® 4/4S en el i.Gear lumio.
b) A continuación, deslice el botón de encendido/apagado hacia la
izquierda y póngalo en la posición de "CHARGE"
c) Durante la carga del iPhone® 4/4S, el indicador LED del i.Gear lumio
estará en rojo.

ES
19
Indicaciones de uso y de seguridad:
dSólo personas cualificadas pueden realizar trabajos técnicos con el producto. El
producto no debe de estar abierto ni se deben realizar modificaciones en él. El
usuario no puede realizar el mantenimiento de los componentes.
eNo exponga el aparato a la humedad, agua de condensación ni lo moje.
jProteja el aparato de temperaturas extremas y cambios bruscos de temperatura.
Utilícelo únicamente en un intervalo de temperaturas de ambiente de entre
10ºC y 40ºC.
mNo aproxime el aparato a fuentes de calor y protéjalo de la luz solar directa.
hUtilice y guarde el aparato en un ambiente lo más libre de polvo posible.
gNunca limpie la superficie del aparato con disolventes, diluyentes, detergentes
u otros productos químicos. Utilice en su lugar un paño suave y seco o un pincel
suave.
¡Atención: LED de clase 2! Radiación óptica. ¡No mirar el haz de luz! EN 62471:2008.
No mire nunca directamente el LED y no oriente el haz de luz directamente hacia
personas o animales para evitar daños oculares. La función de centelleo de la
linterna no se puede utilizar en presencia de personas que sufran epilepsia refleja
(fotosensibilidad).
iPhone is a trademark of Apple Inc., registered in the U.S. and other countries.
El fabricante reserva el derecho de continuar desarrollando el producto. Los
consecutivos cambios en el producto pueden realizarse sin que aparezcan descritos
directamente en este manual. Por lo tanto, la información contenida en el presente
manual de usuario puede no coincidir con el estado técnico de la última versión.
El fabricante garantiza el producto únicamente para el uso previsto. Asimismo, el
fabricante no se responsabiliza de daños o pérdidas de datos, ni de daños resultantes
de estos.
Copyright © 2011 TrekStor GmbH. Todos los derechos reservados. Los nombres de otros
productos y empresas aquí citados son probablemente productos y marcas registradas
de sus respectivos propietarios.

SE 20
bANVÄNDARMANUAL
Vi gratulerar till ditt köp av TrekStor i.Gear lumio och vi är säkra på
att du ska få mycket glädje med denna produkt. Läs följande avsnitt
noggrant så att du lär känna funktionerna för denna produkt och
dess användning.
Den aktuella produktinformationen kan du hämta på TrekStors
webbsida www.trekstor.de.
I leveransen ingår
• TrekStor i.Gear lumio
• USB 2.0-kabeln (USB-A på mini-USB)
• Användarmanual
1) Kontroller och anslutningar för TrekStor i.Gear lumio
A) Lins
B) Finjustering, fokushjul
C) Volymkontroll (, /;)
D) 30-stiftskontakt
E) Laddnings-/strömknapp
F) LED-indikatorlampa
G) USB-port
H) Högtalare
2) Använda TrekStor i.Gear lumio
Ladda TrekStor i.Gear lumio
a) Anslut i.Gear lumio via den medföljande USB-kabeln till en
USB-port på din dator.
b) LED-indikatorn börjar lysa rött för att visa att i.Gear lumio för närvarande
är laddas. LED-lampan växlar till grönt när i.Gear lumio är helt laddad.
c) LED-displayen kommer blinka snabbt i blått när batteriet
i i.Gear lumio är lågt
Table of contents
Languages:
