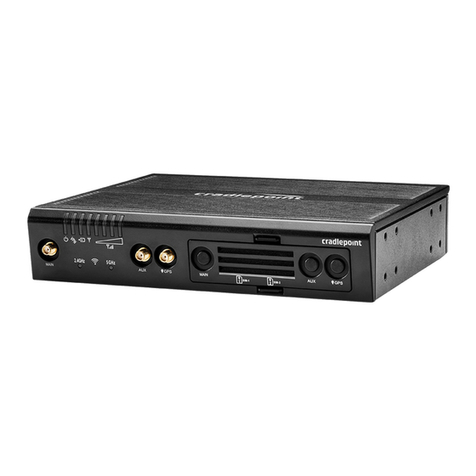
TrekStor Portable WLAN HotSpot User manual

Portable WLAN HotSpot
EN
DE
ES
SE
PL
IT

INDEX
DE ……………………………………………………………………………… 3
EN ……………………………………………………………………………… 12
ES ……………………………………………………………………………… 21
IT ……………………………………………………………………………… 30
PL ……………………………………………………………………………… 39
SE ……………………………………………………………………………… 48

DE
3
BEDIENUNGSANLEITUNG
Wir freuen uns, dass Sie sich für das TrekStor® Portable WLAN HotSpot entschieden haben.
Mit dem TrekStor® Portable WLAN HotSpot können Sie schnell über GPRS, EDGE, UMTS und
HSDPA/HSUPA auf das Internet zugreifen und dabei Ihren Internetzugang via WLAN auf bis zu
5 Endgeräten ausweiten.
i
Die von Ihrem Produkt unterstützten Funktionen sowie das Erscheinungsbild unterliegen•
Länder- und Mobilfunkanbieterspezifischen Anpassungen. Abbildungen dienen lediglich der
Illustration und können vom tatsächlichen Produkt abweichen.
Diese Kurzanleitung beschreibt die Funktionen Ihres Portable WLAN HotSpot in einer Übersicht.•
Für weitergehende Hilfestellung lesen Sie bitte die HILFE in dem WEB Management Portal.
Der Portable WLAN HotSpot kann in einer angemessenen geschlossenen Umgebung•
betrieben werden (Notebook-/Hand-/Hosentasche). Dennoch besteht die Möglichkeit, dass
sich der Portable WLAN HotSpot über lange Phasen von intensiver Datennutzung ähnlich wie
Mobilfunkgeräte erwärmt.Wenn das Ableiten der Wärme durch die Umgebung beeinträchtigt
ist oder das Gerät Hitze ausgesetzt wird (z. B. Sonneneinstrahlung auf Amaturenbrett), kann sich
der Portable WLAN HotSpot als Sicherheitsmaßname abschalten. In diesem Fall starten Sie den
Portable WLAN HotSpot (in einer kühleren, besser ventilierten Umgebung) neu.
Verpackungsinhalt
Ihr Portable WLAN HotSpot wird mit den folgenden Verpackungsinhalten geliefert:
TrekStor Portable WLAN HotSpot•
Bedienungsanleitung•
Batterie•
Datenkabel•
Die 3 Arten zur Nutzung Ihres Portable WLAN HotSpot
Ihr Portable WLAN HotSpot passt sich Ihrem Alltag an, egal ob Sie gerade mit Freunden
unterwegs sind, an Ihrem Notebook surfen oder Ihre drahtlose Interverbindung teilen wollen,
während Sie das Gerät selbst per USB-Kabel an einem Computer benutzen. Nutzen Sie Ihren
Portable WLAN HotSpot auf eine der folgenden Arten ...
1) Batteriebetrieben via WLAN

DE 4
2) Laden & Surfen via USB
3) Laden (am Computer/Ladegerät) und Surfen via WLAN
Lernen Sie Ihren Portable WLAN HotSpot
1) Display (verspiegelt)
2) microSD-Kartenleser
3) USB-Anschluss
4) An/Aus-Taste
5) WiFi/WPS-Taste
6) Verbindungstaste
7) Öffnung für ein Trageband (optional)
8) Verschluss für Batterieabdeckung
WiFi: Synonym für WLAN-Technologie•
nach IEEE 802.11x Standard
WPS: WiFi Protected Setup, ein Standard zum sicheren• Aufbau eines drahtlosen Netzwerkes
Bildschirm
1) Mobilfunknetz Signalstärke
2) Netzwerk-Modus
3) · WLAN-Status
·Anzahl verbundener Geräte
4) Internet-Verbingung
5) ·Neue Nachrichten
·Anzahl neuer Nachrichten
6) Ladestandsanzeige der Batterie
7) Roaming-Status
8) ·M: Manueller Modus
·A: Automatischer Modus

DE
5
Erste Schritte
Installation der SIM-Karte und des Akkus
Bitte beachten Sie die schematischen Darstellungen zum Öffnen der Batterieabdeckung,
dem Herausnehmen der Batterie sowie dem korrekten Einlegen der SIM-Karte: Achten Sie
hier insbesondere auf die Position der abgeschrägten Ecke der SIM-Karte und darauf, dass
die Kontakte nach unten zeigen. Anschliessend legen Sie die Batterie wie abgebildet ein und
schliessen die Abdeckung.
microSD-Karte
a) Entfernen Sie die Abdeckung von dem microSD-Kartenleser.
b) Wenn der Portable WLAN HotSpot mit der Vorderseite nach unten liegt, zeigen auch die
Kontakte der Speicherkarte nach unten.
c) Schieben Sie die microSD-Karte ohne Gewalteinwirkung in den Kartenleser bis die Karte
einrastet.
d) Schließen Sie die Abdeckung. Zum Entnehmen der microSD-Karte drücken Sie die Karte
gegen die Federwirkung.
i
Die Speicherkarte ist ein optionales Zubehör und ist nicht im Lieferumfang enthalten.•
Entfernen Sie die Speicherkarte nicht während der Benutzung. Wenn Sie die Speicherkarte• dennoch herausnehmen, kann dies dazu führen, dass sowohl die Daten als auch die
Speicherkarte selbst beschädigt werden.
Mit dem Portable WLAN HotSpot (via WLAN) ins Internet gehen
1) Schalten Sie das Gerät ein
Halten Sie die Taste "POWER" für
mind. 2 Sekunden gedrückt bis
sich der Bildschirm einschaltet.
iUm Ihren Portable WLAN HotSpot auszuschalten, drücken Sie ebenfalls auf diese Taste bis das
Display erlischt. Die längere Tastendruck-Dauer verhindert ein unbeabsichtigtes Einschalten in
der Tasche.

DE 6
2) Stellen Sie eineWLAN-Verbindung zum PortableWLAN HotSpot her
iDas folgende Beispiel bezieht sich auf einen PC mit Windows XP Betriebssystem
a) Wichtig: Stellen Sie auf dem PC sicher, dass WLAN aktiv ist.
b) Falls das Symbol "WiFi" nicht im Display Ihres Portable WLAN HotSpot zu sehen ist,
drücken Sie die Taste "WiFi/WPS" für mind. 2 Sekunden.
iDas WLAN ist nun auf dem Portable WLAN HotSpot eingeschaltet. Das Gerät wird
damit zu einem aktiven WLAN Access Point (Hotspot), auch wenn gegebenenfalls
noch keine Verbindung ins Internet besteht. Beachten Sie bitte alle Gesetze und
Regularien zum Betrieb von drahtlosen Geräten wie in den Sicherheitshinweisen
beschrieben.
c) Klicken Sie in Ihrem PC oder Laptop auf Start > Systemsteuerung >
Netzwerkverbindungen > Drahtlose Netzwerkverbindungen.
iUm eine WLAN-Verbindung herstellen zu können, muss eine„Drahtlose
Netzwerkverbindung”verfügbar sein. Falls diese nicht unter Ihren
Netzwerkverbindungen angezeigt wird, kontrollieren Sie mithilfe der
Bedienungsanleitung Ihres PCs den Status des Treibers im Gerätemanager.
d) Klicken Sie auf "Verfügbare Drahtlosnetzwerke anzeigen", um das vom Portable WLAN
HotSpot verfügbare Drahtlosnetzwerk zu finden.
e) Wählen Sie das Drahtlosnetzwerk aus, welches der SSID Ihres Portable WLAN HotSpot
entspricht. Die SSID ist ein eindeutiger Netzwerkname für ein Drahtlosnetzwerk.
iSie finden die SSID sowie den Standard WLAN-Schlüssel unter der Batterieabdeckung.
f) Drücken Sie auf„Verbinden“.
g) Standardmäßig ist die Verschlüsselung des Portable WLAN HotSpot WLAN aktiv.
Geben Sie daher in dem von Ihrem PC oder Laptop angezeigten Fenster zweimal
den WLAN-Schlüssel ein.
h) Der PC sollte nun eine Netzwerkadresse (IP) beziehen. Bitte warten Sie einige Augenblicke.
Den Status der Verbindung können Sie dem Taskleisten-Symbol für WLAN-Verbindungen in
der unten rechten Ecke Ihres Bildschirmes entnehmen.
i) Im Anschluss ist es möglich via WLAN auf das Gerät zuzugreifen.
3) Mit dem Internet verbinden
iDie Einwahlparameter für Ihren Portable WLAN HotSpot befinden sich in der Regel auf der
SIM-Karte, die Sie von Ihrem Mobilfunkprovider erhalten haben. Falls Sie die Einstellungen
ändern möchten, lesen Sie bitte die HILFE in dem WEB Management Portal.
Nachdem Sie erfolgreich eine WLAN-Verbindung zwischen Ihrem Endgerät und dem Portable
WLAN HotSpot hergestellt haben, können Sie auf zwei Arten eine Internetverbindung starten:
Sie können zwischen dem "Automatischen Modus" und dem "Manuellen Modus" wählen.
Den Modus können Sie in den Verbindungseinstellungen des WEB Management Portal
wechseln (Zugriff auf das WEB Portal siehe folgendes Kapitel).

DE
7
i
Im Ausland steht als Vorsichtsmaßnahme für ungewollt hohe Roaming-Kosten nur der•
Manuelle Modus zur Verfügung.
Im Automatischen Modus hat die Taste "CONNECT" keine• Auswirkung, denn immer wenn
Sie mit Ihrem Endgerät Daten anfragen oder abschicken, wird eine Verbindung automatisch
bereitgestellt.
Manueller Modus (M)
Um die Verbindung zu starten, drücken Sie die Taste "CONNECT" für mind. 2 Sekunden und warten
Sie bis das Symbol im Display angezeigt wird.
Um die Verbindung zu beenden, drücken Sie die Taste "CONNECT" für mind. 2 Sekunden und warten
Sie bis das Symbol im Display verschwindet.
iSie können eine Verbindung/Trennung der Verbindung auch über das WEB Management
Portal ausführen.
Automatischer Modus (A)
Während Ihr Portable WLAN HotSpot angeschaltet ist, wird in diesem Modus automatisch eine
Verbindung mit dem mobilen Internet aufgebaut, sobald aktiv Daten von Ihrem Endgerät
empfangen oder gesendet werden, z. B. Sie die Startseite Ihres Browsers aufrufen.
iDiese Verbindung wird nach einem gewissen Zeitraum ohne Datentransfer inaktiv. Der
Datentransfer wird aktiv, sobald Sie erneut auf das Internet zugreifen, z. B. die Webseite
aktualisieren.
Login über das WEB Management Portal
a) Stellen Sie sicher, dass eine WLAN-Verbindung zwischen Ihrem Endgerät (mit Browser) und
dem Portable WLAN HotSpot besteht.
b) Starten Sie Ihren Browser und geben http://192.168.1.1 (oder auch http://e5.home) in
die Adresszeile ein
c) Geben Sie Ihr Passwort ein und klicken Sie auf "Login".
i Das Standardpasswort ist admin (Bitte dieses Passwort im WEB Management Portal sobald
wie möglich mit einem individuellen Passwort ersetzen).
PIN eingeben
Wenn Ihre SIM-Karte durch einen PIN-Code geschützt wird, müssen Sie diesen (üblicherweise
4-stelligen) PIN-Code im WEB Management Portal hinterlegen.
Nutzung als USB Modem, Laden am Computer
Sobald Sie Ihren Portable WLAN HotSpot an einen PC anschliessen, installieren sich•
automatisch die USB-Treiber und ein Link zum WEB Management Portal wird auf Ihrem
Desktop abgelegt: "WEB Partner“
Wenn Sie das Web Management Portal aufrufen, müssen Sie als erstes das Passwort•
eingeben. Das Standardpasswort lautet "admin".

DE 8
Der Portable WLAN HotSpot wird nicht nur an Ihrer USB-Schnittstelle geladen, es•
präsentiert sich Ihrem PC auch als Netzwerkadapter, z. B.
- WLAN (Portable WLAN HotSpot über WLAN verbunden) oder
- LAN (Portable WLAN HotSpot über USB verbunden).
Somit können Sie Ihren Portable WLAN HotSpot ähnlich nutzen, wie Sie es gegebenenfalls
von Ihrem DSL Festnetz-Router gewöhnt sind.
Allgemeine Hinweise zur Benutzung
Aufladen der Batterie
Hinweis: Wenn Sie Ihren Portable
WLAN HotSpot für längere Zeit
nicht benutzt haben, dauert es
eine Weile bis Sie das Gerät am
USB-Ladekabel starten können.
Computer mit USB-Anschluss
a) Wenn Sie den Portable WLAN HotSpot lediglich laden wollen, schalten Sie es zunächst aus.
b) Verbinden Sie Ihren Portable WLAN HotSpot mit dem USB-Anschluss Ihres Computers.
Strom sparen
Ihr Portable WLAN HotSpot schont die Batterie, indem sich nach kurzer Zeit ohne Tastendruck
der Bildschirm ausschaltet. Sie können den Bildschirm durch kurzes Drücken einer beliebigen
Taste aktivieren (ähnlich Ihrem Mobilfunktelefon).
Im WEB Management Portal können Sie die Option ändern, das WLAN automatisch nach entweder
10 oder 20 Minuten ohne Datenaktivität abzuschalten. Aktivieren Sie die WLAN-Verbindung, indem
Sie zuerst den Bildschirm‚aufwecken’und anschliessend die Taste "WiFi/WPS" mind. 2 Sekunden
lang drücken bis das Symbol "WiFi" wieder auf dem Display erscheint. Standardmäßig ist diese
automatische WLAN-Abschaltung deaktiviert.
WPS-Modus (Push Button Configuration) aktivieren
Wenn Ihr WLAN-fähiges Gerät (z. B. Internet Tablet) das WPS-Protokoll unterstützt, können Sie
eine WLAN-Verbindung ohne manuelle Eingabe der Sicherheitsparameter vornehmen.
a) Schalten Sie den Portable WLAN HotSpot ein und versichern Sie sich, das WLAN aktiv ist.
b) Nehmen Sie Ihr WPS fähiges Gerät in Betrieb und suchen Sie das Portable WLAN HotSpot WLAN.
c) Aktivieren Sie WPS auf dem Portable WLAN HotSpot indem Sie solange kontinuierlich
auf den "WiFi/WPS" -Knopf drücken bis das Symbol "WiFi" zuerst einmal verschwindet
und danach dasselbe Symbol "WiFi" wieder angezeigt wird.
d) Aktivieren Sie nun die WPS (PBC) Funktion auf Ihrem Endgerät. Lesen Sie dazu
gegebenenfalls in der Hilfe Ihres Endgerätes nach.

DE
9
Portable WLAN HotSpot auf Werkszustand zurück setzen
Sollten Sie eines oder mehrere Passwörter vergessen haben, können Sie Ihren Portable WLAN
HotSpot auf den Auslieferungszustand zurücksetzen.
Bei eingeschaltetem Gerät und aktivem Bildschirm, drücken und halten Sie die Tasten "WiFi/
WPS" und "CONNECT " solange gedrückt, bis der Bildschirm sich ausschaltet. Nun ist Ihr Gerät auf
die bei Auslieferung gesetzten Einstellungen und Passwörter zurückgesetzt und alle persönlich
vorgenommenen Einstellungen sind verloren.
FAQ
Ich komme nicht ins Internet, warum?
1) Überprüfen Sie den Batteriestatus und laden Sie gegebenenfalls die Batterie.
2) Überprüfen Sie, ob dieWLAN-Funktion auf Ihrem Endgerät vollständig gegeben ist, starten Sie
Ihren Computer gegebenenfalls neu oder benutzen Sie den Reparaturmechanismus/
Netzwerkassistenten auf Ihrem PC.
3) Wenn Sie den DHCP-Server ausgestellt haben, aber Ihr Endgerät dennoch eine IP-Adresse
dynamisch beziehen möchte, kommt keine WLAN-Verbindung zustande. Prüfen Sie hier die
Einstellung sowohl auf dem Endgerät als auch auf dem Portable WLAN HotSpot, vor allem
ob Sie eine IP von Ihrem Gateway zugewiesen bekommen haben.
4) Überprüfen Sie, ob Sie per WLAN auf das WEB Management Portal zugreifen können.
Ist dies nicht der Fall, liegt das Problem am lokalen WLAN, nicht am Internetzugang.
Überprüfen Sie das WLAN-Passwort und ob sich Ihr Endgerät mit einem ähnlichen WLAN
gleicher Verschlüsselungsart (z. B. WPA) verbinden kann. Prüfen Sie erneut SSID und
Verschlüsselung.
5) Überprüfen Sie den Signalpegel des mobilen Netzwerkes und prüfen Sie ob die
Einwahleinstellungen mit denen Ihres Netzwerkanbieters überein stimmen. Wenn Sie sich in
einem Roaming-Netzwerk befinden, unterstützt Ihre SIM-Karte vielleicht kein Roaming oder
Sie haben die Einstellung für Roaming gesperrt.
6) Überprüfen Sie, ob Sie eventuell den "Manuellen Modus" verwenden. Denken Sie daran,
dass Sie dann die Verbindung mit der CONNECT Taste starten müssen.
Warum bricht die Verbindung ab?
1) Prüfen Sie ob Sie sich aus der Reichweite des Gerätes entfernt haben oder neue
WLAN-Netzwerke aufgetaucht sind, die Ihr WLAN-Netzwerk stören. Passen Sie
gegebenenfalls den Standort des Portable WLAN HotSpot an.
2) Kontrollieren Sie, ob Ihr Endgerät noch auf das WLAN des Portable WLAN HotSpot zugreift
und passen Sie gegebenenfalls die Einstellung und die Prioritätenliste Ihrer bekannten
WLAN-Netzwerke an.
3) Drücken Sie im Browser auf "Aktualisieren", falls Sie nach einer Weile der Inaktivität den
nächsten Link nicht aufrufen können.

DE 10
Weitere Möglichkeiten bestehen für Sie darin:
die Hilfe im WEB M• anagement Portal zu lesen.
Ihren Portable WLAN HotSpot neu zu starten bzw. die Batterie für• einige Augenblicke zu
entfernen.
auf Werkseinstellungen zurückzusetzen.•
Keinen Erfolg?
Sollten die oben genannten Methoden keinen Erfolg bringen und Sie mit unterschiedlichen
Geräten und Betriebssystemen keine Verbindung in das Internet herstellen konnten, wenden
Sie sich bitte an die Support Hotline.

DE
11
a
Bitte beachten Sie, dass dieses Gerät Funktechnik verwendet und in allen Ländern der Europäischen
Union, der Schweiz und Norwegen nur seiner Bestimmung gemäß verwendet werden darf. In
Frankreich darf dieses Gerät nur innerhalb von geschlossenen Räumen betrieben werden.
a
Batterien/Akkus enthalten chemische Substanzen und müssen ordnungsgemäß entsorgt werden.
Batterien/Akkus gehören nicht in den Hausmüll. Sie können diese beispielsweise bei öffentlichen
Sammelstellen Ihrer Gemeinde abgeben oder überall dort, wo Batterien/Akkus verkauft werden.
Der Hersteller behält sich das Recht vor, das Produkt ständig weiter zu entwickeln. Diese Änderungen
können ohne direkte Beschreibung in dieser Bedienungsanleitung vorgenommen werden.
Informationen in dieser Bedienungsanleitung müssen somit nicht den Stand der technischen
Ausführung widerspiegeln.
Der Hersteller garantiert nur die Eignung für die eigentliche Bestimmung dieses Produktes. Weiter ist der
Hersteller nicht für Beschädigungen oder Verlust von Daten und deren Folgeschäden verantwortlich.
Copyright © 2010 TrekStor GmbH. Alle Rechte vorbehalten. Bei weiteren erwähnten Produkt- oder
Firmenbezeichnungen handelt es sich möglicherweise um Warenzeichen oder Markennamen der
jeweiligen Inhaber.

EN 12
OPERATING INSTRUCTIONS
Thank you for choosing TrekStor® Portable WLAN HotSpot (hereafter referred to as the Portable
WLAN HotSpot).
The supported functions and actual appearance are subject to the product variant purchased.•
The following pictures are provided for illustration only.
This guide briefly describes the functions of the Portable WLAN HotSpot. For details about how•
to set the management parameters, see the "Help" on the "Web management" page.
If the Portable WLAN HotSpot is placed in an environment with poor ventilation, it will get hot•
after prolonged use. When the Portable WLAN HotSpot gets heated to a certain extent, it will
switch off or disconnect from the network automatically to protect itself. In this case, please
place the Portable WLAN HotSpot in a well-ventilated place for heat dissipation and then restart
the Portable WLAN HotSpot.
Getting to know your Portable WLAN HotSpot
Packing List
The package box contains the following items. If any of the items are lost or damaged, contact
your local dealer.
TrekStor Portable WLAN HotSpot•
Operating instructions•
Battery•
Data cable•
Some of the optional accessories are not provided in the package, you can contact your local
dealer to buy them yourself.
Application Scenarios
The Wi-Fi device or computer can be connected to the internet through the Portable WLAN
HotSpot. The actual connecting procedure depends on the operating system of the Wi-Fi device
or computer. You can perform the connection operations as prompted.
Scenario 1: Multi-device access via Wi-Fi

EN
13
Scenario 2: One-device access via USB
Scenario 3: Multi-device access via Wi-Fi and USB at the same time
Appearance
1) Screen
2) microSD card slot
3) USB port
4) Power button
5) Wi-Fi/WPS button
6) Dialing button
7) Strap hole
8) Battery button
Wi-Fi: Wireless Fidelity•
WPS: Wi-Fi Protected Setup•
Screen
1) Signal strength
2) Network
3) ·Wi-Fi enabled
·Number of devices connected
4) Internet connection
5) ·New messages
·Number of new messages
6) Power level
7) Roaming state
8) ·M: Manual mode
·A: Auto mode

EN 14
Before you start
Installing the SIM Card and the Battery
Install the SIM card into the SIM card slot located under the back cover of the device. Ensure that
the SIM card faces the direction as shown in the following figure. Then slide in the SIM card.
Installing the microSD card
a) Remove the rubber cap from the microSD card slot.Then insert the microSD card into the slot.
b) After inserting the microSD card completely, attach the rubber cap.
i
The microSD card is an optional accessory. The• microSD card is not provided in the package, you
can buy one yourself.
To remove the microSD card, open the rubber cap and press the microSD card gently.•
When the microSD card pops up automatically, take it out.
Do not remove the card when it is being used. Otherwise, the card and the Portable WLAN•
HotSpot may be damaged, and the data stored on the card may be corrupted.
Charging the Battery
iIf you have not used the battery for a long time, please charge it first.
Charging by Connecting to a PC
a) Power off the Portable
WLAN HotSpot.
b) Connect the Portable WLAN
HotSpot and PC with a
compatible data cable.

EN
15
Accessing the Internet through a Wi-Fi Connection
iBy default, presets for the management parameters are on the SIM card according to the
requirements of the service provider. You can follow the steps below to quickly access the
Internet. For the details about how to set the management parameters, see the "Help" on
the "Web management" page.
Step1: Power on the Portable WLAN HotSpot.
Step2: Establish a Wi-Fi Connection.
Step3: Access the Internet.
1. Power on the Portable WLAN HotSpot
Press and hold "POWER" until
the screen is illuminated. When
the screen lights up, it indicates
that the Portable WLAN HotSpot
is powered on.
iTo turn off the device, press and hold "POWER" until the screen is off. When the screen is off, it
indicates that the Portable WLAN HotSpot is powered off.
2. Establish a Wi-Fi Connection (Taking a PC for Example)
a) Make sure that the Wi-Fi function is enabled.
b) Select Start > Control Panel > Network Connections > Wireless Network Connection.
iTo set up a Wi-Fi connection, the PC must be configured with a wireless network adapter.
If "Wireless Network Connection" is displayed, the wireless network adapter is available.
Otherwise, you need to check your wireless network adapter.
c) Click "View available Wireless Networks" to display the wireless network list.
d) Select the network whose SSID is the same as that of the Portable WLAN HotSpot, and then
click "CONNECT".

EN 16
i
If the encryption parameter is not already set for the Portable WLAN HotSpot, the•
Wireless Network Connection dialog box is displayed and requires the network key and
confirmation.
The SSID and key label is attached on the Portable WLAN HotSpot.•
•
•
•
Wait until the wireless connection
icon is displayed in the status area
in the lower right corner of the screen.
Then, you can connect your PC to
the Portable WLAN HotSpot.
3. Access the Internet
After you establish a Wi-Fi connection successfully, you can access the Internet in either of the
following two modes. By default, the mode is Auto.
Auto (A)
After the Portable WLAN HotSpot is powered on, it can automatically connect to the Internet
when data transmission is required. If data transmission is not performed over a period of time,
the Portable WLAN HotSpot automatically disconnects from the Internet.
Manual (M)
Press and hold "CONNECT" until is displayed on the screen When is displayed on the screen,
it indicates that the connection is set up successfully. Then you can enjoy the Internet service.
Press and hold "CONNECT" until disappears. When disappears, it indicates that the
connection to the Internet is disconnected.
iYou can also launch web management page to connect to or disconnect from the network
as prompted.
i
You can launch the "Web management" page to select the mode of accessing the• Internet.
If you are in a foreign country, the Portable WLAN HotSpot enters a special roaming mode to•
prevent involuntary and expensive internet connections. While in the roaming mode you can
only press and hold "CONNECT" to establish or disconnect a network connection.
The dialing button has no function in• Auto mode.

EN
17
Accessing the Web Management Page
a) Make sure that the connection between the Portable WLAN HotSpot and the client is OK.
b) Start the internet browser and enter http://192.168.1.1 in the address bar.
c) Enter the password, and then click Login.
iThe default password is admin.
Verifying the PIN code
When the PIN code protection is enabled, you need launch the web management page and
then enter the correct PIN code as prompted. Both the PIN and PUK are delivered with the SIM
card. For details, consult your service provider.
Sharing data stored on the microSD card
After the microSD card is inserted, you can store data on the card or share the data stored on the card
on the "Web management" page.
a) Insert the microSD card.
b) Access the "Web management" page.
c) Click SD Card to manage the data stored on the microSD card.
SMS
You can enjoy the short message (SMS) service on the "Web management" page.
a) Access the "Web management" page.
b) Click SMS to view, create, reply, or send a message.
Daily Use
Power saving mode
If no operation is performed on the Portable WLAN HotSpot for a while, the screen is
automatically switched off. If the PortableWLAN HotSpot has not been accessed for 30 minutes
by default, the Portable WLAN HotSpot changes to the deep sleep state.
When the Portable WLAN HotSpot is in the deep sleep state, you can press any key
to activate the Wi-Fi function. If the Portable WLAN HotSpot is activated, the screen
becomes lightened.

EN 18
Enabling/Disabling the Wi-Fi Function
Press and hold "WiFi/WPS" until WIFI is displayed on the screen. When WIFI is displayed, it
indicates that the Wi-Fi function is enabled.
iPress and hold "WiFi/WPS" until WIFI disappears. When WIFI disappears, it indicates that the
Wi-Fi is disabled.
Establishing a WPS Connection
If the Wi-Fi clients connected to the Portable WLAN HotSpot support the WPS function, the
Portable WLAN HotSpot can generate a network key without manual input. To establish a WPS
connection, please proceed as follows:
a) Power on the Portable WLAN HotSpot.
b) Start the clients connected to the Portable WLAN HotSpot.
c) Enable the WPS function of the Portable WLAN HotSpot.
iBy pressing and holding "WiFi/WPS", you can enable the WPS function of the Portable
WLAN HotSpot.
d) Enable the WPS function of the clients.
iFor the Wi-Fi operations of the clients, see the clients’user guide.
Restoring the Factory Defaults
If you forget the changes of some parameter settings, you can restore them to factory defaults
and reconfigure the parameters of the Portable WLAN HotSpot.
Press and hold "WiFi/WPS" and "CONNECT" at the same time until the screen is off. Then you
restore the factory defaults.
iAfter factory defaults are restored, all personal configuration settings are deleted and all
web-based management settings and parameters are restored to their default values.
Tips:
If you cannot use the Portable WLAN HotSpot properly, you can try the following:
See "Help" on the "Web management" page.•
Restart the Portable WLAN HotSpot.•
Restore the factory defaults.•
Contact your dealer.•

EN
19
Frequently Asked Questions (FAQ)
What can I do if the client connected to the Portable WLAN HotSpot cannot access the
Internet?
1. Check and ensure that the client is connected to the Portable WLAN HotSpot properly.
2. Check the power status to ensure that the Portable WLAN HotSpot is powered on.
3. Check the signal strength to ensure that the area is covered by the network.
4. Check that the network mode is correct. For details about network modes, see "Mobile
Network Settings" on the management page.
5. You must configure the correct peer-peer protocol (PPP) user name and PPP password
when you access the Internet through the Portable WLAN HotSpot. Check whether the user
name and the password are correct, and see Profile Management on the management
page for details.
6. If the DHCP server is disabled and the client obtains the IP address dynamically, the device
cannot access the Internet either. In this case, you need to change the mode to manually
assign an IP address. See DHCP Settings on the management page.
7. Check that the network adapter of your client runs properly.
8. If the problem still persists, please consult your service provider.
What can I do if the Client cannot access the WLAN?
1. If there are interferences or shields near the Portable WLAN HotSpot, you can adjust the
position of the Portable WLAN HotSpot.
2. Check and record the following settings of your client and your Portable WLAN HotSpot:
SSID, WEP type, and key. The SSID of the client must be ANY or the same as that of the
Portable WLAN HotSpot. The WEP type and key of the Client must be the same as that of
the Portable WLAN HotSpot. Otherwise, you need to change the settings.
What can I do if I forgot the default IP address of the management page?
1. You can enter http://e5.home in the address bar and log in to the management page to
obtain the IP address automatically.
2. Restore the factory defaults.

EN 20
a Please note that this device uses radio technology and may only be used for its intended
purpose in all countries of the European Union, Switzerland and Norway. In France this
device may only be used indoors.
aBatteries/rechargeable batteries contain chemical substances and must be disposed of properly.
Batteries/rechargeable batteries should not be thrown away in household garbage. They can
be brought to the public collection points of your community or wherever batteries/rechargeable
batteries are sold.
The manufacturer retains the right to continually improve the product. These changes may be made
without being directly described in these operating instructions. For this reason, the information
provided in these operating instructions may not reflect the current state of the art.
The manufacturer only guarantees suitability for the product’s intended purpose. In addition, the
manufacturer is not responsible for damages or loss of data and subsequent consequences.
Copyright © 2010 TrekStor GmbH. All rights reserved. Other cited product or company names may be
trademarks or brand names of the respective owner.
Table of contents
Languages:
