TRENDnet TV-IP100W User manual

Copyright ©2005. All Rights Reserved. TRENDware International, Inc.
TRENDnet
TRENDware, USA
What's Next in Networking
TV-IP100W
Version 07.08.2005
Wireless Internet Camera Server
Quick Installation Guide
Guide d'installation rapide pour
Caméra Internet Serveur Sans Fil
Anleitung zur Schnellinstallation der
Wireless Internet Kamera Server
Guía de Instalación Rápida para
Servidor de Cámara Inalámbrico de Internet

Table of Contents
English ......................................................................................................
Troubleshooting ........................................................................................
1
1
2
3
5
7
1. Prepare for Installation ......................................................................
2. Install Hardware ................................................................................
3. Configure the Internet Camera ..........................................................
4. Using the Internet Camera Wirelessly ...............................................

Thank you for purchasing the TV-IP100W. This Internet Camera will allow you
to view live images from internal and external networks.
This guide will help you set up and configure your Internet Camera. Following
the installation instructions should be quick and easy. If you run into problems,
please refer to the Troubleshooting section or the more detailed installation
procedures on the CD User's Guide. If you need further technical support,
please visit www.trendnet.com or call our technical support department by
phone.
Verify Package Contents
Please make sure you have everything in the box:
1
1. Prepare for Installation
English QIG
English
System Requirement
1. 10/100Mbps Ethernet
2. CD-ROM Drive
3. CPU: Intel Pentium III 450 MHz or above
4. Memory: 128 MB or above (256 MB Recommend)
5. Web Browser: Microsoft Internet Explorer 5.0 or above
6. VGA Resolution: 800 x 600 or above
TV-IP100W
CD-ROM Quick Installation Guide
AC Power Adapter Metal Stand and
Mounting Bracket
Copyright ©2005. All Rights Reserved. TRENDware International, Inc.
TRENDnet
TRENDware, USA
What's Next in Networking
TV-IP100W
Version 07.08.2005
Wireless Internet Camera Server
Quick Installation Guide
Guide d'installation rapide pour
Caméra Internet Serveur Sans Fil
Anleitung zur Schnellinstallation der
Wireless Internet Kamera Server
Guía de Instalación Rápida para
Servidor de Cámara Inalámbrico de Internet
2
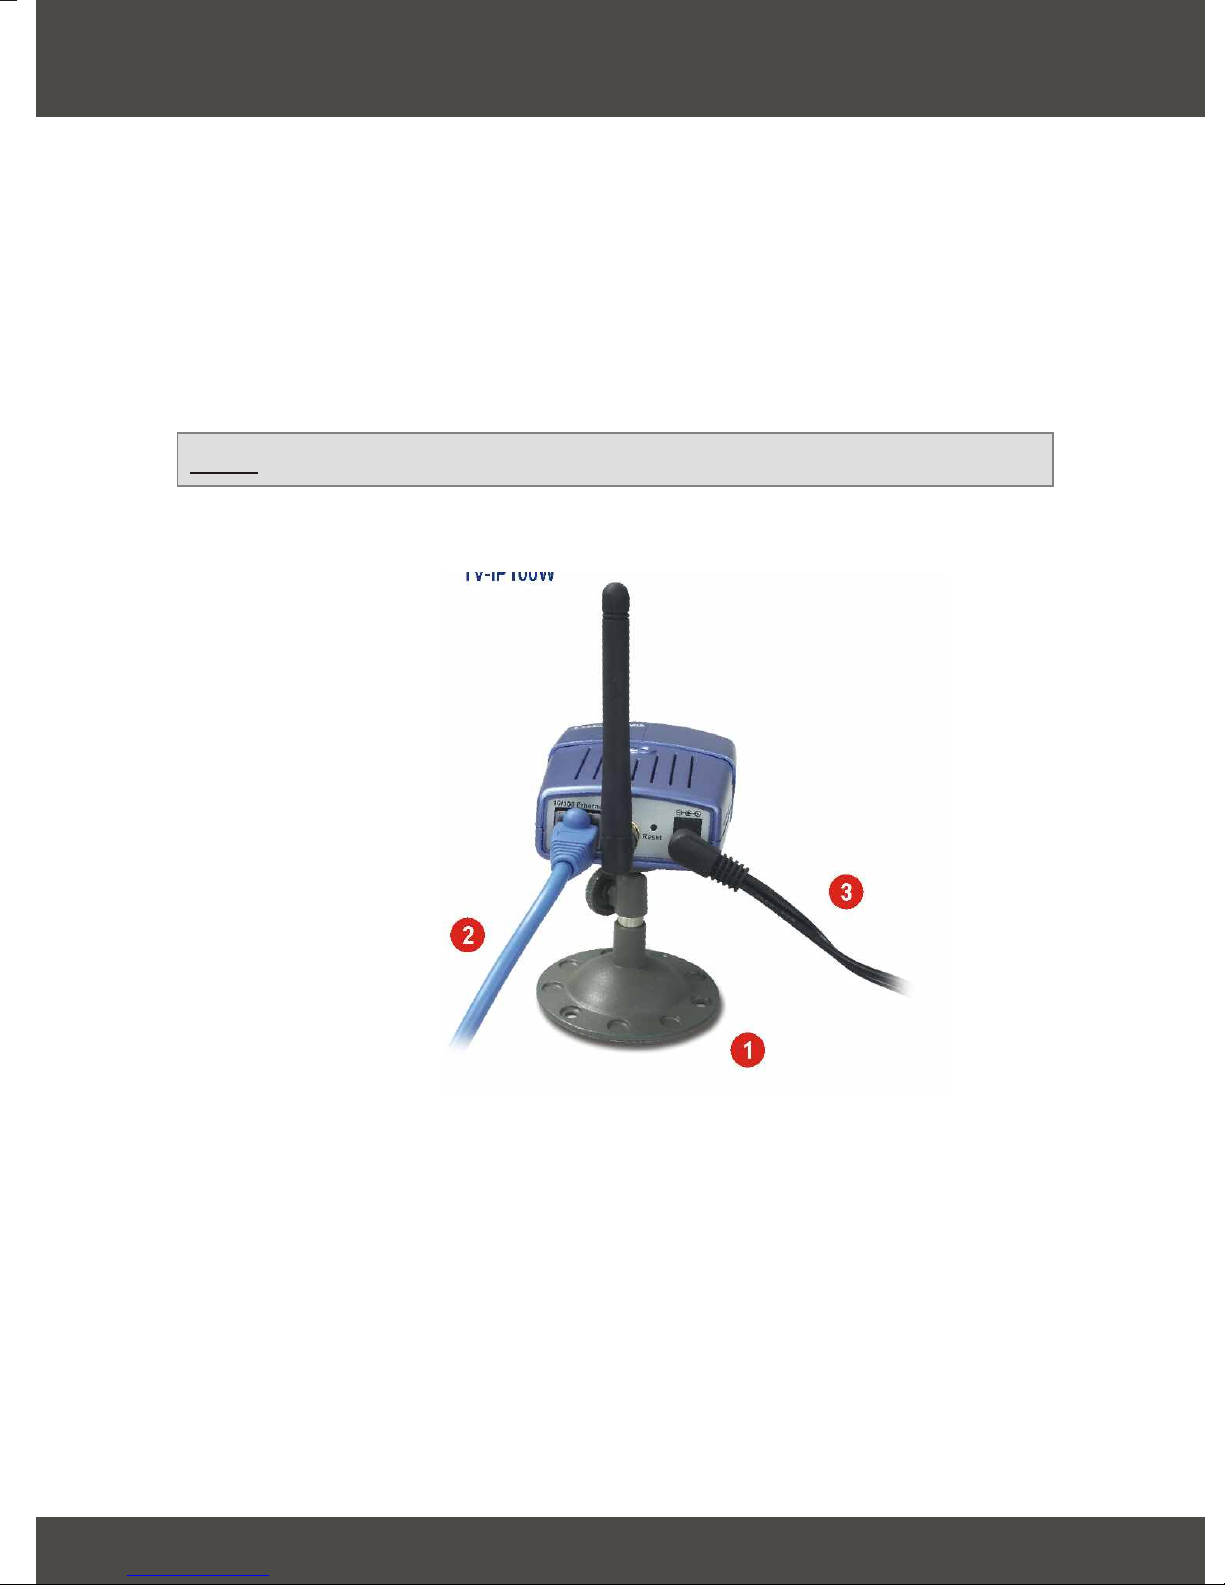
2. Install Hardware
1. Position the metal stand, and mount the Internet Camera to the stand.
2. Connect the RJ-45 network cable to the Internet Camera then connect the
other end of the network cable to a switch or hub.
3. Connect the power adapter to the Internet Camera. Make sure to use the
power adapter supplied with the Internet Camera.
English
3
2
1
TV-IP100W
Note: Using a different power adapter may damage the unit.
3English
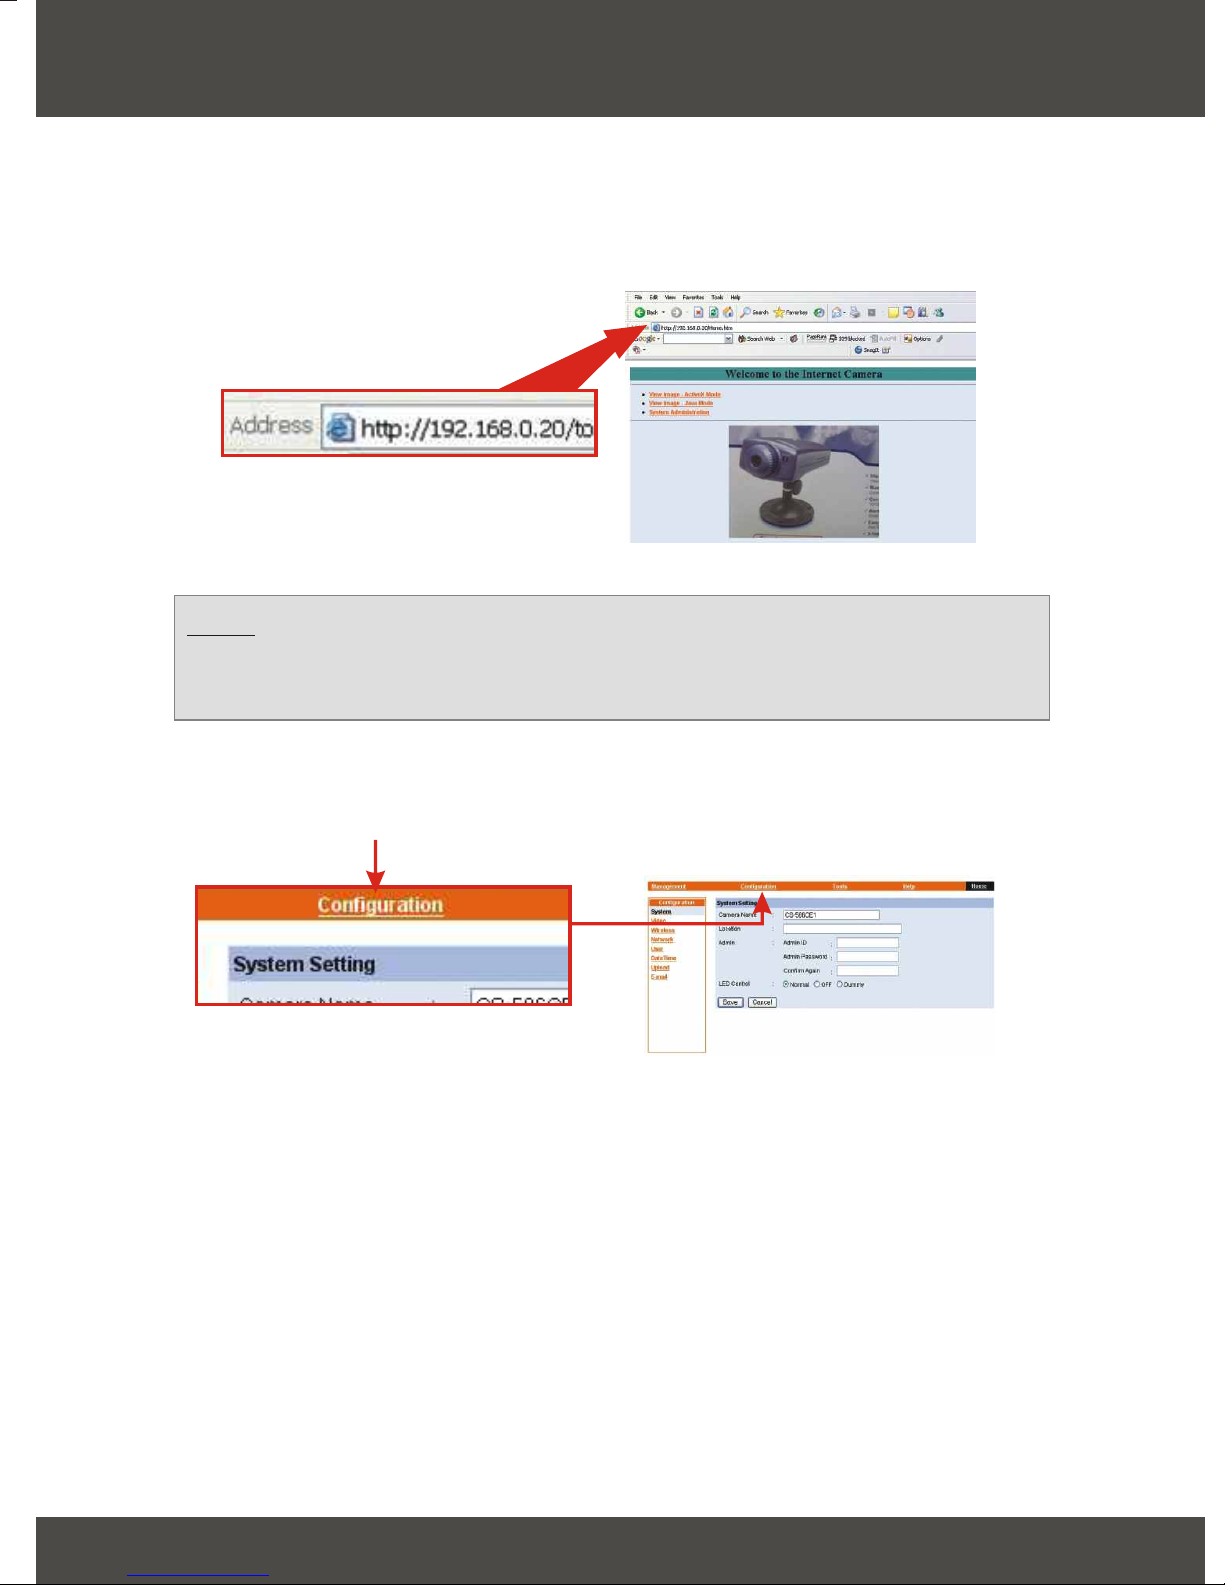
1. Open Internet Browser Window and enter <http://192.168.0.20> (camera's
default IP address). Click System Administration.
3. Configure the Internet Camera
Note: The PC's IP (Example 192.168.0.50) address must correspond
with the Internet Camera's IP address (Default IP: 192.168.0.20) in the
same segment for the two devices to communicate.
2. Click Configuration.
4English
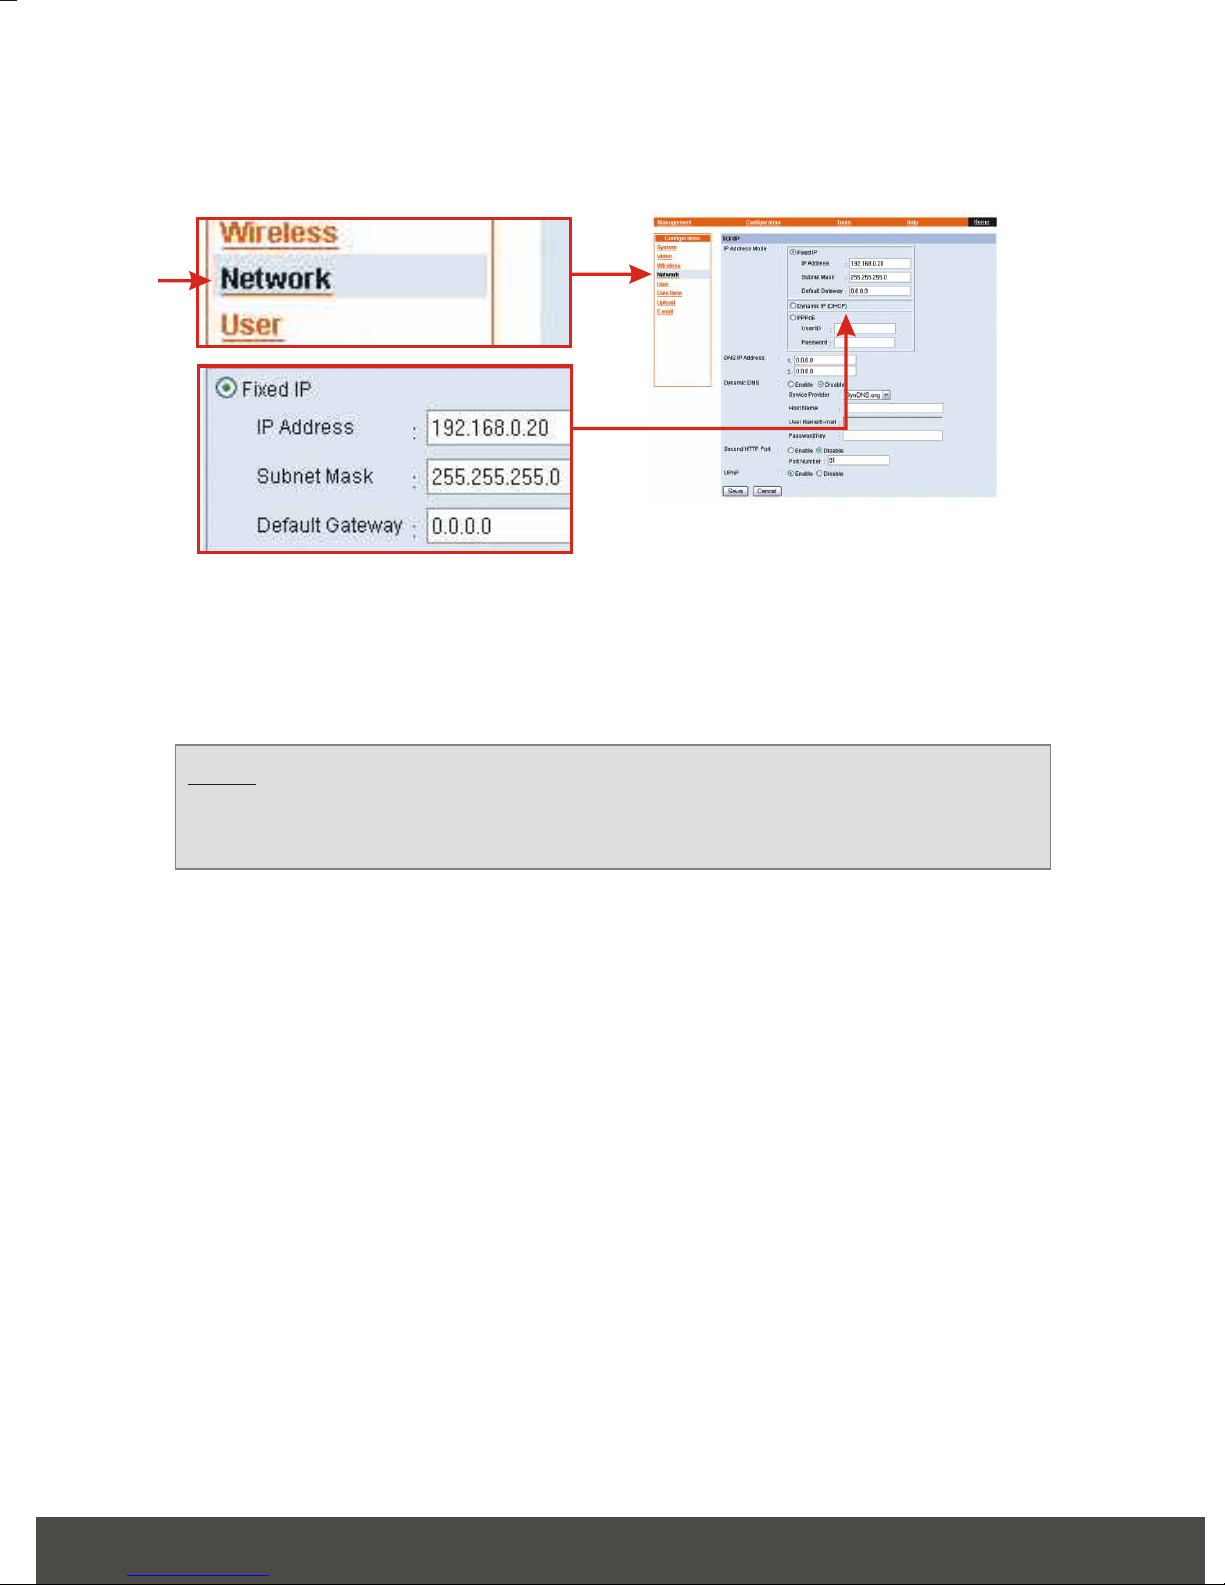
3. Click Network.
Enter an IP address, Subnet mask, and Default gateway for your camera and
click the Save button to keep the changes. Now your camera is ready to use.
Note: If you need to access the configuration remotely, it is
recommended to enter a static IP address and the Internet DNS IP
address.

4. Using the Internet Camera Wirelessly
1. Click Wireless.
2. Type in the same SSID of your wireless Access Point or Router into the
SSID field. Set Wireless Mode to Infrastructure and make sure that the
channel is the same as your wireless Access Point or Router. If your
wireless Access Point or Router has WEP encryption enabled, select Data
encryption and make sure that the Auth mode, Key length, Key format,
and Default key are the same as your wireless Access Point or Router.
5English

6English
3. Scroll down to the bottom of the page and Click Save.
4. Disconnect the CAT5 cable and the power adapter connector from the
TV-IP100W.
5. Reconnect the power adapter connector to the TV-IP100W. Allow 5-10
seconds for the TV-IP100W and the wireless Access Point to communicate
wirelessly. Then type the IP Address that you assigned to the TV-IP100W in
your web browser for verification.
For detailed information about each feature, please refer to the User's Guide
on the CD-ROM or contact our support.

7
Q1.
A1.
Q2.
A2.
Q3.
A3.
Q4.
A4.
The image is blurry, how do I fix this?
You can adjust the Internet Camera's focus by rotating the lens.
Can I replace the camera lens?
No. It cannot be replaced.
How do I view the Internet Camera's live images within my Local
Network?
Open a web browser (Internet Explorer or Netscape), type your
Wireless Internet Camera's IP address (i.e.: 192.168.0.20) in the Address
bar, and then hit the Enter key. The Welcome page of the Internet Camera
will appear.
When I enter the IP address of the camera, the image does not load,
why?
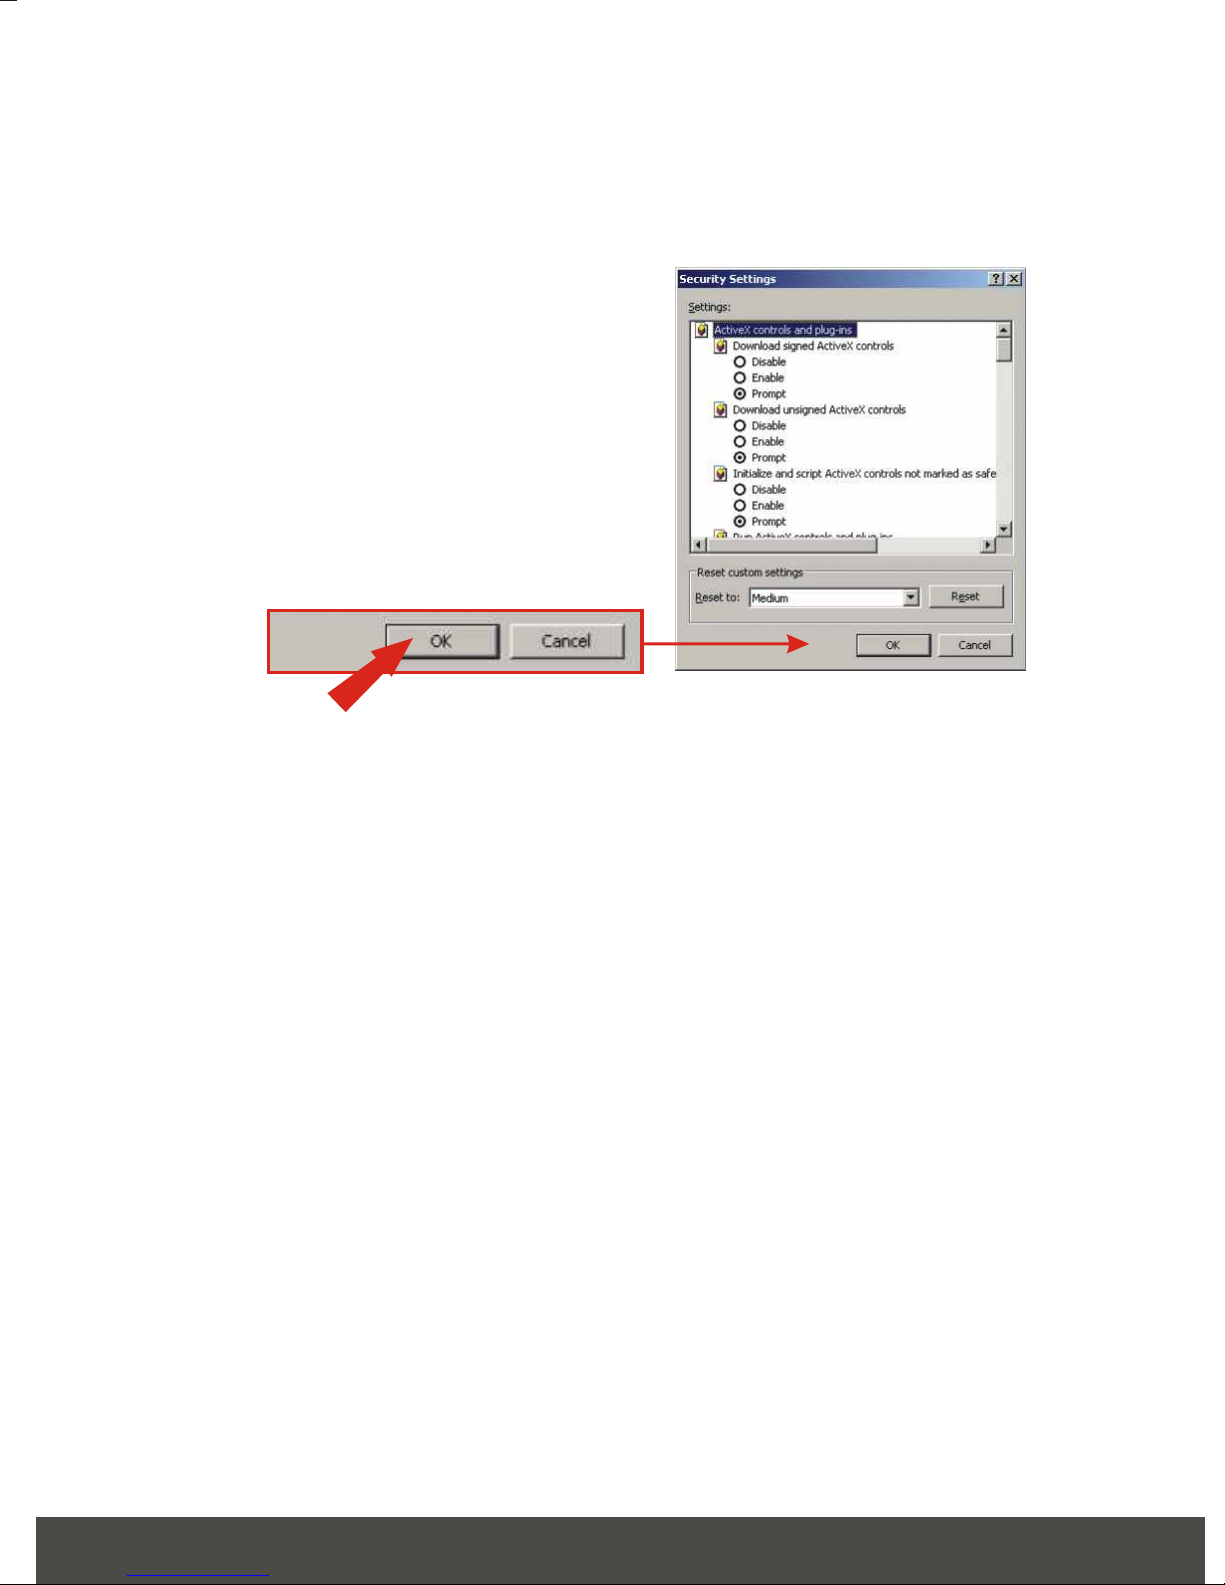
Please make sure all the Active X features are enabled for your
Internet Explorer.
1. Go to Tool (on the Tool bar) > Internet options > Security
Troubleshooting
8
2. Click on Custom Level and make sure all ActiveX controls are set to
"Enable" and click OK.
3. Once you save the settings, the browser will load again and the image
should appear.
Other manuals for TV-IP100W
5
Other TRENDnet Server manuals

TRENDnet
TRENDnet TS-D40G User manual

TRENDnet
TRENDnet TV-IP100W-N - Wireless Internet Camera Server... User manual

TRENDnet
TRENDnet TV-IP200W User manual

TRENDnet
TRENDnet TV-IP100W User manual

TRENDnet
TRENDnet TV-IP100W User manual

TRENDnet
TRENDnet TV-IP100-N User manual

TRENDnet
TRENDnet TV-IP100 - DATA SHEETS User manual

TRENDnet
TRENDnet TV-IP410W User manual

TRENDnet
TRENDnet TV-IP100W User manual

TRENDnet
TRENDnet TV-IP100W User manual


