Tresco KVF-12030-TDW User manual

Technical Specifications
Part No. L-DCE30D-CON L-DCE60D-CON
Output:
DC Voltage 12V 12V
Rated Current 2.5A 5A
Rated Power 30W max. 60W max.
Minimum Load 3W 6W
Input:
Voltage Range 100-277VAC 100-277VAC
Frequency Range 47-63Hz 47-63Hz
Power Factor 0.99@120VAC 0.98@120VAC
(Typ.) @ full load 0.98@277VAC 0.95@277VAC
Efficiency 79% 83%
(Typ.) @ full load
Wiring Suitable for 18-14 AWG, rated 300V, min. 90°C
Protection:
Short Circuit Shut down o/p voltage, re-power on to recover after fault
condition is removed
Over Loading
≤
120% shut down o/p
≤
120% Hiccup mode, recovers
voltage, re-power on to automatically after fault
recover condition is removed
Over Temperature 100°C ± 10°C shut down o/p voltage, automatically
recover after cooling
WorkingTemperature -40°C ~ +60°C (see Derating Curve chart above)
IMPORTANT SAFETY INSTRUCTIONS
CAUTION: To reduce the risk of fire, electric shock, or injury to persons:
Read all instructions before installing system.
Before beginning installation, be sure power is turned OFF to the
power supply and light system.
• The 30W Power Supply operates on line voltage 100-277 VAC.
The 60W Power Supply operates on line voltage 100-277 VAC.
Shock Hazard:Whenever hardwiring the LED Power Supply to a
120-volt circuit with an AC dimmer, turn off power at the circuit breaker
before installing. Failure to do so may result in serious personal injury
or death.
Warning: All wiring must be in accordance with national and local
electrical codes, low-voltage Class 2 circuit. The Power Supply is to
be mounted and wired in accordance with Article 450 of the National
Electric Code (NEC). Failure to install the Power Supply and light fixture
in compliance with applicable codes and regulations may cause serious
personal injury, death and/or major property damage.
• The Power Supply must be installed in a well-ventilated area free
from explosive gases and vapors. Do not install in an airtight, boxed-
in structure.The Power Supply is cooled by circulating air and by
mounting the unit flush to a surface to allow for heat transfer. Operate
the Power Supply at cooler surrounding air temperatures to extend
the life of the unit. See Derating Curve for temperatures above 40°C
(104°F).
• Operate only within the specified ambient temperature range of -40°C
(-40°F) to 60°C (140°F).
Note: It is normal for the LED Power Supply to feel warm when under
a full wattage load.
• The hardwired installation of the Power Supply should only be
performed by a qualified electrician.
• Do not conceal the line voltage input cord or Power Supply inside a
wall, ceiling, soffit, or similar permanent structure, unless consulting
a licensed electrician.This requirement does not apply to the 12VDC
wiring between the Power Supply and the cabinet light system. For
wire runs inside a wall, ceiling, soffit, or similar permanent structure,
use CL2 or better cabling.
• Do not install low-voltage Class 2 wiring along the same run as AC line
voltage. If the line voltage and low-voltage wires need to cross, keep
them at 90° angles.
• Use only insulated staples or plastic ties to secure ALL loose wires.
• Route and secure wires so that they will not be pinched or damaged
when the cabinet is pushed to the wall.
(Continued on page 2)
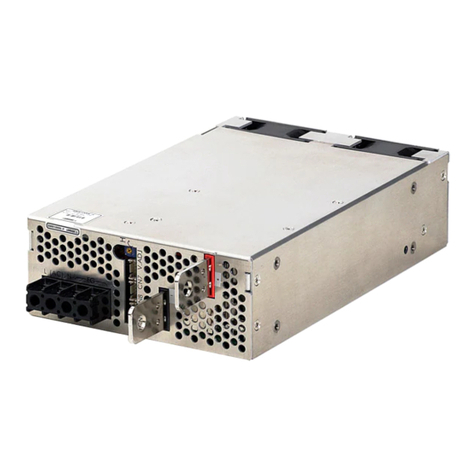
LED DC Power Supply (30W)
L-DCE30D-CON
24 mm
15/16 in.
178 mm
7 in.
61 mm
2-3/8 in.
Cord
152 mm
6 in.
88 mm
3-7/16 in.
13 mm
1/2 in.
26 mm
1 in.
LED DC Power Supply (60W)
L-DCE60D-CON
54 mm
2-1/8 in.
155 mm
6-1/8 in.
20 mm
13/16 in.
LED Wall Dimmer
LED Power Supply
12VDC, 30W or 60W
Mounting Block
Install Wall Dimmer on
input (line voltage) side
of Power Supply
Line Voltage Input Cord
Neutral (white wire)
Ground (green wire)
Line (black wire)
INPUT
OUTPUT 12VDC
Red
Black
LBlack
NWhite
12VDC+
LED DC Power Supply (30W)
L-DCE 30D-CON
24 mm
15/16 in.
178 mm
7 in.
61 mm
2-3/8 in.
Cord
102 mm
4 in.
88 mm
3-7/16 in.
13 mm
1/2 in.
26 mm
1 in.
LED DC Power Supply (60W)
L-DCE 60D-CON
54 mm
2-1/8 in.
155 mm
6-1/8 in.
20 mm
13/16 in.
LED Wall Dimmer
LED Power Supply
12VDC, 30W or 60W
Mounting Block
Install Wall Dimmer on
input (line voltage) side
of Power Supply
Line Voltage Input Cord
Neutral (white wire)
Ground (green wire)
Line (black wire)
INPUT
OUTPUT 12VDC
Red
Black
LBlack
NWhite
12VDC+
Installation Instructions
Hardwire LED Power Supplies
Class 2 • Dimmable 30W & 60W 12VDC Constant Voltage
LED 12VDC Power Supply (30W) Model: ............ KVF-12030-TDW
Part No: ........... L- DCE30D-CON
LED 12VDC Power Supply (60W) Model: ............ KVF-12060-TDW
Part No: ........... L- DCE60D-CON
Mounting Block included with each Power Supply.
For best operation, use LED-compatible wall dimmers.
100
80
60
40
20
-40 -20 0 10 20 30 40 50 60 70
Ambient Temperature (°C)
Load (%)
LED DC Power Supply (30W)
L-DCE30D-CON
LED DC Power Supply (60W)
L-DCE60D-CON
Typical Application
Derating Curve
Mounting Block
pre-wired to Power Supply
Page 1

(Continued from page 1)
IMPORTANT SAFETY INSTRUCTIONS
• Use only LED-compatible Wall Dimmers with LED Power Supplies.
Tresco®Dimming LED Power Supplies are compatible with forward
phase, reverse phase, triac, MLV and ELV dimmers. For best operation,
use a Dimmer that can be programmed or has an adjustable low-
end dial such as the Lutron® C•L and Leviton IllumaTech® Universal
Dimmers. If you are unsure of dimmer compatibility, call
1-800-227-1171.
• Only install the Wall Dimmer on the input (line voltage) side of the
Power Supply.
Do not add a plug-in to input wires and attempt to dim a receptacle.
This can cause unwanted lighting effects (such as flickering), is
dangerous, and against NEC in certain applications.
Fixture does not illuminate • Check installation instructions and diagrams for all
components. Check if the system is wired correctly and
polarities are correct.
• Verify that a compatible constant voltage dimmable fixture is
installed.
• Verify if the power supply and fixture have the same voltage
specifications (i.e. 12V and 12V, etc.).
Fixture does not dim • Check that a compatible constant voltage dimmable fixture is
installed.
• Verify that a compatible dimming control is installed and
wired correctly.
Different fixture types do not dim in sync • Each fixture type has its own circuit design and may respond
differently when dimmed. Check that each fixture type is
installed on a separate dimmable power supply for best
performance.
Fixture is flickering • Verify that a compatible dimming control is installed. If
flickering occurs at low light levels install a compatible
dimming control with low-end dial adjustment
(i.e. Lutron® C•L).
• Check that a compatible constant voltage dimmable fixture is
installed.
• Check that all connections are properly secured.
• Check if fixture is receiving the correct input voltage.
• Check to make sure power supply is not wired to a dimmed
receptacle.
Fixture is steadily (continuous) ashing • Check that the power supply is not overloaded. An
overloaded power supply will cause the auto-reset to trip
repeatedly.
Installation trips main breaker • Check wiring for any short circuits. If breaker continues to
trip there may be a short in the power supply. Call customer
service for a replacement unit.
Troubleshooting
!
• Do not attempt to ground this unit. It is double-insulated.
• This unit can be mounted in any orientation, horizontal or vertical.
• Power Supply provides shut down protection against short circuit,
over loading, and over temperature. Unit automatically recovers after
fault condition is removed and after cooling.
• Not intended to be used in wet locations or outdoor areas.
• Not intended for recessed installation in ceilings or softs.
• If any modication is made to the Power Supply, it will invalidate the
warranty and may render the product unsafe.
Tresco Lighting by Rev-A-Shelf
12400 Earl Jones Way
Louisville, KY 40299
Tel: 800-227-1171
Fax: 502-491-2215
Email: [email protected]
Web: www.trescolighting.com
I-DCE3060D-1, 05/19
I-PSREC-1 218 < This was the Proximity Form No.
LISTED
Save these instructions for future reference.
For technical assistance, call 1-800-227-1171
Page 2
This manual suits for next models
1
Table of contents
