Tridium Vykon NPB-2X-485 Assembly instructions

3951 Westerre Parkway, Suite 350
Richmond, Virginia 23233 USA
NPB-2X-485 Option
INSTALLATION SHEET
NPB-2X-485 Option Installation Sheet
Part Number 10621 Rev 2 Updated:May28, 2009 1
Information and specifications published here are current as of the date of publication of this document. Tridium, Inc. reserves the right to change or modify
specifications without prior notice. The latest product specifications can be found by contacting our corporate headquarters, Richmond, Virginia. Products or
features contained herein may be covered by one or more U.S. or foreign patents. © 2009 Tridium, Inc.
Thisdocumentcoversthemountingandwiringofthe
NPB‐2X‐485optioncardinaVykon®JACEcontroller
(JACE‐200/600,SEC‐J‐x01,orJ‐202‐XPRseries).
RefertotheappropriateJACE®mountingandwiring
documentforfurtherJACEinstallationdetails.
Included in this Package
Includedinthispackageyoushouldfindthe
followingitems:
•NPB‐2X‐485optioncard,connectorendplate.
•two3‐positionterminalplugs,forwiringtoan
RS‐485network
•ThisNPB‐2X‐485OptionInstallationSheet,Part
Number10621Rev2.
Material and Tools Required
Thefollowingtoolsandsuppliesmayberequiredfor
installation:
•#2phillipsscrewdriver:usedtoinstallthe
NPB‐2X‐485.
•Smallflat‐bladescrewdriver:usedformaking
wiringconnectionstotheRS‐485networks.
•#1phillipsscrewdriver:toremoveandrefasten
J‐202‐XPRcovers(ifapplicable).
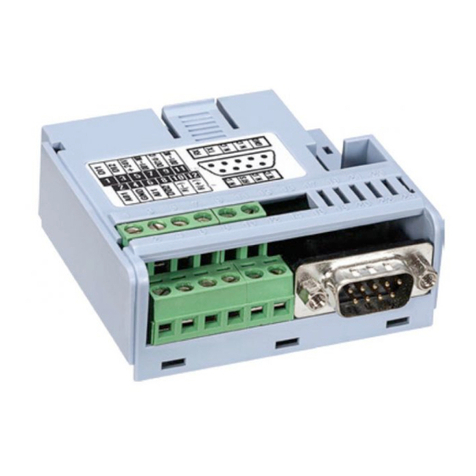
Figure 1 NPB-2X-485 option.
Mounting
Warning PowertotheJACEmustbeOFFwhen
installingorremovingoptioncards,or
damagewilloccur!Also,youmustbevery
carefultopluganyoptioncardintoits
connectorproperly(pinsaligned).
MounttheNPB‐2X‐485optioncardineitherofthe
optioncardslotsoftheJACE,asneeded.Notethe
J‐202‐XPRserieshasonlyoneoptioncardslot.
Note IfinstallinginaSecurityJACE(SEC‐J‐x01),
installinOptionCardSlot2.
SeethenotesinTable 1onsoftwareCOMport
assignmentsforinstalledNPB‐2X‐485optioncards.
Procedure 1 Mounting NPB-2X-485 option card on a JACE.
1.
Remove powerfromtheJACE—seetheprevious
Warning.WaitforallLEDsontheunittobeOff.
2.
RemovetheJACEcoverorcovers(J‐202‐XPR).
ForallbuttheJ‐202‐XPR,pressinthefourtabson
bothendsoftheunit,andliftthecoveroff.
Note Ifaccessorymodulesarepluggedintothe
JACE,youmayneedtoslidethemawayfrom
theunittogettothecovertabs.
Table 1 NPB-2X-485 option description.
Description Notes / COM Port Assignments
Dual port,
optically isolated
RS-485 adapter,
with two
3-position,
removable
screw-terminal
connector plugs.
See Figure 2 on
page 2 for
location of Option
Slots1and 2 on a
JACE-200/600.
The J-202-XPR series controller accepts
only one (1) option card, where ports for
the NPB-2X-485 are COM7 and COM8.
For other JACE models (JACE-200/600,
SEC-J-x01) up to 2 RS-485 option cards
may be installed, where:
•If single RS-485 option in Option Slot 1,
ports are COM3, COM4.
•If two RS-485 options, ports are
COM3, COM4 for Option Slot 1,
and COM5, COM6 for Option Slot 2.
•If single RS-485 option in Option Slot 2,
ports are COM3, COM4, unless one of
the following are in Option Slot 1:
• NPB-232: ports are COM4, COM5.
• NPB-GPRS: ports are COM5, COM6.
SR 584
s
XRXT
XRXT
s
COM3 / COM5
COM7
COM4 / COM6
COM8
See Notes in
Table 1.

NPB-2X-485 Option Installation Sheet
Updated: May 28, 2009 Part Number 10621 Rev 2
Wiring
Material and Tools Required
2
FortheJ‐202‐XPR,firstremovetherightcover,
thentheleftcover,retainingthetwoscrewsthat
secureeachcover.
3.
ForallbuttheJ‐202‐XPR,removethebatteryand
bracketassemblybytakingoutthescrews
holdingitinplace,settingthescrewsasidefor
later.Unplugthebatteryfromtheconnectoron
theJACE.SeeFigure 2foranexplodedview.
Figure 2 Remove battery assembly.
4.
Removetheblankingendplatefortheslotyouare
installingtheoptioncardinto.
(Retaintheblankingendplateincasetheoption
cardmustberemovedatalaterdate.)
5.
CarefullyinsertthepinsoftheNPB‐2X‐485into
thesocketoftheappropriateoptioncardslot.The
mountingholesontheoptionboardshouldline
upwiththestandoffsonthebaseboard.Iftheydo
not,theconnectorisnotproperlyaligned.Press
untiltheoptioncardiscompletelyseated.
6.
Placethecustomendplatethatcamewiththe
NPB‐2X‐485overitsconnector(seeFigure 3).
Figure 3 NPB-2X-485 inserted, end plate on top.
7.
Plugthebatterycableintothebatteryconnector
ontheJACE(seeFigure 3forlocationonthe
JACE‐200/600).
8.
ForallbuttheJ‐202‐XPR,setthebatteryand
bracketassemblybackovertheoptioncardslots,
withmountingholesalignedwiththestandoffs.
Screwsenterholesinthebatterybracketfirst.
Figure 4 Re-fasten screws.
9.
Placethescrewsthroughtheendplate(s),andinto
thestandoffsonthebaseboard.Usinga
screwdriver,handtightenscrews.
10.
ReplacetheJACEcoverorcovers(J‐202‐XPR).
Ifaccessorymoduleswereunpluggedfromthe
JACE,plugthembackasbefore,andsecure.
Wiring
ConnecttoanRS‐485multipointnetworkusingoneof
the3‐positionscrewterminalconnectors,using
shielded18‐22AWGwiring.RefertotheTIA/EIA‐485
standardformoredetails.
Screwterminalsareminus(–),plus(+),andshield(S),
asindicatedontheNPB‐2X‐485endplatelabel—see
Figure 1onpage 1.
LEDs
FourLEDsarevisibleonthetopoftheNPB‐2X‐485
optioncard(covermustberemovedfromJACE).The
labelontheNPB‐2X‐485endplatenotesthesefour
LEDsas“TX”and“RX”—seeFigure 1onpage 1.
ThetwoLEDsforeachportaredescribedasfollows:
•TX(yellow)—Transmit,indicatesthattheJACE
issendingdatatoadeviceconnectedonthe
RS‐485trunk.
•RX(green)—Receive,indicatesthattheJACEis
receivingdatafromadeviceconnectedonthe
RS‐485trunk
Screws (4)
Option Slot 2
Area
JACE-200/600
Blanking
End
Plate
Battery
Assembly
(includes
cable and
bracket)
Unplug battery here
Option Slot 1
Area
JACE
Battery
Connector
Insert NPB-2X-485 into
option card slot carefully,
with pins aligned.
Fully seat card. JACE-200/600
Place NPB-2X-485
custom end plate
over end.
For JACE models
with battery
assembly over the
Option Slots,
reinsert the
4 screws through
thebatterybracket,
endplates,andinto
the standoffs. JACE-200/600
