manuals.online logo
Brands
  1. Home
  2. •
  3. Brands
  4. •
  5. Campbell
  6. •
  7. Control Unit
  8. •
  9. Campbell CELL200 Series User manual

Campbell CELL200 Series User manual

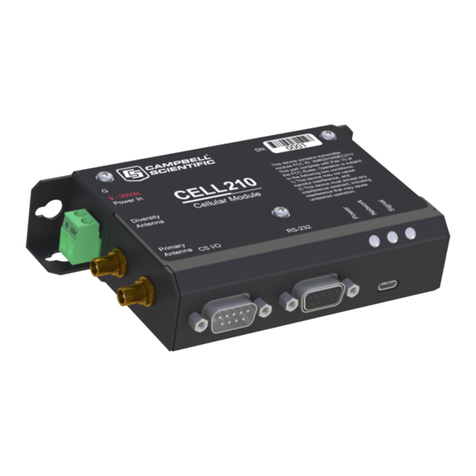
4G LTE Cellular Module
For Private Dynamic IP Addresses
Part Number 34285
Revision: 04/2020
www.campbellsci.com.au/cell220
1. Introduction
This Quick Deploy Guide is a general reference to give the
installer an overview of the steps required to make this
system operational. The Product Manual is the definitive
source for detailed installation instructions and information.
For best results, update to the latest data logger operating
system and version of Device Configuration Utility.
2. Selecting a data service
Before installing a data logging system with telemetry, you
will need a SIM and data plan. For most applications, Telstra
will offer the best coverage, especially in regional areas. Telstra
and Optus coverage maps can be found on each provider's
respective websites.
The CELL220 and CR300-CELL220 will work with standard data
plans, no extra steps are necessary thanks to the
complimentary Konect Pakbus Router service. A micro-SIM
(3FF) is the correct size for use with the CELL220.
3. Install the SIM card
1. Remove the SIM card cover.
2. Note the location of the notched corner for
correct alignment. The gold contact points of the
SIM face down when inserting the SIM card as
shown in FIGURE 3-1 (p. 2). Gently slide the card
into the slot until it stops and locks into place. To
eject the SIM card, press it in slightly and release.
3. Replace the SIM card cover.
4. Konect PakBus Router setup
4.1 Get started
Open a web browser and go to www.konectgds.com.
First-time users need to create a free account. After you
submit your information, you will receive two emails up to five
minutes apart. One email will contain a Passport ID and the
other your Password. If emails are not received, check your
email junk folder.
NOTE:
CR3000, CR1000 and CR800-series users must refer to the
CELL200 Product Manual. This Quick Deploy Guide applies
to the CR300, CR1000X and CR6 data loggers. For any other
loggers, please check the Product Manual or contact
Campbell Scientific.
You will need the Konect PakBus Router redemption code that
came on a card with the Campbell Scientific CELL220 modem.
4.2 Set up Konect PakBusRouter
1. Sign in to www.konectgds.com using your Passport
ID and Password found in the two received emails.
Once logged in, you will be at the Welcome page.
2. Click devices and services on the command bar
to the left and select Redeem PakBus Router Code.
Enter your complimentary router redemption code
found on the card and click Submit.
3. This screen shows the assigned DNS address and Port
for the router. A TCP password must be entered for
additional security, and you must select a unique
PakBus Address for your data logger.
5. Hardware and software configuration
5.1 Set up hardware
1.
Connect the cellular antenna using both
Cellular and Diversity ports if using multiple
antennas or a MIMO antenna. This is the
recommended method. If using a single
antenna, use the Primary Antenna port.
2.
Connect your data logger to the CELL200-
series module RS-232 or CS I/O port. Ensure
the same port is used for each device. Use
the 18663 cable for RS-232 connection, and
the SC12 cable for CS I/O connection (either
female connector on the SC12 cable can be
used for the CELL220)
3.
If not connecting through CS I/O, provide
power to the CELL200 series. If using CS I/O,
note that power for the modem is supplied
by the data logger. USB power on the data
logger will not power the modem, 12V is
required.
5.2 Configure datalogger
1.
Connect to your data logger by using Device
Configuration Utility.
2.
On the Datalogger tab, change the data logger PakBus
Address and PakBus/TCP Password to match the
values entered in the Konect PakBus Router setup.
3.
On the Network Services tab in the PakBus/TCP
Client field, enter the DNS address and Port number
noted during the Konect PakBus Router setup.
4.
On the PPP tab, set Config/Port Used to CS I/O SDC8
or RS-232, depending on how the modem is connected
to the data logger.
5.
(Optional) On the PPP tab, set User Name and Password if
required by your cellular carrier.
6.
Verify the Modem Dial String setting is blank.
7.
If connecting through RS-232, on the Comport Settings
tab, set RS232 BaudRate to 115200 Fixed.
8.
Validate changes by clicking on the Apply button (bottom
left). A summary of the logger settings will be displayed in
a new window. Click on the OK button.
9.
Shut down Device Configuration Utility and start it again.
This will activate the Cellular tab needed for the next
step.
TIP:
This information will be required for configuration of the
data logger as well as PC software setup. Please note
your DNS, Port, TCP Password and PakB
us address as you
will need them later.
10.
Reconnect to the datalogger using Device
Configuration Utility. On the Cellular tab, enter the
APN provided by your cellular provider. For Telstra, this
will most commonly be "telstra.internet" (without
quotes).
11.
At this stage, we recommend to archive a copy of the
logger settings on your computer. To save a copy of
these settings for future use, click Summary then
Save and select a folder on your PC.
12.
Click Apply to save the changes.
13.
Once changes have been applied, disconnect from
the data logger and close Device Configuration Utility
5.3 Set upLoggerNet
1.
Open Loggernet.
2.
Go to Main > Setup to open the Setup screen.
3.
Set Standard view by selecting View > Standard
4.
Select Add Root > IPPort.
5.
Select PakBusPort then pbRouter for PakBus
data loggers such as the CR1000X.
6.
Add the relevant data logger to the pbRouter (in our
example, it is a CR1000X).
7.
In the Entire Network window on the left, select the
IPPort in the Network Map. The DNS and Port
information (from the Konect Pakbus Router information
in Step 4.2) is used in this step. Enter them into the
Internet IP Address field in the format DNS:Port with a
colon separating DNS and Port. For example,
axanar.konectgds.com:pppp where pppp is the port
number.
8.
In the PakBusPort, please make sure that the box
corresponding to PakBus Port Always Open is unticked.
In the "TCP Password" field, enter the TCP password.
9.
For PakBus data loggers, select the pbRouter in the
Network Map and set the PakBus Address to 4070.
10.
For PakBus data loggers, select the data logger in the
Network Map and set the PakBus Address to match that
of the data logger (default address in the data logger is 1).
Click Apply to save the changes.
6. Test the connection
Use the Connect screen to test the connection. Click on the
appropriate station and click Connect to initiate a call to the
data logger. It is important to ensure data logger has 12V
power when powering the modem via CS I/O.
If the call is successful, the connectors at the bottom of the
screen will come together and clock information from the data
logger will be displayed in the Station Date/Time field.
TIP:
The connection time is subject to many external factors. It
is often less than 30 seconds but could be up to 15
minutes.
Be patient.
Contact Us
If you require any assistance in following this Quick Deploy Guide or you run into any other issues, contact one of our application
engineers through [email protected] or on 07 4401 7700.

Other manuals for CELL200 Series

4

Other Campbell Control Unit manuals

Campbell CELL200 Series User manual

Campbell

Campbell CELL200 Series User manual

Campbell CELL200 Series User manual

Campbell

Campbell CELL200 Series User manual

Campbell CELL200-Series User manual

Campbell

Campbell CELL200-Series User manual

Campbell CR10 PROM User manual

Campbell

Campbell CR10 PROM User manual
Campbell GRANITE VOLT Series User manual

Campbell

Campbell GRANITE VOLT Series User manual

Campbell SDM-IO16 User manual

Campbell

Campbell SDM-IO16 User manual

Campbell TEMP 120 User manual

Campbell

Campbell TEMP 120 User manual

Campbell NL116 User manual

Campbell

Campbell NL116 User manual
Campbell SDM-SIO1A User manual

Campbell

Campbell SDM-SIO1A User manual
Campbell CompactFlash CFM100 User manual

Campbell

Campbell CompactFlash CFM100 User manual

Campbell SDM-AO4A User manual

Campbell

Campbell SDM-AO4A User manual

Campbell CURS100 User manual

Campbell

Campbell CURS100 User manual

Campbell CELL205 User manual

Campbell

Campbell CELL205 User manual

Campbell SDM-SIO1A User manual

Campbell

Campbell SDM-SIO1A User manual

Campbell LLAC4 User manual

Campbell

Campbell LLAC4 User manual

Campbell CS240 User manual

Campbell

Campbell CS240 User manual

Campbell SDM-CD16 User manual

Campbell

Campbell SDM-CD16 User manual

Campbell SDM-CD16D User manual

Campbell

Campbell SDM-CD16D User manual
Campbell SDM-SI01A User manual

Campbell

Campbell SDM-SI01A User manual

Campbell CompactFlash CFM100 User manual

Campbell

Campbell CompactFlash CFM100 User manual

Campbell CR300 series Installation and operating instructions
Campbell

Campbell CR300 series Installation and operating instructions

Campbell CDM-A100 Series User manual

Campbell

Campbell CDM-A100 Series User manual
Popular Control Unit manuals by other brands

Siemens Simatic S7-1500 manual

Siemens

Siemens Simatic S7-1500 manual

Erica Synths PICO VCA2 quick start guide

Erica Synths

Erica Synths PICO VCA2 quick start guide

ADLINK Technology Express-SL user manual

ADLINK Technology

ADLINK Technology Express-SL user manual

AEV ProCal SNAP user guide

AEV

AEV ProCal SNAP user guide

SMC Networks DXT1215 instruction manual

SMC Networks

SMC Networks DXT1215 instruction manual

Lubeworks 18063521 instruction manual

Lubeworks

Lubeworks 18063521 instruction manual

WifiTrax Model Science WFD-60 Getting started guide

WifiTrax Model Science

WifiTrax Model Science WFD-60 Getting started guide

Atmel ATBTLC1000 BluSDK user guide

Atmel

Atmel ATBTLC1000 BluSDK user guide

BenQ PointWrite PW03 user manual

BenQ

BenQ PointWrite PW03 user manual

Moeller Xcomfort CAEE-02/01 Assembly instructions

Moeller

Moeller Xcomfort CAEE-02/01 Assembly instructions

DeVilbiss FinishLine HAR-680 Service bulletin

DeVilbiss

DeVilbiss FinishLine HAR-680 Service bulletin

Bosch POPEX B299 installation guide

Bosch

Bosch POPEX B299 installation guide

Linear Technology DC1453A Demo Manual

Linear Technology

Linear Technology DC1453A Demo Manual

Carlisle BINKS 84-501 Service manual

Carlisle

Carlisle BINKS 84-501 Service manual

Telit Wireless Solutions JF2 Hardware user's guide

Telit Wireless Solutions

Telit Wireless Solutions JF2 Hardware user's guide

Wetronic MS16 manual

Wetronic

Wetronic MS16 manual

Motorline MC10-11 User's and installer's manual

Motorline

Motorline MC10-11 User's and installer's manual

Infineon HybridPACK 2 Mounting instruction

Infineon

Infineon HybridPACK 2 Mounting instruction

manuals.online logo
manuals.online logoBrands
  • About & Mission
  • Contact us
  • Privacy Policy
  • Terms and Conditions

Copyright 2025 Manuals.Online. All Rights Reserved.