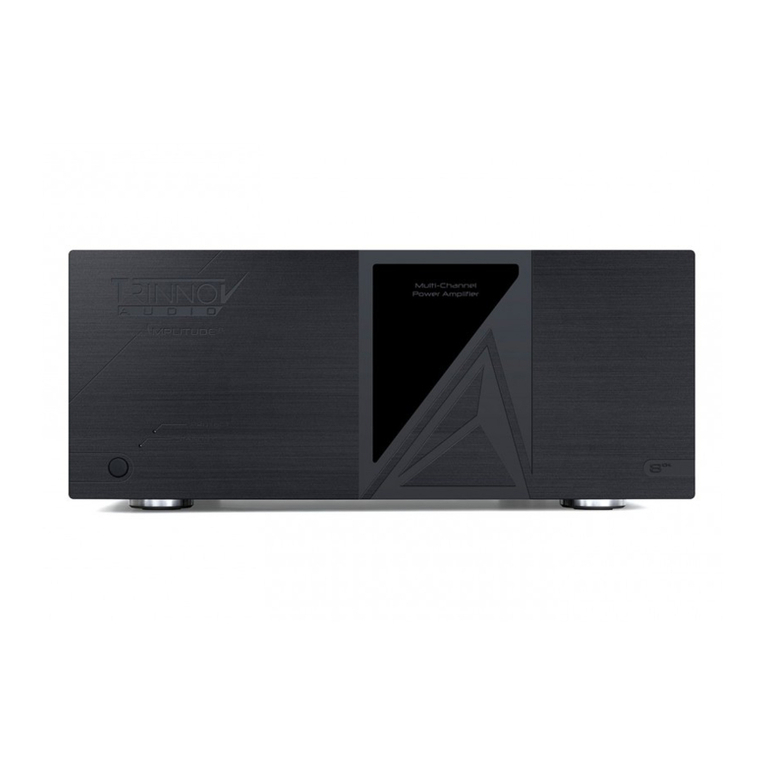
Trinnov Audio Amplitude 16 User manual

www.trinnov.com
USER MANUAL

32
AMPLITUDE16 USER MANUAL
THANK YOU FOR CHOOSING TRINNOV AUDIO
AMPLITUDE16 OWNER’S MANUAL
Designed in partnership with ICEpower according to our specifications, the Amplitude16 maximizes
the performance of their class D modules to deliver the best possible immersive experience. With
the Amplitude16, Trinnov Audio delivers the highest possible performance in a very cost-effective
package, with unprecedented versatility.
Version 1.0 - Last update: June 2021
f Contents
IMPORTANT SAFETY INSTRUCTIONS 4
ABOUT THE AMPLITUDE16 6
PRESENTATION 6
IMPORTANT RECOMMENDATION 6
SPECIFICATIONS 7
THE FRONT PANEL 9
THE REAR PANEL 10
ENVIRONMENTAL NOTICE 11
OPERATION 11
CHANNEL BRIDGING 12
REMOTE TRIGGERS 12
APPENDIX 13
PINOUT & WIRING 14
RACK EARS 14
SPECIFICATIONSTABLE OF CONTENTS

54
AMPLITUDE16 USER MANUAL
IMPORTANT SAFETY INSTRUCTIONS
The lightning flash with arrowhead symbol, within an equilateral triangle, is intended
to alert the user to the presence of uninsulated “dangerous voltage” within the
product’s enclosure that may be of significant magnitude to constitute a risk of
electric shock to persons.
TO REDUCE THE RISK OF FIRE OR ELECTRIC SHOCK, DO NOT EXPOSE THIS PRODUCT TO RAIN OR MOISTURE.
CAUTION: TO PREVENT ELECTRIC SHOCK, DO NOT USE THE AC (POLARIZED) PLUG WITH AN EXTENSION
CORD, RECEPTACLE OR OTHER OUTLET UNLESS THE BLADES CAN BE FULLY INSERTED TO PREVENT BLADE
EXPOSURE.
EXTENSION CORDS ARE NOT RECOMMENDED FOR USE WITH THIS PRODUCT.
THIS UNIT CONTAINS VOLTAGES WHICH CAN CAUSE SERIOUS INJURY OR DEATH. DO NOT OPERATE WITH
COVERS REMOVED. REFER ALL SERVICING TO YOUR AUTHORIZED TRINNOV AUDIO DEALER.
FOR CONTINUED PROTECTION AGAINST FIRE HAZARD, REPLACE FUSES ONLY WITH THE SAME TYPE AND
RATING OF FUSES AS SPECIFIED.
Please carefully read each item of the operating instructions and safety precautions before
installing and using this product. Use extra care to follow the warnings written on the product
itself and/or in the operating instructions. Keep the operating instructions and safety precautions
for future reference.
Install the Amplitude16 on a solid, flat, level surface
that is dry, well ventilated and out of direct sunlight.
Be sure that all four feet are supported.
Do not use this apparatus near water.
To prevent fire or shock hazard, do not allow liquids
to spill or objects to fall into any openings of the
product.
Clean only with a dry cloth. Do not use liquid
solvent-based cleaners.
Protect the detachable power chords from
being walked on or pinched particularly at plugs,
convenience receptacles, and the point where they
exit from the apparatus. If the ac cord becomes
damaged, do not use it. Immediately replace it with
a new one of the same or better rating.
To prevent damage to the analog output circuitry,
be certain not to short the output signal to ground.
Ensure that your audio output cables do not have
any internal shorts before connecting them to the
Amplitude16.
Unplug this apparatus during lightning storms or
when unused for long periods of time.
Do not open the equipment case or remove any of
the cover panels. There is no serviceable part for
this product . Refer all servicing to qualified service
personnel.
To prevent fire or shock hazard, do not allow
liquids to spill or objects to fall into any openings
of the product. Use only attachments/accessories
specified by the manufacturer.
Do not defeat the safety purpose of the polarized
or grounding-type plug. A polarized plug has two
blades with one wider that the other. A grounding-
type plug has two blades and a third grounding
prong. The wide blade or the third prong is provided
for your safety. If the provided plug does not fit into
your outlet, consult an electrician for replacement
of the obsolete outlet.
Before connecting the equipment, check that the
main power supply voltage rating corresponds with
the local main power supply. The rating of the main
power supply voltage is printed on the equipment.
If replacement of the ac line fuses and/or any
internal fuses becomes necessary, replace only
with same value and type of fuse : 2x t10a 5x20mm
slow blow. Never bypass the fuses.
It is imperative that the Amplitude16 be operated in
a well ventilated environment and the immediate
external temperature be maintained as specified.
Do not expose the Amplitude
16
to humidity, steam,
smoke or excessive dampness or dust. Maximum
permissible operating conditions: 0°c to 40°c, 20-
80% relative humidity. External cooling fans may
be required in some cases.
Do not stack any equipment directly above or below
the Amplitude
16
as to protect it from overheating, as
well as the continued functionality of any equipment
near and around it.
When installing the Amplitude
16
in your system,
make certain to allow a minimum of ½ inch of
ventilation on each side of the unit. Also, allow
at least 2 inches of ventilation space above the
unit. Improper ventilation of the unit may cause
overheating, which may damage the unit and cause
a fire. Place the unit on a solid surface only. I.E. Not
on carpet, etc.
To completely disconnect the apparatus from the
ac, disconnect all power sources.
Refer all servicing to qualified service personnel.
Servicing is required when the apparatus has been
damaged in any way, such as when the power-
supply cord or plug in damaged, liquid has been
spilled or object have fallen into the apparatus,
or the apparatus has been exposed to rain or
moisture, does not operate normally or has been
dropped.
Do not expose this apparatus to dripping or
splashing and ensure that no objects filled with
liquids, such as vases, are placed on the apparatus.
The main plug of the power supply cord shall
remain readily operable.
Aftermarket and third party modifications.
Please note that any aftermarket and/or third-party
modifications will void the warranty.
The disconnect symbol, is intended to warn the user that it is required to disconnect
all power sources in order to prevent any shock hazard.
CAUTION: TO REDUCE THE RISK OF ELECTRICAL SHOCK, DO NOT REMOVE COVER (OR BACK).
NO USER-SERVICEABLE PARTS INSIDE. REFER SERVICING TO QUALIFIED SERVICE PERSONNEL

76
AMPLITUDE16 USER MANUAL
SPECIFICATIONSABOUT THE AMPLITUDE16 SPECIFICATIONS
PRESENTATION
Like all Trinnov power amplifiers, the Amplitude16 is designed to match the Altitude AV Processor range.
This match is achieved both in aesthetics and performance. The input level sensitivity of the Amplitude16
matches perfectly the Altitude output level to maximize dynamic range and signal-to-noise ratio. To
extract maximum performance, a custom dual power supply and a bespoke thermal dissipation design
have been developed.
Feature rich, the Amplitude16 also provides unprecedented versatility. With the ability to bridge any pair of
channels, the Amplitude16 meets the various requirements of immersive sound home theaters.
IMPORTANT RECOMMENDATION
Before turning on your Amplitude16, make sure you are using the right fuses: 2x 10A 5x20mm slow blow.
Use both Power Inlets.
AUDIO POWER
ONE CHANNEL 8Ω 200W - 1kHz, 0,1%< THD+N
ONE CHANNEL 4Ω 400W - 1kHz, 0,1%< THD+N
ONE CHANNEL BRIDGED 8Ω 800W - 1kHz, 0,1%< THD+N
ONE CHANNEL BRIDGED 4Ω 1000W - 1kHz, 0,1%< THD+N
TOTAL OUTPUT POWER
(SE or BTL)
2800W all channels driven @40°C continuous, 120 VAC
3200W all channels driven @40°C continuous, 230 VAC
GAIN 16 dB single ended / 22 dB bridged
AUDIO PERFORMANCE
THD+N SINGLE ENDED 0.0015% - 8Ω, 5W (2dBu)
THD+N BRIDGED 0.0015% - 8Ω, 20W (8dBu)
FREQUENCY RESPONSE +0/-0,6 dB 20 Hz to 20 kHz, load-independent
DAMPING FACTOR 2340 at 100Hz / 1820 at 1kHz / 354 at 10kHz
SIGNAL TO NOISE RATIO 126 dB referenced to rated 1% THD output (A-Weighted)
CROSSTALK 96 dB single ended 200W 8Ω
POWER SUPPLY
POWER REQUIREMENTS 2x 100/240V (auto-selecting)
POWER CONSUMPTION 0,5W< at Standby; 125W at idle; Max 2x 2000W fully loaded
THERMAL CONVERSION 683 BTU/h MAX
MAINS FUSE 2x 10 Amp slow blow for different Voltages & Countries
TRIGGER INPUT 5-15 VDC; Steady State (mini-jack TS)
TRIGGER OUTPUT 8-10 VDC; Steady State (mini-jack TS)
MODES /PROCESS
Standby: Amplier is ready to be turned on via front panel switch or
remote trigger.
Overcurrent, D.C., and/or thermal protection: Amplier will cycle.
Catastrophic D.C. or output stage failure: Amplier will shut down.
AUDIO INPUTS & OUTPUTS
INPUT CONNECTOR 2x DB25 Female, Tascam Analog Pinout
INPUT IMPEDANCE 47kΩ, each phase
INPUT SENSITIVITY 6.16V (+18dBu) RMS balanced in = 200W into 8Ω single ended out
OUTPUT CONNECTOR 1x 5 way binding post per channel

98
AMPLITUDE16 USER MANUAL
THE FRONT PANEL
SPECIFICATIONS
PHYSICAL CHARACTERISTICS
CHASSIS: 3 Rack Units
WEIGH T: 20.5 kg, above 45 lbs
ENVIRONMENTAL CONDITIONS:
● • Temperature: 0°C - 40°C / 32°F - 104°F
● • Humidity: 20% - 80% relative humidity (without condensation)
Dimensions including feetDimensions including rack ears
THE FRONT PANEL
1 - POWER BUTTON
Press the front panel power button to exit the standby mode and start the amplifier.
3 - POWER LED
The Power LED indicates when:
• The Amplitude16 is on standby (dimmed red)
• The Amplitude16 is booting (waving green)
• The Amplitude16 is powered on (full white)
They are indicating:
• Normal operation (white), clipping (red),
protection (blinking red)
• Bridge Status for each pair of channels
(vertical LED bar)
• With the optional AoIP input board, only
channels routed through the audio network to
the amplifier will be lit
Please refer to chapter 2.2 for more
information on bridging.
2 - FRONT PANEL LEDS

1110
AMPLITUDE16 USER MANUAL
THE REAR PANEL
THE REAR PANEL
1 - 2x AC INLETS
Use the 2x included power cords to connect your
amplifier to an AC power source.
2 - 2x REAR PANEL FUSE
Use the same type and rating only: T10A 5x20mm
slow blow.
3 - POSITIVE BINDING POST
Connect the + (plus) speaker connector. The
binding posts can accept spade plugs, banana
plugs or bare wire. In bridge (BTL) mode, connect
the + (plus) connector of the odd channel output.
4 - NEGATIVE BINDING POST
Connect the - (minus) speaker connector. The
binding posts can accept spade plugs, banana
plugs or bare wire. In bridge (BTL) mode, connect
the - (minus) connector of the even channel output.
5 - BRIDGING SWITCH
Each pair of speaker output can be bridged using
the BTL switch: SE position: each pair of outputs is
set as two individual speaker outputs BTL position:
each pair of outputs is bridged and must be
connected to a single speaker following the white
marking for speaker connection.
Please refer to chapter 2.2 for more information
on Bridging.
6 - ANALOG INPUTS
Two DB25 female connectors allow you to connect
to the inputs of the amplifier. The Amplitude16 uses
the DB25 Tascam Pinout standard described in the
appendix of this document. Note: when Bridged
mode is selected, it takes the odd-numbered
channel in a mono format as the primary input, as
indicated on the white marking below each DB25
connector.
7 - REMOTE TRIGGER INPUT & OUTPUT
The amplifier will power on with a Steady State
12V signal fed through the Trigger input. The same
tension is passed onto the Trigger output to power
on other devices.
8 - LED SWITCH
When switched off, the front panel LEDs will be
turned off one minute after the amplifier is powered
on.
9 - OPTIONAL INPUT BOARD
This is a slot for a future optional audio over IP
input board.
OPERATION
Before turning on the Amplitude16, ensure that all precautions and warnings have been carefully
reviewed and adhered to. Damage to the Amplitude16 caused by improper operation, wiring and/or
ventilation will not be covered under warranty and Trinnov Audio will not be liable for any consequential
damage or loss. When the amplifier is connected, it goes into Standby. The amplifier is completely off,
save for a minimal (and low power) supply to power the soft-start circuit.
When the Standby button is pressed, the soft-start sequence begins and the Power LED turns white.
Pressing the Standby button again takes the amp directly into the standby mode.
ENVIRONMENTAL NOTICE
Here are critical instructions to follow before you turn the power on your Amplitude16:
I. It is imperative that the Amplitude16 is connected to the ground via its 2x three-wire AC power cords.
It is important that the AC power outlets, which the Amplitude16 is plugged into, are actually grounded.
Failure to do so will severely compromise the performance, reliability, and safety of use of the Amplitude16.
II. Ventilation is an important issue when placing the Amplitude
16
in a system. Make certain that the
Amplitude16 is placed in a well-ventilated area or rack unit.
III. Please take note that some power line conditioners defeat the AC power ground on their outlets. If
the intention is to plug the Amplitude
16
into a line conditioner, check with your dealer to make certain
that the particular conditioner that is intended for use DOES NOT DEFEAT THE AC GROUND on its AC
outlets. Only the highest-powered line conditioners should be considered for use with the Amplitude16.
Otherwise, the amplifier’s power output may be compromised.
IV. DO NOT remove any cover panels from the Amplitude16, as there are no user serviceable components
inside. Refer servicing and updating to qualified service personnel only.
V. It is imperative that the Amplitude16 be operated in a well-ventilated environment and the immediate
external temperature is maintained below 40°C. External cooling fans may be required in some cases.
Do not stack any equipment directly above or below the Amplitude16, to protect it from overheating, as
well as the continued functionality of any equipment near and around it.

1312
AMPLITUDE16 USER MANUAL
OPERATION
CHANNEL BRIDGING
One of the key features of the Amplitude16 is the ability to bridge any pair of the amplifier channels. Bridging
the channels allows you to increase the power output.
For example, you can combine two channels to power one subwoofer or four channels into powering two
subwoofers.
To bridge two channels, move the bridging switch of the required channels to the BTL position.
Speaker connection must be done as follows:
● • Connect the plus (+) of the speaker to the plus (+) of the odd
output channel binding post
● • Connect the minus (-) of the speaker to the minus (-) of the even
output channel binding post
TROUBLESHOOTING SOLUTIONS
In case the Amplitude16 would function abnormally during operation, please review the items in the
following checklist.
Please be sure to thoroughly check all other connected components such as speakers, preamplifiers, as
well as cables.
* when encountering such errors, the amplifier may automatically attempt a new start up sequence (ie; if the temperature drops below
a certain level in case of overheating). If after the restart, the error occurs again for 3 consecutive cycles, the amplifier will enter a
permanent shut down mode with all LED (channel, bridge status and power LEDs) lit red constant until a manual reboot is done.
**manually restarting the amplifier in case of a DC error is dangerous. This will be indicated with all LEDs (channel, bridge status and
power LEDs) lit in red constant.
REMOTE TRIGGERS
Use the remote trigger to connect to a compatible preamplifier, source device or other product with 5 to
12 VDC output.
When so interconnected, the Amplitude16 will turn on and off in response to the signals received from the
source device. The trigger circuit requires a steady-state signal. Units that send a pulse signal for turn-on
and turn-off will not work with the Amplitude16.
The trigger output will pass through the steady-state signal received on the trigger input to switch
downstream devices on and off.
Common Practices:
● Avoid specifying the Amplitude16 to drive very low impedance drivers
● Avoid bridging adjacent channels
● Split bridged channels across the two circuits
➔ Example:
● • Power supply 1: outputs 1 & 2 bridged
● • Power supply 2: outputs 9 & 10 bridged
NOTE: Make sure to use a mono TS 35mm mini-jack cable for 12V triggers
APPENDIX
SYMPTOM POSSIBLE CAUSE(S) LED ERROR PATTERN REMEDY
No power or front
panel lights and no
sound.
Power cables
are not inserted
100% into AC input
connectors.
N/A
Ensure that both AC cords are
inserted all the way into the
Amplitude16 and that the wall
outlets are active.
Rear panel fuse is
open N/A Replace with same type and
rating ONLY.
Circuit breaker is
open (AC outlet). N/A
Check the AC outlet circuit
breaker and reset, if necessary,
or contact an authorized
Trinnov dealer.
Startup Error DC on every output
or PSU not starting
Power LED
will flash red
Contact an authorized Trinnov
Dealer
No audio output on a
pair of channels but
the amplier remains
operational
Excessive current
limitation and/or
overheating
A pair of channel LED
illuminates in red
constant
Contact an authorized Trinnov
Dealer
No audio output on
any channel and the
amplier shuts down
Channel(s)
heatsink module(s)
overheating
Power LED will flash
red and group(s) of 4
channels LEDs illuminate
in red constant (channels
1-4, 5-8, 9-12 or 13-16)*
Shut down the Amplitude16
until it cools. This should be a
very rare occurrence. If it does
happen, an external fan may
be required.
Power Supply
overheating
Power LED will flash red
and all upper or all lower
channel LED’s illuminate
in red constant*
Shut down the Amplitude16
until it cools. This should be a
very rare occurrence. If it does
happen, an external fan may
be required.
Fan Error Power LED will flash red*
Please contact an authorized
Trinnov dealer. Service may be
required
DC Error Power LED will flash red
Contact an authorized Trinnov
dealer. Attempting to manually
restart the amplier without
solving the DC issue may
permanently damage the
device.**

14
AMPLITUDE16 USER MANUAL
APPENDIX
PINOUT & WIRING
The Amplitude16 may require custom cables when used in bridged mode:
● • When Bridged mode is selected on any pair of channels, it takes the odd-numbered channel in a mono
format as the primary input, as indicated on the white marking below each DB25 connector.
●• Consequently, if you are using a 8x XLR to DB25 breakout to connect your preamplifier to the Amplitude16,
you will lose one XLR on your cable for every pair of bridged channels.
● • As an exemple, in case you bridge channels 1/2 and 9/10, you will not use the XLR #2 and #10 from
your DB25/XLR Breakout to the processor.
H= Hot C= Cold G= Ground
RACK EARS
The total width of the amplifier including rack ears is 482 mm.
Thank you for your attention
Please enjoy your system

Trinnov Audio - 5 rue Edmond Michelet - 93360 Neuilly-Plaisance - France
+33 (0)1 84 23 40 34 - highend@trinnov.com
Table of contents
Other Trinnov Audio Amplifier manuals
Popular Amplifier manuals by other brands
Schiit
Schiit Jotunheim R owner's manual
Rolls
Rolls RA102 Operation guide
Xantech
Xantech PA435X installation instructions
Soundstream
Soundstream Tarantula TA2.160 Installation, operation and specification manual
Harley Benton
Harley Benton AirBorne quick start guide
Musical Surroundings
Musical Surroundings NOVA III owner's manual
