Tripp Lite B097-048 User manual

1
Quick Start Guide
Console Servers
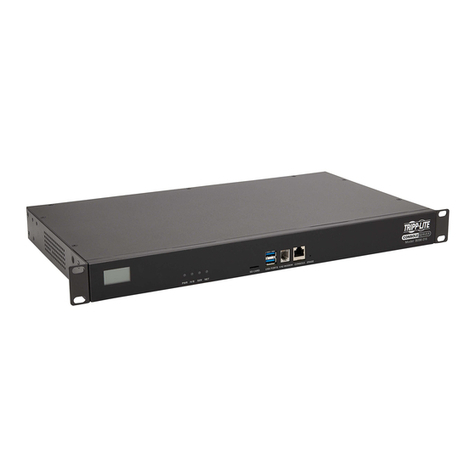
Models: B097-016 (16-Port), B097-048 (48-Port)
Español 4 • Français 7 • Русский 10
PROTECT YOUR INVESTMENT!
Register your product for quicker service and ultimate peace of mind.
You could also win an ISOBAR6ULTRA surge protector—a $100 value!
www.tripplite.com/warranty
1111 W. 35th Street, Chicago, IL 60609 USA • www.tripplite.com/support
Copyright © 2018 Tripp Lite. All rights reserved.
Package Includes
• B097-016 or B097-048 Console Server
• (x2) C13 to NEMA 5-15P Power Cords, 6 ft.
• (x2) Cat5 UTP Patch Cables, 6 ft.
• (x1) B090-A9F Straight-Through Serial Adapter
(DB9 to RJ45, F/F)
• (x1) B090-A9F-X Crossover Serial Adapter (DB9 to RJ45, F/F)
• (x1) B090-A9M Modular Serial Adapter (DB9 to RJ45, M/F)
• (x6) Rubber Feet
• Rack-Mounting Hardware
• Quick Start Guide

2
Hardware Assembly
Connect the Console Server
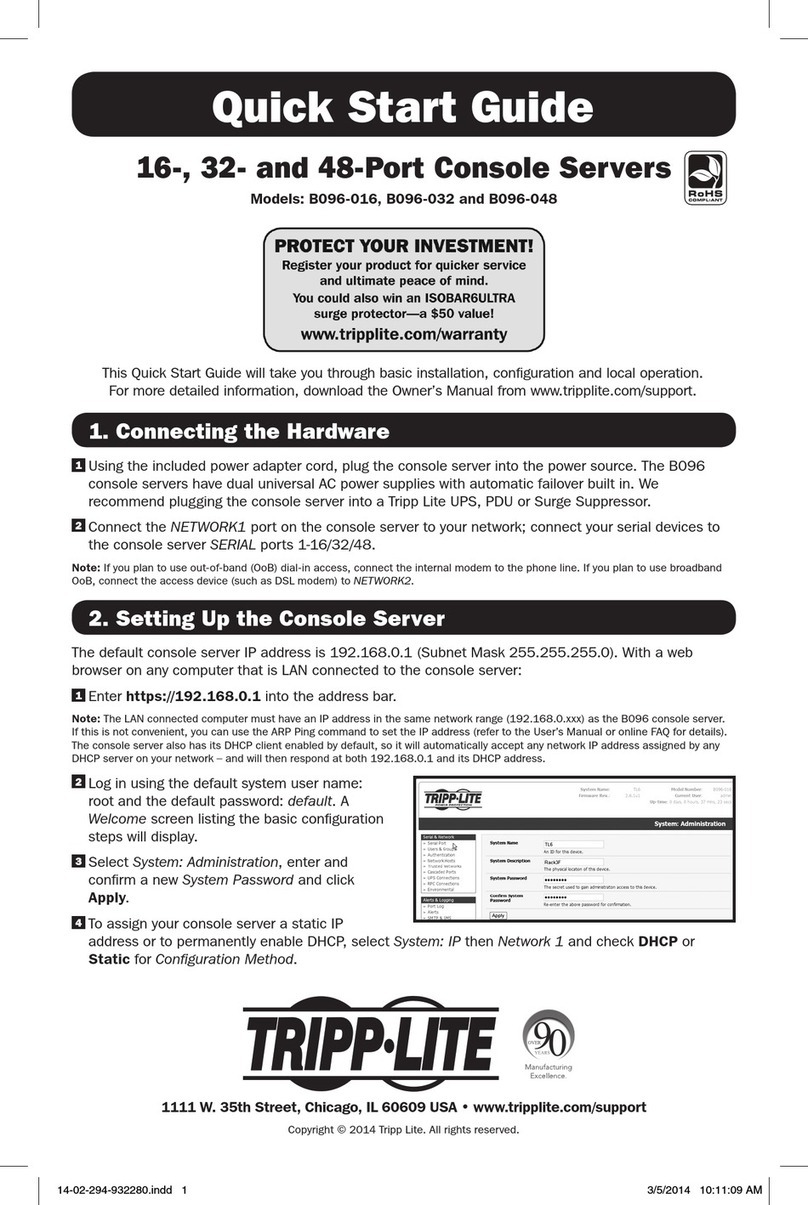
1. If free standing: Attach the included adhesive-backed rubber feet to the console server’s base.
If rack-mounted: Attach the included rack-mount kit to the sides of the console server to be fixed onto the rack.
2. Connect the NET1 port on the console server to your primary network.
3. If you plan to use the NET2 port, you may connect it now.
Note: NET2 can connect to a secondary network. For example, a secondary network may consist of a segregated management LAN or to the WAN via
your Out-of-Band (OOB) management network. Alternatively, it can connect to the same primary network as NET1 for redundancy.
4. Connect your serial devices to the console server’s serial ports labeled 1-16/48 (depending on model).
5. Power on the console server by connecting the included C13 to NEMA 5-15P power cords to the console server’s built-in dual universal
AC power supplies (with automatic failover).
The B097-016 and B097-048 are addressable at one of the two IP addresses:
1. The built-in (default) IP address of 192.168.0.1 (subnet mask 255.255.255.0).
or
2. The default IP address the console server’s DHCP Client accepts from a DHCP server on your network.
Note: The console server will now respond at both 192.168.0.1 and its DHCP-supplied address.
If using a browser on the same network as the console server’s NET1 port (192.168.0.X, or the range used by your DHCP server):
3. Enter https://192.168.0.1/ or http://[DHCP-supplied address]/ and press Enter.
4. Log in using the default username and password.
Username: root
Password: default
5. Press Enter. The console server’s interface welcome page will load.
Configuration and management options present themselves in expanded by-default menus along the left side of the interface.
The top-level menus are Serial & Network, Alerts & Logging, and System, Status & Manage.
The remainder of the page lists configuration tasks required to turn the console server into a usable unit. Some of these tasks will be
marked as completed due to the console server’s factory settings. The procedures in the next section document initial configuration using
the menus, rather than the task list.
Setting a Strong, High-Entropy Password for the Root User
1. Click Serial & Network > User & Groups.
2. Click Edit for the Root User.
3. Enter a strong, high-entropy password in the Password field.
4. Re-enter the passcode in the Confirm field.
5. Click Apply.
Set NET1 Port’s Network Configuration Method
1. Click System > IP.
2. Click Network Interface (if it is not the front-most tab).
3. For the Configuration Method, select either DHCP or Static.
4. If Static, enter an IP Address and Subnet Mask for the NET1 interface.
Set NET2 Port’s Network Configuration Method
NET2 is inactive by default. NET2 can be set up for failover/OOB access or as a management LAN gateway. To activate:
1. Click System > IP.
2. Click Management LAN Interface to make it the front-most tab.
3. Click the Deactivate this network interface checkbox to de-select this option and activate NET2.
4. For Configuration Method, click either the DHCP or Static radio button.
5. If Static, enter an IP Address and Subnet Mask for the NET2 interface (leaving Gateway and DNS fields blank).
Out-of-Band (OOB) – set these for your management network.
IP Passthrough – set these to match an unused private IP range.
Note: The console server’s firewall determines which protocols and services can be used to access which ports and devices. HTTPS and SSH are enabled
to the console server by default. To change access settings for the console server and connected serial ports, click System > Services. Then click the
Service Access tab and adjust accordingly.

3
Connect the Console Server
Other Mode and Functions
Alternatively, NET2 can be used as a redundant connection, sharing the same network settings as NET1.
1. Click System > IP.
2. Click General Settings to make it the front-most tab.
3. For Interface Aggregation, choose between Bridge interfaces or Bond interfaces.
4. Click Apply.
Configuring Managed Devices
1. Click Serial & Network > Serial Port.
Note: By default, all serial ports are set in Console Server mode.
To configure a port:
2. Click Edit.
3. Set the Common Settings (Baud Rate, Parity, Data Bits, Stop Bits and Flow Control) for Port X to match the device connected to serial
Port X.
4. To enable remote access to the device, check the Console Server Mode radio button in Console Server Settings and click the
checkboxes for allowed protocols (e.g. Telnet, SSH and Web Terminal).
5. Click Apply.
Note: Configure user access policies for connecting to such ports in Serial & Network > Users & Groups. An AAA server can configure them remotely. See
the Owner’s Manual for more information.
Please refer to the Owner’s Manual for details on advanced features, such as configuration, PDU and UPS power management,
environmental monitoring, logging, and auto-response alerts.
Warranty and Product Registration
4-Year Limited Warranty
Tripp Lite warrants its products to be free from defects in materials and workmanship for a period of
four (4) years from the date of initial purchase. Tripp Lite’s obligation under this warranty is limited
to repairing or replacing (at its sole option) any such defective products. To obtain service under this
warranty, you must obtain a Returned Material Authorization (RMA) number from Tripp Lite or an
authorized Tripp Lite service center. Products must be returned to Tripp Lite or an authorized Tripp Lite
service center with transportation charges prepaid and must be accompanied by a brief description
of the problem encountered and proof of date and place of purchase. This warranty does not apply to
equipment, which has been damaged by accident, negligence or misapplication or has been altered or
modified in any way.
EXCEPT AS PROVIDED HEREIN, Tripp Lite MAKES NO WARRANTIES, EXPRESS OR IMPLIED, INCLUDING
WARRANTIES OF MERCHANTABILITY AND FITNESS FOR A PARTICULAR PURPOSE. Some states do not
permit limitation or exclusion of implied warranties; therefore, the aforesaid limitation(s) or exclusion(s)
may not apply to the purchaser.
EXCEPT AS PROVIDED ABOVE, IN NO EVENT WILL Tripp Lite BE LIABLE FOR DIRECT, INDIRECT,
SPECIAL, INCIDENTAL OR CONSEQUENTIAL DAMAGES ARISING OUT OF THE USE OF THIS PRODUCT,
EVEN IF ADVISED OF THE POSSIBILITY OF SUCH DAMAGE. Specifically, Tripp Lite is not liable for any
costs, such as lost profits or revenue, loss of equipment, loss of use of equipment, loss of software,
loss of data, costs of substitutes, claims by third parties, or otherwise.
PRODUCT REGISTRATION
Visit www.tripplite.com/warranty today to register your new Tripp Lite product. You’ll be automatically
entered into a drawing for a chance to win a FREE Tripp Lite product!*
* No purchase necessary. Void where prohibited. Some restrictions apply. See website for details.
FCC Notice, Class B
This device complies with part 15 of the FCC Rules. Operation is subject to the following two
conditions: (1) This device may not cause harmful interference, and (2) this device must accept any
interference received, including interference that may cause undesired operation.
Note: This equipment has been tested and found to comply with the limits for a Class B digital device,
pursuant to part 15 of the FCC Rules. These limits are designed to provide reasonable protection
against harmful interference in a residential installation. This equipment generates, uses and can
radiate radio frequency energy and, if not installed and used in accordance with the instructions, may
cause harmful interference to radio communications. However, there is no guarantee that interference
will not occur in a particular installation. If this equipment does cause harmful interference to radio
or television reception, which can be determined by turning the equipment off and on, the user is
encouraged to try to correct the interference by one or more of the following measures:
• Reorient or relocate the receiving antenna.
• Increase the separation between the equipment and receiver.
• Connect the equipment into an outlet on a circuit different from that to which the receiver is
connected.
• Consult the dealer or an experienced radio/TV technician for help.
Any changes or modifications to this equipment not expressly approved by Tripp Lite could void the
user’s authority to operate this equipment.
WEEE Compliance Information for Tripp Lite Customers and Recyclers (European Union)
Under the Waste Electrical and Electronic Equipment (WEEE) Directive and implementing
regulations, when customers buy new electrical and electronic equipment from
Tripp Lite they are entitled to:
• Send old equipment for recycling on a one-for-one, like-for-like basis
(this varies depending on the country)
• Send the new equipment back for recycling when this ultimately becomes waste
Tripp Lite has a policy of continuous improvement. Specifications are subject to change without notice.
1111 W. 35th Street, Chicago, IL 60609 USA • www.tripplite.com/support

4
Guía de Inicio Rápido
Servidores de Consola
Modelos: B097-016 (16 Puertos), B097-048 (48 Puertos)
English 1 • Français 7 • Русский 10
1111 W. 35th Street, Chicago, IL 60609 EE. UU. • www.tripplite.com/support
Copyright © 2018 Tripp Lite. Todos los derechos reservados.
El Paquete Incluye
• Servidor de Consola B097-016 o B097-048
• Cables de Alimentación C13 a NEMA 5-15P, 1.83 m [6 pies]
• (x2) Cables Patch UTP Cat5, 1.83 m [6 pies]
• (x1) Adaptador Serial de Paso Directo B090-A9F
(DB9 a RJ45, H/H)
• (x1) Adaptador Serial Cruzado B090-A9F-X (DB9 a RJ45, H/H)
• (x1) Adaptador Serial Modular B090-A9M (DB9 a RJ45, M/H)
• (x6) Patas de Goma
• Accesorios para la Instalación en Rack
• Guía de Inicio Rápido

5
Conjunto de Hardware
Conecte el Servidor de Consola
1. Si está independiente: Coloque las patas de goma con respaldo adhesivo a la base del servidor de consola.
Si está instalado en rack: Coloque el juego para instalación en rack incluido a los lados del servidor de consola para sujetarlo al rack.
2. Conecte el puerto NET1 en el servidor de consola a su red primaria.
3. Si planea usar el puerto NET2, puede conectarlo ahora.
Nota: NET2 puede conectarse a una red secundaria. Por ejemplo, una red secundaria puede consistir de una LAN de administración segregada o en la WAN
a través de su red de administración fuera de banda [OOB]. En forma alterna, puede conectarse a la misma red primaria como NET1 para redundancia.
4. Conecte sus dispositivos seriales a los puertos seriales del servidor de consola marcados 1 ~ 16 / 48 (según el modelo).
5. Encienda el servidor de consola conectando los cables de alimentación C13 a NEMA 5-15P incluidos a las fuentes de alimentación
universales dobles de CA del servidor de consola (con recuperación automática de falla).
El B097-016 y el B097-048 son direccionables en una de las dos direcciones IP:
1. La dirección IP de 192.168.0.1 incorporada (predeterminada) (máscara de subred 255.255.255.0).
o
2. La dirección IP predeterminada que acepta el Cliente DHCP del servidor de consola que acepta desde un servidor DHCP en su red.
Nota: El servidor de consola ahora responderá a 192.168.0.1 y su dirección DHCP suministrada.
Si usa un navegador en la misma red como el puerto NET1 del servidor de consola (192.168.0.X, o el rango usado por su servidor DHCP):
3. Ingrese https://192.168.0.1/ o http://[dirección DHCP suministrada]/ y presione Enter.
4. Inicie sesión usando el usuario y contraseña predeterminados.
Nombre de Usuario: root
Contraseña: default
5. Presione Enter. Se cargará la página de bienvenida de la interfaz del servidor de consola.
Las opciones de configuración y administración se presentan en los menús ampliados de forma predeterminada en el lado izquierdo de
la interfaz. Los menús de nivel superior son Serial y Red, Alertas e Inicio de Sesión y Sistema, Estado y Administración.
El resto de la página enumera tareas de configuración necesarias para activar el servidor de consola en una unidad utilizable. Algunas de
estas tareas se marcarán como terminadas debido a los parámetros de fábrica del servidor de consola. Los procedimientos descritos en
la siguiente sección documentan la configuración inicial utilizando los menús, en lugar de la lista de tareas.
Establecimiento de un Código de Acceso Robusto, de Alta Entropía para el Usuario Raíz
1. Haga Click en Serial y Red > Usuario y Grupos.
2. Haga Click en Editar para el Usuario Raíz.
3. Ingrese una contraseña fuerte y de alta entropía en el campo Contraseña.
4. Reingrese la contraseña en el campo Confirmar.
5. Haga Click en Aplicar.
Configure el Método de Configuración de Red del Puerto NET1
1. Haga Click en Sistema > IP.
2. Haga Click en Interfaz de Red (si no es la pestaña al frente).
3. Para el Método de Configuración, seleccione DHCP o Estático.
4. Si es Estático, ingrese una Dirección IP y Máscara de Subred para la interfaz de NET1.
Configure el Método de Configuración de Red del Puerto NET2
NET2 está inactivo de forma predeterminada. NET2 puede configurarse para a prueba de fallas / acceso fuera de banda o como un portal
LAN de administración. Para activarlo:
1. Haga Click en Sistema > IP.
2. Haga Click en Interfaz LAN de Administración para hacerla la pestaña más al frente.
3. Haga Click en el cuadro de diálogo Desactivar esta interfaz de red para de-seleccionar esta opción y activar NET2.
4. Para el Método de Configuración, Haga Click en el botón selector de opción DHCP o Estático.
5. Si es Estático, ingrese una Dirección IP y Máscara de Subred para la interfaz de NET2 (dejando sin marcar los campos de Portal y DNS).
Fuera de banda [OOB] – configure estos para su red de administración.
IP de Paso directo - configure estos para coincidir un rango IP privado sin uso.
Nota: El cortafuego del servidor de consola determina qué protocolos y servicios pueden usarse para acceder a cuáles puertos y dispositivos. HTTPS y
SSH son habilitados para el servidor de consola de forma predeterminada. Para cambiar los parámetros de acceso para el servidor de consola y puertos
seriales conectados, Haga Click en Sistema > Servicios. Entonces Haga Click en la pestaña de Acceso a Servicio y ajuste en consecuencia.

6
Conecte el Servidor de Consola
Otros Modos y Funciones
En forma alternativa, NET2 puede usarse como una conexión redundante, compartiendo los mismos parámetros de red que NET1.
1. Haga Click en Sistema > IP.
2. Haga Click en Parámetros Generales para hacerla la pestaña más al frente.
3. Para el Agregado de Interfaz, elija entre Puentear interfaces o Pegar interfaces.
4. Haga Click en Aplicar.
Configuración de Dispositivos Administrados
1. Haga Click en Serial y Red > Puerto Serial.
Nota: De forma predeterminada, todos los puertos seriales están configurados en modo de Servidor de Consola.
Para configurar un puerto:
2. Haga Click en Editar.
3. Configure los Parámetros Comunes (Tasa de Baudios, Paridad, Bits de Datos, Bits de Paro y Control de Flujo) para que el Puerto X
coincida con el dispositivo conectado al Puerto serial X.
4. Para habilitar el acceso remoto al dispositivo, marque el botón selector de Modo de Servidor de Consola en Parámetros del Servidor
de Consola y Haga Click en las casillas de verificación para los protocolos permitidos (por ejemplo, Telnet, SSH y Terminal Web).
5. Haga Click en Aplicar.
Nota: Configure las políticas de acceso del usuario para conectar a dichos puertos en Serial y Red > Usuarios y Grupos. Un servidor AAA los puede
configurar de forma remota. Para más información, consulte el Manual del Propietario.
Por favor, consulte el Manual del propietario para más detalles sobre características avanzadas, tales como configuración, administración de
energía de PDU y UPS, monitoreo ambiental, inicio de sesión y alertas de respuesta automática.
Garantía
Garantía Limitada por 4 Años
Tripp Lite garantiza durante un período de cuatro (4) años a partir de la fecha de compra inicial que
este producto no tiene defectos de materiales ni de mano de obra. La obligación de Tripp Lite bajo
esta garantía está limitada a la reparación o reemplazo (A su entera discreción) de cualquier producto
defectuoso. Para obtener servicio bajo esta garantía, debe obtener un número de Autorización de
Devolución de Mercancía (RMA) de Tripp Lite o de un centro de servicio autorizado de Tripp Lite. Los
productos deben ser regresados a Tripp Lite o a un centro de servicio autorizado de Tripp Lite con los
cargos de transporte prepagados y deben acompañarse con una breve descripción del problema y
un comprobante de la fecha y el lugar de compra. Esta garantía no se aplica a equipos que hayan
sido dañados por accidente, negligencia o mal uso, o hayan sido alterados o modificados de alguna
manera.
EXCEPTO COMO SE INDICA EN EL PRESENTE, TRIPP LITE NO HACE GARANTÍAS EXPRESAS O
IMPLÍCITAS, INCLUIDAS GARANTÍAS DE COMERCIABILIDAD Y ADECUACIÓN PARA UN PROPÓSITO
PARTICULAR. Algunos estados no permiten la limitación o exclusión de garantías implícitas; por lo
tanto, las limitaciones o exclusiones antes mencionadas pueden no aplicarse al comprador.
EXCEPTO COMO SE INDICA ANTERIORMENTE, EN NINGÚN CASO TRIPP LITE SERÁ RESPONSABLE
POR DAÑOS DIRECTOS, INDIRECTOS, ESPECIALES, INCIDENTALES O CONSECUENTES QUE SURJAN
DEL USO DE ESTE PRODUCTO, INCLUSO SI SE ADVIERTE SOBRE LA POSIBILIDAD DE TAL DAÑO.
Específicamente, Tripp Lite no es responsable por ningún costo, como pérdida de ganancia o ingresos,
pérdida de equipos, pérdida del uso de equipos, pérdida de software, pérdida de datos, costos de
sustituciones, reclamaciones de terceros o de cualquier otra forma.
Información de Cumplimiento con WEEE para Clientes y Recicladores de Tripp Lite
(Unión Europea)
Según la Directiva de Residuos de Aparatos Eléctricos y Electrónicos (WEEE, por sus siglas
en inglés) [Waste Electrical and Electronic Equipment] y regulaciones aplicables, cuando los
clientes adquieren un nuevo equipo eléctrico y electrónico de Tripp Lite tienen el derecho a lo
siguiente:
• Enviar el equipo viejo a reciclaje en una base de uno por uno, semejante por semejante
(esto varía de un país a otro)
• Envíe el equipo nuevo de regreso para reciclaje una vez que finalmente sea un desecho
Tripp Lite tiene una política de mejora continua. Las especificaciones están sujetas a cambios sin
previo aviso.
1111 W. 35th Street, Chicago, IL 60609 EE. UU. • www.tripplite.com/support

7
Guide de démarrage rapide
Serveurs de console
Modèles : B097-016 (16 ports), B097-048 (48 ports)
English 1 • Español 4 • Русский 10
1111 W. 35th Street, Chicago, IL 60609 USA • www.tripplite.com/support
Droits d'auteur © 2018 Tripp Lite. Tous droits réservés.
L'emballage inclut
• Serveur de console B097-016 ou B097-048
• (x2) Cordons d'alimentation de C13 à NEMA 5-15P, 1,8 m (6 pi)
• (x2) Cordons de raccordement Cat5 UTP, 1,8 m (6 pi)
• (x1) Adaptateur de série à passage direct B090-A9F
(DB9 à RJ45, F/F)
• (x1) Adaptateur de série de croisement B090-A9F-X (DB9 à RJ45,
F/F)
• (x1) Adaptateur de série modulaire B090-A9M (DB9 à RJ45, M/F)
• (x6) Pieds en caoutchouc
• Quincaillerie de montage en bâti
• Guide de démarrage rapide

8
Quincaillerie d'assemblage
Raccorder le serveur de console
1. Si sur pied : Fixer les pieds en caoutchouc à revers adhésif inclus à la base du serveur de console.
Si monté en bâti : Fixer l'ensemble de montage en bâti aux côtés du serveur de console à être fixé au bâti.
2. Raccorder le port NET1 sur le serveur de console au réseau principal.
3. Si le port NET2 est utilisé, il peut être raccordé maintenant.
Remarque : NET2 peut être raccordé à un réseau secondaire. Par exemple, un réseau secondaire peut consister d'un réseau local de gestion ségrégé ou
du réseau étendu via le réseau de gestion hors bande. Sinon, il peut être raccordé au même réseau principal que NET1 à des fins de redondance.
4. Raccorder les appareils de série aux ports de série du serveur de console étiquetés 1-16/48 (selon le modèle).
5. Mettre le serveur de console sous tension en raccordant les cordons d'alimentation C13 à NEMA 5-15P aux alimentations CA doubles
universelles intégrées du serveur de console (avec basculement automatique).
Le B097-016 et le B097-048 peuvent être adressés à l'une des deux adresses IP suivantes :
1. L'adresse IP intégrée (par défaut) de 192.168.0.1 (masque de sous-réseau 255.255.255.0).
ou
2. L'adresse IP par défaut acceptée par le client DHCP du serveur de console depuis un serveur DHCP sur le réseau.
Remarque : Le serveur de console répondra dorénavant à 192.168.0.1 et à l'adresse fournie par son DHCP.
Si le même réseau que celui du port NET1 du serveur de console est utilisé (192.168.0.X ou la plage utilisée par le serveur DHCP) :
3. Saisir https://192.168.0.1/ ou http://[adresse fournie par le DHCP]/, puis appuyer sur Enter (entrée).
4. Se connecter en utilisant le nom d'utilisateur et le mot de passe par défaut.
Nom d'utilisateur : root
Mot de passe : default
5. Appuyer sur Enter (entrée). La page d'accueil de l'interface du serveur de la console s'affichera.
Les options de configuration et de gestion sont affichées dans des menus ouverts par défaut le long du côté gauche de l'interface. Les
menus de niveau supérieur sont Serial & Network (de série et réseau), Alerts & Logging (alertes et connexion) et System, Status &
Manage (système, état et gestion).
Le reste des tâches de configuration des listes de la page exigent que le serveur de console soit transformé en un appareil utilisable.
Certaines de ces tâches seront marquées comme étant complétées en raison des paramètres de l'usine du serveur de console. Les
procédures de la section suivante décrivent la configuration initiale en utilisant les menus plutôt que la liste des tâches.
Configuration d'un mot de passe à entropie élevée difficile à deviner pour l'utilisateur racine
1. Cliquer sur Serial & Network > User & Groups (de série et réseau > utilisateurs et groupes).
2. Cliquer sur Edit (modifier) pour l'utilisateur racine.
3. Saisir un mot de passe à entropie élevée difficile à deviner dans le champ Password (mot de passe).
4. Saisir de nouveau le mot de passe dans le champ Confirm (confirmer).
5. Cliquer sur Apply (appliquer).
Définir la méthode de configuration du réseau du port NET1
1. Cliquer sur System > IP (système > IP).
2. Cliquer sur Network Interface (interface du réseau) (si ce n'est pas l'onglet en avant-plan).
3. Pour la méthode de configuration, sélectionner DHCP ou Static (statique).
4. Si Static (statique) est sélectionné, saisir une IP Address (adresse IP) et un Subnet Mask (masque de sous-réseau) pour l'interface NET1.
Définir la méthode de configuration du réseau du port NET2
NET2 est inactif par défaut. NET2 peut être configuré pour basculement/accès hors bande ou comme une passerelle du réseau local de
gestion. Pour l'activer :
1. Cliquer sur System > IP (système > IP).
2. Cliquer sur Management LAN Interface (gestion de l'interface du réseau local) afin qu'il devienne l'onglet en avant-plan.
3. Cliquer sur la case à cocher Deactivate this network interface (désactiver cette interface de réseau) pour désactiver cette option et
activer NET2.
4. Pour Configuration Method (méthode de configuration), cliquer sur le bouton radio DHCP ou Static (statique).
5. Si Static (statique) est sélectionné, saisir une IP Address (adresse IP) et un Subnet Mask (masque de sous-réseau) pour l'interface NET1
(en laissant les champs Gateway (passerelle) et DNS vides).
Hors bande (OOB) – les configurer pour le réseau de gestion.
IP passthrough (intercommunication IP) - les configurer pour qu'ils correspondent à une plage IP privée non utilisée.
Remarque : Le pare-feu du serveur de console détermine quels protocoles et services peuvent être utilisés pour avoir accès aux ports et aux dispositifs. HTTPS et
SSH sont activés par défaut pour le serveur de console. Pour modifier les paramètres d'accès pour le serveur de console et les ports de série connectés, cliquer
sur System > Services (système > services). Cliquer ensuite sur l'onglet System > Services (accès au service) et apporter des changements au besoin.

9
Raccorder le serveur de console
Autres modes et fonctions
NET2 peut également être utilisé comme une connexion redondante partageant les mêmes paramètres de réseau que NET1.
1. Cliquer sur System > IP (système > IP).
2. Cliquer sur General Settings (paramètres généraux) afin qu'il devienne l'onglet en avant-plan.
3. Pour Interface Aggregation (agrégation de l'interface), choisir entre Bridge interfaces (interfaces de pont) ou Bond interfaces
(interfaces de mise à la terre).
4. Cliquer sur Apply (appliquer).
Configuration des dispositifs gérés
1. Cliquer sur Serial & Network > Serial Port (de série et réseau > port de série).
Remarque : Par défaut, tous les ports de série sont configurés en mode Console Server (serveur de console).
Pour configurer un port :
2. Cliquer sur Edit (modifier).
3. Configurer les Common Settings (paramètres communs) (Baud Rate (débit en bauds), Parity (parité), Data Bits (bits d'information), Stop
Bits (bits d'arrêt) et Flow Control (contrôle de flux)) pour que le Port X corresponde à l'appareil connecté au Port X de série.
4. Pour activer l'accès à distance vers le dispositif, cocher le bouton radio Console Server Mode (mode du serveur de console) dans
Console Server Settings (paramètres du serveur de console), puis cliquer sur les cases à cocher pour les protocoles permis (p. ex. Telnet,
SSH et Web Terminal).
5. Cliquer sur Apply (appliquer).
Remarque : Configurer les politiques d'accès de l'utilisateur pour une connexion à de tels ports dans Serial & Network > Users & Groups (de série et
réseau > utilisateurs et groupes). Un serveur AAA peut les configurer à distance. Consulter le manuel de l'utilisateur pour plus d'informations.
Veuillez consulter le manuel de l'utilisateur pour des détails sur les fonctionnalités évoluées comme la configuration, la gestion de
l'alimentation de la PDU et de l'onduleur, la surveillance environnementale, la connexion et les alertes de réponse automatique.
Garantie
Garantie limitée de 4 ans
Tripp Lite garantit que ses produits sont exempts de vices de matériaux et de fabrication pendant
une période de quatre (4) ans à partir de la date d'achat initiale. La responsabilité de Tripp Lite, en
vertu de la présente garantie, se limite à la réparation ou au remplacement (à sa seule discrétion) de
ces produits défectueux. Pour obtenir réparation sous cette garantie, vous devez obtenir un numéro
d'autorisation de retour de matériel (« RMA ») auprès de Tripp Lite ou d'un centre de réparation autorisé
par Tripp Lite. Les produits doivent être retournés à Tripp Lite ou à un centre de réparation autorisé par
Tripp Lite en port prépayé et être accompagnés d'une brève description du problème et d'un justificatif
de la date et du lieu d'achat. Cette garantie ne s'applique pas au matériel ayant été endommagé suite
à un accident, à une négligence ou à une application abusive, ou ayant été altéré ou modifié d'une
façon quelconque.
SAUF INDICATION CONTRAIRE DANS LES PRÉSENTES, Tripp Lite N'ÉMET AUCUNE GARANTIE,
EXPRESSE OU TACITE, Y COMPRIS DES GARANTIES DE QUALITÉ COMMERCIALE ET D'ADÉQUATION À
UN USAGE PARTICULIER. Certains États n'autorisant pas la limitation ni l'exclusion de garanties tacites,
les limitations ou exclusions susmentionnées peuvent ne pas s'appliquer à l'acheteur.
À L'EXCEPTION DES DISPOSITIONS CI-DESSUS, Tripp Lite NE POURRA EN AUCUN CAS ÊTRE TENUE
RESPONSABLE DE DOMMAGES DIRECTS, INDIRECTS, SPÉCIAUX, FORTUITS OU CONSÉCUTIFS
RÉSULTANT DE L'UTILISATION DE CE PRODUIT, MÊME SI AYANT ÉTÉ AVISÉE DE L'ÉVENTUALITÉ DE TELS
DOMMAGES. Plus précisément, Tripp Lite ne pourra être tenu responsable de coûts, tels que perte de
bénéfices ou de recettes, perte de matériel, impossibilité d'utilisation du matériel, perte de logiciel,
perte de données, frais de produits de remplacement, réclamations d'un tiers ou autres.
WEEE Compliance Information for Tripp Lite Customers and Recyclers (Union européenne)
En vertu de la directive et des règlements d'application relatifs aux déchets d'équipements
électriques et électroniques (DEEE), lorsque des clients achètent de l'équipement électrique et
électronique neuf de
Tripp Lite, ils ont droit :
• D'envoyer l'équipement usagé au recyclage pourvu qu'il soit remplacé par un équipement
équivalent
(cela varie selon les pays)
• D'envoyer le vieil équipement au recyclage en autant qu'il remplace un équipement
équivalent (cela varie selon les pays)
La politique de Tripp Lite en est une d'amélioration continue. Les caractéristiques techniques sont
modifiables sans préavis.
1111 W. 35th Street, Chicago, IL 60609 USA • www.tripplite.com/support
10
Краткое руководство пользователя
Консольные серверы
Модели: B097-016 (16-портовый), B097-048 (48-портовый)
English 1 • Español 4 • Français 7
1111 W. 35th Street, Chicago, IL 60609 USA • www.tripplite.com/support
Охраняется авторским правом © 2018Tripp Lite. Перепечатка запрещается.
Комплект поставки
• Консольный сервер мод. B097-016 или B097-048
• Шнуры питания длиной 1,8 м с разъемами C13 и NEMA 5-15P (2 шт.)
• Соединительные кабеля UTP категории 5 длиной 1,8 м (2 шт.)
• Последовательный переходник с прямой разводкой B090-A9F
(с разъемами DB9 и RJ45, гнездо/гнездо) (1 шт.)
• Последовательный переходник с перекрестной разводкой B090-A9F-X (с разъемами
DB9 и RJ45, гнездо/гнездо) (1 шт.)
• Последовательный переходник модульной конструкции B090-A9M
(с разъемами DB9 и RJ45, штекер/гнездо) (1 шт.)
• Резиновые ножки (6 шт.)
• Оснастка для монтажа в стойку
• Краткое руководство пользователя

11
Порядок сборки
Подключение консольного сервера
1. При напольной установке: прикрепите входящие в комплект резиновые ножки с клейкой обратной поверхностью к основанию консольного сервера.
При монтаже в стойку: прикрепите входящие в комплект крепежные элементы для монтажа в стойку с боковой стороны консольного сервера, устанавливаемого в стойку.
2. Подсоедините порт NET1 консольного сервера к основной сети.
3. Если предполагается использование порта NET2, то он может быть подключен в данный момент.
Примечание. Порт NET2 может подключаться к вспомогательной сети. Например, в качестве вспомогательной сети может использоваться отдельная управляющая ЛВС или резервная сеть управления,
обеспечивающая выход в глобальную вычислительную сеть. Кроме того, он может подключаться к той же основной сети, что и порт NET1, в целях резервирования.
4. Подключите свои последовательные устройства к последовательным портам консольного сервера с маркировкой 1-16/48 (в зависимости от модели).
5. Подайте питание на консольный сервер путем подключения входящих в комплект шнуров питания с разъемами C13 и NEMA 5-15P к спаренным универсальным источникам
питания переменного тока (с функцией автоматического переключения на резервный источник), встроенным в консольный сервер.
Консольные серверы моделей B097-016 и B097-048 доступны по одному из двух IP-адресов:
1. Встроенный (присвоенный по умолчанию) IP-адрес: 192.168.0.1 (маска подсети 255.255.255.0).
или
2. Присвоенный по умолчанию IP-адрес, принимаемый DHCP-клиентом консольного сервера от DHCP-сервера вашей сети.
Примечание. Теперь консольный сервер отвечает как по адресу 192.168.0.1, так и по адресу, полученному от своего DHCP-сервера.
При использовании браузера в той же сети, что и порт NET1 консольного сервера (т.е. 192.168.0.Х или в диапазоне, используемом DHCP-сервером):
3. Введите https://192.168.0.1/ или http://[адрес, присвоенный DHCP-сервером]/ и нажмите Enter.
4. Войдите в систему с присвоенными по умолчанию именем пользователя и паролем.
Имя пользователя: root
Пароль: default
5. Нажмите Enter. Загружается стартовая страница интерфейса консольного сервера.
В развертывающихся по умолчанию меню на левой стороне интерфейса представлены опции настройки и управления. Меню верхнего уровня: Serial & Network (Последовательное
подключение и сеть), Alerts & Logging (Предупредительные сигналы и регистрация) и System, Status & Manage (Система, статус и управление).
На оставшейся части страницы перечисляются настроечные задачи, необходимые для превращения консольного сервера в полезный для работы элемент. Некоторые из этих
задач обозначены как выполненные в соответствии с заводскими настройками консольного сервера. Процедуры, описанные в следующем разделе, фиксируют начальную
настройку с использованием меню, а не список задач.
Задание надежного пароля с высокой степенью хаотичности для привилегированного пользователя
1. Нажмите Serial & Network > Users & Groups (Посл. подключение и сеть > Пользователи и группы).
2. Нажмите Edit (Редактировать) для Root User (Привилегированный пользователь).
3. Введите надежный пароль с высокой степенью хаотичности в поле Password (Пароль).
4. Введите этот пароль повторно в поле Conrm (Подтверждение).
5. Нажмите Apply (Применить).
Установка способа настройки сети для порта NET1
1. Нажмите System > IP (Система > IP-адрес).
2. Нажмите Network Interface (Сетевой интерфейс), если это не самая передняя вкладка.
3. В меню Conguration Method (Способ настройки) выберите DHCP или Static (Статический).
4. В случае выбора опции Static (Статический) введите значения IP Address (IP-адрес) и Subnet Mask (Маска подсети) для интерфейса NET1.
Установка способа настройки сети для порта NET2
По умолчанию порт NET2 установлен как неактивный. Порт NET2 может быть настроен на автоматическое переключение на резервный источник / обеспечение доступа через OOB или в
качестве шлюза управляющей ЛВС. Для его активации:
1. Нажмите System > IP (Система > IP-адрес).
2. Нажмите на вкладку Management LAN Interface (Интерфейс управляющей ЛВС), чтобы переместить ее на первое место.
3. Снимите галочку в поле Deactivate this network interface (Деактивировать этот сетевой интерфейс) для отмены выбора данной опции и активации порта NET2.
4. В меню Conguration Method (Способ настройки) поставьте кнопку-переключатель рядом с опцией DHCP или Static (Статический).
5.
В случае выбора опции Static (Статический) введите значения IP Address (IP-адрес) и Subnet Mask (Маска подсети) для интерфейса NET2 (оставив пустыми поля Gateway (Шлюз) и DNS).
Для настройки резервной OOB установите указанные значения для своей управляющей сети.
Для IP-транзита установите их таким образом, чтобы они соответствовали неиспользуемому внутреннему диапазону IP-адресов.
Примечание. Межсетевой экран консольного сервера определяет, какие протоколы и сервисы могут использоваться для получения доступа и к каким портам и устройствам разрешается такой доступ.
Протоколы HTTPS и SSH по умолчанию разрешены для консольного сервера. Чтобы изменить настройки доступа для консольного сервера и подключенных последовательных портов, нажмите System >
Services (Система > Сервисы). Затем нажмите на вкладку Service Access (Доступ к сервисам) и внесите соответствующие изменения.

12
Подключение консольного сервера
Другие режимы и функции
Кроме того, порт NET2 может использоваться в качестве резервного соединения с теми же сетевыми настройками, что и порт NET1.
1. Нажмите System > IP (Система > IP-адрес).
2. Нажмите на вкладку General Settings (Общие настройки), чтобы переместить ее на первое место.
3. В меню Interface Aggregation (Объединение интерфейсов) выберите опцию Bridge interfaces (Bridge-интерфейсы) или Bond interfaces (Bond-интерфейсы).
4. Нажмите Apply (Применить).
Настройка управляемых устройств
1. Нажмите Serial & Network > Serial Port (Посл. подключение и сеть > Последовательный порт).
Примечание. По умолчанию все последовательные порты установлены в режим Console Server (Консольный сервер).
Для настройки порта:
2. Нажмите Edit (Редактировать).
3. Установите Общие настройки (Baud Rate (Скорость передачи данных), Parity (Четность), Data Bits (Биты данных), Stop Bits (Стоповые биты) и Flow Control (Управление потоками))
для Порта X для согласования устройства, подключенного к последовательному Порту X.
4. Для обеспечения возможности удаленного доступа к устройству поставьте кнопку-переключатель Console Server Mode (Режим консольного сервера) рядом с опцией Console
Server Settings (Настройки консольного сервера) и поставьте галочки в поля, соответствующие разрешенным протоколам (например,Telnet, SSH иWeb Terminal).
5. Нажмите Apply (Применить).
Примечание. Настройте правила пользовательского доступа для подключения к таким портам в разделе Serial & Network > Users & Groups (Посл. подключение и сеть > Пользователи и группы). Сервер
AAA может настраивать их удаленно. Более подробную информацию см. в Руководстве пользователя.
Подробнее о расширенных функциях, включая настройку, управление питанием PDU и ИБП, контроль условий среды, регистрация и вход в систему и автоматические
предупредительные сигналы, см. в Руководстве пользователя.
Гарантийные обязательства
Условия 4-летней ограниченной гарантии
Компания Tripp Lite гарантирует отсутствие дефектов материалов и изготовления в течение четырех (4) лет с момента первоначальной
покупки. Обязательства компании Tripp Lite по настоящей гарантии ограничиваются ремонтом или заменой (по ее единоличному
усмотрению) любых таких дефектных изделий. Для получения услуг по данной гарантии необходимо получить номер Returned Material
Authorization (RMA ―разрешение на возврат материалов) от компанииTripp Lite или ее авторизованного сервисного центра. Изделия
должны быть возвращены в компаниюTripp Lite или ее авторизованный сервисный центр с предоплатой транспортных расходов
и сопровождаться кратким описанием возникшей проблемы и документом, подтверждающим дату и место его приобретения.
Действие настоящей гарантии не распространяется на оборудование, поврежденное в результате аварии, небрежного обращения или
неправильного использования, а также видоизмененное каким бы то ни было образом.
ЗА ИСКЛЮЧЕНИЕМ ПРЕДУСМОТРЕННЫХ ЗДЕСЬ СЛУЧАЕВ КОМПАНИЯ Tripp Lite НЕ ПРЕДОСТАВЛЯЕТ КАКИХ-ЛИБО ЯВНЫХ ИЛИ
ПОДРАЗУМЕВАЕМЫХ ГАРАНТИЙ, ВКЛЮЧАЯ ГАРАНТИИ КОММЕРЧЕСКОЙ ПРИГОДНОСТИ И ПРИГОДНОСТИ ДЛЯ КАКОЙ-ЛИБО КОНКРЕТНОЙ
ЦЕЛИ. В некоторых штатах/государствах ограничение или исключение подразумеваемых гарантий не допускается; следовательно,
вышеуказанное(-ые) ограничение(-я) или исключение(-я) могут не распространяться на покупателя.
ЗА ИСКЛЮЧЕНИЕМ ПРЕДУСМОТРЕННЫХ ВЫШЕ СЛУЧАЕВ КОМПАНИЯ Tripp Lite НИ ПРИ КАКИХ ОБСТОЯТЕЛЬСТВАХ НЕ НЕСЕТ
ОТВЕТСТВЕННОСТИ ЗА ПРЯМЫЕ, КОСВЕННЫЕ, СЛУЧАЙНЫЕ ИЛИ ПОБОЧНЫЕ УБЫТКИ ЛИБО УБЫТКИ, ОПРЕДЕЛЯЕМЫЕ ОСОБЫМИ
ОБСТОЯТЕЛЬСТВАМИ, ВОЗНИКАЮЩИЕ В СВЯЗИ С ИСПОЛЬЗОВАНИЕМ ДАННОГО ИЗДЕЛИЯ, ДАЖЕ В СЛУЧАЕ ЕЕ ИНФОРМИРОВАНИЯ О
ВОЗМОЖНОСТИ НАСТУПЛЕНИЯ ТАКИХ УБЫТКОВ. В частности, компания Tripp Lite не несет ответственности за какие-либо издержки,
такие как упущенные прибыли или доходы, потеря оборудования, потеря возможности использования оборудования, потеря
программного обеспечения, потеря данных, расходы на заменители, урегулирование претензий третьих лиц и пр.
Информация по выполнению требований Директивы WEEE для покупателей и переработчиков продукции компании
Tripp Lite (являющихся резидентами Европейского союза)
Согласно положениям Директивы об утилизации отходов электрического и электронного оборудования (WEEE) и
исполнительных распоряжений по ее применению, при покупке потребителями нового электрического или электронного
оборудования производства компании
Tripp Lite они получают право на:
• Продажу старого оборудования по принципу "один к одному" и/или на эквивалентной основе
(в зависимости от конкретной страны)
• Отправку нового оборудования на переработку после окончательной выработки его ресурса
Компания Tripp Lite постоянно совершенствует свою продукцию. В связи с этим возможно изменение технических характеристик без
предварительного уведомления.
1111 W. 35th Street, Chicago, IL 60609 USA • www.tripplite.com/support
18-06-309 93-3862_RevB
This manual suits for next models
1
Table of contents
Languages:
Other Tripp Lite Server manuals

Tripp Lite
Tripp Lite USB Device Server US-4A User manual

Tripp Lite
Tripp Lite SmartRack SRN4G6US User manual

Tripp Lite
Tripp Lite U2S-2A User manual

Tripp Lite
Tripp Lite B096-016 User manual

Tripp Lite
Tripp Lite B092-016 User manual

Tripp Lite
Tripp Lite B098-016 User manual

Tripp Lite
Tripp Lite AG-0608 Series User manual

Tripp Lite
Tripp Lite B093-004-2E4U User manual

Tripp Lite
Tripp Lite B092-016 User manual

Tripp Lite
Tripp Lite U2S-2A User manual