TROY Group WindPort User manual

Quick Install Guide
Part Number 40151-100
Revision 1.0
BluetoothTM PC Card
TM

ii
Copyright Notice
All rights reserved. No part of this publication may be reproduced, stored, in a
retrieval system, or transmitted in any form or by any means, electronic, mechani-
cal, photocopying, recording, or otherwise, without the prior written permission
of TROY Group, Inc. The information contained herein is designed only for use
with this TROY product. TROY is not responsible for any use of this information
as applied to other products.
Neither TROY nor its affiliates shall be liable to the purchaser of this product or
third parties for damages, losses, costs, or expenses incurred by purchaser or third
parties as a result of accident, misuse or abuse of this product or unauthorized
modifications, repairs, or alterations to this product, or (excluding the U.S.) failure
to strictly comply with TROY’S operating and maintenance instructions.
Warranty Notice
TROY GROUP, INC. SPECIFICALLY DISCLAIMS THE IMPLIED WAR-
RANTIES OF MERCHANTABILITY AND FITNESS OF THIS PRODUCT
FOR A PARTICULAR PURPOSE. TROY shall not be liable for any errors con-
tained in this manual or for any damages resulting from loss of use, data profits, or
any incidental or consequential damages arising from the use of TROY products
or services.
Trademark Notice
WindPort and WindConnect are registered trademarks of TROY Group, Inc.
Bluetooth is a trademark of BLUETOOTH SIG, Inc. and licensed to TROY.
General Notice: Other product names used herein are for identification purposes
only and may be trademarks of their respective owners. TROY disclaims any and
all rights in those marks.
Copyright © 2001 by TROY Group, Inc.

iii
Contents
Introduction
Windows System Requirements . . . . . . . . . . . . . . . . . . . . . . . . . . . . . . .1
About Your User’s Guide . . . . . . . . . . . . . . . . . . . . . . . . . . . . . . . . . . . .2
1 Installing the WindPort Bluetooth PC Card
Hardware and Software
Before You Begin . . . . . . . . . . . . . . . . . . . . . . . . . . . . . . . . . . . . . . . .1-1
WindPort PC Card and Utility Installation under Windows 95, 98 and ME 1-2
WindPort PC Card and Utility Installation under Windows 2000 . . . . . . .1-2
Connecting to the Laptop PC . . . . . . . . . . . . . . . . . . . . . . . . . . . . . . .1-1
2 Configuring the Bluetooth Software
Setting Your Workstation Name . . . . . . . . . . . . . . . . . . . . . . . . . . . . .2-1
Creating the Virtual COM Port . . . . . . . . . . . . . . . . . . . . . . . . . . . . . .2-3
Setting Up Your Windows System . . . . . . . . . . . . . . . . . . . . . . . . . . . .2-5
Making the Bluetooth Connection . . . . . . . . . . . . . . . . . . . . . . . . . . .2-5
Folders . . . . . . . . . . . . . . . . . . . . . . . . . . . . . . . . . . . . . . . . . . . . . . . .2-9
3 Troubleshooting . . . . . . . . . . . . . . . . . . . . . . . . . . . . . . . . . . . . . .3-1
4 Where to Get Help
Worldwide Web Support . . . . . . . . . . . . . . . . . . . . . . . . . . . . . . . . . . .4-1
Contacting TROY . . . . . . . . . . . . . . . . . . . . . . . . . . . . . . . . . . . . . . .4-1
Returning Products . . . . . . . . . . . . . . . . . . . . . . . . . . . . . . . . . . . . . . .4-1
Warranty . . . . . . . . . . . . . . . . . . . . . . . . . . . . . . . . . . . . . . . . . . . . . .4-2
5 Notices
FCC Compliance Statement . . . . . . . . . . . . . . . . . . . . . . . . . . . . . . . .5-1
Declaration of Conformity . . . . . . . . . . . . . . . . . . . . . . . . . . . . . . . . .5-2
Regulatory Information . . . . . . . . . . . . . . . . . . . . . . . . . . . . . . . . . . . .5-3

iv

1
Introduction
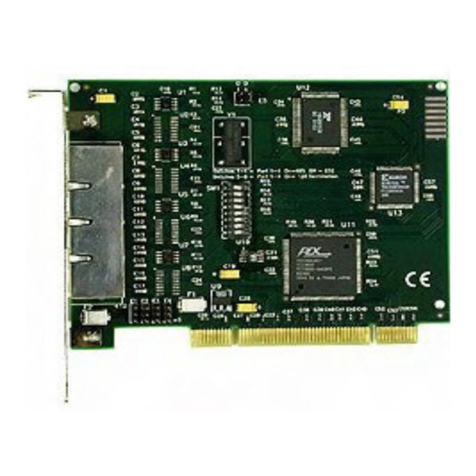
The TROY WindPortTM BluetoothTM PC Card is a device that enables wireless
communications capabilities on most models of laptop computers By using the
WindPort, you can conveniently communicate with other devices, such as print-
ers, mobile phones, and PDAs, without using a cable, as shown in the diagram
below.
WindowsTM System Requirements
To use the WindPort Bluetooth PC card, your system should include:
◗A laptop computer with a Pentium 133MHz or higher processor
◗At least one free PCMCIA card slot
Printer with TROY
WindConnect
Bluetooth
Print
Adapter
Laptop computer with
WindPort PC Card
Bluetooth
wireless
communications link
Bluetooth
enabled
Mobile Phone
Bluetooth
enabled
Handheld Computer

2
◗Microsoft Windows 98, 2000, ME, or Windows XP
◗At least 64MB RAM
◗At least 10MB of free hard disk space to install the software
◗A CD-ROM drive
Unpacking and Handling
The WindPort shipping box contains the following items:
◗WindPort Bluetooth PC Card
◗WindPort Bluetooth PC Card Quick Install Guide
◗Installation CD-ROM
The WindPort Bluetooth PC Card is designed to withstand normal handling pro-
cedures, but reasonable precautions should be exercised during installation, partic-
ularly with regard to static discharge.
◗Make sure that you are adequately grounded by touching a bare metal part of
the PC while installing the WindPort Bluetooth PC Card.
◗Avoid moving around the work area in order to eliminate static charge
buildup.
◗If possible, do not work on a carpeted area.
About Your Quick Install Guide
This book contains system requirements, important safety information, and
instructions on:
◗Installing the WindPort hardware
◗Using the WindPort with a Microsoft Windows system

1-1
Installing the
PC Card BluetoothTM
Hardware and Software
You can now configure your laptop PC to communicate wirelessly to other
Bluetooth devices. To do this, you will use TROY-provided software to create a
special local communication port.
Before You Begin
Before you begin the installation, make sure that:
◗The laptop PC is powered on
◗Windows is running
◗Windows 98 and ME users should either have their original Windows CD-
ROM distribution kit or should have the Windows files available in the
\WINDOWS\OPTIONS\CABS directory on their hard drive (the installa-
tion process requires certain Windows files that are not normally pre-installed)
WindPort PC Card and Utility Installation under Windows 95,
98, and ME
1. Insert the WindPort PC Card into the PCMCIA slot and turn on the comput-
er. The Windows wizard will automatically detect the adapter and display
New Hardware Found. Click on Next to continue.
2. Select the Search for the best driver for my device [recommended]
option and click on Next.
3. Insert the WindPort Installation CD-ROM and select the location where the
driver is placed. We recommend that you use the Specify a location
1

option, which allows you to directly enter the path to the appropriate driver (if
you are installing from the CD-ROM, this is typically D:\drivers\win9x).
Then click on Next to continue.
4. Windows will identify and display the WindPort as a Bluetooth PC Card.
Click on Next to confirm the driver selection.
5. Follow the instructions on the screen and accept the default values. Note that
the Found New Hardware Wizard will appear multiple times during the
installation process.
6. If the wizard prompts you to insert the Windows disk or CD, insert the
Windows CD or direct it to search the appropriate folders on your hard drive.
7. When the installation process is complete, restart your computer.
8. To install the WindPort Bluetooth Utility, insert the WindPort Installation CD-
ROM once again. Double click on the setup.exe icon.
9. Follow the on-screen instructions to complete the utility installation. Two pro-
grams will be installed when you have completed the installation process:
◗Bluetooth Neighborhood
◗Bluetooth Software Suite
You have finished the hardware and software installation process under
Windows 95, 98, or ME. You may now proceed to the next chapter for con-
figuration the software.
WindPort PC Card and Utility Installation under Windows 2000
1. Insert the WindPort PC Card into the PCMCIA slot and turn on the comput-
er. The Windows wizard will automatically detect the adapter and prompt you
to install the required driver. Click on Next to continue.
2. Select the Search for a suitable driver for my device [recommended]
option and click on Next.
3. Insert the WindPort Installation CD-ROM and select the location where the
driver is placed. We recommend that you use the Specify a location
option, which allows you to directly enter the path to the appropriate driver (if
you are installing from the CD-ROM, typically this is D:\drivers\w2k).
Then click on Next to continue.
1-2

4. Windows 2000 will display the adapter as WindPort as a Bluetooth PC
Card. The wizard may identify multiple drivers that are suitable for this
device. If this is the case, select the Install one of the other drivers check
box, and, in the subsequent menu, highlight the driver located in the w2k
folder. Click on Next to confirm the driver selection.
5. Follow the instructions on the screen and accept the default values. Note that
the Found New Hardware Wizard will appear multiple times during the
installation process.
6. Click on Yes to continue if the Windows wizard prompts you that the
WindPort driver does not contain a Microsoft Digital Signature.
7. To install the WindPort Bluetooth Utility, insert the WindPort Installation CD-
ROM once again. Double click on the setup.exe icon.
8. Follow the on-screen instructions to complete the utility installation. Two pro-
grams will be installed when you have completed the installation process:
◗Bluetooth Neighborhood
◗Bluetooth Software Suite
You have finished the hardware and software installation process under
Windows 2000. You may now proceed to the next chapter for configuration
the software.
1-3

1-4

Configuring the
BluetoothTM Software
After you have completed the software and hardware installation process, an icon for
the Bluetooth Neighborhood will appear on your desktop. In addition, you can
access the Bluetooth Software Suite from the Windows Start menu in the Windows
Control Panel window. In addition, the Bluetooth Configuration Tool can also
be accessed from the Windows Control Panel.
Setting Your Workstation Name
Before using the Bluetooth software, you should provide a name for your workstation
(the local device). To do this:
1. Start the Bluetooth Neighborhood program by double clicking
on the desktop icon.
2. The Bluetooth Neighborhood appears. Click Bluetooth on the menu bar,
and then click Bluetooth Neighborhood Properties.
2
2-1

3. The Bluetooth Neighborhood Properties dialog box appears. At the top
of the dialog box, click the Settings tab.
4.In the Bluetooth Device Name text box, type the device name you wish
remote users to see. (for example, “Adam”). You may also select the appro-
priate Bluetooth Device Class (for example, “Laptop”).
5. Click OK.
2-2

Creating the Virtual COM Port (Required for Serial Port Profile;
Optional for Other Profiles)
The WindPort uses virtual COM ports to communicate with remote Bluetooth
devices. A Bluetooth COM port is identical in function to a regular hardwired PC
serial port (for example, COM1) except that the data is transmitted wirelessly. The
operation of these virtual COM ports is transparent to application programs; that is,
if a program works with a regular PC serial port, it should also work with the
WindPort virtual COM ports. The WindPort comes pre-configured to handle most
Bluetooth profiles:
Service Profile Default COM port
Default OBEX Object 8
business card Push
File transfer OBEX File 9
Transfer
Headset Headset 10
Audio Gateway Headset 11
DUN Dial-up 7
Networking
FAX Fax 7
LAN LAN Access 7
To use the WindPort adapter with the Serial Port Profile, you must first create one
or more virtual COM ports. This is done as follows:
1. Click the Windows Start button, select Settings and then Control Panels.
2. The Control Panel window appears. Double click on the Bluetooth
Configuration Tool.
2-3

3. You see the Bluetooth Configuration Tool dialog box. Click Add.
4. To add a new Bluetooth Port, select a free port name (COM1-COM99) and
click the Add button. Please allow a few seconds for the Device Manager to
update after either removing or adding a port.
2-4

2-5
5. Your new port will now be displayed. Check the Bluetooth profile(s) that you
want to enable on the virtual COM port and then click OK. Note that certain
application programs only allow a single profile per port (consult the documenta-
tion for your application for information about restrictions).
6. Reboot your computer to activate the virtual COM port.
Setting Up Your Windows System
All of the Windport Local Services work transparently with most Windows appli-
cations and utilities. Therefore, you should set up your Windows system exactly
as if you were using a local port. For example, if you are using the Dial-up net-
working, you should use the standard Windows Make New Connection utility
(in the Dial-up Networking folder in My Computer) to set up the connection
to the WindPort default Dial-up Networking COM7 port. Please refer to your
Windows documentation for details on setting up your Windows application.
Making the Bluetooth Connection (Not Required if Using TROY
WindConnect Port Monitor Software)
Note: The TROY WindConnect Bluetooth Port Monitor Software has its own
built-in discovery program, so skip this section if you are using this software (or
any other software with built-in discovery capabilities).
The next step is to discover the remote Bluetooth device and bind the Virtual Com
Port to the Bluetooth device. To do this:

2-6
1. Double-click on Bluetooth Neighborhood program icon on
the desktop.
2. The Bluetooth Neighborhood window appears. Click the
Device Discovery button (or select Bluetooth on the menu
bar and then click Device Discovery).
3. You will see the messages Searching for remote devices and then
Performing name discovery on discovered devices. The name of the
remote Bluetooth device will then be displayed, along with the names of any
other Bluetooth devices in the vicinity (if you have performed previous discov-
eries, you may see grayed-out icons for remote Bluetooth devices that are no
longer in range). In this example, the remote device is called Max.
Click
Here

4. The available Local Services are displayed on the left side of the screen.
These will normally include:
COMx(serial port profile; e.g., COM3) LAN (LAN access)
FAX (fax profile) Headset
Network (ad hoc Bluetooth DUN (dial-up networking)
network) Audio Gateway
If you need more information about these Local Services, please refer to the
Bluetooth Software Suite User’s Manual on the Windport installation CD-ROM.
Note that there can be more than one local service of a given type. For
example, you could have the local services COM3, COM5, and COM7, all
of which are virtual COM ports that implement the Serial Port Profile
5. Drag the desired local service icon over the remote device icon. For example,
in the picture below, the COM5 virtual port icon is dragged over the Max
icon to bind the WindPort to this remote Bluetooth device.
6. If the device has multiple ports, you will be asked to select the desired port.
Also, you will be prompted for a Bluetooth passkey if the device requires it (refer
to the documentation that came with your device for information on passkeys).
2-7

7. If the binding is successful, yellow “rays” appear to radiate from the remote
device icon as shown below, and the green light on the WindPort blinks
rapidly. You should now be able to communicate from your PC to the
remote device as if it were directly connected to your computer (if you are
using the headset or Audio Gateway Local Services, you must first right click
on the Local Service icon and then click on Enable Audio to turn on the
sound).
Note:
If you are unable to connect, try re-positioning the PC and repeat the above
steps to bind the COM port.
Folders
The Bluetooth Neighborhood allows files and remote Bluetooth device icons to be
stored in folders. These folders act like standard Windows folders, including normal
drag and drop operation. They are useful, for example, for grouping several remote
Bluetooth devices together so that you can send data simultaneously to all of the
grouped devices.
For details on how to use folders, refer to the Bluetooth Software Suite User’s Manual
on the WindPort Installation CD-ROM.
2-8

3-1
Troubleshooting
If you are unable to connect from your laptop to a remote Bluetooth device, then
check the following:
1. Make sure that the WindPort is firmly seated in the PCMCIA slot on your
computer.
2. Make sure that the green light on the WindPort is blinking. If it is not on,
then there is no Bluetooth wireless connection. Try restarting the remote
Bluetooth device and then repeat the discovery process.
3. Make sure that the WindPort and/or your device are not on a metal table or
near large metal objects. If necessary, move the device to a different location
and try again. Note that the Bluetooth maximum range of 10 meters (33
feet) is for an open space environment, so this range may be significantly
reduced if there are obstacles present.
4. If the green light is flashing and you cannot send data, double check your
Windows application program setup.
If none of the above suggestions work, then contact TROY as described in the
next section.
3

3-2
Table of contents
