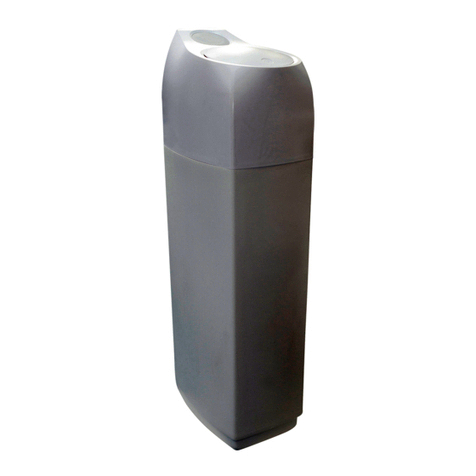
True blue power TB-30 User manual

How to install, operate
and maintain your emand
Controlled Water Softener
Model TB-30
Insta ation and Operation Manua
7330189 (Rev. C 8/16/11)
Systems tested and certified by NSF International
against NSF/ANSI Standard 44
for hardness reduction and efficiency.
Printed on recycled paper
TM
If you have any questions about system
programming, operation or maintenance,
call toll free:
1-800-689-4571
Monday - Friday, 8:30 am - 6:00 pm EST
or Saturday 9:00 am - 3:00 pm EST
or visit us online at:
www.truebluewatersolutions.com
When you call, please be prepared to provide
the model, date code and serial number of your
product, found on the rating decal, located on
the back of the controller top cover.
Manufactured for efender Security Company by
Ecodyne Water Systems
1890 Woodlane rive
Woodbury, MN 55125

2
TABLE OF CONTENTS
Page
Specifications & imensions . . . . . . . . . . . . . . . . . . . . . . . . . . . . . . . . . . . . . . . . . . . . . . . . . . . . . . . . . . . . . . . . . . . 3
Inspect Shipment . . . . . . . . . . . . . . . . . . . . . . . . . . . . . . . . . . . . . . . . . . . . . . . . . . . . . . . . . . . . . . . . . . . . . . . . . . . . 4
Safety Guides . . . . . . . . . . . . . . . . . . . . . . . . . . . . . . . . . . . . . . . . . . . . . . . . . . . . . . . . . . . . . . . . . . . . . . . . . . . . . . 4
Installation Requirements . . . . . . . . . . . . . . . . . . . . . . . . . . . . . . . . . . . . . . . . . . . . . . . . . . . . . . . . . . . . . . . . . . . . . 5
Typical Installation Illustrations . . . . . . . . . . . . . . . . . . . . . . . . . . . . . . . . . . . . . . . . . . . . . . . . . . . . . . . . . . . . . . . . . 6
Installation Instructions . . . . . . . . . . . . . . . . . . . . . . . . . . . . . . . . . . . . . . . . . . . . . . . . . . . . . . . . . . . . . . . . . . . . . 7-10
Programming the Electronic Controller . . . . . . . . . . . . . . . . . . . . . . . . . . . . . . . . . . . . . . . . . . . . . . . . . . . . . . . 11-12
Controller Features / Options . . . . . . . . . . . . . . . . . . . . . . . . . . . . . . . . . . . . . . . . . . . . . . . . . . . . . . . . . . . . . . . 13-14
Routine Maintenance . . . . . . . . . . . . . . . . . . . . . . . . . . . . . . . . . . . . . . . . . . . . . . . . . . . . . . . . . . . . . . . . . . . . . . . 15
Troubleshooting . . . . . . . . . . . . . . . . . . . . . . . . . . . . . . . . . . . . . . . . . . . . . . . . . . . . . . . . . . . . . . . . . . . . . . . . . 16-19
Exploded View & Parts List . . . . . . . . . . . . . . . . . . . . . . . . . . . . . . . . . . . . . . . . . . . . . . . . . . . . . . . . . . . . . . . . 20-23
TB-30 WATER SOFTENER LIMITED WARRANTY
Warrantor: Defender Security Company, dba True Blue Water Solutions, 3750 riority Way South, Suite 200,
Indianapolis, IN 46240
This warranty gives you specific legal rights, and you may also have other rights which vary from state to state.
Warrantor warrants, to the original owner, that:
● For a period of ten (10) years from the date of installation, all parts will be free from defects in materials and work-
manship and will perform their normal functions.
● For a period of two (2) years from the date of installation, labor to repair or replace any part deemed to be defective
in materials or workmanship, will be provided at no additional cost.
● For a period of ten (10) years from the date of installation, the salt storage tank and fiberglass mineral tank will not
rust, corrode, leak, burst, or in any other manner fail to perform its proper functions.
Warrantor shall have the option to repair or replace any defective warranted part. If, after expiration of the two (2) year
labor warranty, a warranted part proves to be defective, Warrantor will ship a replacement part directly to your home, with-
out charge, or, at your request, will perform the labor to repair or replace any part. All non-warranted labor is performed at
Warrantor’s then current labor rates, including trip charge.
If you have questions regarding a warranted product, need assistance with installation or troubleshooting, wish to order a
part or report a warranty issue, we are just a phone call away. SIMPLY IAL 1-800-689-4571, Monday - Friday, 8:30 am -
6:00 pm EST, or Saturday 9:00 am - 3:00 pm EST, for assistance.
General rovisions
The above warranties are effective provided the water softener is operated at water pressures not exceeding 125 psi, and
at water temperatures not exceeding 120°F; provided further that the water softener is not subject to abuse, misuse, neg-
lect, freezing, accident or negligence; and provided further that the water softener is not damaged as the result of any
unusual force of nature such as, but not limited to, flood, hurricane, tornado or earthquake. This warranty is void if the
product is repaired, modified or altered, unless such repair, modification or alteration is expressly authorized by the
Warrantor in writing.
Warrantor is excused if failure to perform its warranty obligations is the result of strikes, government regulation, materials
shortages, or other circumstances beyond its control.
THERE ARE NO WARRANTIES ON THE WATER SOFTENER BEYON THOSE SPECIFICALLY ESCRIBE ABOVE.
ALL IMPLIE WARRANTIES, INCLU ING ANY IMPLIE WARRANTY OF MERCHANTABILITY OR OF FITNESS FOR A
PARTICULAR PURPOSE, ARE ISCLAIME TO THE EXTENT THEY MIGHT EXTEN BEYON THE ABOVE PERI-
O S. THE SOLE OBLIGATION OF WARRANTOR UN ER THESE WARRANTIES IS TO REPLACE OR REPAIR THE
COMPONENT OR PART WHICH PROVES TO BE EFECTIVE WITHIN THE SPECIFIE TIME PERIO , AN WARRAN-
TOR IS NOT LIABLE FOR CONSEQUENTIAL OR INCI ENTAL AMAGES, LOSS OF OTHER GOO S OR ASSOCIAT-
E EQUIPMENT OR AMAGES TO ANY ASSOCIATE EQUIPMENT, VALUE OF THIS WARRANTY SHALL NOT
EXCEE THE PRICE PAI BY YOU FOR THE EQUIPMENT. NO WARRANTOR AGENT, REPRESENTATIVE, OR
OTHER PERSON IS AUTHORIZE TO EXTEN OR EXPAN THE WARRANTIES EXPRESSLY ESCRIBE ABOVE.
Some states do not allow limitations on how long an implied warranty lasts or exclusions or limitations of incidental or
consequential damage, so the limitations and exclusions in this warranty may not apply to you. This warranty applies to
consumer-owned installations only.
Manufactured by Ecodyne Water Systems, 1890 Woodlane rive, Woodbury, MN 55125,
for efender Security Company, 3750 Priority Way South rive, Suite 200, Indianapolis, IN 46240.

3
Specifications & Dimensions
Model TB-30
Model Code tb-30
Rated Softening Capacity (Grains @ Salt ose)
11,800 @ 2.3 lbs.
25,300 @ 7.4 lbs.
30,200 @ 12.5 lbs.
Rated Efficiency (Grains/Pound of Salt @ Minimum Salt ose) 5,130 @ 2.3 lbs.
Water Used uring Regeneration @ Minimum Salt ose 2.5 gal. / 1,000 grains
Rated Service Flow Rate 7.5 gpm
Amount of High Capacity Ion Exchange Resin 0.78 cu. ft.
Pressure rop at Rated Service Flow 9.1 psig
Water Supply Max. Hardness 90 gpg
Water Supply Max. Clear Water Iron 8 ppm*
Water Pressure Limits (minimum / maximum) 20 - 125 psi
Water Temperature Limits (minimum / maximum) 40 - 120 °F
Minimum Water Supply Flow Rate 3 gpm
Maximum rain Flow Rate 2.0 gpm
*Capacity to reduce clear water iron is substantiated by WQA test data.
These systems conform to NSF/ANSI 44 for the specific performance claims as verified
and substantiated by test data.
The efficiency rating is only valid at the stated salt dose. These softeners were efficiency
rated according to NSF/ANSI Standard 44.
Variable Salt Dose: The salt dose is selected by the electronic controls at regeneration
time based on the amount needed.
3-3/8"
OUTLET
INLET
11-1/2"
18"
DIA.
39"
11"
DIA.
INLET -
OUTLET
41-1/4"
48-3/4"
FIG. 1

4
acking List
Inspect Shipment
Ground Clamp
Kit 20 ft. rain Hose
Bypass Valve Clips
Adaptor Elbow
Installation
Adaptors
FIG. 2
Hose Clamps Grommet
The parts required to assemble and install the water
softener are included with the unit. Thoroughly check
the water softener for possible shipping damage and
parts loss. Also inspect and note any damage to the
shipping carton.
Remove and discard (or recycle) all packing materials.
To avoid loss of small parts, we suggest you keep the
small parts in the parts bag until you are ready to use
them.
Ferrule Nut
Safety Guides
=The water softener requires a minimum water flow of 3 gallons per minute at the inlet. Maximum allowable inlet
water pressure is 125 psi. If daytime pressure is over 80 psi, nighttime pressure may exceed the maximum. Use
a pressure reducing valve if necessary (Adding a pressure reducing valve may reduce the flow). If your home is
equipped with a back flow preventer, an expansion tank must be installed in accordance with local codes and
laws.
=The water softener works on 24 volt, 60 Hz electrical power only, supplied by a direct plug-in transformer (includ-
ed). Be sure to use the included transformer and plug it into a nominal 120V, 60 cycle household outlet that is in
a dry location only, grounded and properly protected by an overcurrent device such as a circuit breaker or fuse.
Power consumption is 13.5 W max imum and 1.0 W typical. If transformer is replaced, use only UL, CUL or CSA
approved Class 2 transformer with the following specifications:
§Input: 120 VAC, 60 Hz, 13.5 W §Output Voltage: 24 VAC §Output Current: 400 mA
=o not use this system to treat water that is microbiologically unsafe or of unknown quality without adequate dis-
infection upstream or downstream of the system.
European irective 2002/96/EC requires all electrical and electronic equipment to be disposed of accord-
ing to Waste Electrical and Electronic Equipment (WEEE) requirements. This directive or similar laws are
in place nationally and can vary from region to region. Please refer to your state and local laws for proper
disposal of this equipment.

5
LUMBING CODES
All plumbing must be completed in accordance with
national, state and local plumbing codes.
LAUNDRY TUBSTAND I E
1-1/2”
air gap
FLOOR DRAIN
AIR GA REQUIREMENTS
A drain is needed for regeneration water (See Figure
3). A floor drain, close to the water softener, is pre-
ferred. A laundry tub, standpipe, etc. are other drain
options. Secure valve drain hose in place. Leave an
air gap of 1-1/2” between the end of the hose and the
drain. This gap is needed to prevent backflow of
sewer water into the water softener. o not put the
end of the drain hose into the drain.
FIG. 3
1-1/2”
air gap
rain
Hose
rain
Hose
1-1/2”
air gap
LOCATION REQUIREMENTS
Consider all of the following when selecting an installa-
tion location for the water softener.
=o not locate the water softener where freezing
temperatures occur. o not attempt to treat water
over 120ºF. Freezing temperatures or hot water
damage voids the warranty.
=To condition all water in the home, install the water
softener close to the water supply inlet, and
upstream of all other plumbing connections, except
outside water pipes. Outside faucets should remain
on hard water to avoid wasting conditioned water
and salt.
=A nearby drain is needed to carry away regenera-
tion discharge (drain) water. Use a floor drain,
laundry tub, sump, standpipe, or other options
(check your local codes). See "Air Gap
Requirements" and "Valve rain Requirements"
sections.
=The water softener works on 24 volt, 60 Hz electri-
cal power only, supplied by a direct plug-in trans-
former (included). Provide an electrical outlet within
10 feet, in accordance with NEC and local codes.
=Always install the water softener between the water
inlet and water heater. Any other installed water
conditioning equipment should be installed between
the water inlet and water softener (See Figure 4
below).
=Avoid installing in direct sunlight. Excessive sun
heat may cause distortion or other damage to non-
metallic parts.
Insta ation Requirements
THE RO ER ORDER TO INSTALL WATER TREATMENT EQUI MENT
FIG. 4
Pressure
Tank
City Water Supply
Well Water Supply
Well
Pump
OR
Optional
Sediment
Filter
Water
Heater
Water
Softener
Untreated Water to
Outside Faucets
Hot Water
to House
Cold Water
to House
rain
Hose

6
Typica Insta ation I ustrations
FIG. 5FIG. 5
120 Volt
Outlet
Soft
Water
Hard
Water
Hard Water to
outside faucets
CROSSOVER
Use if water supply flows from the left.
Include single or 3-valve bypass.
MAIN WATER I E
Hard
Water Soft
Water
To
Softener
Inlet
From
Softener
Outlet
1” NPT Sweat
Adaptor (2)
not included
1” NPT
Installation
Adaptor (2) *
O-ring Seal (2) *
Bypass Valve *
Clip (4) *
* Included with softener. Pipe and
fittings supplied by installer.
Valve
INLET
Valve
INLET
1” NPT
Installation
Adaptor (2) *
O-ring Seal (2) *
Clip (2) *
1” NPT Sweat
Adaptor (2)
not included
INLET
Valve
OUTLET
Valve
BYPASS
Valve
MAIN WATER I E
INSTALLATION USING 3-VALVE BY ASS
For soft water SERVICE:
- Open the inlet and out-
let valves
- Close the bypass valve
For hard water BY ASS:
- Close the inlet and out-
let valves
- Open the bypass valve
Soft
Water
Hard
Water

7
Insta ation Instructions
1. TURN OFF WATER SU LY
a. Close the main water supply valve near the well
pump or water meter.
b. Shut off the electric or fuel supply to the water
heater.
c. Open high and low faucets to drain all water from
the house pipes.
2. INSTALL BY ASS VALVE AND/OR
LASTIC INSTALLATION ADA TORS:
a. If installing a single bypass valve, push the bypass
valve, with lubricated o-ring seals in place, into the
valve inlet and outlet ports (See Figures 5 & 7).
- OR -
b. If installing a 3-valve bypass system, slide plastic
installation adaptors, with lubricated o-ring seals in
place, into the valve inlet and outlet ports (See
Figures 5 & 7).
c. Make sure the turbine and support are firmly in
place in the valve outlet, as shown in Figure 8.
Blow into the valve port and observe the turbine for
free rotation.
d. Snap the two large plastic clips in place on the inlet
and outlet ports, from the top, down (See Figure 9).
Make sure they snap into place. Pull on the bypass
valve, or installation adaptors, to make sure they
are held securely in place.
3. MOVE THE UNIT INTO INSTALLATION
OSITION
a. Move the water softener into the desired location.
Set it on a solid, level surface.
IM ORTANT: o not place shims directly under the
salt storage tank to level the softener.
The weight of the tank, when full of
water and salt, may cause the tank to
fracture at the shim.
Turn the bypass
valve downward if
connecting to floor
level plumbing
INLET
OUTLET
FIG. 10
FIG. 7
FIG. 9
FIG. 8
Turbine Turbine Support Assembly
Valve Outlet
O-ring
Clip
Bypass valve or
plastic adaptor
END VIEWSIDE VIEW
INLET
OUTLET
Clip (2)
Clip (2)
Bypass
Valve
Plastic
installation
adaptors
SINGLE BY ASS VALVE
Pull out for “Service”
(Soft water)
Push in for
“Bypass”
FIG. 6

8
4. COM LETE INLET AND OUTLET
LUMBING
Pipe fittings must be 3/4” minimum.
Use:
=Copper pipe
=Threaded pipe
=PEX (Crosslinked Polyethylene) pipe
=CPVC plastic pipe
=Other pipe approved for use with potable water
IM ORTANT: o not solder with plumbing attached to
installation adaptors and single bypass
valve. Soldering heat will damage the
adaptors and valve.Measure, cut, and
loosely assemble pipe and fittings from
the main water pipe to the inlet and out-
let ports of the water softener valve. Be
sure to keep fittings fully together, and
pipes squared and straight.
Be sure hard water supply pipe goes to the water sof-
tener valve inlet side.
NOTE: Inlet and outlet are marked on the water sof-
tener valve. Trace the water flow direction to
be sure hard water is to inlet.
IM ORTANT: Be sure to fit, align and support all
plumbing to prevent putting stress on
the water softener valve inlet and outlet.
Stress from misaligned or unsupported
plumbing may cause damage to the
valve.
Complete the inlet and outlet plumbing for the type of
pipe you will be using.
5. COLD WATER I E GROUNDING
CAUTION: The house cold water pipe (metal only) is
often used as a ground for the house elec-
trical system, The 3-valve bypass type of
installation, shown in Figure 8, will maintain
ground continuity. If you use a plastic
bypass valve at the unit, continuity is bro-
ken. To restore the ground, do the follow-
ing:
a. Install the included metal ground clamp across the
removed section of main water pipe, securely tight-
ening the hardware at the center (See Figure 11).
NOTE: Check local plumbing and electrical codes for
proper installation of grounding. The installa-
tion must conform to them.
FIG. 11
Ground
Clamp
Inlet / Outlet
Pipes
6. INSTALL VALVE DRAIN HOSE
a. Measure, cut to needed length and connect the 3/8"
drain line (provided) to the water softener valve
drain fitting. Use a hose clamp to hold the hose in
place.
Insta ation Instructions
NOTE: Avoid drain hose
runs longer than 30
feet. Avoid elevat-
ing the hose more
than 8 feet above
the floor. Make the
valve drain line as
short and direct as
possible.
NOTE: If codes require a
rigid drain line see
Figure 13.
b. Route the drain hose or
copper tubing to the
floor drain. Secure
drain hose. This will
prevent “whipping'' dur-
ing regenerations. See
“Air Gap Requirements"
section. FIG. 12
FIG. 13
rain Fitting
on valve
Valve
rain
Hose
1-1/2”
Air Gap
To
Floor
rain
CONNECTING A RIGID VALVE DRAIN TUBE:
To adapt a copper drain tube to the softener, cut the
barbed end from the drain fitting, as shown. Obtain a
compression fitting (1/4” female pipe thread x 1/2” O. .
tube) and needed tubing from your local hardware store.
1/4” NPT Threads
Clip
Compression Fitting,
1/4” NPT x 1/2” O. .
tube (not provided)
Cut barbs from drain fitting
1/2” O. . copper tube
(not provided)

9
8. CONNECT BRINE TUBING
a. Route the tubing attached to the brine valve assem-
bly out of the brine tank through the hole provided in
the tank sidewall. Use the slot in the brinewell to
hold tubing in place.
b. Connect the end of this tube to the nozzle/venturi
assembly, as shown in Figure 14, using a ferrule nut
(provided). Tighten the nut by hand, then an addi-
tional 1/4 turn with pliers.
Insta ation Instructions
9. TEST FOR LEAKS
To prevent air pressure in the water softener and
plumbing system, complete the following steps in
order:
a. Fully open two or more softened cold water faucets
close to the water softener, located downstream
from the water softener.
b. Place the bypass valve (single or 3 valve) into the
"bypass" position. See Figures 5 & 6.
c. Slowly open the main water supply valve. Run
water until there is a steady flow from the opened
faucets, with no air bubbles.
d. Place bypass valve(s) in "service" or soft water posi-
tion as follows:
=Single bypass valve: Slowly move the valve stem
toward "service," pausing several times to allow
the water softener to fill with water.
=3 valve bypass: Fully close the bypass valve and
open the outlet valve. Slowly open the inlet
valve, pausing several times to allow the water
softener to fill with water.
e. After about three minutes, open a hot water faucet
until there is a steady flow and there are no air bub-
bles, then close this faucet.
f. Close all cold water faucets and check for leaks at
the plumbing connections that you made.
g. Check for leaks around clips at softener’s inlet and
outlet. If a leak occurs at a clip, depressurize the
plumbing (turn off the water supply and open
faucets) before removing clip. When removing clips
at the softener’s inlet or outlet, push the single
bypass valve body toward the softener (See Figure
15). Improper removal may damage clips. o not
reinstall damaged clips.
FIG. 15
...depressurize the
plumbing, then push
Bypass Valve body
toward softener
If removing
clips...
FIG. 14
rain
Elbow
Grommet
Nozzle/
Venturi
Ferrule
Nut
Brine
Valve
Tubing
Brinewell To
Floor
rain
Overflow
rain
Hose
7. INSTALL SALT STORAGE TANK OVER-
FLOW FITTINGS AND HOSE
a. Insert the rubber grommet into the 3/4” diameter
hole in the salt storage tank sidewall (See Figure
14).
b. Push the barbed end of the hose adaptor elbow into
the grommet.
c. Measure, cut to needed length and connect the 3/8"
drain line (provided) to the salt storage tank over-
flow elbow and secure in place with a hose clamp.
d. Route the hose to the floor drain, or other suitable
drain point no higher than the drain fitting on the salt
storage tank (This is a gravity drain). If the tank
overfills with water, the excess water flows to the
drain point. Cut the drain line to the desired length
and route it neatly out of the way.
IM ORTANT: For proper operation of the water soften-
er, do not connect the water softener
valve drain tubing to the salt storage
tank overflow hose.

10
Insta ation Instructions
10. ADD WATER AND SALT TO THE SALT
STORAGE TANK
1. Using a container, add about three gallons of clean
water into the salt storage tank.
2. Add salt to the storage tank. Use nugget, pellet or
coarse solar salts with less than 1% impurities.
11. LUG IN THE WATER SOFTENER
uring installation, the water softener wiring may be
moved or jostled from place. Be sure all leadwire con-
nectors are secure on the back of the electronic board
and be sure all wiring is away from the valve gear and
motor area, which rotates during regenerations.
a. Plug the water softener into an electrical outlet that
is not controlled by a switch.
NOTE: The water heater is filled with hard water and,
as hot water is used, it will refill with condi-
tioned water. In a few days, the hot water will
be fully conditioned. To have fully conditioned
hot water immediately, wait until the initial
recharge is over. Then, drain the water heater
(following instructions for water heater) until
water runs cold.
12. ROGRAM THE CONTROLLER
a. Complete the Programming Steps on the next two
pages.
13. SANITIZE THE WATER SOFTENER /
SANITIZE AFTER SERVICE
Care is taken at the factory to keep your unit clean and
sanitary. Materials used to make the unit will not infect
or contaminate your water supply, and will not cause
bacteria to form or grow. However, during shipping,
storage, installation and operation, bacteria could get
into the unit. For this reason, sanitizing as follows is
suggested* when installing.
a. Slide open the salt lid, remove the brinewell cover
and pour about 3 oz. (6 tablespoons) of household
bleach into the softener brinewell. Replace the
brinewell cover.
bMake sure the bypass valve(s) is in the “service”
(open) position.
c Start a recharge: Press the RECHARGE button and
hold for 3 seconds, until “Recharge Now” begins to
flash in the display. This recharge draws the sanitiz-
ing bleach into and through the water softener. Any
air remaining in the unit is purged to the drain.
d. After the recharge has completed, fully open a cold
water faucet, downstream from the softener, and
allow 50 gallons of water to pass through the sys-
tem. This should take at least 20 minutes. Close
the faucet.
*Recommended by the Water Quality Association. On some
water supplies, the unit may need periodic disinfecting.
14. RESTART THE WATER HEATER
a. Turn on the electricity or fuel supply to the water
heater and relight the pilot, if applicable.
NOTE: The water heater is filled with hard water and,
as hot water is used, it refills with conditioned
water. In a few days, the hot water will be fully
conditioned. To have fully conditioned hot
water immediately, wait until the initial recharge
(previous step) is over. Then, drain the water
heater (following instructions for water heater)
until water runs cold.
If you have any questions about system programming, operation or maintenance,
call toll free: 1-800-689-4571 Monday - Friday, 8:30 am - 6:00 pm EST, or Saturday 9:00 am - 3:00 pm EST,
or visit us online at: www.truebluewatersolutions.com

11
Programming the E ectronic Contro er
CONTROLLER SETTINGS REQUIRED
upon installation, and after an extended power outage.
When the transformer is plugged into the electrical
outlet, a model code (tb-30) and a test number
(example: J2.0), are briefly shown in the display.
Then the words “PRESENT TIME” appear and 12:00
PM begins to flash.
A. SET RESENT TIME OF DAY
If the words “PRESENT TIME" do not show in the dis-
play, press the SELECT button several times until
they do.
FIG. 17
FIG. 18
B. SET WATER HARDNESS NUMBER
NOTE: If “HAR NESS” and a number do not show in
the display, press the SELECT button a few
times until they do.
1. Press the UP (
) or OWN (–) buttons to set the
value of your water’s hardness in grains per gallon
(gpg).
1. Press the UP (
) or OWN (–) buttons to set the
present time. Up moves the display ahead; down
sets the time back. Be sure AM or PM is correct.
NOTE: Press buttons and quickly release to slowly
advance the display. Hold the buttons down
for fast advance.
2. When the correct time is displayed, press the
SELECT button, and the display will change to
show the “Hardness” screen.
NOTE: If your water supply contains iron, compen-
sate for it by adding to the water hardness
number. For example, assume your water is
20 gpg hard and contains 2 ppm iron. Add 5
to the hardness number for each 1 ppm of
iron. In this example, you would use 30 for
your hardness number.
20 gpg hardness
2 ppm iron x 5 = 10 +10
(times) 30 HAR NESS NUMBER
2. When finished setting your water’s hardness num-
ber, press the SELECT button, and the display will
change to show the “Recharge Time” screen.
C. SET REGENERATION STARTING TIME
NOTE: If “RECHARGE TIME” and a flashing time
(2:00 AM is the factory default) are not show-
ing in the display, press the SELECT button a
few times until they do.
FIG. 19
continued on next page
FIG. 16
UP button
OWN
button
isplay
RECHARGE
button
SELECT
button

12
O TIONAL RECHARGE CONTROLS
Sometimes a manually initiated regeneration (re -
charge) may be desired or needed. Two examples:
=You have used more water than usual (guests,
extra washing, etc.) and you may run out of soft
water before the next scheduled regeneration.
=You did not refill the storage tank with salt before it
had run completely out.
Use one of the following two features to begin a
regeneration either immediately or at the next preset
regeneration start time:
RECHARGE NOW
To manually start a regeneration cycle, press and
hold the RECHARGE button for a few seconds, until
“RECHARGE NOW” flashes in the display.
The softener begins an immediate regeneration.
When completed (in about two hours), you will have a
new supply of soft water. Once started, you cannot
cancel this regeneration.
RECHARGE TONIGHT
To set a regeneration cycle to begin at the next preset
regeneration time, touch (press, but do not hold) the
RECHARGE button. “RECHARGE TONIGHT” flash-
es in the display.
FIG. 23
A regeneration will begin at the next preset regenera-
tion start time (2:00 AM or as set). If you decide to
cancel this regeneration before it starts, touch the
same button once more.
VACATION NOTE
True Blue demand controlled water softeners regen-
erate only while water is being used and softening
capacity must be restored. For this reason, the unit
will not regenerate when you are away from home for
extended periods.
FIG. 24
Programming the E ectronic Contro er
FIG. 20
1. Press the UP (
) or OWN (–) buttons to set the
type of salt you will be using in your water softener.
The default is NaCl (standard Sodium Chloride
water softener salt). If you will be using KCl
(Potassium Chloride) instead, be sure to set the
salt type to KCl. This setting adjusts the regenera-
tion cycle times to compensate for the different rate
at which KCl dissolves.
2. When the correct salt type is displayed, press the
SELECT button. The display then shows the pres-
ent time of day.
NORMAL O ERATION
uring normal operation, the present time of day
shows in the display.
1. Press the UP (
) or OWN (–) buttons to set the
desired regeneration start time in 1 hour incre-
ments. The factory default is 2:00 AM. In most
households this is a good time for regeneration to
start (takes about 2 hours) because water is not
being used. uring regeneration hard water is
bypassed to house faucets.
2. When finished setting the desired regeneration
start time, press the SELECT button, and the dis-
play will change to show the salt type setting
screen.
D. SET SALT TY E
NOTE: If a salt type (“nACL” or “kCL”) does not show
in the display, press the SELECT button a few
times until one does.
FIG. 21
FIG. 22
continued from previous page

13
O TIONAL SETTINGS:
=SALT EFFICIENCY
=MAXIMUM DAYS BETWEEN REGEN-
ERATIONS
=97% FEATURE
=12 / 24 HOUR CLOCK
=BACKWASH & FAST RINSE TIMES
1. To set any of these options, press and hold SELECT
for 3 seconds until “000 - -” shows in the display.
Then press (do not hold) SELECT again to display
one of the “Salt Efficiency” screens shown below.
97% FEATURE: The 97% Feature can save salt
and water by regenerating when 97% of the soften-
er’s capacity has been used up. With this feature
ON, the regeneration can occur at any time (when-
ever the system has reached 97% of its capacity).
The default is OFF. If this feature is desired, turn it
on by pressing the UP (
) button.
SALT EFFICIENCY: When this feature is ON, the
water softener will operate at salt efficiencies of
4000 grains of hardness per pound of salt or high-
er. The softener may recharge more often using
smaller salt dosage and less water. This softener
is shipped with the efficiency feature set OFF. Use
the UP (
) or OWN (–) buttons to change
between OFF and ON. An efficiency icon will be
displayed when this feature is ON.
Contro er Features / Options
FIG. 25
FIG. 26
MAXIMUM DAYS BETWEEN REGENERATIONS:
The electronic controller automatically determines
regeneration frequency. This provides the greatest
operating efficiency and, under most conditions this
feature will be left in its default mode. However,
you can set this feature to force a regeneration
every set number of days. You may want to do this
if, for exam ple, your water supply contains iron and
you want the softener to regenerate at least once
every few days to keep the resin bed clean. Use
the UP (
) or OWN (–) to change the number of
days (up to 15). If no change is desired, continue
to next step.
3. Press SELECT again to display the “97%” screen.
2. Press SELECT again to display the “Recharge
ays” screen.
FIG. 27
Efficiency
Icon
FIG. 28
FIG. 29

14
Contro er Features / Options
4. Press SELECT again to display the “12 or 24 hr”
screen.
If you wish to change the fast rinse time, use the
UP (
) or OWN (–) buttons to set the fast rinse
time between 1 and 30 minutes.
6. Press SELECT to return to the normal run (time of
day) screen.
12 OR 24 HOUR CLOCK: All time displays are
shown in 12 hour (AM/PM) format at the default
setting. If 24 hour time format is de sired, set to “24
hr” by pressing the UP (
) button.
5. Press SELECT again to display the “bA-” back-
wash time setting screen.
FIG. 30
FIG. 31
BACKWASH & FAST RINSE TIMES: If you expe-
rience salty tasting water after regeneration, you
may need to increase the backwash and fast rinse
times. You may increase or decrease the back-
wash and fast rinse times from their default values,
in 1 minute increments.
If you wish to change the backwash time, use the
UP (
) or OWN (–) buttons to set the backwash
time between 1 and 30 minutes. Then press
SELECT to display the “Fr-” fast rinse time setting
screen.
FIG. 32
ROGRAM MEMORY
If electrical power to the softener is interrupted, the
time display is blank, but the electronic controller
keeps correct time for about 6 hours. When power is
restored, you must reset the present time only if the
display is flashing. All other settings are maintained
and never require resetting unless a change is
desired. If the time is flashing after a long power out-
age, the softener continues to work as it should to
provide you with soft water. However, regenerations
may occur at the wrong time of day until you reset the
clock to the correct time of day.

15
FIG. 33
Broom
Handle
Pencil
Mark
1” - 2”
Salt
Salt Bridge
Water Level
Push tool into
salt bridge to
break
FIG. 34
Cap
O-ring Seal
Screen Support
Screen
Gasket
*Flow Plug (HV C)
Housing
Ferrule
Nut
Cone Screen
*Flow Plug
*Install with lettered
side up, concave
side down.
CLEANING THE NOZZLE & VENTURI
A clean nozzle & venturi (See Figure 34) is a necessity
for the water softener to work properly. This small
component creates the suction to move brine from the
brine tank, into the resin tank. If it should become
plugged with sand, silt, dirt, etc., the water softener will
not work, and hard water will result.
Nozzle & Venturi isc
IMPORTANT: Be sure small hole in the gasket is cen-
tered directly over the small hole in the nozzle & ven-
turi housing. Be sure the numbers are facing up
Routine Maintenance
ADDING SALT
Lift the salt storage tank cover and check the salt level
frequently. If the water softener uses all the salt before
you refill it, you will experience hard water. Until you
have established a refilling routine, check the salt
every two or three weeks. Always add if less than 1/4
full. Be sure the brinewell cover is on.
NOTE: If using potassium chloride (KCl), do not fill the
storage tank more than 1/2 full.
NOTE: In humid areas, it is best to keep the salt stor-
age level lower, and to refill more often to avoid
salt “bridging”.
Recommended Salt: Nugget, pellet or coarse solar
salts with less than 1% impurities.
Salt Not Recommended: Rock salt, high in impurities,
block, granulated, table, ice melting, ice cream making
salts, etc.
BREAKING A SALT BRIDGE
Sometimes, a hard crust or salt “bridge” forms in the
brine tank. It is usually caused by high humidity or the
wrong kind of salt. When the salt “bridges,” an empty
space forms between the water and the salt. Then,
salt will not dissolve in the water to make brine.
Without brine, the resin bed is not recharged and hard
water will result.
If the storage tank is full of salt, it is difficult to tell if
you have a salt bridge. A bridge may be underneath
loose salt. Take a broom handle, or like tool, and hold
it next to the water softener. Measure the distance
from the floor to the rim of the water softener. Then,
gently push the broom handle straight down into the
salt. If a hard object is felt before the pencil mark is
even with the top, it is most likely a salt bridge. Gently
push into the bridge in several places to break it. o
not use any sharp or pointed objects as you may
puncture the brine tank. o not try to break the salt
bridge by pounding on the outside of the salt tank.
You may damage the tank.
To get access to the nozzle & venturi, remove the
water softener’s top cover. Put the bypass valve(s)
into the bypass position. Be sure the water softener is
in soft water (service) cycle (no water pressure at noz-
zle & venturi). Then, holding the nozzle & venturi
housing with one hand, un screw the cap. o not lose
the o-ring seal. Lift out the screen support and screen.
Then, remove the nozzle & venturi disc, gasket and
flow plug(s). Wash the parts in warm, soapy water
and rinse in fresh water. Be sure to clean both the top
and bottom of the nozzle & venturi disc. If needed,
use a small brush to remove iron or dirt. o not
scratch, misshape, etc., surfaces of the nozzle & ven-
turi.
Gently replace all parts in the correct order. Lubricate
the o-ring seal with silicone grease and locate in place.
Install and tighten the cap by hand, while supporting
the housing. Overtightening may break the cap or
housing. Put the bypass valve(s) into service (soft
water) position.
Recharge the softener to reduce water level in the
tank. This will also assure that the softener is com-
pletely recharged and ready to provide softened water
again. Check the water level in the tank by looking
down the brinewell. If the water level does not drop
after a recharge, the problem has not been resolved.
Call 1-800-689-4571.
Empty Space

16
Troub eshooting Guide
ROBLEM CAUSE CORRECTION
No soft water No salt in the storage tank. Add salt and then initiate a “Recharge Now”.
Salt is “bridged” (a layer of salt in the
salt storage tank has hardened).
Break salt bridge, as described on the previous
page, and then initiate a “Recharge Now”.
If display is blank, transformer may be
unplugged at wall outlet, power cable
leads may be disconnected from the
electronic control board, fuse may be
blown, circuit breaker may be popped,
or transformer may be plugged into a
switched outlet which is “off.”
Check for power loss due to any of these and
correct. When power is restored, if the display
shows the “Present Time” setting screen, it
means time was lost during the outage. Set the
present time. Other settings such as hardness
are retained in memory during a power loss.
Manual bypass valve(s) in bypass
position.
Place bypass valve(s) in service position.
irty, plugged or damaged nozzle &
venturi.
Take apart, clean and inspect the nozzle & ven-
turi assembly.
Valve drain hose plugged or restricted. rain hose must not have any kinks, sharp
bends, or be raised too high above the softener.
Water hard sometimes Bypassed hard water being used dur-
ing recharge, due to present time or
recharge time settings being incorrect.
Check the time displayed. If not correct, refer
to “Set Present Time of ay”. Check the regen-
eration starting time.
Hardness number setting is too low. Referring to “Set Water Hardness Number”,
check the current hardness setting and increase
if needed.
Hot water being used when softener is
recharging.
Avoid using hot water during recharges,
because water heater refills with hard water.
Increase in actual hardness of water
supply.
Have unsoftened water sample tested. Check
the current “Hardness” setting and increase if
needed.
Turbine is not turning freely. Check turbine, as described on the next page.
Motor stalled or clicking Motor malfunction or internal valve
fault causing high torque on motor.
Contact your dealer for service.
Error code Err01, Err02,
Err03 or Err04 displa ed.
Fault in wiring harness, connections to
position switch, switch, valve or motor.
Contact your dealer for service.
Error code Err05 dis-
pla ed.
Electronic timer (PWA) malfunction. Contact your dealer for service.
TROUBLESHOOTING - INITIAL CHECKS
Always make these initial checks first:
1. Is display blank? Check power source.
2. Is Error code displayed? If so, go to “Automatic
Electronic iagnostics.”
3. Is correct time displayed? If not, recharges occur at
the wrong time. Set present time.
4. Is there salt in the brine tank? If not, refill.
5. Is salt “bridged”?
6. Are plumbing bypass valve(s) in service position?
7. Are inlet and outlet pipes connected to the True Blue
water softener inlet and outlet respectively?
8. Is valve drain hose free of kinks and sharp bends,
and not elevated over 8 feet above the floor.
9. Is the brine tube connected?
10. Check the hardness setting (See “Set Water
Hardness Number”). Be sure it is correct for the
household's water supply. Perform a hardness test
on a raw water sample to compare with the setting.
11. Perform a hardness test on a conditioned water
sample to determine whether a problem exists.
If no problem is found after making the initial checks,
proceed to “Troubleshooting - Manual iagnostics” and
“Manual Advance Recharge Check” on the next three
pages.

17
Troub eshooting
AUTOMATIC ELECTRONIC DIAGNOSTICS
The electronic controller has a self-diagnostic function
for the electrical system (except input power and
water meter). The computer monitors the electronic
components and circuits for correct operation. If a
malfunction occurs, an error code appears in the dis-
play.
FIG. 35
Motor
Sensor
Housing
Turbine
Valve
Outlet
Turbine
Support
& Shaft
Position
Switch
FIG. 36
The chart on the previous page shows the error
codes that could appear, and possible problems indi-
cated by the codes. While an error code is displayed,
all timer buttons are inoperable, except for the
SELECT button. SELECT remains operational so the
service person can make use of the Manually Initiated
Electronic iagnostics to further isolate the defect,
and check the water meter.
TO REMOVE AN ERROR CODE:
1. Unplug the transformer.
2. Correct the problem.
3. Plug the transformer back in.
4. Wait for at least 6 minutes while the electronic con-
troller operates the valve through an entire cycle.
The error code will return if the problem was not
corrected.
FIG. 37
MANUALLY INITIATED ELECTRONIC
DIAGNOSTICS
1. To enter diagnostics, press and hold the SELECT
button until “000 - -” appears in the display.
2. The first 3 digits indicate water meter operation as
follows:
000 (steady) = Soft water not in use, and no
flow through the meter.
OPEN A NEARBY SOFT WATER FAUCET.
000 to 199 = Repeats for each gallon of water
passing through the meter.
NOTE: If you don't get a reading in the display with
faucet open, pull the sensor from the valve
outlet port. Pass a small magnet back and
forth in front of the sensor. If you get a read-
ing in the display with the magnet, unhook the
in and out plumbing and check the turbine for
binding (See Figure 36).
3. The last 2 digits in the display indicate position
switch operation as follows:
4. Use the RECHARGE button to manually advance
the valve into each cycle and check correct switch
operation.
5. While in this diagnostic screen, the following infor-
mation is available and may be beneficial for vari-
ous reasons. This information is retained by the
computer from the first time electrical power is
applied to the electronic controller.
a. Press the UP (
) button to display the number
of days this electronic control has had electrical
power applied.
b. Press the OWN (–) button to display the num-
ber of regenerations initiated by this electronic
control since the model code number was
entered.
Correct Switch
Displays Valve Cycle Status
– – Valve in service, fill, brining,
backwash or fast rinse position.
– PValve rotating from one position
to another.

18
Troub eshooting
6. Press the SELECT button and hold in for 3 sec-
onds until the model code (tb-30) shows in the dis-
play. This code identifies the softener model. If
the wrong number shows, the softener will operate
on incorrect configuration data.
7. To change the code number - Press UP (
) or
OWN (–) button until the correct code shows.
8. To return to the present time display, press the
SELECT button. If the model code was
changed, make all electronic controller set-
tings.
NOTE: If the electronic control is left in a diagnostic
display (or a flashing display when setting
times or hardness), present time automatically
returns if a button is not pressed within 4 min-
utes.
RESETTING TO FACTORY DEFAULTS:
To reset the electronic controller to its factory default
for all settings (time, hardness, etc.):
1. Press the SELECT button and hold it until the dis-
play changes twice to show “CO E” and the flash-
ing model code.
2. Press the UP (
) button (a few times, if necessary)
to display a flashing “SoS”.
3. Press the SELECT button, and the electronic con-
troller will restart.
4. Set the present time, hardness, etc., as described
on pages 11 & 12.
FIG. 39
FIG. 38

19
24 VAC
Transformer
Turbine
Sensor
OUT
GND
+5
Position
Switch
NO
NC
grn
brn
Valve
Motor
Back of Controller (PWA)
AC INPUT POS. / TURBINE MOTOR
Troub eshooting
WIRING SCHEMATIC
FIG. 41
This check verifies proper operation of the valve
motor, brine tank fill, brine draw, regeneration flow
rates, and other controller functions. Always make
the initial checks, and the manual initiated diagnos-
tics.
NOTE: The electronic control display must show a
steady time (not flashing).
1. Press the RECHARGE button and hold in for 3
seconds. “RECHARGE NOW” begins to flash as
the softener enters the fill cycle of regeneration.
Remove the brinewell cover and, using a flashlight,
observe fill water entering the tank.
If water does not enter the tank, look for an
obstructed nozzle, venturi, fill flow plug, brine tub-
ing, or brine valve riser pipe.
2. After observing fill, press the RECHARGE button to
move the softener into brining. A slow flow of
water to the drain will begin. Verify brine draw from
the brine tank by shining a flashlight into the
brinewell and observing a noticeable drop in the
liquid level.
NOTE: Be sure water is in contact with the salt, and
not separated by a salt bridge.
If the water softener does not draw brine, check for
(most likely to least likely):
=irty or plugged nozzle and venturi.
=Nozzle and venturi not seated on the gasket, or
gasket deformed.
=Restriction in valve drain, causing a back-pres-
sure (bends, kinks, elevated too high, etc.).
=Obstruction in brine valve or brine tubing
=Inner valve failure (obstructed outlet disc, wave
washer deformed, etc.)
NOTE: If water system pressure is low, an elevated
drain hose may cause back pressure, stop-
ping brine draw.
3. Again, press the RECHARGE button to move the
softener into backwash. Look for a fast flow of
water from the drain hose.
An obstructed flow indicates a plugged top distribu-
tor, backwash flow plug, or drain hose.
4. Press the RECHARGE button to move the softener
into fast rinse. Again look for a fast drain flow.
Allow the softener to rinse for a few minutes to
flush out any brine that may remain in the resin
tank from the brining cycle test.
5. To return the softener to service, press the
RECHARGE button.
MANUAL ADVANCE REGENERATION CHECK
FIG. 40
Motor
Cam
Position markers
(valve in service)

20
1
Valve Assembly
See Pages 22 & 23
for parts
2
3
4
5
6
7
8
9
10
11
12
13
14 15
16 17
22
18
19
20
21
28
29
23
24
25
26
30
31
32
33
34
35
36
Softener Exp oded View (Mode TB-30)
27
This manual suits for next models
1
Table of contents
Popular Water Dispenser manuals by other brands

Elson
Elson EBW25 Installation and user instructions

Elkay
Elkay EZOOTL8 1A Series Installation and use manual

ScaleBlaster
ScaleBlaster SB-175 Installation & operation manual
Elkay
Elkay EZH2O LZS8WS 1B Series Installation, care & use manual
CASO DESIGN
CASO DESIGN HW 1660 Original operating manual
Igloo
Igloo MWC502 instruction manual

vitapur
vitapur VWD2266W Use & care guide
Vertex
Vertex PureWaterCooler PWC-8000 Owners & installation manual

Vertex
Vertex PureWaterCooler PWC-3500 Owners & installation manual
Water Worker
Water Worker HT2B installation manual

3M
3M CWS Series Installation and operating instructions
Petwa
Petwa 75V owner's manual
