Trumpeter Junkers Ju-87D Stuka User manual
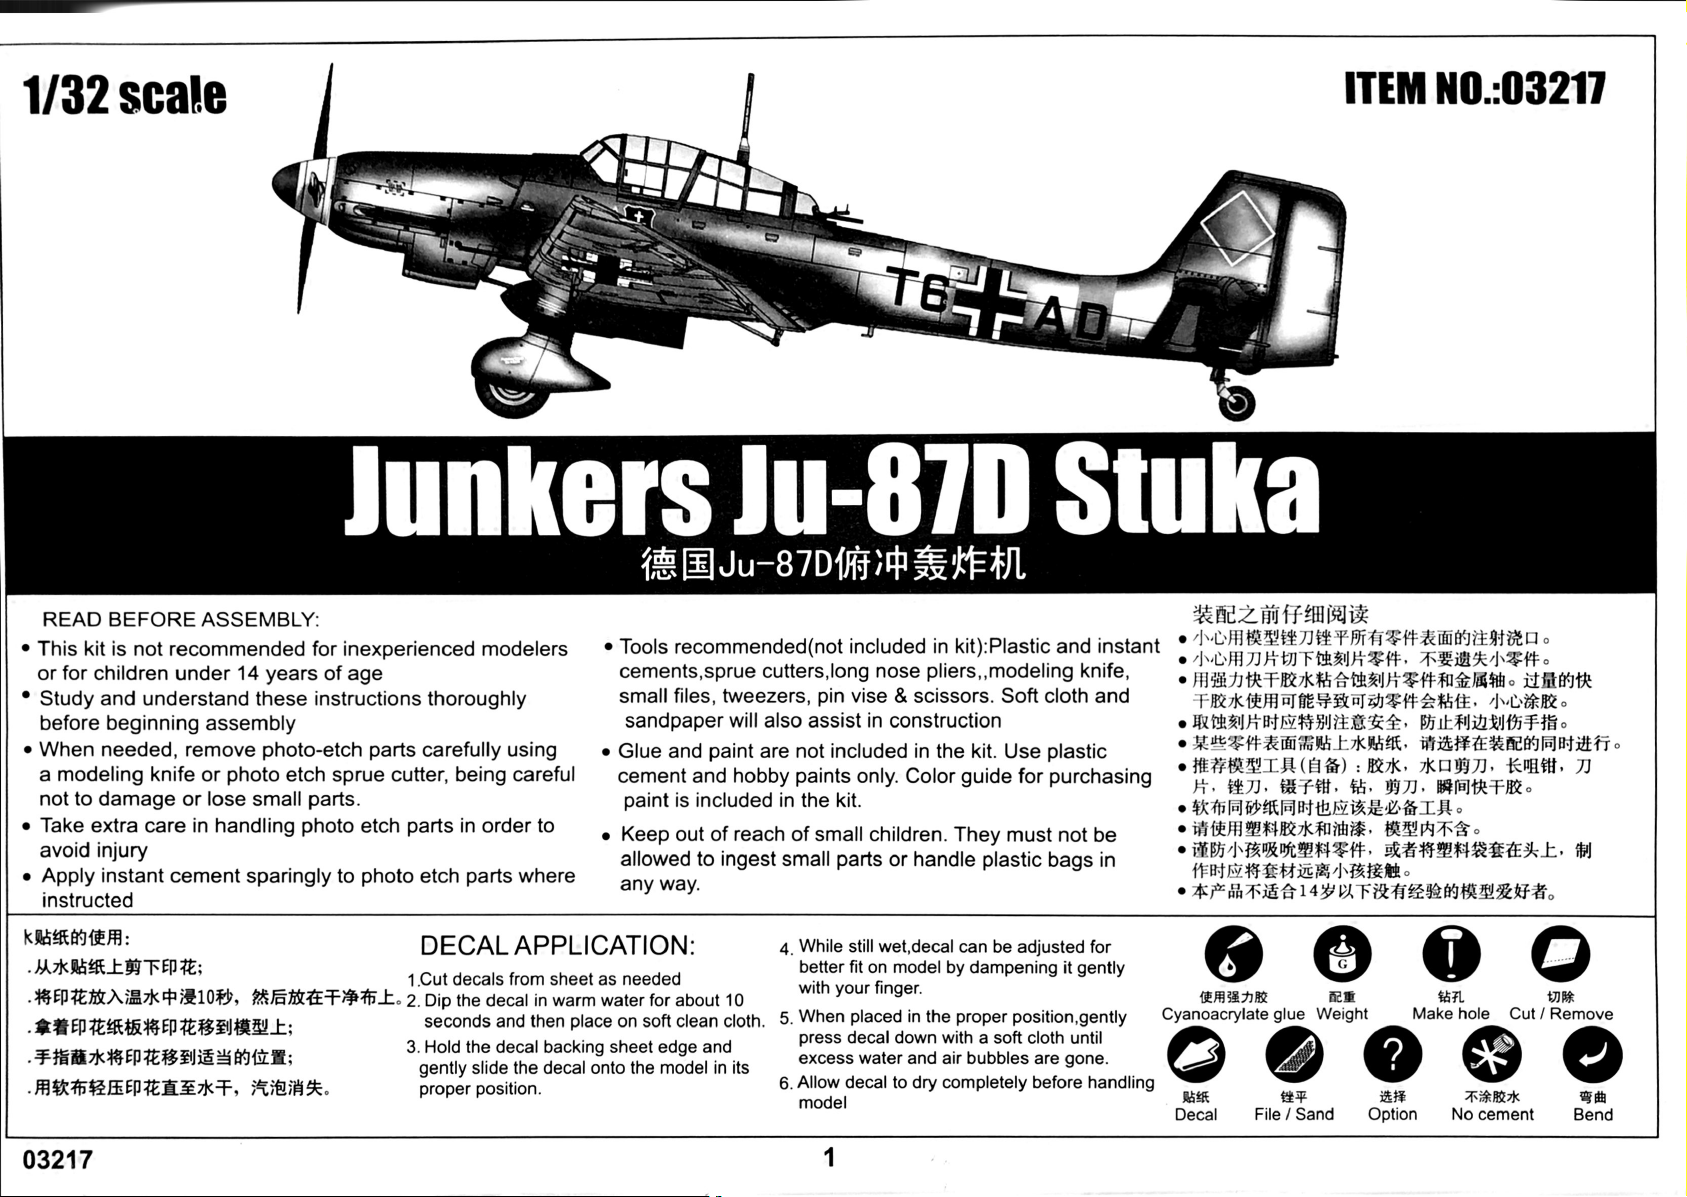
1/32 scale ITEM NO.:03217
TA
JunkersJu-87DStuka
tJu-87D(4
READ BEFORE ASSEMBLY: •Toolsrecommended(notincludedinkit):Plasticandinstant HER#DTB fT#iái tE O.
• JHIF HF#, FF#.
•This kit is not recommended for inexperienced modelers
cements,sprue cutters, long nose pliers,,modeling knife,
small files, tweezers, pin vise & scissors. Soft cloth and
sandpaper will also assist in construction
Glue and paint are not included in the kit. Use plastic
cement and hobby paints only. Color guide for purchasing
paint is included in the kit.
Keep out of reach of small children. They must not be
allowed to ingest small parts or handle plastic bags in
any way.
or for children under 14 years of age
• Study and understand these instructions thoroughly
before beginning assembly
•When needed, remove photo-etch parts carefully using •##NIN(H) : Bk. ķIJ, K J)
a modeling knife or photo etch sprue cutter, being careful
not to damage or lose small parts.
• Take extra care in handling photo etch parts in order to
avoid injury
• Apply instant cement sparingly to photo etch parts where
instructed
kRiANE#: DECAL APPLICATION: 4. While still wet,decal can be adjusted for
.AKEE# FEDE; better fit on model by dampening it gently
with your finger.
1.Cut decals from sheet as needed
.$)ERA*109, AREFĦE. 2. Dip the decal in warm water for about 10
*EDEAA%EDEBIWVE; Cyanoacrylate glue Weight Make hole Cut/ Remove
seconds and then place on soft clean cloth. 5. When placed in the proper position,gently
press decal down with a soft cloth until
excess water and air bubbles are gone.
3. Hold the decal backing sheet edge and
gently slide the decal onto the model in its
proper position.
.#4ABEEDÆAEKT, AAH*. 6. Allow decal to dry completely before handling
model Decal File / Sand Option No cement Bend
03217 1

B
Parts
C1
A
APC
2
HF ft
P
C3
Hc3
www
MNS
OD
OHOs
03217 2

Parts
QR
,(E X2
Main tyre
L&AE <RRA)
Tail tyre
WA WE X
WA D
WBX2
We Y
Photo etched part(PE)
Decal
TL
LLOBTÊ-LIL
WD (IA)B
Photo etched part(PE) D-DAAAO-AD
KAMGB4:
Unused parts R7 R8 R10 R11 R12 R15R16 R17 R18 R19
A15A16 A32 S23 Q34 Q35 R2 R3 R4 R6
Ua0AAAA
R20 R21 R22 R23 R24 R25 R26 R27 R28 R29
R30 R31 R32 PE-A2 PE-A3 PE-A4 PE-A5
PE-A6 PE-A7 PE-B1 PE-B2 PE-B3 PE-B4 PE-B6
PE-B8 PE-B9 Y1 X7 X9 X12
03217 1/32 Junkers Ju-87D Stuka
03217 3

1C42 C6 -C39
C3
HB8CA0 C7-
Silver
C11+C12 C41 C5
C14- C13
C37
$67L
Make holes
C43 Metal Black
C20 C8
HARAAAN/A
C15 C20+C21 H8
C9+C10
C38 Silver
C46
AN C47
Opposite C47
-C18
IC16
Opposite Č16
CÁ5 H12 33
Flat black
Q27
C4
H7060 C19
C17
RLM02 Gray Opposite C17
C44 C1-
S11 C2
Q10 H1233 H1828
Flat black
Q17 Metal Black
S7 S8
Q26 Opposite S8
S13
Q24 )D Q21
Q2
H7060
RLM02 Gray D
Q16 H123Q22
Flat black
Q19
03217 4

Q41
Q39
Q5 Q6
HB8
$
Silver Q28
H88
Q3 Q23
Silver
Q40
Q36
Q7
Q25
Q38
H1828
M2 Q13
Steel
Q15
M7
HZ060 Q11
Q12
RLM02 Gray Opposite Q12
Q14 H70 60
RLM02 Gray
03217 5

N32
3HZO60
H7060 -N11
H|70 60 RLM02 Gray
RLM02 Gray N47
RLM02 Gray H060
N12 N46
N56 RLMO2 Gray
M9 Q37 K
M5
N57 N36
-N40
N19
N16
N26
N44
N6 N41 N38
N29
N17
-N51 HZ060
-N54
N33
RLM02 Gray Q31
N21
N52 N53 N55 N1
H70 60 H116
N3
RLM02 Gray
RLM66 Black Gray
N30
N4 N18
N10
N15
Opposite N15
N14
-N23
*N22
Opposite N22
N50
H7060
RLM02 Gray
6
03217

Q42 Q43
Tail tyre s12
H7060
RLM02 Gray
M4
M10
03217 7

5«ENKTRR)
Left horizontal stabilizer
s20 S14
Q1
s15 30
Decal
S22+S24 N35
X3
S21+S26
«EMKPRR)
Right horizontal stabilizer
S9 S2
S10
N28 S3+S16
M3+M6
N27
S1+S18
xN P3 P6-
OppositeP3
03217 8

6
X10 P18
P17
A10
N5
A8
N34
X5
03217 9

A31 A5 8A30 Ag
A27+A29
A26+A28
P10 A6 A7-
A33 P11 A33
A11 p12
P9 A4
Make hole
L
2 Make hole P1 P2
A21
S19 S25
P4 P5 X2
P14+P15
P13+P16
X6 Make hole Make hole X8
A35 A34
Right wing Left wing
03217 10

9X11
M8
Right wing
(EMMR)
Left wing
03217 11

10
P7
P8 PE-B5 x 2 N49
PE-B7x2
X1
N45
N13
N48
X4
N43
Y3
(Y4)
-PE-B6 N42 R9
X13 pE-B8
APE-B9
Opposite PE-B9
A-R13
R1 R5
R14
03217 12

12 A12
I A2 Opposite A12
Opposite A2 A3 AN A18
A37
tNN9
Opposite N9
N31
A1 A20 Opposite A18
Opposite A37
A36 Opposite A20 A17
A19
RAN A25
Opposite A25
A22 31N A23
Opposite A23
A24
/.
.
N39
AN37
Opposite N37
03217 13

13 15
Main tyre Left main undercarriage
Left main undercarriage
O9
*N20
Opposite N20
N2
S4+S17
Q33 Q8
tN24+N25
Opposite N24+N25
.İA14
Opposite A14
A13
N8+N7-
-Q20
19 Right main undercarriage
Q30
eee
S4+S17 Main tyre Q29
Q32
Right main undercarriage
Q18
03217 14

WB5 KA)-L <A)-R (B)-R
16 (B)-L
WB6
WB1
WB2 WD1 WD1
WB3 -WB7
WB4
Option Option
WD2
(WD3 ) WD2
(WD3) WD14
(WD15) WD14
(WD15) WD13
Make holes WD6
Option
Make four Make four
<D) -L (D)-R
18 19
WE4 (WD9+WD10 )
WD7+WD8
WE3
WE6
WE2 WD11
WD5- -WD4 WD12-
WE5
WE1- PE-A1
WE7 WD6
Make two WD13
Make two 20 EWA4 X4
WA1
Q4
WD6
WD13 WA2+WA3 WA5
(C)-L (C)-R
15
03217

20 KA)-L
KE)
(B)-L
Option
KA)-R
o
<D)-L (C)-L ..
Option
(C)-R
<B)-R
(D)-R
03217 16
This manual suits for next models
1
Popular Toy manuals by other brands

KidKraft
KidKraft Modern-Day Play Kitchen with EZ Kraft... manual

LeapFrog
LeapFrog Farm Mash-Up Parent guide & instructions

ROBBE
ROBBE MILAN Instruction and user's manual

REVELL
REVELL Dodge Charger SRT8 instruction manual

Reely
Reely 1537717 operating instructions

WowWee
WowWee FlyTech HOVERPOD REMOTE CONTROL HOVERCRAFT quick start guide

Peg-Perego
Peg-Perego Monster IGMC0007US Use and care

Spacerails
Spacerails LEVEL 4 quick start guide

Black Horce Model
Black Horce Model SHARK BH119 Instruction manual book

Eduard
Eduard SM-79-II Sparviero Interior Assembly instructions

BERG
BERG Black Edition user manual

ROBBE
ROBBE Dimona Assembly and operating instructions


