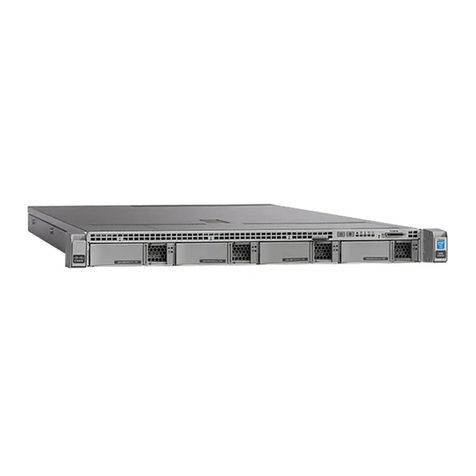
Trustwave 300 User manual

Web Filter Appliance Installation Guide
Models: 300, 500, 700
Version 5.1.00
Publication Date: 29 April 2013

Trustwave Web Filter - Appliance Installation Guide - Version 5.1.00
Legal Notice
Copyright © 2013 Trustwave Holdings, Inc. All rights reserved. ii
Legal Notice
Copyright © 2013 Trustwave Holdings, Inc.
All rights reserved. This document is protected by copyright and any distribution, reproduction, copying, or
decompilation is strictly prohibited without the prior written consent of Trustwave. No part of this
document may be reproduced in any form or by any means without the prior written authorization of
Trustwave. While every precaution has been taken in the preparation of this document, Trustwave
assumes no responsibility for errors or omissions. This publication and features described herein are
subject to change without notice.
While the authors have used their best efforts in preparing this document, they make no representation or
warranties with respect to the accuracy or completeness of the contents of this document and specifically
disclaim any implied warranties of merchantability or fitness for a particular purpose. No warranty may be
created or extended by sales representatives or written sales materials. The advice and strategies
contained herein may not be suitable for your situation. You should consult with a professional where
appropriate. Neither the author nor Trustwave shall be liable for any loss of profit or any commercial
damages, including but not limited to direct, indirect, special, incidental, consequential, or other damages.
The most current version of this document may be obtained from:
www.trustwave.com/support/
Trademarks
Trustwave and the Trustwave logo are trademarks of Trustwave. Such trademarks shall not be used, cop-
ied, or disseminated in any manner without the prior written permission of Trustwave.
Part# WF-AIG-130429

Trustwave Web Filter - Appliance Installation Guide - Version 5.1.00
Formatting Conventions
iii Copyright © 2013 Trustwave Holdings, Inc. All rights reserved.
Formatting Conventions
This manual uses the following formatting conventions to denote specific information.
Format and
Symbols
Meaning
Blue Underline A blue underline indicates a Web site or email address.
Bold Bold text denotes UI control and names such as commands, menu items, tab and field
names, button and check box names, window and dialog box names, and areas of windows
or dialog boxes.
Code Text in this format indicates computer code or information at a command line.
Italics Italics are used to denote the name of a published work, the current document, or another
document; for text emphasis; or to introduce a new term. In code examples italics indicate a
placeholder for values and expressions.
[Square brackets] In code examples, square brackets indicate optional sections or entries.
Note: This symbol indicates information that applies to the task at hand.
Tip: This symbol denotes a suggestion for a better or more productive way to use the
product.
Caution: This symbol highlights a warning against using the product in an unintended
manner.
Warning: This symbol alerts you that a situation has the potential to cause bodily harm or
death, or significant damage to property or equipment.
More documentation: This symbol highlights a reference to additional information in the
Web Filter Administrator Guide.

Trustwave Web Filter - Appliance Installation Guide - Version 5.1.00
Formatting Conventions
Copyright © 2013 Trustwave Holdings, Inc. All rights reserved. iv

Trustwave Web Filter - Appliance Installation Guide - Version 5.1.00
v Copyright © 2013 Trustwave Holdings, Inc. All rights reserved.
Table of Contents
Legal Notice . . . . . . . . . . . . . . . . . . . . . . . . . . . . . . . . . . . . . . . . . . . . . . . . . . . . . . . . . . . . . . . . . ii
Formatting Conventions . . . . . . . . . . . . . . . . . . . . . . . . . . . . . . . . . . . . . . . . . . . . . . . . . . . . . . . . . iii
List of Figures . . . . . . . . . . . . . . . . . . . . . . . . . . . . . . . . . . . . . . . . . . . . . . . . . . . . . . . . . . . . . . . . xi
1 Web Filter Appliance Introduction 13
1.1 About this Document . . . . . . . . . . . . . . . . . . . . . . . . . . . . . . . . . . . . . . . . . . . . . . . . . . . . 13
2 Service Information 15
2.1 Trustwave Technical Support Call Procedures . . . . . . . . . . . . . . . . . . . . . . . . . . . . . . . . . . . 15
3 Preliminary Setup Procedures 17
3.1 Unpack the Unit from the Carton . . . . . . . . . . . . . . . . . . . . . . . . . . . . . . . . . . . . . . . . . . . . 17
3.2 Select a Site for the Server . . . . . . . . . . . . . . . . . . . . . . . . . . . . . . . . . . . . . . . . . . . . . . . . 18
3.2.1 300 Series Server Setup Procedures . . . . . . . . . . . . . . . . . . . . . . . . . . . . . . . . . . . 18
3.2.1.1 Set Top Applications . . . . . . . . . . . . . . . . . . . . . . . . . . . . . . . . . . . . . . . . . . 18
3.2.1.2 Optional 1U 2-Unit Tray Kit Applications . . . . . . . . . . . . . . . . . . . . . . . . . . . . 18
3.3 Rack Mount the Server . . . . . . . . . . . . . . . . . . . . . . . . . . . . . . . . . . . . . . . . . . . . . . . . . . . 19
3.3.1 Rack Setup Precautions . . . . . . . . . . . . . . . . . . . . . . . . . . . . . . . . . . . . . . . . . . . . 19
3.3.2 Rack Mount Instructions for 500 Series Servers . . . . . . . . . . . . . . . . . . . . . . . . . . . 19
3.3.2.1 Rack Setup Suggestions . . . . . . . . . . . . . . . . . . . . . . . . . . . . . . . . . . . . . . . 19
3.3.2.2 Install the Inner Slides . . . . . . . . . . . . . . . . . . . . . . . . . . . . . . . . . . . . . . . . 19
3.3.2.3 Install the Outer Slides . . . . . . . . . . . . . . . . . . . . . . . . . . . . . . . . . . . . . . . . 20
3.3.2.4 Install the Slide Assemblies to the Rack . . . . . . . . . . . . . . . . . . . . . . . . . . . . 20
3.3.2.5 Install the Chassis into the Rack . . . . . . . . . . . . . . . . . . . . . . . . . . . . . . . . . 22
3.3.3 Rack Mount Instructions for 700 Series Servers . . . . . . . . . . . . . . . . . . . . . . . . . . . 23
3.3.3.1 Rack Setup Suggestions . . . . . . . . . . . . . . . . . . . . . . . . . . . . . . . . . . . . . . . 23
3.3.3.2 Identify the Sections of the Rack Rails . . . . . . . . . . . . . . . . . . . . . . . . . . . . . 23
3.3.3.3 Install the Inner Rails . . . . . . . . . . . . . . . . . . . . . . . . . . . . . . . . . . . . . . . . . 23
3.3.3.4 Install the Outer Rails . . . . . . . . . . . . . . . . . . . . . . . . . . . . . . . . . . . . . . . . . 24
3.3.3.5 Install the Server into the Rack . . . . . . . . . . . . . . . . . . . . . . . . . . . . . . . . . . 25
3.3.3.6 Install the Server into a Telco Rack . . . . . . . . . . . . . . . . . . . . . . . . . . . . . . . 26
3.3.4 Install the Bezel on the 500 and 700 Series Chassis . . . . . . . . . . . . . . . . . . . . . . . . 27
3.4 Check the Power Supply . . . . . . . . . . . . . . . . . . . . . . . . . . . . . . . . . . . . . . . . . . . . . . . . . . 28
3.4.1 Power Supply Precautions . . . . . . . . . . . . . . . . . . . . . . . . . . . . . . . . . . . . . . . . . . 29
3.5 General Safety Information . . . . . . . . . . . . . . . . . . . . . . . . . . . . . . . . . . . . . . . . . . . . . . . . 29
3.5.1 Server Operation and Maintenance Precautions . . . . . . . . . . . . . . . . . . . . . . . . . . . 29
3.5.2 AC Power Cord and Cable Precautions . . . . . . . . . . . . . . . . . . . . . . . . . . . . . . . . . . 30

Trustwave Web Filter - Appliance Installation Guide - Version 5.1.00
Copyright © 2013 Trustwave Holdings, Inc. All rights reserved. vi
3.5.3 Electrical Safety Precautions . . . . . . . . . . . . . . . . . . . . . . . . . . . . . . . . . . . . . . . . . 30
3.5.4 Motherboard Battery Precautions . . . . . . . . . . . . . . . . . . . . . . . . . . . . . . . . . . . . . 31
4 Install the Server 33
4.1 Setup Procedures. . . . . . . . . . . . . . . . . . . . . . . . . . . . . . . . . . . . . . . . . . . . . . . . . . . . . . .33
4.1.1 Quick Start Setup Requirements . . . . . . . . . . . . . . . . . . . . . . . . . . . . . . . . . . . . . . 33
4.1.2 LCD Panel Setup Requirements. . . . . . . . . . . . . . . . . . . . . . . . . . . . . . . . . . . . . . . 33
4.2 Quick Start Setup Procedures . . . . . . . . . . . . . . . . . . . . . . . . . . . . . . . . . . . . . . . . . . . . . . 34
4.2.1 Link the Workstation to the Web Filter. . . . . . . . . . . . . . . . . . . . . . . . . . . . . . . . . . 34
4.2.1.1 Monitor and Keyboard Setup . . . . . . . . . . . . . . . . . . . . . . . . . . . . . . . . . . . . 34
4.2.1.2 Serial Console Setup. . . . . . . . . . . . . . . . . . . . . . . . . . . . . . . . . . . . . . . . . . 34
4.2.2 Power on the Web Filter. . . . . . . . . . . . . . . . . . . . . . . . . . . . . . . . . . . . . . . . . . . . 34
4.2.2.1 Power up a 300 Series Model . . . . . . . . . . . . . . . . . . . . . . . . . . . . . . . . . . . 34
4.2.2.2 Power up a 500 or 700 Series Model . . . . . . . . . . . . . . . . . . . . . . . . . . . . . . 35
4.2.3 Serial Connection Setup Procedures . . . . . . . . . . . . . . . . . . . . . . . . . . . . . . . . . . . 35
4.2.4 Login screen . . . . . . . . . . . . . . . . . . . . . . . . . . . . . . . . . . . . . . . . . . . . . . . . . . . . 36
4.2.5 Quick Start menu screen . . . . . . . . . . . . . . . . . . . . . . . . . . . . . . . . . . . . . . . . . . . 36
4.2.6 Quick Start menu: administration menu. . . . . . . . . . . . . . . . . . . . . . . . . . . . . . . . . 37
4.2.6.1 Change filtering mode . . . . . . . . . . . . . . . . . . . . . . . . . . . . . . . . . . . . . . . . 37
4.2.6.2 Configure network interface LAN1 . . . . . . . . . . . . . . . . . . . . . . . . . . . . . . . . 38
4.2.6.3 Configure network interface LAN2 . . . . . . . . . . . . . . . . . . . . . . . . . . . . . . . . 38
4.2.6.4 Configure bridge network interface . . . . . . . . . . . . . . . . . . . . . . . . . . . . . . . 38
4.2.6.5 Configure default gateway . . . . . . . . . . . . . . . . . . . . . . . . . . . . . . . . . . . . . 38
4.2.6.6 Configure DNS servers . . . . . . . . . . . . . . . . . . . . . . . . . . . . . . . . . . . . . . . . 39
4.2.6.7 Configure host name . . . . . . . . . . . . . . . . . . . . . . . . . . . . . . . . . . . . . . . . . 39
4.2.6.8 Time Zone regional setting . . . . . . . . . . . . . . . . . . . . . . . . . . . . . . . . . . . . . 39
4.2.6.9 Additional Administrative Options. . . . . . . . . . . . . . . . . . . . . . . . . . . . . . . . . 39
4.2.7 System Status screen. . . . . . . . . . . . . . . . . . . . . . . . . . . . . . . . . . . . . . . . . . . . . . 41
4.2.8 Log Off, Disconnect the Peripherals. . . . . . . . . . . . . . . . . . . . . . . . . . . . . . . . . . . . 41
4.3 LCD Panel Setup Procedures . . . . . . . . . . . . . . . . . . . . . . . . . . . . . . . . . . . . . . . . . . . . . . . 42
4.3.1 LCD Panel. . . . . . . . . . . . . . . . . . . . . . . . . . . . . . . . . . . . . . . . . . . . . . . . . . . . . . 42
4.3.1.1 LCD panel keypad . . . . . . . . . . . . . . . . . . . . . . . . . . . . . . . . . . . . . . . . . . . 42
4.3.1.2 LCD Menu . . . . . . . . . . . . . . . . . . . . . . . . . . . . . . . . . . . . . . . . . . . . . . . . . 42
4.3.2 Trustwave menu . . . . . . . . . . . . . . . . . . . . . . . . . . . . . . . . . . . . . . . . . . . . . . . . . 43
4.3.2.1 WF Filter Mode . . . . . . . . . . . . . . . . . . . . . . . . . . . . . . . . . . . . . . . . . . . . . 44
4.3.2.2 IP / LAN1 and 2 . . . . . . . . . . . . . . . . . . . . . . . . . . . . . . . . . . . . . . . . . . . . . 44
4.3.2.3 IP / Bridge. . . . . . . . . . . . . . . . . . . . . . . . . . . . . . . . . . . . . . . . . . . . . . . . . 45
4.3.2.4 Gateway . . . . . . . . . . . . . . . . . . . . . . . . . . . . . . . . . . . . . . . . . . . . . . . . . . 45
4.3.2.5 DNS 1 and 2 . . . . . . . . . . . . . . . . . . . . . . . . . . . . . . . . . . . . . . . . . . . . . . . 45
4.3.2.6 Host Name . . . . . . . . . . . . . . . . . . . . . . . . . . . . . . . . . . . . . . . . . . . . . . . . 46
4.3.2.7 Regional Setting (Time Zone, date, time) . . . . . . . . . . . . . . . . . . . . . . . . . . . 46
4.3.2.8 Additional Administrative Options. . . . . . . . . . . . . . . . . . . . . . . . . . . . . . . . . 46
4.3.3 LCD Options menu . . . . . . . . . . . . . . . . . . . . . . . . . . . . . . . . . . . . . . . . . . . . . . . 47
4.3.3.1 Heartbeat . . . . . . . . . . . . . . . . . . . . . . . . . . . . . . . . . . . . . . . . . . . . . . . . . 47

Trustwave Web Filter - Appliance Installation Guide - Version 5.1.00
vii Copyright © 2013 Trustwave Holdings, Inc. All rights reserved.
4.3.3.2 Backlight . . . . . . . . . . . . . . . . . . . . . . . . . . . . . . . . . . . . . . . . . . . . . . . . . . 48
4.3.3.3 LCD Controls . . . . . . . . . . . . . . . . . . . . . . . . . . . . . . . . . . . . . . . . . . . . . . . 48
4.4 Physically Connect the Unit to the Network. . . . . . . . . . . . . . . . . . . . . . . . . . . . . . . . . . . . . 48
4.4.1 Invisible, Firewall, or Router mode . . . . . . . . . . . . . . . . . . . . . . . . . . . . . . . . . . . . 48
4.4.2 Bridge mode . . . . . . . . . . . . . . . . . . . . . . . . . . . . . . . . . . . . . . . . . . . . . . . . . . . . 49
4.4.2.1 Bridge mode with bypass card installed . . . . . . . . . . . . . . . . . . . . . . . . . . . . 50
4.4.2.2 Bridge mode without bypass card installed . . . . . . . . . . . . . . . . . . . . . . . . . . 50
4.5 Access the Web Filter Online . . . . . . . . . . . . . . . . . . . . . . . . . . . . . . . . . . . . . . . . . . . . . . . 51
4.5.1 Access the Web Filter via its LAN 1 or Bridge IP Address . . . . . . . . . . . . . . . . . . . . . 51
4.6 Log in, Generate SSL Certificate . . . . . . . . . . . . . . . . . . . . . . . . . . . . . . . . . . . . . . . . . . . . 52
4.6.1 Log in to the Web Filter . . . . . . . . . . . . . . . . . . . . . . . . . . . . . . . . . . . . . . . . . . . . 52
4.6.2 Generate SSL Certificate . . . . . . . . . . . . . . . . . . . . . . . . . . . . . . . . . . . . . . . . . . . 53
4.6.3 IE Security Certificate Installation Procedures. . . . . . . . . . . . . . . . . . . . . . . . . . . . . 54
4.6.3.1 Accept the Security Certificate in IE . . . . . . . . . . . . . . . . . . . . . . . . . . . . . . . 54
4.6.3.2 Map the Web Filter’s IP Address to the Server’s Host Name . . . . . . . . . . . . . . 59
4.7 Test Filtering or the Mobile Security Client Connection . . . . . . . . . . . . . . . . . . . . . . . . . . . . . 61
4.7.1 Test Filtering on the Web Filter. . . . . . . . . . . . . . . . . . . . . . . . . . . . . . . . . . . . . . . 61
4.7.2 Test the Mobile Security Client Connection. . . . . . . . . . . . . . . . . . . . . . . . . . . . . . . 61
4.8 Set Library Updates . . . . . . . . . . . . . . . . . . . . . . . . . . . . . . . . . . . . . . . . . . . . . . . . . . . . .62
4.8.1 Activate and Register the Web Filter . . . . . . . . . . . . . . . . . . . . . . . . . . . . . . . . . . . 62
4.8.2 Perform a Complete Library Update. . . . . . . . . . . . . . . . . . . . . . . . . . . . . . . . . . . . 63
4.8.3 Monitor the Library Update Process . . . . . . . . . . . . . . . . . . . . . . . . . . . . . . . . . . . . 64
4.9 Next Steps. . . . . . . . . . . . . . . . . . . . . . . . . . . . . . . . . . . . . . . . . . . . . . . . . . . . . . . . . . . . 65
5 Best Filtering Practices 67
5.1 Threat Class Groups . . . . . . . . . . . . . . . . . . . . . . . . . . . . . . . . . . . . . . . . . . . . . . . . . . . . .68
5.1.1 Threats/Liabilities . . . . . . . . . . . . . . . . . . . . . . . . . . . . . . . . . . . . . . . . . . . . . . . . 69
5.1.1.1 Category block. . . . . . . . . . . . . . . . . . . . . . . . . . . . . . . . . . . . . . . . . . . . . . 69
5.1.1.2 Rule block . . . . . . . . . . . . . . . . . . . . . . . . . . . . . . . . . . . . . . . . . . . . . . . . . 69
5.1.1.3 X-Strike on blocked categories. . . . . . . . . . . . . . . . . . . . . . . . . . . . . . . . . . . 70
5.1.1.4 Custom Lock, Block, Warn, X Strikes, Quota pages . . . . . . . . . . . . . . . . . . . . 70
5.1.1.5 URL Keywords . . . . . . . . . . . . . . . . . . . . . . . . . . . . . . . . . . . . . . . . . . . . . . 70
5.1.1.6 Search Engine Keywords. . . . . . . . . . . . . . . . . . . . . . . . . . . . . . . . . . . . . . . 71
5.1.1.7 Custom Category (blocked) . . . . . . . . . . . . . . . . . . . . . . . . . . . . . . . . . . . . . 71
5.1.1.8 Minimum Filtering Level . . . . . . . . . . . . . . . . . . . . . . . . . . . . . . . . . . . . . . . 71
5.1.1.9 Override Account bypass. . . . . . . . . . . . . . . . . . . . . . . . . . . . . . . . . . . . . . . 72
5.1.1.10 Exception URL bypass . . . . . . . . . . . . . . . . . . . . . . . . . . . . . . . . . . . . . . . . 72
5.1.1.11 Proxy Patterns . . . . . . . . . . . . . . . . . . . . . . . . . . . . . . . . . . . . . . . . . . . . . 73
5.1.1.12 File type blocking . . . . . . . . . . . . . . . . . . . . . . . . . . . . . . . . . . . . . . . . . . . 73
5.1.2 Bandwidth/Productivity . . . . . . . . . . . . . . . . . . . . . . . . . . . . . . . . . . . . . . . . . . . . 74
5.1.2.1 Time Quota/Hit Quota . . . . . . . . . . . . . . . . . . . . . . . . . . . . . . . . . . . . . . . . 74
5.1.2.2 Overall Quota . . . . . . . . . . . . . . . . . . . . . . . . . . . . . . . . . . . . . . . . . . . . . . 74
5.1.2.3 Time Based Profiles . . . . . . . . . . . . . . . . . . . . . . . . . . . . . . . . . . . . . . . . . . 74
5.1.2.4 Warn option with low filter settings . . . . . . . . . . . . . . . . . . . . . . . . . . . . . . . 75

Trustwave Web Filter - Appliance Installation Guide - Version 5.1.00
Copyright © 2013 Trustwave Holdings, Inc. All rights reserved. viii
5.1.2.5 Warn-strike . . . . . . . . . . . . . . . . . . . . . . . . . . . . . . . . . . . . . . . . . . . . . . . . 75
5.1.2.6 P2P patterns . . . . . . . . . . . . . . . . . . . . . . . . . . . . . . . . . . . . . . . . . . . . . . . 76
5.1.2.7 IM patterns . . . . . . . . . . . . . . . . . . . . . . . . . . . . . . . . . . . . . . . . . . . . . . . . 76
5.1.2.8 Game patterns . . . . . . . . . . . . . . . . . . . . . . . . . . . . . . . . . . . . . . . . . . . . . . 76
5.1.2.9 Streaming Media patterns . . . . . . . . . . . . . . . . . . . . . . . . . . . . . . . . . . . . . . 77
5.1.2.10 Remote Access patterns . . . . . . . . . . . . . . . . . . . . . . . . . . . . . . . . . . . . . . 77
5.1.2.11 HTTPS settings. . . . . . . . . . . . . . . . . . . . . . . . . . . . . . . . . . . . . . . . . . . . . 77
5.1.2.12 Category block . . . . . . . . . . . . . . . . . . . . . . . . . . . . . . . . . . . . . . . . . . . . . 78
5.1.2.13 Rule block . . . . . . . . . . . . . . . . . . . . . . . . . . . . . . . . . . . . . . . . . . . . . . . . 78
5.1.2.14 SE Keywords . . . . . . . . . . . . . . . . . . . . . . . . . . . . . . . . . . . . . . . . . . . . . . 78
5.1.2.15 URL Keywords . . . . . . . . . . . . . . . . . . . . . . . . . . . . . . . . . . . . . . . . . . . . . 79
5.1.2.16 Custom Block/Warn/X Strikes/Quota pages . . . . . . . . . . . . . . . . . . . . . . . . . 79
5.1.2.17 Real Time Probe information . . . . . . . . . . . . . . . . . . . . . . . . . . . . . . . . . . . 79
5.1.3 General/Productivity . . . . . . . . . . . . . . . . . . . . . . . . . . . . . . . . . . . . . . . . . . . . . . 80
5.1.3.1 Warn Feature with higher thresholds . . . . . . . . . . . . . . . . . . . . . . . . . . . . . . 80
5.1.3.2 Warn-strike with higher thresholds. . . . . . . . . . . . . . . . . . . . . . . . . . . . . . . . 80
5.1.3.3 Time Quota/Hit Quota . . . . . . . . . . . . . . . . . . . . . . . . . . . . . . . . . . . . . . . . 81
5.1.3.4 Time Based Profiles . . . . . . . . . . . . . . . . . . . . . . . . . . . . . . . . . . . . . . . . . . 81
5.1.3.5 Overall Quota . . . . . . . . . . . . . . . . . . . . . . . . . . . . . . . . . . . . . . . . . . . . . . 82
5.1.3.6 Customize a Trustwave Supplied Category . . . . . . . . . . . . . . . . . . . . . . . . . . 82
5.1.3.7 Local category adds/deletes . . . . . . . . . . . . . . . . . . . . . . . . . . . . . . . . . . . . 83
5.1.3.8 Custom Block/Warn/X Strikes/Quota pages. . . . . . . . . . . . . . . . . . . . . . . . . . 83
5.1.4 Pass/Allow . . . . . . . . . . . . . . . . . . . . . . . . . . . . . . . . . . . . . . . . . . . . . . . . . . . . . 84
5.1.4.1 Always Allow Custom Category . . . . . . . . . . . . . . . . . . . . . . . . . . . . . . . . . . 84
5.1.4.2 URL exceptions . . . . . . . . . . . . . . . . . . . . . . . . . . . . . . . . . . . . . . . . . . . . . 84
5.1.4.3 IP exceptions . . . . . . . . . . . . . . . . . . . . . . . . . . . . . . . . . . . . . . . . . . . . . . . 85
5.1.4.4 Override Accounts . . . . . . . . . . . . . . . . . . . . . . . . . . . . . . . . . . . . . . . . . . . 85
5.1.4.5 Pattern detection bypass. . . . . . . . . . . . . . . . . . . . . . . . . . . . . . . . . . . . . . . 86
6 LED Indicators and Buttons 87
6.1 Front Control Panels on 500 and 700 Series Units . . . . . . . . . . . . . . . . . . . . . . . . . . . . . . . . 87
6.2 Rear Panel on the 700 Series Unit . . . . . . . . . . . . . . . . . . . . . . . . . . . . . . . . . . . . . . . . . . . 88
6.3 Front Control Panel on a 300 Series Unit . . . . . . . . . . . . . . . . . . . . . . . . . . . . . . . . . . . . . . 88
7 Regulatory Specifications and Disclaimers 89
7.1 Declaration of the Manufacturer or Importer. . . . . . . . . . . . . . . . . . . . . . . . . . . . . . . . . . . . 89
7.1.1 Safety Compliance. . . . . . . . . . . . . . . . . . . . . . . . . . . . . . . . . . . . . . . . . . . . . . . . 89
7.1.2 Electromagnetic Compatibility (EMC) . . . . . . . . . . . . . . . . . . . . . . . . . . . . . . . . . . . 89
7.1.3 Federal Communications Commission (FCC) Class A Notice (USA). . . . . . . . . . . . . . . 89
7.1.4 FCC Declaration of Conformity . . . . . . . . . . . . . . . . . . . . . . . . . . . . . . . . . . . . . . . 89
7.1.5 Electromagnetic Compatibility Class A Notice . . . . . . . . . . . . . . . . . . . . . . . . . . . . . 89
7.1.5.1 Industry Canada Equipment Standard for Digital Equipment (ICES-003) . . . . . 89
7.1.6 EC Declaration of Conformity . . . . . . . . . . . . . . . . . . . . . . . . . . . . . . . . . . . . . . . . 90
7.1.6.1 European Community Directives Requirement (CE) . . . . . . . . . . . . . . . . . . . . 90

Trustwave Web Filter - Appliance Installation Guide - Version 5.1.00
ix Copyright © 2013 Trustwave Holdings, Inc. All rights reserved.
Appendices 91
Appendix A: HyperTerminal setup procedures . . . . . . . . . . . . . . . . . . . . . . . . . . . . . . . . . . . . 91
Appendix B: Accepting Security Certificates . . . . . . . . . . . . . . . . . . . . . . . . . . . . . . . . . . . . . . 94
B.1 Accept the Security Certificate in Firefox. . . . . . . . . . . . . . . . . . . . . . . . . . . . . . . . . . 94
B.2 Temporarily Accept the Security Certificate in IE . . . . . . . . . . . . . . . . . . . . . . . . . . . 96
B.3 Accept the Security Certificate in Safari . . . . . . . . . . . . . . . . . . . . . . . . . . . . . . . . . 97
B.4 Accept the Security Certificate in Chrome . . . . . . . . . . . . . . . . . . . . . . . . . . . . . . . . 98
Index . . . . . . . . . . . . . . . . . . . . . . . . . . . . . . . . . . . . . . . . . . . . . . . . . . . . . . . . . . . . . . . . . . . . . 101

Trustwave Web Filter - Appliance Installation Guide - Version 5.1.00
Copyright © 2013 Trustwave Holdings, Inc. All rights reserved. x

Trustwave Web Filter - Appliance Installation Guide - Version 5.1.00
List of Figures
xi Copyright © 2013 Trustwave Holdings, Inc. All rights reserved.
List of Figures
Figure 1: Rear of 300 series chassis with serial port identified . . . . . . . . . . . . . . . . . . . . . . . . . . . . 34
Figure 2: Portion of 500 series chassis rear with serial port identified. . . . . . . . . . . . . . . . . . . . . . . 34
Figure 3: Portion of 700 series chassis rear with serial port identified. . . . . . . . . . . . . . . . . . . . . . . 34
Figure 4: Rear of 300 series chassis with LAN ports identified . . . . . . . . . . . . . . . . . . . . . . . . . . . . 49
Figure 5: Portion of 500 series chassis rear with LAN ports identified . . . . . . . . . . . . . . . . . . . . . . . 49
Figure 6: Portion of 700 series chassis rear with LAN ports identified . . . . . . . . . . . . . . . . . . . . . . . 49
Figure 7: Typical rear view of 500 or 700 series appliance with bypass LAN ports identified.. . . . . . . 50

Trustwave Web Filter - Appliance Installation Guide - Version 5.1.00
List of Figures
Copyright © 2013 Trustwave Holdings, Inc. All rights reserved. xii

Trustwave Web Filter - Appliance Installation Guide - Version 5.1.00
Web Filter Appliance Introduction
13 Copyright © 2013 Trustwave Holdings, Inc. All rights reserved.
1 Web Filter Appliance Introduction
Thank you for choosing to install and evaluate the Trustwave Web Filter appliance. Trustwave’s Web Filter
tracks each user’s online activity, and can be configured to block specific Web sites, service ports, and
pattern and file types, and lock out an end user from Internet access, thereby protecting your organization
against lost productivity, network bandwidth issues, and possible legal problems that can result from the
misuse of Internet resources.
The Web Filter provides an extensive library filtering category database, user authentication, implementa-
tion of time and quota filtering profiles, and tools for tailoring a user’s filtering profile to comply with your
organization’s Internet usage policy, based on the end user’s Internet usage habits.
Quick setup procedures—to implement the best filtering practices—are included in the Best Filtering Prac-
tices section (Section 5) of this
Guide.
1.1 About this Document
This document is divided into the following sections:
•Introduction: This section includes an overview of the Web Filter product and how to use this
document
•Service Information: This section provides Trustwave contact information
•Preliminary Setup Procedures: This section includes instructions on how to physically set up the
Web Filter appliance in your environment
•Install the Server: This section explains how to configure the Web Filter for filtering
•Best Filtering Practices: This section is comprised of suggested best practices for implementing and
using the Web Filter.
•LED Indicators and Buttons: This section explains how to read LED indicators and use LED buttons
for troubleshooting the unit
•Regulatory Specifications and Disclaimers: This section cites safety and emissions compliance
information for the Web Filter appliance models referenced therein
•Index: This section provides an alphabetized list of some topics included in this document

Trustwave Web Filter - Appliance Installation Guide - Version 5.1.00
Web Filter Appliance Introduction
Copyright © 2013 Trustwave Holdings, Inc. All rights reserved. 14

Trustwave Web Filter - Appliance Installation Guide - Version 5.1.00
Service Information
15 Copyright © 2013 Trustwave Holdings, Inc. All rights reserved.
2 Service Information
The user should not attempt any maintenance or service on the unit beyond the procedures outlined in
this document.
Any initial hardware setup problem that cannot be resolved at your internal organization should be
referred to a Trustwave solutions engineer or technical support representative.
For technical assistance or warranty repair, please visit http://www.trustwave.com/support/.
2.1 Trustwave Technical Support Call Procedures
When calling Trustwave regarding a problem, please provide the representative the following information:
• Your contact information.
• Serial number or original order number.
• Description of the problem.
• Network environment in which the unit is used.
• State of the unit before the problem occurred.
• Frequency and repeatability of the problem.
• Can the product continue to operate with this problem?
• Can you identify anything that may have caused the problem?

Trustwave Web Filter - Appliance Installation Guide - Version 5.1.00
Service Information
Copyright © 2013 Trustwave Holdings, Inc. All rights reserved. 16

Trustwave Web Filter - Appliance Installation Guide - Version 5.1.00
Preliminary Setup Procedures
17 Copyright © 2013 Trustwave Holdings, Inc. All rights reserved.
3 Preliminary Setup Procedures
3.1 Unpack the Unit from the Carton
Inspect the packaging container for evidence of mishandling during transit. If the packaging container is
damaged, photograph it for reference.
Carefully unpack the unit from the carton and verify that all accessories are included. Save all packing
materials in the event that the unit needs to be returned to Trustwave.
The carton should contain the following items:
• 1 Web Filter appliance (WF)
• 1 serial port cable
•For500 and 700 series models, the following items are also included in the carton:
• 1 AC power cord for 500 series models, 2 AC power cords for 700 series models
• 1 bezel to be installed on the front of the chassis
• 1 set of rack mounting rails
•For300 series models, the following items are also included in the carton:
• 1 power adapter with power cord
• 1 set of 4 pressure sensitive feet to be affixed to the bottom corners of a non-rack mounted unit
• If you have purchased the optional 1U two-unit tray for mounting the half-U server(s) in a rack,
this item will be shipped in a separate carton.
Inspect the server and accessories for damage. If the contents appear damaged, file a damage
claim with the carrier immediately.
For troubleshooting tips to assist you during the installation process, visit
http://www.trustwave.com/software/8e6/ts/wf.html.
For hardware specifications of this model, see:
http://www.trustwave.com/software/8e6/hd/m86-wf-hd-specs.htm.
Warning: To avoid danger of suffocation, do not leave plastic bags used for packaging the server or any
of its components in places where children or infants may play with them.
Tip: Consult the Web Filter Administrator Guide for information about RAID and hardware maintenance.
This and other Guides for the Web Filter product can be obtained from
http://www.trustwave.com/support/wf/documentation.asp.

Trustwave Web Filter - Appliance Installation Guide - Version 5.1.00
Preliminary Setup Procedures
Copyright © 2013 Trustwave Holdings, Inc. All rights reserved. 18
3.2 Select a Site for the Server
The server operates reliably within normal office environmental limits. Select a site that meets the
following criteria:
• Clean and relatively free of excess dust.
• Well-ventilated and away from sources of heat, with the ventilating openings on the server kept free of
obstructions.
• Away from sources of vibration or physical shock.
• Isolated from strong electromagnetic fields and noise caused by electrical devices such as elevators,
copy machines, air conditioners, large fans, large electric motors, radio and TV transmitters, and high-
frequency security devices.
• Access space provided so the server power cord can be unplugged from the power supply or the wall
outlet—this is the only way to remove the AC power cord from the server.
• Clearance provided for cooling and airflow: Approximately 30 inches (76.2 cm) in the back and 25
inches (63.5 cm) in the front.
• Located near a properly earthed, grounded, power outlet.
3.2.1 300 Series Server Setup Procedures
3.2.1.1 Set Top Applications
If you have a 300 series server you do not wish to rack mount, apply the pressure sensitive feet (that
came with the server) to the bottom corners of the unit, and then place the unit in a location that meets
server site selection criteria.
3.2.1.2 Optional 1U 2-Unit Tray Kit Applications
If you have purchased the optional 1U 2-unit tray kit for rack mounting one or two 300 series servers,
proceed to the instructional “300 Series Appliance Tray Installation” document packaged within the 1U 2-
unit tray kit’s shipping carton.
When you have finished installing the 300 series server(s) in your server rack, continue to the Install the
Server section of this Installation Guide.

Trustwave Web Filter - Appliance Installation Guide - Version 5.1.00
Preliminary Setup Procedures
19 Copyright © 2013 Trustwave Holdings, Inc. All rights reserved.
3.3 Rack Mount the Server
3.3.1 Rack Setup Precautions
3.3.2 Rack Mount Instructions for 500 Series Servers
3.3.2.1 Rack Setup Suggestions
• Determine the placement of each component in the rack before you install the rails.
• Install the heaviest server components on the bottom of the rack first, and then work up.
3.3.2.2 Install the Inner Slides
1. Locate the right inner slide, (the slide that will be used on the right side of chassis when facing the
front panel of the chassis).
2. Align the four (4) square holes on the right inner slide against the hooks on the right side of the
chassis as show below on the left.
Warning: Before rack mounting the server, the physical environment should be set up to safely
accommodate the server. Be sure that:
• The weight of all units in the rack is evenly distributed. Mounting of the equipment in the rack should be
such that a hazardous condition is not achieved due to uneven mechanical loading.
• The rack will not tip over when the server is mounted, even when the unit is fully extended from the
rack.
• For a single rack installation, stabilizers are attached to the rack.
• For multiple rack installations, racks are coupled together.
• Reliable earthing of rack-mounted equipment is maintained at all times. Particular attention should be
given to supply connections other than direct connections to the branch circuit (e.g. use of power
strips).
• A power cord will be long enough to fit into the server when properly mounted in the rack and will be
able to supply power to the unit.
• The connection of the server to the power supply will not overload any circuits. Consideration should be
given to the connection of the equipment to the supply circuit and the effect that overloading of the
circuits might have on overcurrent protection and supply wiring. Appropriate consideration of
equipment nameplate ratings should be used when addressing this concern.
• The server is only connected to a properly rated supply circuit. Reliable earthing (grounding) of rack-
mounted equipment should be maintained.
• The air flow through the server’s fan or vents is not restricted. Installation of the equipment in a rack
should be such that the amount of air flow required for safe operation of the equipment is not
compromised.
• The maximum operating ambient temperature does not exceed 104°F (40°C). If installed in a closed or
multi-unit rack assembly, the operating ambient temperature of the rack environment may be greater
than room ambient. Therefore, consideration should be given to installing the equipment in an
environment compatible with the maximum ambient temperature (Tma) specified by the manufacturer.
Warning: Extend only one component at a time. Extending two or more components simultaneously may
cause the rack to become unstable.

Trustwave Web Filter - Appliance Installation Guide - Version 5.1.00
Preliminary Setup Procedures
Copyright © 2013 Trustwave Holdings, Inc. All rights reserved. 20
3. Securely attach the slide to the chassis with two M4 flat head screws.
4. Repeat steps 1-3 to install the left inner slide to the left side of the chassis.
3.3.2.3 Install the Outer Slides
1. Measure the distance from the front rail of the rack to the rear rail of the rack.
2. Attach a short bracket to the rear side of the right outer slide, and a long bracket to the front side of
the right outer slide as shown above on the right.
3. Adjust the short and long brackets to the proper distance so that the chassis can snugly fit into the
rack.
4. Secure the slides to the cabinet with screws.
5. Repeat steps 1-4 for the left outer slide.
3.3.2.4 Install the Slide Assemblies to the Rack
1. After you have installed the short and long brackets to the outer slides, you are ready to install the
whole slide assemblies (outer slides with short and long brackets attached) to the rack. (See the
previous page.)
This manual suits for next models
2
Table of contents
Other Trustwave Firewall manuals
Popular Firewall manuals by other brands

Hillstone
Hillstone SG-6000 X-Series reference guide

Fortinet
Fortinet FortiGate FortiGate-5001A Security system guide

SonicWALL
SonicWALL NSA 2400 Getting started guide

Watchguard
Watchguard SSL 100 quick start guide

8e6 Technologies
8e6 Technologies appliance watchdog user guide

Cisco
Cisco 3100 Series Hardware installation guide