TruTech KLV3112A User manual


1 HOW IT WORKS
SAFETY PRECAUTIONSSAFETY PRECAUTIONS
SAFETY PRECAUTIONS
The lightning flash with an arrowhead
symbol, within the equilateral triangle,
is intended to alert the user to the
presence of uninsulated "dangerous
voltage" within the product's enclosure
that may be of sufficient magnitude to
constitute a risk of electric shock to
persons.
The exclamation point within the
equilateral triangle is intended to alert
the user to the presence of important
operating and maintenance (servicing)
instructions in this owner’s manual.
The following marks and symbols are located onThe following marks and symbols are located on
The following marks and symbols are located on
back of the unit.back of the unit.
back of the unit.
On PlacementOn Placement
On Placement
• Do not use the unit in places which are extremely hot, cold, dusty, or humid.
• Do not restrict the air flow of the unit by placing it in a place with poor air flow, by covering it with
a cloth, or by placing it on carpeting.
On SafetyOn Safety
On SafetyOn Safety
On Safety
• When connecting or disconnecting the AC cord, grip the plug and not the cord itself. Pulling the
cord may damage it and create a hazard.
On CondensationOn Condensation
On Condensation
• When left in a heated room where it is warm and damp, water droplets or condensation may form
inside the unit. When there is condensation inside the unit, the unit may not function normally. Let
the unit stand for 1 to 2 hours before turning the power on, or gradually heat the room and allow
the unit to dry before use.
Caution marking is located on back enclosure of the unit.
WARNING: TO REDUCE THE RISK OF FIREWARNING: TO REDUCE THE RISK OF FIRE
WARNING: TO REDUCE THE RISK OF FIRE
OR ELECTRIC SHOCK, DO NOT REMOVE COVEROR ELECTRIC SHOCK, DO NOT REMOVE COVER
OR ELECTRIC SHOCK, DO NOT REMOVE COVER
(OR BACK). NO USER-SERVICEABLE PARTS INSIDE.(OR BACK). NO USER-SERVICEABLE PARTS INSIDE.
(OR BACK). NO USER-SERVICEABLE PARTS INSIDE.
REFER SERVICING TO QUALIFIED SERVICEREFER SERVICING TO QUALIFIED SERVICE
REFER SERVICING TO QUALIFIED SERVICE
PERSONNEL.PERSONNEL.
PERSONNEL.
WARNING:WARNING:
WARNING:WARNING:
WARNING:
TO PREVENT FIRE OR SHOCK HAZARD, DO NOTTO PREVENT FIRE OR SHOCK HAZARD, DO NOT
TO PREVENT FIRE OR SHOCK HAZARD, DO NOT
EXPOSE THIS APPLIANCE TO RAIN OR MOISTURE.EXPOSE THIS APPLIANCE TO RAIN OR MOISTURE.
EXPOSE THIS APPLIANCE TO RAIN OR MOISTURE.
CAUTION:CAUTION:
CAUTION:CAUTION:
CAUTION:
USE OF CONTROLS OR ADJUSTMENTS ORUSE OF CONTROLS OR ADJUSTMENTS OR
USE OF CONTROLS OR ADJUSTMENTS OR
PERFORMANCE OF PROCEDURES OTHER THANPERFORMANCE OF PROCEDURES OTHER THAN
PERFORMANCE OF PROCEDURES OTHER THAN
THOSE SPECIFIED MATHOSE SPECIFIED MA
THOSE SPECIFIED MAY RESULY RESUL
Y RESULY RESUL
Y RESULT IN HAZARDOUST IN HAZARDOUS
T IN HAZARDOUST IN HAZARDOUS
T IN HAZARDOUS
RADIARADIA
RADIARADIA
RADIATION EXPOSURE.TION EXPOSURE.
TION EXPOSURE.TION EXPOSURE.
TION EXPOSURE.
TO PREVENT ELECTRIC SHOCK, MATO PREVENT ELECTRIC SHOCK, MA
TO PREVENT ELECTRIC SHOCK, MATCH WIDETCH WIDE
TCH WIDETCH WIDE
TCH WIDE
BLADE OF PLUG TO WIDE SLOT OF WBLADE OF PLUG TO WIDE SLOT OF W
BLADE OF PLUG TO WIDE SLOT OF WALL OUTLETALL OUTLET
ALL OUTLETALL OUTLET
ALL OUTLET,,
,,
,
THEN FULLTHEN FULL
THEN FULLTHEN FULL
THEN FULLY INSERY INSER
Y INSERY INSER
Y INSERTT
TT
T..
..
.
The symbol for Class
(Double lnsulation)
This product contains a
low power laser device.
CAUTIONCAUTION
CAUTIONCAUTION
CAUTION
INVISIBLE LASER RADIATION IS
EMITTED WHEN OPENED AND
INTERLOCKS DEFEATED.
AVOID EXPOSURE TO BEAM

HOW IT WORKS 2
SAFETY PRECAUTIONSSAFETY PRECAUTIONS
SAFETY PRECAUTIONS
Notes on CopyrightNotes on Copyright
Notes on Copyright
It is forbidden by law to copy, broadcast, show, broadcast on cable, play in public, or rent copyrighted
material without permission.
Apparatus Claims of "U.S. Patent Nos. 4,907,093; 5,315,448; and 6,516,132." licensed for limited
viewing uses only.
This product incorporates copyright protection technology that is protected by U.S. patents and other
intellectual property rights. Use of this copyright protection technology must be authorized by
Macrovision, and is intended for home and other limited viewing uses only unless otherwise authorized
by Macrovision. Reverse engineering or disassembly is prohibited.
WW
WW
WARNING:ARNING:
ARNING:ARNING:
ARNING: Should any trouble occur, disconnect the AC power cord and refer servicing to
a qualified technician.
FCC InformationFCC Information
FCC Information
This device complies with Part 15 of the FCC rules. Operation is subject to the following two conditions:
(1) This device may not cause harmful interference, and
(2) This device must accept any interference received, including interference that may cause
undesired operation.
NOTE:NOTE:
NOTE:NOTE:
NOTE: This equipment has been tested and found to comply with the limits for a Class B digital device,
pursuant to part 15 of the FCC Rules. These limits are designed to provide reasonable protection
against harmful interference in a residential installation. This equipment generates, uses, and can
radiate radio frequency energy and, if not installed and used in accordance with the instructions, may
cause harmful interference to radio communications. However, there is no guarantee that
interference will not occur in a particular installation. If this equipment does cause harmful
interference to radio or television reception, which can be determined by turning the equipment off
and on, the user is encouraged to try to correct the interference by one or more of the following
measures:
• Reorient or relocate the receiving antenna.
• Increase the separation between the equipment and receiver.
• Connect the equipment into an outlet on a circuit different from that to which the receiver is
connected.
• Consult the dealer or an experienced radio/TV technician for help.
WARNING:WARNING:
WARNING:WARNING:
WARNING: Changes or modifications to this unit not expressly approved by the party responsible for
compliance could void the user authority to operate the equipment.
This Class B digital apparatus complies with Canadian ICES-003.
Shielded cables must be used with this unit to ensure compliance with the Class FCC limits.

3 HOW IT WORKS
IMPORIMPOR
IMPORIMPOR
IMPORTT
TT
TANT SAFETY INSTRUCTIONSANT SAFETY INSTRUCTIONS
ANT SAFETY INSTRUCTIONSANT SAFETY INSTRUCTIONS
ANT SAFETY INSTRUCTIONS
1. Read these instructions.
2. Keep these instructions.
3. Heed all warnings.
4. Follow all instructions.
5. Do not use this apparatus near water.
6. Clean only with a dry cloth.
7. Do not block any of the ventilation openings. Install in accordance with the manufacturer's
instructions.
8. Do not install near any heat sources such as radiators, heat registers, stoves, or other appara-
tus (including amplifiers) that produce heat.
9. Do not defeat the safety purpose of the polarized or grounding-type plug. A polarized plug has
two blades with one wider than the other. A grounding type plug has two blades and a third
grounding prong. The wide blade or the third prong are provided for your safety. When the
provided plug does not fit into your outlet, consult an electrician for replacement of the obsolete
outlet.
10. Protect the power cord from being walked on or pinched particularly at plugs, convenience
receptacles, and the point where they exit from the apparatus.
11. Only use attachments/accessories specified by the manufacturer.
12. Use only with a cart, stand, tripod, bracket, or table specified by the
manufacturer, or sold with the apparatus. When a cart is used, use
caution when moving the cart/apparatus combination to avoid injury from
tip-over.
13. Unplug this apparatus during lightning storms or when unused for long periods of time.
14. Refer all servicing to qualified service personnel. Servicing is required when the apparatus has
been damaged in any way, such as the power-supply cord or plug is damaged, liquid has spilled
or objects have fallen into the apparatus, the apparatus has been exposed to rain or moisture,
does not operate normally, or has been dropped.
Portable Cart Warning

HOW IT WORKS 4
TABLE OF CONTENTSTABLE OF CONTENTS
TABLE OF CONTENTS
Repeat Playback ................................. 19Repeat Playback ................................. 19
Repeat Playback ................................. 19
DVDDVD
DVDDVD
DVD PP
PP
Programmablerogrammable
rogrammablerogrammable
rogrammable MM
MM
Memory .................. 20emory .................. 20
emory .................. 20emory .................. 20
emory .................. 20
DVD Programmable Memory ............... 20
VV
VV
Viewingiewing
iewingiewing
iewing JPEG FJPEG F
JPEG FJPEG F
JPEG FILes ............................... 20ILes ............................... 20
ILes ............................... 20ILes ............................... 20
ILes ............................... 20
Play Modes for CD or JPEG Disc ............. 21Play Modes for CD or JPEG Disc ............. 21
Play Modes for CD or JPEG Disc ............. 21
Customizing the Function Settings ........ 22-23Customizing the Function Settings ........ 22-23
Customizing the Function Settings ........ 22-23
LANGUAGE ................................... 22
VIDEO ........................................... 22
DEFAULT ....................................... 23
Using the TV ....................................... 24Using the TV ....................................... 24
Using the TV ....................................... 24
TV SETUP ...................................... 25-27TV SETUP ...................................... 25-27
TV SETUP ...................................... 25-27
Listening to the Radio ........................... 28Listening to the Radio ........................... 28
Listening to the Radio ........................... 28
TT
TT
Trr
rr
roubleshooting Guide .......................... 29oubleshooting Guide .......................... 29
oubleshooting Guide .......................... 29oubleshooting Guide .......................... 29
oubleshooting Guide .......................... 29
Maintenance ........................................ 30Maintenance ........................................ 30
Maintenance ........................................ 30
Specifications ..................................... 30Specifications ..................................... 30
Specifications ..................................... 30
Limited Warranty .................................. 31Limited Warranty .................................. 31
Limited Warranty .................................. 31
Safety Precautions .............................1-2Safety Precautions .............................1-2
Safety Precautions .............................1-2
Important Safety Instructions ................. 3Important Safety Instructions ................. 3
Important Safety Instructions ................. 3
TT
TT
Table of Contents ................................. 4able of Contents ................................. 4
able of Contents ................................. 4able of Contents ................................. 4
able of Contents ................................. 4
Disc Formats ........................................ 5Disc Formats ........................................ 5
Disc Formats ........................................ 5
Accessories .......................................... 6Accessories .......................................... 6
Accessories .......................................... 6
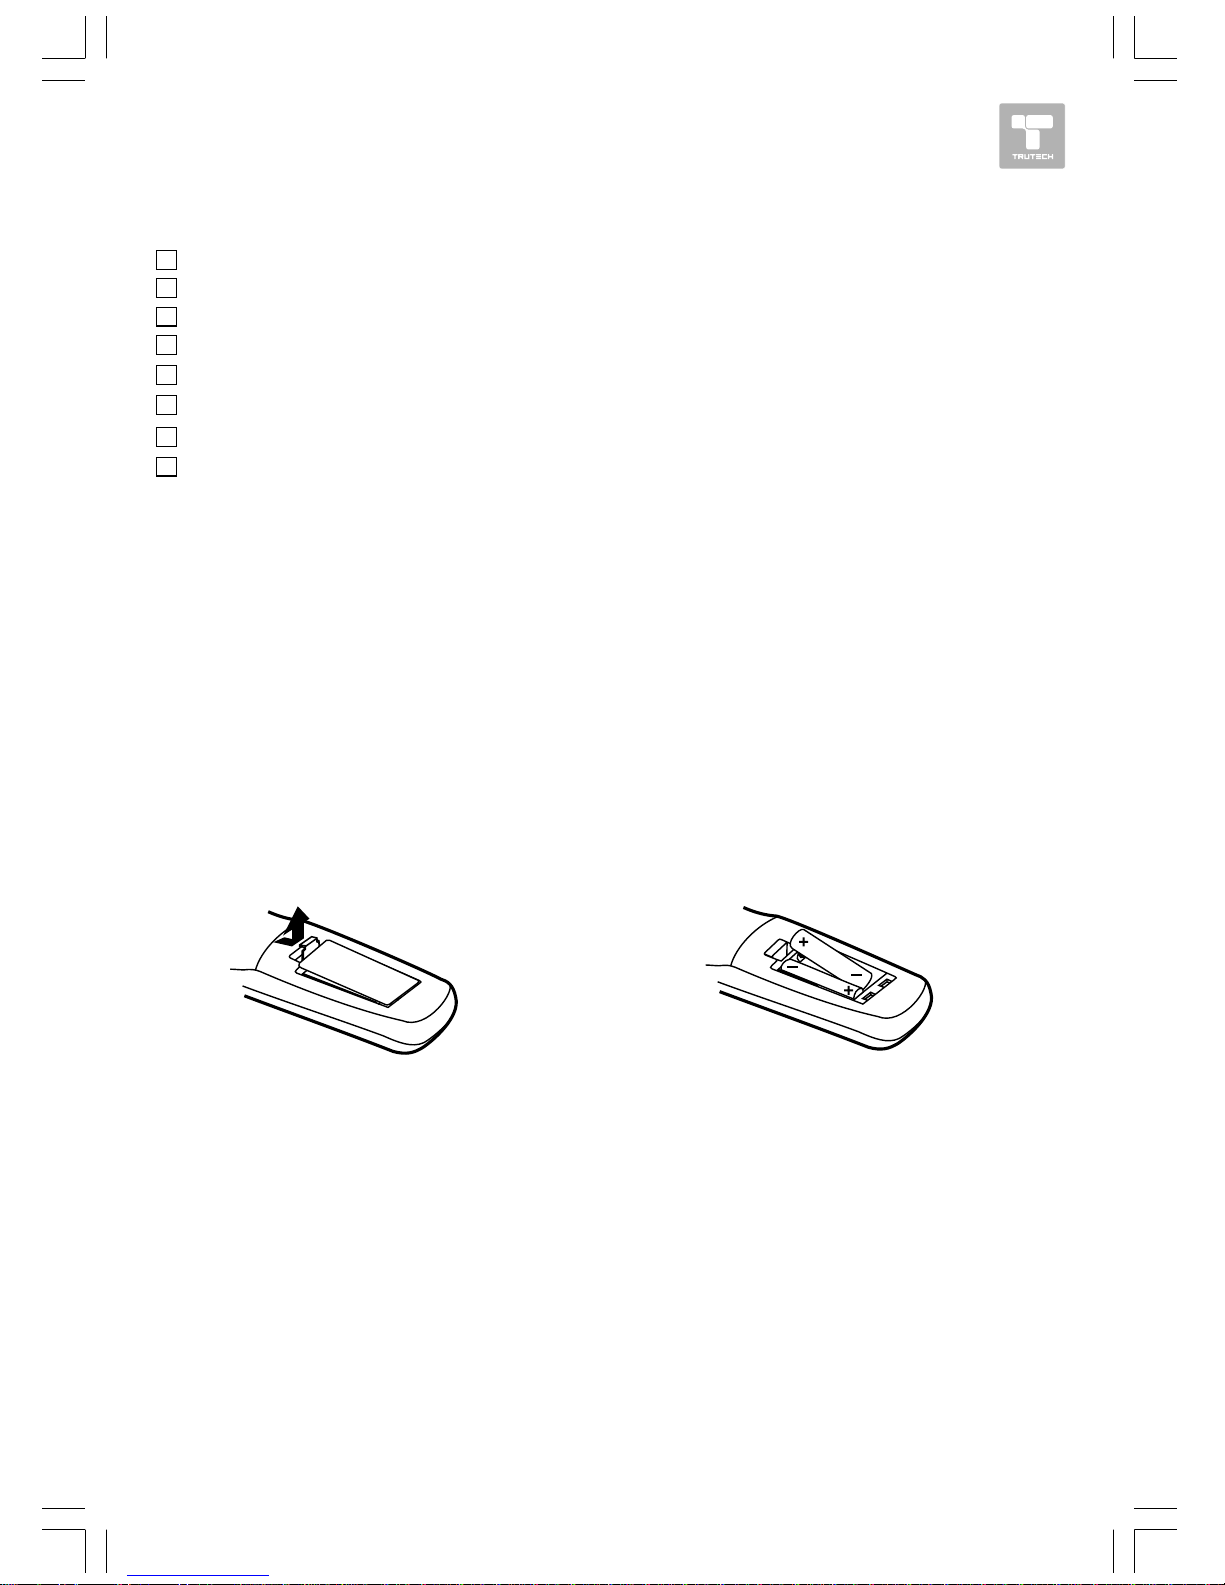
Remote Control ..................................... 6Remote Control ..................................... 6
Remote Control ..................................... 6
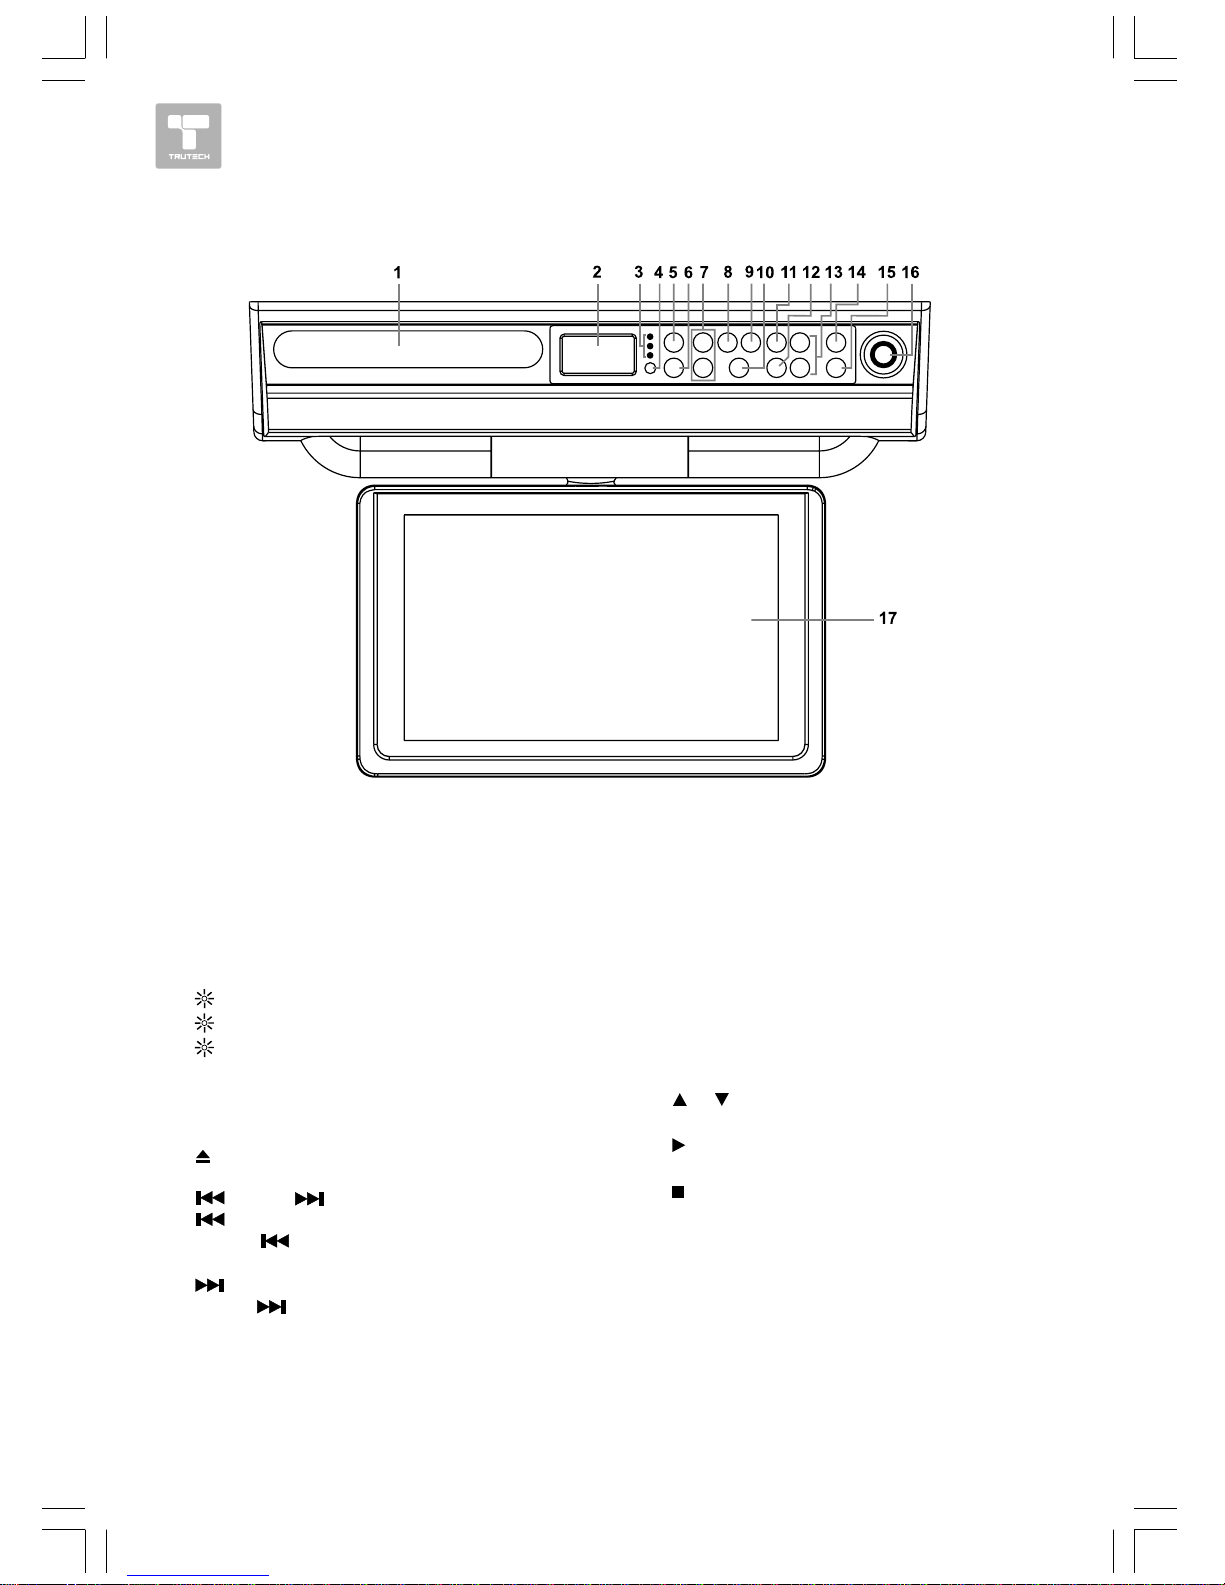
Control Reference Guide .................... 7-9Control Reference Guide .................... 7-9
Control Reference Guide .................... 7-9
Mounting Instructions ........................ 10-11Mounting Instructions ........................ 10-11
Mounting Instructions ........................ 10-11
Connections .................................... 12-13Connections .................................... 12-13
Connections .................................... 12-13
Connecting the TV Antenna ...................12
Connecting the Unit to a TV or
other Video Equipment ...................... 12
Connecting the Unit to a Stereo Receiver
or Amplifier ..................................... 12
Plugging in the Unit ......................... 13
Monitor Operation ............................... 13Monitor Operation ............................... 13
Monitor Operation ............................... 13
Unit Operation .................................... 14Unit Operation .................................... 14
Unit Operation .................................... 14
Sound System .................................... 14Sound System .................................... 14
Sound System .................................... 14
Setting the Clock ................................... 15Setting the Clock ................................... 15
Setting the Clock ................................... 15
Setting the Cooking Timer ........................ 15Setting the Cooking Timer ........................ 15
Setting the Cooking Timer ........................ 15
Playing a Disc ................................. 16-18Playing a Disc ................................. 16-18
Playing a Disc ................................. 16-18
Playing a Disc .................................. 16
Pausing Playback ............................. 16
Stopping Playback ............................. 16
Skipping to a Different Track ............... 16
Fast Forward/Fast Reverse ............... 16
Angle Selection .............................. 17
Subtitle Selection .............................. 17
Audio Selection ............................... 17
Display Function .............................. 18
Special Functions ................................ 18Special Functions ................................ 18
Special Functions ................................ 18
Locating a Specific Title/Chapter/Time .. 18
Locating a Specific Track ................... 18
Setting Favorite Bookmark
During Playback ............................. 19

5 HOW IT WORKS
The unit can play
Region Management InformationRegion Management Information
Region Management Information
Region Management Information: This unit is designed and manufactured to respond to the Region
Management Information that is encoded on DVDs. If the region number printed on the DVD does
not correspond to the region number of this unit, this unit cannot play that disc.
The region number of this unit is 1.
Disc Function or Operation that is Not AvailableDisc Function or Operation that is Not Available
Disc Function or Operation that is Not Available
When the “ ” symbol appears on the screen, it indicates that the function or operation attempted
is not available at that time. This occurs because the DVD manufacturer determines the specific
functions. Certain functions may not be available on some discs. Be sure to read the documentation
provided with the DVD.
TT
TT
Titles, Chapters and Titles, Chapters and T
itles, Chapters and Titles, Chapters and T
itles, Chapters and Tracksracks
racksracks
racks
• DVDs are divided into “titles”“titles”
“titles”“titles”
“titles” and “chapters”“chapters”
“chapters”“chapters”
“chapters”. If the disc
has more than one movie on it, each movie would be
a separate “title”“title”
“title”“title”
“title”. “Chapters”“Chapters”
“Chapters”“Chapters”
“Chapters” are sections of titles.
• Audio CDs are divided into “tracks”“tracks”
“tracks”“tracks”
“tracks”. A “track”“track”
“track”“track”
“track” is usually
one song on an Audio CD.
Icons Used on DVDsIcons Used on DVDs
Icons Used on DVDs
Sample lcons Language selections for audio
Language selections for subtitles
Screen aspect ratio
Multiple camera angles
Region code indicator
Note:Note:
Note:Note:
Note:
• When playing a CD-G (Graphics) or CD EXTRA disc, the audio portion will be played, but the graphic
images will not be shown.
DISC FORMADISC FORMA
DISC FORMATSTS
TSTS
TS
Notes on Unauthorized Discs
You may not be able to play back some DVDs on this unit if they were purchased from outside
your geographic area or made for business purposes.
Note :
Numbers identify each title, chapter, and track on a disc. Most discs have these numbers
recorded on them, but some do not.
DVDs
[8cm/12cm disc]
Audio CDs
[8cm/12cm disc]
Compatible

HOW IT WORKS 6
ACCESSORIESACCESSORIES
ACCESSORIES
Please check and identify the included accessories.Please check and identify the included accessories.
Please check and identify the included accessories.
Remote control ............................................................................................. x 1
AAA 1.5V battery .......................................................................................... x 2
Mounting template ......................................................................................... x 1
1.06" (27mm) spacers ................................................................................... x 4
.57" (14.4mm) spacers .................................................................................. x 4
.32" (8.2mm) spacers .................................................................................... x 4
#M 5 x 69 mm screws .................................................................................... x 4
#M 5 x 40 mm screws .................................................................................... x 4
Battery ReplacementBattery Replacement
Battery Replacement
When the batteries become weak, the operating distance of the remote control is greatly reduced
and you will need to replace them.
Caution:
Danger of explosion if battery is incorrectly replaced. Replace only with the same or
equivalent type.
Notes:Notes:
Notes:Notes:
Notes:
• Do not place the remote control near magnetic devices or magnetic cards.
• If the remote control is not going to be used for a long time, remove the batteries to avoid
corrosion damage caused by battery leakage.
• Do not mix old and new batteries. Do not mix ALKALINE, standard (CARBON-ZINC) or rechargeable
(NICKEL-CADMIUM) batteries.
• Always remove batteries as soon as they become weak.
• Weak batteries can leak and severely damage the remote control.
• WARNING: Do not dispose of batteries in a fire. Batteries may explode or leak.
TT
TT
To Install Batterieso Install Batteries
o Install Batterieso Install Batteries
o Install Batteries
1.1.
1.1.
1. Open the battery door. 2.2.
2.2.
2. Insert two AAA batteries.
REMOTE CONTROLREMOTE CONTROL
REMOTE CONTROL
Using the Remote ControlUsing the Remote Control
Using the Remote Control
• This remote control is magnetic and can be attached to most refrigerators. Some refrigerators
panels are not metallic. In this case, try attaching the magnetic remote control to the side of
the refrigerator.
• Point the remote control at the REMOTE SENSOR located on the unit.
• When there is a strong ambient light source, the performance of the infrared REMOTE SENSOR
may be degraded, causing unreliable operation.
• The recommended effective distance for remote operation is about 16 feet (5 meters).

7 HOW IT WORKS
CONTROL REFERENCE GUIDECONTROL REFERENCE GUIDE
CONTROL REFERENCE GUIDE
Remote ControlRemote Control
Remote Control
1)1)
1)1)
1)
2)2)
2)2)
2)
3)3)
3)3)
3)
4)4)
4)4)
4)
5)5)
5)5)
5)
6)6)
6)6)
6)
7)7)
7)7)
7)
8)8)
8)8)
8)
9)9)
9)9)
9)
10)10)
10)10)
10)
11)11)
11)11)
11)
12)12)
12)12)
12)
FUNCTION ButtonFUNCTION Button
FUNCTION Button
Use to select DVD, TV or RADIO
mode.
PICTURE ButtonPICTURE Button
PICTURE Button
Selects from preset screen display
settings to match the type of show
you are watching.
MEMORY ButtonMEMORY Button
MEMORY Button
Sets title/chapter in a favorite order.
Enter the number of a selected
station.
EXITEXIT
EXITEXIT
EXIT ButtonButton
ButtonButton
Button
Press to exit the TV menu and return
directly to normal viewing.
DVD MENU ButtonDVD MENU Button
DVD MENU Button
Press to enter the main menu of the
DVD you are watching.
VOLUME (+/-) ButtonsVOLUME (+/-) Buttons
VOLUME (+/-) Buttons
Adjusts the volume.
//
//
/ TUNING ButtonsTUNING Buttons
TUNING ButtonsTUNING Buttons
TUNING Buttons
: Fast reverse playback.
::
::
: Fast forward playback.
TUNINGTUNING
TUNINGTUNING
TUNING ::
::
: Scans all available
radio stations.
PREV ButtonPREV Button
PREV Button
Selects previous titles, chapters or
tracks on a disc.
ANGLE ButtonANGLE Button
ANGLE Button
During DVD playback, switch the
camera angle of the video
presentation when scenes with
multiple camera angles are recorded
on a DVD.
GOTO ButtonGOTO Button
GOTO Button
Goes directly to a location on a DVD/
CD.
AUDIO ButtonAUDIO Button
AUDIO Button
Selects audio soundtracks of a DVD
or change the output mode of a CD.
MTS ButtonMTS Button
MTS Button
Press to select MONO sound, STEREO
sound or Secondary Audio Program
(SAP).
FORMAFORMA
FORMAFORMA
FORMAT ButtonT Button
T ButtonT Button
T Button
Press to select the picture format.

HOW IT WORKS 8
CONTROL REFERENCE GUIDECONTROL REFERENCE GUIDE
CONTROL REFERENCE GUIDE
Remote ControlRemote Control
Remote Control
RETURN
STST
STST
STANDBY/ON ButtonANDBY/ON Button
ANDBY/ON ButtonANDBY/ON Button
ANDBY/ON Button
Turns on the unit and puts it in
standby mode.
Number (0-9) ButtonsNumber (0-9) Buttons
Number (0-9) Buttons
LAST CH ButtonLAST CH Button
LAST CH Button
Press to switch repeatedly between
the last two channels displayed.
TV MENU ButtonTV MENU Button
TV MENU Button
Press to display the on-screen TV
menu.
CURSOR (CURSOR (
CURSOR (CURSOR (
CURSOR ( ,,
,,
, ,,
,,
, ,,
,,
, ) Buttons) Buttons
) Buttons) Buttons
) Buttons
Use to highlight selections on a
screen and make adjustments to
certain settings.
CH+ /CH+ /
CH+ /CH+ /
CH+ / CH- ButtonsCH- Buttons
CH- ButtonsCH- Buttons
CH- Buttons
Use to change TV channels.
ENTER ButtonENTER Button
ENTER Button
Confirms selections on a menu
screen.
MUTEMUTE
MUTEMUTE
MUTE ButtonButton
ButtonButton
Button
Press to turn off the sound.
STOP/BAND ButtonSTOP/BAND Button
STOP/BAND Button
Stops playback.
Switches between AM and FM.
PLAPLA
PLAPLA
PLAY ButtonY Button
Y ButtonY Button
Y Button
Starts playback.
PAUSE ButtonPAUSE Button
PAUSE Button
Pauses playback, frames advance.
NEXTNEXT
NEXTNEXT
NEXT ButtonButton
ButtonButton
Button
Selects next titles, chapters or
tracks on a disc.
SOUND ButtonSOUND Button
SOUND Button
Press to select from preset sound
settings to match the type of show
you are watching.
SUBTITLE ButtonSUBTITLE Button
SUBTITLE Button
Selects one of the subtitle languages
programmed on a DVD.
SETUP ButtonSETUP Button
SETUP Button
Enters and exits the SETUP menu of
the DVD.
REPEAREPEA
REPEAREPEA
REPEAT ButtonT Button
T ButtonT Button
T Button
Repeats chapter or title of a DVD.
Repeats single track or whole CD.
DISPLADISPLA
DISPLADISPLA
DISPLAY ButtonY Button
Y ButtonY Button
Y Button
Changes disc status information
displayed on the screen.
13)13)
13)13)
13)
14)14)
14)14)
14)
15)15)
15)15)
15)
16)16)
16)16)
16)
17)17)
17)17)
17)
18)18)
18)18)
18)
19)19)
19)19)
19)
20)20)
20)20)
20)
21)21)
21)21)
21)
22)22)
22)22)
22)
23)23)
23)23)
23)
24)24)
24)24)
24)

9 HOW IT WORKS
CONTROL REFERENCE GUIDECONTROL REFERENCE GUIDE
CONTROL REFERENCE GUIDE
1)1)
1)1)
1) Disc TrayDisc Tray
Disc TrayDisc Tray
Disc Tray
Opens or closes the tray by pressing OPEN/
CLOSE button.
Places a disc on the disc tray, label side up.
2)2)
2)2)
2) Display WindowDisplay Window
Display WindowDisplay Window
Display Window
Displays system information.
3)3)
3)3)
3) POWER ON IndicatorsPOWER ON Indicators
POWER ON IndicatorsPOWER ON Indicators
POWER ON Indicators
DVD :DVD :
DVD :DVD :
DVD : DVD indicator
TV :TV :
TV :TV :
TV : TV indicator
RADIO :RADIO :
RADIO :RADIO :
RADIO : RADIO indicator
4)4)
4)4)
4) Remote SensorRemote Sensor
Remote SensorRemote Sensor
Remote Sensor
Receives the remote control unit signals.
5)5)
5)5)
5) ON/OFF ButtonON/OFF Button
ON/OFF ButtonON/OFF Button
ON/OFF Button
Turns the unit on and off.
6)6)
6)6)
6) OPEN/CLOSE ButtonOPEN/CLOSE Button
OPEN/CLOSE ButtonOPEN/CLOSE Button
OPEN/CLOSE Button
Use to open/close the disc tray.
7)7)
7)7)
7) PREV/PREV/
PREV/PREV/
PREV/ NEXT ButtonsNEXT Buttons
NEXT ButtonsNEXT Buttons
NEXT Buttons
PREV buttonPREV button
PREV button
Press PREVPREV
PREVPREV
PREV to go back to previous
chapters/tracks.
NEXT ButtonNEXT Button
NEXT Button
Press NEXTNEXT
NEXTNEXT
NEXT to advance to chapters/
tracks.
Use to search for a station automatically or
select presetted stations.
8)8)
8)8)
8) SET CLOCK ButtonSET CLOCK Button
SET CLOCK ButtonSET CLOCK Button
SET CLOCK Button
Use to set the current time.
9)9)
9)9)
9) TIMER ButtonTIMER Button
TIMER ButtonTIMER Button
TIMER Button
Use to set the cooking timer.
10)10)
10)10)
10) DVD/TV/RADIO ButtonDVD/TV/RADIO Button
DVD/TV/RADIO ButtonDVD/TV/RADIO Button
DVD/TV/RADIO Button
Use to select DVD, TV or RADIO mode.
11)11)
11)11)
11) TV MENU ButtonTV MENU Button
TV MENU ButtonTV MENU Button
TV MENU Button
Opens and closes the TV menu.
12)12)
12)12)
12) SET ButtonSET Button
SET ButtonSET Button
SET Button
Use to enter the sub-menu menu and confirm
selections in TV mode.
13)13)
13)13)
13) //
//
/ CH ButtonCH Button
CH ButtonCH Button
CH Button
Use to skip/search TV channel.
14)14)
14)14)
14) PLAY ButtonPLAY Button
PLAY ButtonPLAY Button
PLAY Button
Press to start or resume playback of a disc.
15)15)
15)15)
15) STOP • BAND ButtonSTOP • BAND Button
STOP • BAND ButtonSTOP • BAND Button
STOP • BAND Button
Stops playing a disc.
Switches between AM and FM.
16)16)
16)16)
16) VOLUME ControlVOLUME Control
VOLUME ControlVOLUME Control
VOLUME Control
Adjusts the volume levels.
17)17)
17)17)
17) ScreenScreen
ScreenScreen
Screen
UnitUnit
UnitUnit
Unit

HOW IT WORKS 10
MOUNTING INSTRUCTIONSMOUNTING INSTRUCTIONS
MOUNTING INSTRUCTIONS
b) Fold the Mounting Template along the
guideline that is closest to the thickness of
your cabinet overhang.
c) Tape Mounting Template to the underside
of the cabinet with the folded portion of the
Mounting Template flush up against the
cabinet overhang (see Figure 2). Go to
STEP 2.STEP 2.
STEP 2.STEP 2.
STEP 2.
If your cabinet DOESDOES
DOESDOES
DOES have an overhang:
a) Measure the thickness of the cabinet
overhang (see Figure 1).
STEP 1STEP 1
STEP 1STEP 1
STEP 1
If your cabinet does NOTNOT
NOTNOT
NOT have an overhang:
a) Place the Mounting Template in the desired
location inside or underneath the cabinet
(whichever has less obstructions, and will
be easier for you to reach to drill holes),
flush with the front edge of the cabinet and
tape it down. Go to STEP 2STEP 2
STEP 2STEP 2
STEP 2.
STEP 2STEP 2
STEP 2STEP 2
STEP 2
Use an electric drill with a ¼” drill bit (not
included) to drill all four holes marked on the
Mounting Template (see Figure 3). To reduce
splintering, place a small piece of masking tape
over each hole location before drilling. Go to
STEP 3.STEP 3.
STEP 3.STEP 3.
STEP 3.
If your cabinet DOESDOES
DOESDOES
DOES have an overhang:
a) Eight screws are included with this unit, but
you will only need four of them. Select the
screw length which will go completely through
your cabinet bottom, and extend at least 3/
8" past the bottom of your cabinet overhang.
b) This unit includes three sets of four spacers
of various lengths. The spacers can be put
together to form longer spacers to
accommodate various cabinet overhang
thicknesses. Determine the best combination
of spacers which is equal to or longer than
the cabinet overhang thickness.
c) Hold the unit up against the bottom of the
cabinet, and align the four holes on the top
of the unit with the screws. Partially tighten
each screw, but do not fully tighten the
screws until all of them have been started.
d) Gently tighten each screw until they are firmly
holding the unit in place.
(Continued on next page)(Continued on next page)
(Continued on next page)
STEP 3STEP 3
STEP 3STEP 3
STEP 3
If your cabinet does NOTNOT
NOTNOT
NOT have an overhang:
a) Eight screws are included with this unit, but
you will only need four of them. Select the
screw length which will go completely
through your cabinet bottom, and provide at
least 3/8" of thread to screw into the main
unit.
b) Insert the four selected screws through each
hole from the inside of the cabinet going down
(see Figure4).
Cabinet Bottom
Front
edge
Figure 1
Figure 3
Cabinet Bottom
Front
edge
Template
Figure 2
Figure 4
TOOLS NEEDED: 1) Electric drill with 1/4” bit; 2) Phillips-head (cross style) screwdriver.

11 HOW IT WORKS
e) Partially tighten each screw, but do not fully
tighten the screws until all of them have
been started (see Figure 6).
f) Gently tighten each screw until they are firmly
holding the unit in place. The top front edge
of the unit should clear the overhang.
MOUNTING SUGGESTIONSMOUNTING SUGGESTIONS
MOUNTING SUGGESTIONS
1) If your cabinet has obstructions inside it which prevent you from using the template, cut out the
corresponding area on the template, but do NOT cut out or through the screw holes.
2) If your cabinet has obstructions underneath it, which will interfere with the mounting of the unit,
remove the obstruction before mounting the unit, or find another location to mount the unit.
3) It is recommended that you wear safety glasses while drilling to prevent eye injuries.
4) For wood cabinets, you may want to mark the hole locations with a nail, pressed gently but firmly
into the wood so that a slight impression is made. This will also help keep the drill bit centered
in the right location.
5) Hold the drill firmly against the cabinet to keep the drill from “walking”.
(Continued from previous page)(Continued from previous page)
(Continued from previous page)
c) Insert the four selected screws through each
hole from the inside of the cabinet going down
(see Figure 5).
MOUNTING INSTRUCTIONSMOUNTING INSTRUCTIONS
MOUNTING INSTRUCTIONS
Figure 5 Figure 6
d) Hold each screw head down and push the
unit and spacers onto the screws, then hold
the unit up until spacers are firmly against
the bottom of the cabinet (and fully nested
within each other if you are using multiple
spacers for each screw).
TO REDUCE THE RISK OF FIRE, DO NOT PLACE ANY HEATO REDUCE THE RISK OF FIRE, DO NOT PLACE ANY HEA
TO REDUCE THE RISK OF FIRE, DO NOT PLACE ANY HEATING OR COOKINGTING OR COOKING
TING OR COOKINGTING OR COOKING
TING OR COOKING
APPAPP
APPAPP
APPARAARA
ARAARA
ARATUS BENEATUS BENEA
TUS BENEATUS BENEA
TUS BENEATH THIS UNITTH THIS UNIT
TH THIS UNITTH THIS UNIT
TH THIS UNIT..
..
.
CAUTIONCAUTION
CAUTIONCAUTION
CAUTION

HOW IT WORKS 12
CONNECTIONSCONNECTIONS
CONNECTIONS
Connecting the TVConnecting the TV
Connecting the TV AA
AA
Antennantenna
ntennantenna
ntenna
Connect a TV antenna or CATV cable or Satellite system to the TV antenna terminal.
TV antenna
To the TV ANT IN
terminal
11
11
1
22
22
2
Connecting the Unit to a Stereo Receiver or AmplifierConnecting the Unit to a Stereo Receiver or Amplifier
Connecting the Unit to a Stereo Receiver or Amplifier
ANALOG CONNECTIONANALOG CONNECTION
ANALOG CONNECTION
Use the Audio cable (not supplied). Connect the R (right) AUDIO OUT and L (left) AUDIO OUT jacks
on the rear of the unit to the R (right) AUDIO IN and L (left) AUDIO IN jacks on your other source.
Connecting the Unit to a TV or other Video EquipmentConnecting the Unit to a TV or other Video Equipment
Connecting the Unit to a TV or other Video Equipment
Use the Audio/Video cable (not supplied). Connect the VIDEO OUT and R/L (right/left) AUDIO OUT
jacks on the rear of the unit to the VIDEO IN and R/L (right/left) jacks on your TV or other video
equipment.

13 HOW IT WORKS
MONITOR OPERAMONITOR OPERA
MONITOR OPERATIONTION
TIONTION
TION
Follow the illustrations below to open the monitorFollow the illustrations below to open the monitor
Follow the illustrations below to open the monitor..
..
.
1.Gently pull the monitor down from the back, and twist it counter-clockwise so the screen is
visible.
2.The screen can be turned up to 270o. Do NOT force the screen once it stops turning. The
screen does NOT turn completely around.
CONNECTIONSCONNECTIONS
CONNECTIONS
Plugging in the UnitPlugging in the Unit
Plugging in the Unit
Plug the AC power cord into the wall outlet
a) Before plugging in the power cord, make sure the voltage of the unit matches your local voltage.
b) Plug the power cord directly into the nearest wall outlet, and wrap the remaining cord around the
cord storage knob at the rear of the unit.
AC power cord
CAUTIONCAUTION
CAUTIONCAUTION
CAUTION: TO PREVENT ELECTRIC SHOCK, MA: TO PREVENT ELECTRIC SHOCK, MA
: TO PREVENT ELECTRIC SHOCK, MA: TO PREVENT ELECTRIC SHOCK, MA
: TO PREVENT ELECTRIC SHOCK, MATCH WIDE BLADE OF PLUG TO WIDE SLOT OF WTCH WIDE BLADE OF PLUG TO WIDE SLOT OF W
TCH WIDE BLADE OF PLUG TO WIDE SLOT OF WTCH WIDE BLADE OF PLUG TO WIDE SLOT OF W
TCH WIDE BLADE OF PLUG TO WIDE SLOT OF WALLALL
ALLALL
ALL
OUTLETOUTLET
OUTLETOUTLET
OUTLET, THEN FULL, THEN FULL
, THEN FULL, THEN FULL
, THEN FULLY INSERY INSER
Y INSERY INSER
Y INSERTT
TT
T..
..
.
To AC outlet

HOW IT WORKS 14
UNIT OPERAUNIT OPERA
UNIT OPERATIONTION
TIONTION
TION
TT
TT
Turur
urur
urning the Unit Onning the Unit On
ning the Unit Onning the Unit On
ning the Unit On
While the power cord is connected and the unit is on standby, power will be consumed and only the
clock display will flash.
Dolby Digital (for DVD)Dolby Digital (for DVD)
Dolby Digital (for DVD)
Dolby Digital is a technology developed by Dolby Laboratories. Soundtracks encoded in Dolby Digital
can reproduce from one to 5.1 discrete channels of excellent quality audio.
The unit automatically recognizes the Dolby Digital bitstream and provides a downmix suitable for two-
channel listening. An additional Dolby Digital decoder is required for reproduction of the discrete
multi-channel soundtracks available on many DVDs.
Manufactured under license from Dolby Laboratories.
‘Dolby’ and the double-D symbol are trademarks of Dolby Laboratories.
SOUND SYSTEMSOUND SYSTEM
SOUND SYSTEM
• Press the ON/OFFON/OFF
ON/OFFON/OFF
ON/OFF button to turn the unit on and the DVD indicator lights up.
After a short period of time, “DVD” will appear on the front display and the DVD logo (start-up
picture) will appear on the screen.
• Press the DVD/TV/RADIODVD/TV/RADIO
DVD/TV/RADIODVD/TV/RADIO
DVD/TV/RADIO button (the FUNCTIONFUNCTION
FUNCTIONFUNCTION
FUNCTION button on the remote control) to TV mode and
the TV indicator lights up.
After a short period of time, “TV” will appear on the front panel display and the TV program will
begin on the screen.
• Press the DVD/TV/RADIODVD/TV/RADIO
DVD/TV/RADIODVD/TV/RADIO
DVD/TV/RADIO button (the FUNCTIONFUNCTION
FUNCTIONFUNCTION
FUNCTION button on the remote control) to RADIO mode
and the radio indicator lights up.
After a short period of time, “TUNER” and the FM frequency will appear on the front panel display.

15 HOW IT WORKS
SETTING THE CLOCKSETTING THE CLOCK
SETTING THE CLOCK
To adjust the clock, the unit must be in standby mode. To enter standby mode, make sure that the unit
is plugged in, but not turned on.
• Check that the rated voltage of the unit matches your local voltage.
4. Press the PREV/PREV/
PREV/PREV/
PREV/ NEXTNEXT
NEXTNEXT
NEXT buttons to set
the current minutes then press the SET CLOCKSET CLOCK
SET CLOCKSET CLOCK
SET CLOCK
button once to start the clock.
1. When the AC power cord is plugged in, the
clock display will blink.
SETTING THE COOKING TIMERSETTING THE COOKING TIMER
SETTING THE COOKING TIMER
1. Press the TIMERTIMER
TIMERTIMER
TIMER button. The “TIMER” indicator
appears and the cooking time “10” blinks.
2. Press the PREV/PREV/
PREV/PREV/
PREV/ NEXTNEXT
NEXTNEXT
NEXT buttons to
select your desired time from 1-99 minutes.
• Press the TIMER button repeatedly to select
time: 10, 15, 30, 45, 60, 75, 90 minutes.
• Press and hold the PREV/PREV/
PREV/PREV/
PREV/ NEXTNEXT
NEXTNEXT
NEXT
buttons to fast forward/reverse the cooking
time.
4. To turn OFF the ALARM, press the TIMERTIMER
TIMERTIMER
TIMER
button once. Otherwise, the ALARM will
automatically turn off after 60 minutes if no
button is pressed.
CANCELLING THE COOKING TIMERCANCELLING THE COOKING TIMER
CANCELLING THE COOKING TIMER
• Press the TIMER button until the time of the cooking timer shows "OFF". The “TIMER” indicator will
disappear.
3. When the preset time elapses, the ALARM
will sound.
3. Press the PREV/PREV/
PREV/PREV/
PREV/ NEXTNEXT
NEXTNEXT
NEXT buttons to set
the current hours then press the SET CLOCKSET CLOCK
SET CLOCKSET CLOCK
SET CLOCK
button once to confirm. Then, the MINUTE
blinks.
2. Press the SET CLOCKSET CLOCK
SET CLOCKSET CLOCK
SET CLOCK button until the HOUR
blinks.

HOW IT WORKS 16
This owner’s manual explains the basic instructions of this unit. Some DVDs are produced in aThis owner’s manual explains the basic instructions of this unit. Some DVDs are produced in a
This owner’s manual explains the basic instructions of this unit. Some DVDs are produced in a
manner that allows specific or limited operation during playback. Such as, the unit may notmanner that allows specific or limited operation during playback. Such as, the unit may not
manner that allows specific or limited operation during playback. Such as, the unit may not
respond to all operating commands. This is not a defect in the unit. Refer to the instruction notesrespond to all operating commands. This is not a defect in the unit. Refer to the instruction notes
respond to all operating commands. This is not a defect in the unit. Refer to the instruction notes
of discs.of discs.
of discs.of discs.
of discs.
“ ” may appear on the screen during operation. A “ ” means that the desired operation is not
permitted by the unit or disc.
Playing a DiscPlaying a Disc
Playing a Disc
1. Press the ON/OFFON/OFF
ON/OFFON/OFF
ON/OFF button to turn on the unit.
2. Press the FUNCTIONFUNCTION
FUNCTIONFUNCTION
FUNCTION button to select DVD mode.
See CUSTOMIZING THE FUNCTION SETTINGSCUSTOMIZING THE FUNCTION SETTINGS
CUSTOMIZING THE FUNCTION SETTINGSCUSTOMIZING THE FUNCTION SETTINGS
CUSTOMIZING THE FUNCTION SETTINGS (page 22 to 23) before proceeding to step 3.
3. Press the OPEN/CLOSEOPEN/CLOSE
OPEN/CLOSEOPEN/CLOSE
OPEN/CLOSE button. The disc tray opens.
4. Place a disc onto the disc tray with the label side up.
5. Press the OPEN/CLOSEOPEN/CLOSE
OPEN/CLOSEOPEN/CLOSE
OPEN/CLOSE button. The disc tray closes.
It takes a short while for your unit to load the disc. After loading, the unit will automatically either
bring you to the main menu of the DVD or start playback of the disc.
6. If the unit does not automatically start playing the DVD, press the PLAPLA
PLAPLA
PLAYY
YY
Y button.
PausingPausing
PausingPausing
Pausing PP
PP
Playback (layback (
layback (layback (
layback (SS
SS
Stilltill
tilltill
till MM
MM
Mode)ode)
ode)ode)
ode)
Press the PP
PP
PAUSEAUSE
AUSEAUSE
AUSE button on the remote. To resume normal playback, press the PLAPLA
PLAPLA
PLAYY
YY
Y button.
Each time you press the PAUSEPAUSE
PAUSEPAUSE
PAUSE button, the picture advances one frame.
StoppingStopping
StoppingStopping
Stopping PP
PP
Playbacklayback
laybacklayback
layback
Press the STOPSTOP
STOPSTOP
STOP button at the location where you want to interrupt playback. To resume playback
at the position where the disc was stopped, press the PLAPLA
PLAPLA
PLAYY
YY
Y button.
If you press the STOPSTOP
STOPSTOP
STOP button twice, the unit’s memory will be cleared and pressing the PLAPLA
PLAPLA
PLAYY
YY
Y
button will reset the disc to the beginning.
Skipping to aSkipping to a
Skipping to a DD
DD
Difif
ifif
ifferfer
ferfer
ferent Chapter/Tent Chapter/T
ent Chapter/Tent Chapter/T
ent Chapter/Trackrack
rackrack
rack
• Press the PREVPREV
PREVPREV
PREV button repeatedly to skip to the start of the current or previous chapter/
track.
• Press the NEXTNEXT
NEXTNEXT
NEXT button to skip to the next chapter/track.
• For an audio CD, use the number buttons (remote control only) to go directly to that track
number.
Fast Forward/Fast ReverseFast Forward/Fast Reverse
Fast Forward/Fast Reverse
1. Press the TUNINGTUNING
TUNINGTUNING
TUNING or TUNINGTUNING
TUNINGTUNING
TUNING button on the remote control when a disc is playing.
• The disc begins fast scan at x2 speed.
• Four speeds are available. Each time the TUNINGTUNING
TUNINGTUNING
TUNING or TUNINGTUNING
TUNINGTUNING
TUNING
button is pressed, the
speed of fast scan changes in the following sequence:
PLAPLA
PLAPLA
PLAYING A DISCYING A DISC
YING A DISCYING A DISC
YING A DISC
2. Press the PLAPLA
PLAPLA
PLAYY
YY
Y button when you have reached the desired point to resume playback at normal
speed.
Notes:
• The DVD player mutes sound during reverse and forward scan of DVD video discs.
• The fast playback speed may differ depending on the disc.
• When MUTEMUTE
MUTEMUTE
MUTE is pressed, the sound is mute and the “L O”
indicator always blinks on the LCD display until MUTEMUTE
MUTEMUTE
MUTE is
pressed again or VOL is pressed.

17 HOW IT WORKS
PLAPLA
PLAPLA
PLAYING A DISCYING A DISC
YING A DISCYING A DISC
YING A DISC
AngleAngle
AngleAngle
Angle SS
SS
Selectionelection
electionelection
election
Some DVDs contain scenes which have been shot from a number of different angles. For these
discs, the same scene can be viewed from each of these different angles.
1. While you are playing a DVD with different angles
recorded, press the ANGLEANGLE
ANGLEANGLE
ANGLE button to view the
number of current angles available.
2. Press the ANGLEANGLE
ANGLEANGLE
ANGLE button repeatedly to change the
scene to the next angle in those recorded.
• About two seconds later, playback continues
from the new angle selected.
• If no button is pressed within 10 seconds,
playback continues without changing the current
angle.
Notes:Notes:
Notes:Notes:
Notes:
• This function can only be used for discs on which scenes shot from multiple angles have been
recorded.
• If only one angle is recorded, “ ” is displayed.
Sequence of angle shotsSequence of angle shots
Sequence of angle shots
(Example)
Notes:Notes:
Notes:Notes:
Notes:
• If only one language is recorded, the language does not change.
• About two seconds later, playback continues with the new subtitle selected.
• The number of languages recorded differs depending on the disc.
• If no button is pressed within a few seconds, playback continues without changing the current
subtitle.
• This function can only be used for discs on which subtitles have been recorded in multiple
languages.
• On some DVDs, subtitles are activated from the main menu of the DVD. Press the MENUMENU
MENUMENU
MENU button
to activate the main menu.
SubtitleSubtitle
SubtitleSubtitle
Subtitle SS
SS
Selectionelection
electionelection
election
1.1.
1.1.
1. While a DVD is playing, press the SUBTITLESUBTITLE
SUBTITLESUBTITLE
SUBTITLE button to display the current language setting,
as shown in the example below.
2.2.
2.2.
2. Press the SUBTITLESUBTITLE
SUBTITLESUBTITLE
SUBTITLE button repeatedly to select the desired subtitle language.
Notes:Notes:
Notes:Notes:
Notes:
• If only one audio format is recorded, the number does not change.
• Some DVD discs allow you to change audio selections via the disc menu only. If this is the case,
press the MENU button and choose the appropriate language on the disc menu.
• You can select different audio channels (Left, Right, Mix or Stereo) on an audio CD by pressing
the AUDIO button repeatedly.
AudioAudio
AudioAudio
Audio SS
SS
Selectionelection
electionelection
election
On some discs, the sound is recorded in two or more formats. Follow the directions below to select
the type of playback.
1. While a disc is playing, press the AUDIOAUDIO
AUDIOAUDIO
AUDIO button to show the current audio format number.
2. Press the AUDIOAUDIO
AUDIOAUDIO
AUDIO button repeatedly to select the desired audio format.

HOW IT WORKS 18
SPECIAL FUNCTIONSPECIAL FUNCTION
SPECIAL FUNCTION
PLAPLA
PLAPLA
PLAYING A DISCYING A DISC
YING A DISCYING A DISC
YING A DISC
Locating aLocating a
Locating a SS
SS
Specificpecific
pecificpecific
pecific TT
TT
Title/Chapter/Timeitle/Chapter/Time
itle/Chapter/Timeitle/Chapter/Time
itle/Chapter/Time
If a DVD contains title/chapter/time numbers, you can locate a specific title/chapter/time by
directly selecting a title/chapter/time number.
1. Press the GOTOGOTO
GOTOGOTO
GOTO button to display TitleTitle
TitleTitle
Title.
2. Press the or button to select the option (Title, Chapter or
Time) then press the corresponding number button(s) for the
Title/Chapter/Time you want.
3. Press the ENTERENTER
ENTERENTER
ENTER button to confirm. The unit will start playback
about 3 seconds later.
Locating aLocating a
Locating a SS
SS
Specificpecific
pecificpecific
pecific TT
TT
Trackrack
rackrack
rack
If a CD contains track numbers, you can locate a specific track by directly selecting track number.
1. Press the GOTOGOTO
GOTOGOTO
GOTO button.
2. Press the or button to select the option (Track, Time or
Disc Time) then press the corresponding number button(s) for
the Track/Time/Disc time you want.
3. Press the ENTERENTER
ENTERENTER
ENTER button to confirm. The unit will start playback
about 3 seconds later.
Notes:Notes:
Notes:Notes:
Notes:
• If the time numbers you entered is not permited by the DVD, after you press the ENTERENTER
ENTERENTER
ENTER button,
it will restore to “- - : - - : - -”“- - : - - : - -”
“- - : - - : - -”“- - : - - : - -”
“- - : - - : - -”. You should re-enter correct numbers.
• Some discs may not respond to this process.
• Some scenes may not be located as precisely as you specified.
• This method for accessing specific locations is available only within the current title of the DVD.
DisplayDisplay
DisplayDisplay
Display FF
FF
Functionunction
unctionunction
unction
While the disc is playing, press the DISPLAY button on the remote control repeatedly to display
information on operation status.
Time:Time:
Time:Time:
Time: The elapsed time from the beginning of the
title which is currently playing.
Title/Chapter:Title/Chapter:
Title/Chapter: The number of the title/chapter currently
playing and total titles/chapter on disc.
Audio:Audio:
Audio:Audio:
Audio: The type of the audio currently selected is
displayed.
Subtitle:Subtitle:
Subtitle:Subtitle:
Subtitle: The subtitle number and language currently
selected is displayed. When a disc with only
one subtitle is played back, “ ” is
displayed.
Angle:Angle:
Angle:Angle:
Angle: The current angle is displayed. When a disc
with only one angle is played back, “ ” is
displayed.

19 HOW IT WORKS
Setting Favorite Bookmarks During PlaybackSetting Favorite Bookmarks During Playback
Setting Favorite Bookmarks During Playback
While a disc is playing, you can mark the desired scene.
1. Press the GOTOGOTO
GOTOGOTO
GOTO button until Bookmark1Bookmark1
Bookmark1Bookmark1
Bookmark1 appears.
2. Press the ENTERENTER
ENTERENTER
ENTER button to mark the desired scene and the
time of this point will be shown in Bookmark1Bookmark1
Bookmark1Bookmark1
Bookmark1.
3. Press the ENTER button to play the favorite bookmark.
TT
TT
To Seto Set
o Seto Set
o Set OO
OO
Otherther
therther
ther BB
BB
Bookmarksookmarks
ookmarksookmarks
ookmarks
1. Press the GOTOGOTO
GOTOGOTO
GOTO button until Bookmark1Bookmark1
Bookmark1Bookmark1
Bookmark1 appears, then use
the or button to select Bookmark2Bookmark2
Bookmark2Bookmark2
Bookmark2/Bookmark3Bookmark3
Bookmark3Bookmark3
Bookmark3.
2. Press the ENTERENTER
ENTERENTER
ENTER button.
Notes:
• Some discs may not work with marking operation.
• The marking is cancelled when you open the disc tray or turn the unit off.
SPECIAL FUNCTIONSPECIAL FUNCTION
SPECIAL FUNCTION
You can play a specific title or chapter repeatedly.
(Title repeat, chapter repeat, A-B repeat)
Repeating aRepeating a
Repeating a CC
CC
Chapterhapter
hapterhapter
hapter
You can play the same chapter repeatedly.
1. While the disc is playing, press the REPEAREPEA
REPEAREPEA
REPEAT DISCT DISC
T DISCT DISC
T DISC button until the “ ” indicator displays
on the screen. The current chapter is played repeatedly.
TT
TT
Too
oo
o RR
RR
Resumeesume
esumeesume
esume NN
NN
Noror
oror
ormalmal
malmal
mal PP
PP
Playbacklayback
laybacklayback
layback
3. While the disc is playing, press the REPEAREPEA
REPEAREPEA
REPEAT DISCT DISC
T DISCT DISC
T DISC button until the “ ” indicator displays
on the screen.
Repeating aRepeating a
Repeating a TT
TT
Titleitle
itleitle
itle
You can play the same title repeatedly.
2. While the disc is playing, press the REPEAREPEA
REPEAREPEA
REPEAT DISCT DISC
T DISCT DISC
T DISC button until the “ ” indicator displays
on the screen. The current title is played repeatedly.
Repeating aRepeating a
Repeating a WW
WW
Wholehole
holehole
hole DD
DD
Discisc
iscisc
isc
2. While the disc is playing, press the REPEAREPEA
REPEAREPEA
REPEAT DISCT DISC
T DISCT DISC
T DISC button on the remote control until the “ ”
indicator displays on the screen. The whole disc is played repeatedly.
TT
TT
Too
oo
o RR
RR
Resumeesume
esumeesume
esume NN
NN
Noror
oror
ormalmal
malmal
mal PP
PP
Playbacklayback
laybacklayback
layback
3. Press the REPEAREPEA
REPEAREPEA
REPEAT DISCT DISC
T DISCT DISC
T DISC button until the “ ” indicator
displays on the screen.
You can play a single track or whole disc repeatedly.
Repeating aRepeating a
Repeating a SS
SS
Singleingle
ingleingle
ingle TT
TT
Trackrack
rackrack
rack
You can play the same track repeatedly.
1. While the disc is playing, press the REPEAREPEA
REPEAREPEA
REPEAT DISCT DISC
T DISCT DISC
T DISC button on the remote control until the
“” indicator displays on the screen. The current track is played repeatedly.
You can play a single track or the entire CD repeatedly through
the Toolkit which appears on the right in the window.
While the disc is playing, use the and button to select "Repeat",
then press the ENTERENTER
ENTERENTER
ENTER button to select SS
SS
Singleingle
ingleingle
ingle/All/OffAll/Off
All/OffAll/Off
All/Off.
Single:Single:
Single:Single:
Single: Repeat the current track.
All:All:
All:All:
All: Repeat the entire CD.
Off:Off:
Off:Off:
Off: Resume normal playback
REPEAREPEA
REPEAREPEA
REPEAT PLAT PLA
T PLAT PLA
T PLAYBACKYBACK
YBACKYBACK
YBACK
Table of contents
Other TruTech TV DVD Combo manuals