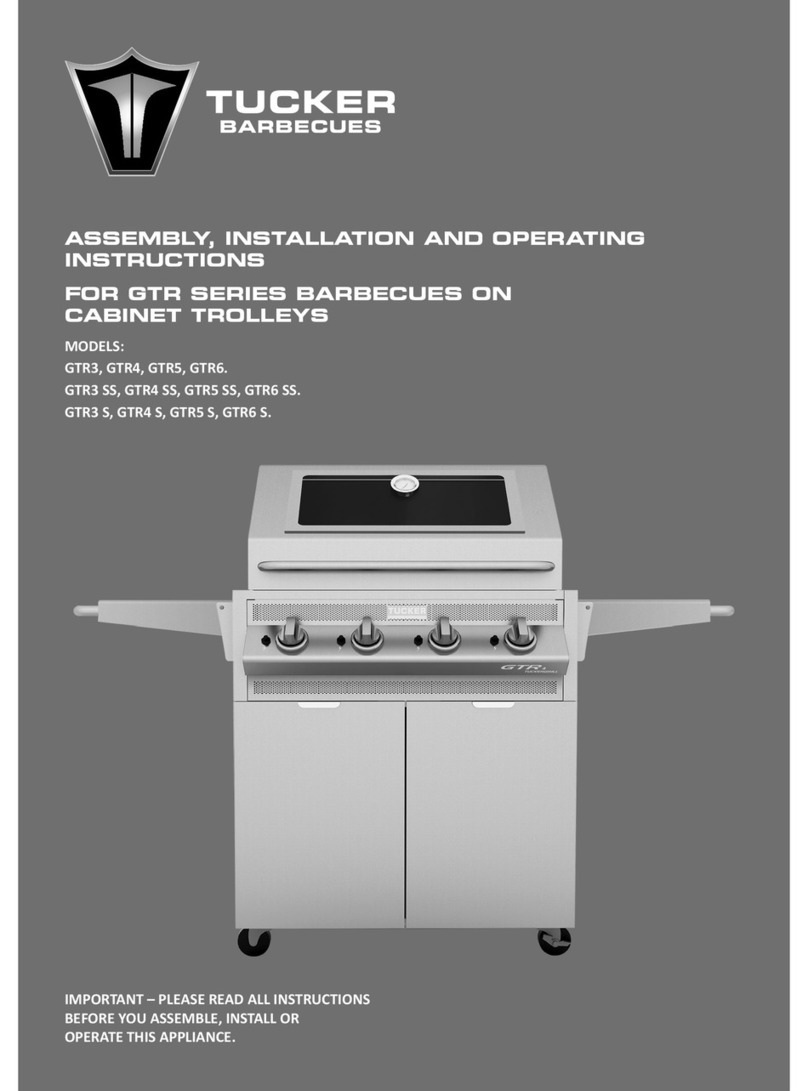
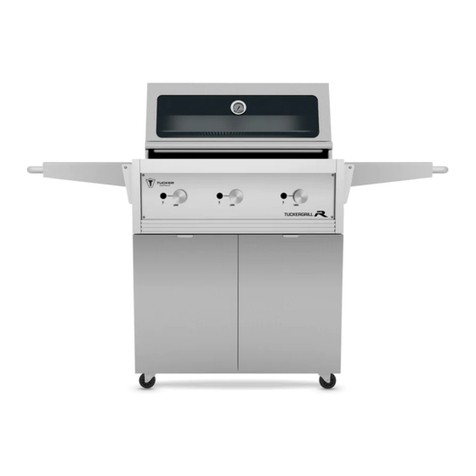
Tucker GTR4 Assembly instructions

ASSEMBLY, INSTALLATION AND OPERATING
INSTRUCTIONS
FOR GTR ROASTING HOODS TO SUIT
GTR BARBECUE MODELS
MODELS:
GTR3, GTR4, GTR5, GTR6.
GTR3 SS, GTR4 SS, GTR5 SS, GTR6 SS.
GTR3 S, GTR4 S, GTR5 S, GTR6 S.
IMPORTANT – PLEASE READ ALL INSTRUCTIONS
BEFORE YOU ASSEMBLE, INSTALL OR
OPERATE THIS APPLIANCE.

2
GENERAL WARNINGS
ROASTING HOOD ASSEMBLY INSTRUCTIONS
INSTALLATION INSTRUCTIONS & WARNINGS
DIMENSIONS
OPERATING INSTRUCTIONS
COOKING HINTS
WARRANTY
3
4
6
8
9
13
14
CONTENTS

3
IMPORTANT SAFETY
INSTRUCTIONS
• Tucker GTR Barbecues and Roasting Hoods
are approved for outdoor use only.
• Keep this manual for future reference.
• Read all instructions carefully before
assembly and usage of the Barbecue with
the Roasting Hood on it.
• When not in use the Roasting Hood should be
left shut
• The recommended maximum cooking
temperature is 200 degrees Celsius.
• Clean your Barbecue and Roasting Hood
regularly; check the grease trays for excess
grease build up as damage by grease or fat
re is not covered by warranty.
• Always turn off the gas supply when you
nish Barbecuing.
• A canvas cover for this Barbecue will extend
its life and ensure trouble free operation.
• Attend an operating Barbecue at all times.
• Do not use this appliance indoors or in any
enclosed area.
• Do not spray aerosols in the vicinity of this
appliance while it is in operation.
• Do not place articles on or against this
appliance.
WARNING FOR
YOUR SAFETY
If you smell gas:
1. Shut off gas supply to appliance.
2. Extinguish any open ame.
3. Open lid or hood.
4. If odour continues, immediately call your
gas supplier or your Fire Department.
• Do not use or store ammable materials in or
near this appliance.
• Always leak test /check hose connections
after lling cylinders.
• Check cylinder condition for rust and that
the date stamp is current as every gas
cylinder in Australia must be pressure tested
every ten years.
• Never disconnect the barbecue whilst it is
running.
• Do not modify this appliance in any way.
• Do not allow children to operate the
barbecue.
• If a grease/fat re should arise, turn off the
gas supply immediately until extinguished.
• Always open the Lid or Roasting Hood before
lighting.
HAZARDOUS FIRE OR EXPLOSION MAY
RESULT IF INSTRUCTIONS ARE IGNORED.
It is the consumer’s responsibility to see that the
barbecue is properly assembled, installed and
taken care of. Failure to follow the instructions in
this manual could result in serious bodily injury
and /or property damage.

4
ROASTING HOOD ASSEMBLY
INSTRUCTIONS
• Roasting Hood body
• Handle
• Rear Cooking Shelf
• Roasting Rack
• Roasting Pan
• GTR BBQs can be installed with either a Flat
Hinged weather cover/ Lid or a Roasting
Hood.
• Make sure to read any separate instructions
on Assembly, Installation and Operation of
the GTR Barbecue and / or Wok Burner if
they are to be tted to the BBQ.
• If you have a Flat Hinged Weather Cover/
Lid, attach the Lid onto the back of the BBQ
with the Phillips head bolts provided.
Tools required for assembly – 10mm spanner
Check you have all the correct components as
listed below.
1. The Roasting Hood can now be tted.
Remove any packaging, cable ties and
components from inside the Hood. You
should have a Rear Cooking Shelf, Roasting
Rack, Drip Pan and Handle for the Roasting
Hood inside.
NOTE: The Roasting Hoods are packaged inside
the Cabinet Trolley for transport, they cannot be
removed unless the Doors of the Cabinet Trolley
are removed rst.
If you have chosen a Roasting Hood with
your GTR Barbecue and Cabinet Trolley you
may need to unhinge and remove the Doors
completely from either side of the Cabinet to
allow the removal of the Roasting Hood.
TOOLS NEEDED
ROASTING HOOD PARTS LIST 2. First attach the Handle onto the front of the
Roasting Hood with the nuts provided, you
will nd the nuts and washers attached to
the handle ends.
3. To t the Roasting Hood onto the BBQ, the
base of the Roasting Hood has 4 x locating
tags that t into corresponding slots on the
top of the BBQ.
4. Slide the angled tags on the front of
the base of the Roasting Hood into the
corresponding slots in the front of the BBQ.
You will need to angle the base of the
Roasting Hood down toward the front of the
BBQ so that it allows the tags to slot into the
slots in the BBQ easier.

5
NOTE: The Rear Cooking Shelf can be stored
away inside the back of the Roasting Hood if
not required.
5. Once the front tags are located into the
BBQ, the tags on the rear of the Roasting
Hood base will locate straight down into the
corresponding slots on the back of the BBQ
for secure attachment.
6. Now place the Rear Cooking Shelf into the
rear of the Roasting Hood onto the support
brackets.
7. The Roasting Rack and Pan are both used
when Roasting and can be stored away
inside the Cabinet Tolley until required.

6
INSTALLATION INSTRUCTIONS
& WARNINGS
BARBECUE INSTALLATION INSTRUCTIONS
INSTALLATION WARNINGS
READ THE IMPORTANT INFORMATION
ON THE FRONT OF THE BARBECUE.
CAUTION: ELECTRICAL WARNING
HAZARDOUS FIRE OR EXPLOSION MAY RESULT IF
INSTRUCTIONS ARE IGNORED.
If your barbecue incorporates an electrical
component, such as a rotisserie or light, then it
must be electrically grounded in accordance
with local codes.
The electric cord must be equipped with
a three-prong (grounding) plug for your
protection against shock hazard and should
be plugged directly into a properly grounded
three-prong receptacle. Do not cut or remove
the grounding prong from this plug.
Keep any electrical supply cord and fuel supply
hose away from any heated surfaces.
It is the consumer’s responsibility to see that the
barbecue and hood are properly assembled,
installed and taken care of.
Failure to follow instructions in this manual could
result in injury and/or property damage.
This barbecue is designed and approved for
outdoor use only.
Be mindful of the location of the installation of
the barbecue.
When using the roasting hood it is better that
the prevailing wind blows into the front of the
BBQ during cooking.
NOTE: Strong winds blowing into the back or
across the back of the hood whilst cooking with
the hood closed can cause overheating of the
BBQ. The Roasting Hood is designed so that Hot
air from inside the Roasting Hood is released
through the vent in the top of the Roasting
Hood when it is shut while roasting.
Strong winds can prevent the hot air escaping
out of this vent and may even in some cases
push the hot air down and out the front of the
base of the BBQ Fascia where the cold fresh air
is designed to enter the BBQ Body.
This choice of installation can cause the front of
the BBQ to get unusually hot and can damage
the ignition system and control valves.
The intended use of this barbecue is to be
installed onto a Tucker GTR Cabinet Trolley.
Be sensible about the location of your
barbecue.
The barbecue must be located on a solid and
level surface that can safely support the BBQ.
The Cabinet Trolley is tted with lockable
Stainless Steel Castors, when you have your BBQ
installed into position, the brakes on the Castors
must be locked to avoid the Cabinet Trolley
from moving during use.
Do not locate the barbecue near combustible
materials or surfaces, either above or around
the barbecue such as overhanging trees,
bushes or ammable liquids and the like.
Do not obstruct any of the air ventilation
openings on the front of the barbecue.
Do not use this appliance indoors or on marine
craft.
This appliance shall only be used in an above
ground, open-air situation with natural
ventilation, without stagnant areas where
gas leakage and products of combustion
are rapidly dispersed by wind and natural
convection.
Any enclosure in which the appliance is used
shall comply with one of the following:
• An enclosure with walls on all sides, but at
least one permanent opening at ground
level and no overhead cover. (gure 1)
• Within a partial enclosure that includes an
overhead enclosure and no more than two
walls. (gure 2 and 3)
• Within a partial enclosure that includes an
overhead cover and more than two walls,
the following shall apply. (gures 4 and 5)
• At least 25% of the total wall area is
completely open.
• At least 30% of the remaining wall area is
open and unrestricted.

7
DIAGRAMMATICAL REPRESENTATIONS OF
OUTDOOR AREAS
The following gures are diagrammatical
representations of outdoor areas. The areas
used in the gures below are examples – the
same principles apply to any other shaped
area.
FIGURE F1 – OUTDOOR AREA – EXAMPLE 1
FIGURE F2 – OUTDOOR AREA – EXAMPLE 2
FIGURE F3 – OUTDOOR AREA – EXAMPLE 3
Both ends open
• In the case of balconies, at least 20% of the
total of the side, back and front wall areas
shall be and remain open and unrestricted.
FIGURE 4 OUTDOOR AREA –EXAMPLE 4
FIGURE F5 – OUTDOOR AREA – EXAMPLE 5
Open side at least
25% of total wall area
30% or more in total
of the remaining wall
area is open and
unrestricted.
OPEN AT SIDE AT LEAST 25% OF TOTAL WALL AREA. 30% OR
MORE IN TOTAL OF THE REMAINING WALL AREA IS OPEN
AND UNRESTRICTED
OPEN SIDE AT LEAST 25% OF TOTAL WALL AREA. 30% OR
MORE IN TOTAL OF THE REMAINING WALL AREA IS OPEN
AND UNRESTRICTED.
Open side at least
25% of total wall area
30% or more in total
of the remaining wall
area is open and
unrestricted.

8
DIMENSIONS OF GTR ROASTING HOOD
(Measurements are in mm)
DIMENSIONS
Model (A) (B) (C) (D) (E) (F) (G) (H) (I)
GTR SS &
GTR +1
side
Hood
360 400 25 320 75 440 470 290 430
GTR3 &
GTR3 SS 495 535 25 320 75 440 470 290 430
GTR4 &
GTR4 SS 653 695 25 320 75 440 470 290 430
GTR5 &
GTR5 SS 810 857 25 320 75 440 470 290 430
GTR6 &
GTR6 SS 973 1017 25 320 75 440 470 290 430
D
F
H
E
G
I
D
A
B
C

9
OPERATING INSTRUCTIONS
ROASTING HOOD
ROAST RACK AND BAKING DISH
WARNING: If the barbecue burners should go
out due to strong winds, care should be taken.
Open the hood remove the barbecue drip tray
and wait 1 minute before re-lighting to let any
gas disperse all surfaces of the roasting hood
are hot; do not touch any part of the hood
except the handle.
NOTE:
• Cold and windy conditions can affect
roasting hood temperatures.
• Do not run the barbecues on high for long
periods unless you are cooking.
1. Always open the hood before lighting the
barbecue.
2. Use the burners on high to reach180OC -
200OC with the hood closed to pre heat the
barbecue.
3. Then turn the burners down a little to
maintain between 180OC - 200OC.
4. This will provide you with the optimum
temperature for roasting.
5. For barbecuing the temperature is much the
same although it depends on the way you
like to cook, slowly or fast.
6. The maximum recommended temperature
for roasting is 200OC.
• Cooking times can vary slighty depending
on weather conditions but generally cooking
times should be similar to regular oven times
at the same temperatures.
• Allow 1 hour per kilo of meat. A standard size
family roast will take approximately 2-3 hours,
(the slower the better).
• The water keeps the roast moist while
cooking and collects oil and marinade that
drips off the roasting meat.
• Without the water the tray will get very hot
and buckle and the fat will hiss and spit.
• The tray also protects the roast from direct
heat and are from oil dripping on the tiles
and burning the roast.
• Put your meat /sh/poultry to be roasted on
the roast rack.
• The ideal temperature to roast is 180OC-
200OC.
• Check your roast regularly and top up the
water in the baking dish as it will slowly
evaporate over time as it boils.
When your roast is half cooked, turn it over so as
to brown the roast evenly on both sides.
At this time you can put your vegetables up on
the rear-cooking shelf either in another baking
dish or just on the shelf to roast them above the
grill.
• The roasting rack is designed for roasting.
• Place the roast rack on the cooking surface.
• Place the baking dish lled with water under
the roast rack.

10
HANDY HINTS
REAR-COOKING SHELF
• The roast vegetables will require turning
every 10 minutes, as they can stick to the
baking dish.
• Only lightly baste the vegetables, as oil is
highly ammable.
• Use baking paper under the vegetables to
stop them sticking.
• You can make tasty gravy from the reduced
water in the baking dish with the addition of
a stock cube and a little our or cornour.
• The area above the open grill is as hot as the
area below.
• You can grill any meat up on the cooking
shelf.
• The chance of are up is decreased, as the
distance from the ceramic tiles is further
away.
• This makes it ideal for fatty meat like
sausages, lamb chops, pork chops, ribs,
chicken wings and legs, satays.
• The area above the solid hot plate is used for
keeping food hot that is already cooked or
as an area to warm buns or hold food from
cooking any faster than you require.
• The area above the open grill can also be
used when roasting vegetables or small
roasts or racks of lamb.
• The rear cooking shelf can be adjusted
forwards or backwards to give you better
stability when using large pans or big pieces
of meat and sh on it.
• When not required the rear cooking shelf
can also be stored away upright inside the
rear of the hood or when roasting or using
the rotisserie as the photo below shows.
The rear-cooking shelf is used for extra cooking
space inside the hood as well as a warming
space.

11
OPTIONAL ROTTISERIE ASSEMBLY
INSTRUCTIONS
The roasting hood must be fully assembled
before you install the rotisserie kit.
1. Open the hood.
2. Attach the rotisserie motor bracket to the
left hand side of the hood using the nuts and
bolts provided.
3. Slide the motor down over the bracket.
4. Skewer the meat over the rod and fasten
it rmly with the prongs supplied. Slide the
counter weight onto the skewer rod.
5. Push the rotisserie rod into the hole in the
motor and locate the other end into the slot
in the hood.
6. Make sure the meat is centered on the
skewer rod as slipping meat will strain the
motor and wear the gearing causing the
motor to fail.
7. The counter weight can help ease the strain
on the motor by positioning it opposite the
heavy side of the meat and adjusting the
weight.
A baking dish lled with water centred under
the meat will help avoid unnecessary are-ups.

12
NEW BBQ ‘BURNING IN’ PROCESS
PRE-HEATING THE BBQ BEFORE COOKING
Open the Roasting Hood for this process.
Brush a light coating of cooking oil over the
surface of the Cooking Grills and Solid Hot Plate.
Turn all Burners onto low and run the BBQ for 5
minutes.
Rub the entire surface of the Plate and Grills
again with a light coating of oil.
This will protect them from surface rust as
moisture in the air can cause surface rusting.
Replace the Flat Lid over the BBQ once it has
cooled down or if you have a Roasting Hood
close the Hood when you have nished oiling.
Once you have your BBQ alight, run it for 4-5
minutes on High to heat it up.
Apply a light coating of cooking oil over the
surface of the Plate and Grills to prevent food
from sticking to them.
We recommend you cook on the Medium
setting as you will have sufcient heat to Grill or
Roast.
If more heat is required, you can turn it up a little
if need be.
Flare up will occur if the cooking surface gets
too hot.
The recommended cooking temperature inside
the Roasting Hood is 180OC, never exceed
200OC with the Roasting Hood closed.

13
COOKING HINTS
CLEAN UP
Flare ups will occur if the cooking surface
gets too hot, the recommended cooking
temperature is 180 degrees with a Roasting
Hood closed.
If are ups occur turn the BBQ down and
the are will subside as the temperature will
decrease.
Always turn the meat with tongs, a fork will
pierce the sealed surface and let out the juices.
A few green gum leaves placed onto the
cooking grill or hot plate will give an Aussie bush
avour to your meat or vegetables.
Don’t slash the steaks to see if they are cooked,
press the steak on the top if its soft it is rare, if it
is slightly springy it’s medium rare, less springy
medium and when rm its well done.
If time permits marinade the meat for added
avour and tenderness. A basic wine, herb,
onion and garlic marinade is ne.
Fruit and vegetable accompaniments can be
cooked alongside meat or grilled in a Wok on
the Wok burner. Some are best wrapped in
foil to retain juices or you can place them on
skewers.
Go easy on sugar and honey in marinades and
basting sauces as very sweet mixtures tend to
scorch easily.
Grilling the perfect steak requires the grill to be
per-heated well so that the grill is hot, this whey
when you place your steak on the grill it will sear
the meat quickly on the outside of the steak, it is
best to turn the steaks over often, say every 20-
30 seconds as this will ensure the meats fat and
enzymes are evenly cooked, you may like to
cook your steaks until the blood shows through
them before you turn them but you will not be
able to cook rare or medium rare steaks this
way as they will start to overcook in this manner.
Place sausages on the grill or plate and turn
them frequently to brown the surface evenly.
Be careful not to use to much heat as sausages
contain a lot of fatty oil which will cause the
ame to are up burning the outside of the
sausage when cooked over the open grill.
Bacon, eggs, mushrooms, tomatoes and onions
are best cooked on the plate you can toast
buns or bread on the open grill.
Fish, can be cooked on the plate with our and
herbs or wrapped in foil to seal in the juices on
the grill. Cooking times for sh vary as to the
type and thickness of them generally times are
a lot shorter than meat.
1. Check the grease collection tray after each
use and wash it in hot soapy water in the
sink.
2. Scrape the plate and grills clean and wipe
them over with a coat of cooking oil.
3. Wipe the barbecue over with a soft cloth to
remove grease and marks.
4. Replace the lid or close the hood to protect
the cooking surfaces from the weather when
storing the BBQ away.
5. Check the gas supply is turned off.
6. Cover the barbecue with a Tucker barbecue
cover (optional extra recommended) when
the barbecue is cooled down.

14
WARRANTY
TUCKER GTR ROASTING HOOD WARRANTY
WARRANTY PERIOD
NOT COVERED
CONDITIONS OF THIS WARRANTY
Stainless steel body
Rear Cooking Shelf
All other parts
10 years
5 years
1 year
The warranty does not cover the purchaser or
any other person for damage malfunction or
loss due to the following:
• Lack of maintenance, abuse, neglect,
misuse, accident, or improper installation of
this appliance.
• Scratches, dents or discoloration caused by
heat, abrasive or chemical cleaners.
• Damage due to grease or fat res.
• Surface rust.
• Cleaning and normal wear and tear.
• Unauthorized repairs during the warranty
period.
• Removal or re-installation costs.
SERVICE CALLS OF THE ABOVE NATURE ARE
CHARGEABLE
1. The appliance is delivered to TUCKER
AUSTRALIA distributors service department
or authorized service agent and freight
charges both ways is to be paid by the
owner. No liability is accepted for loss or
damage during transit.
2. The appliance is installed by a qualied
person and operated and maintained in
accordance with the instructions supplied.
Repairs and service must be carried out by
an authorized person.
3. Installation must conform to the standards
laid down by the local codes or, in the
absence of local codes, with AGA code
AG:601 AS:5601:2002
4. No alterations or repairs are to be carried
out without obtaining the distributors prior
consent. Such repair or any replacement
does not extend the warranty period.
5. Proof of purchase together with this warranty
must be provided to verify purchase date
and establish the warranty period. Only the
original purchaser is covered under this war-
ranty.
6. Where this warranty is inconsistent with any
state laws, the rights of the purchaser shall
prevail.
7. Parts installed from other manufacturer’s
products will nullify this warranty.
FOR YOUR RECORDS
Model:
Serial Number:
Retailer:
Purchase Date:
Gas type:
TUCKER AUSTRALIA PTY LTD.
138 Silverwater Road
Silverwater NSW 2128 AUSTRALIA.
PHONE: (+612) 9748 8368
FAX: (+612) 9748 8138
WEB SITE: www.tuckerbbq.com.au
EMAIL: [email protected]


TUCKER AUSTRALIA PTY LTD.
138 Silverwater Road
Silverwater NSW 2128 AUSTRALIA.
PHONE: (+612) 9748 8368
FAX: (+612) 9748 8138
WEB SITE: www.tuckerbbq.com.au
EMAIL: [email protected]
This manual suits for next models
11
Table of contents
Other Tucker Grill manuals
Popular Grill manuals by other brands

GRILLS-MAX
GRILLS-MAX 45SCFT Installation and operation instructions

North
North T10 Use and maintenance instructions

THOMSON
THOMSON THPL935 user manual

Sunshine
Sunshine Legend 4500D Assembly & operation manual

Patton
Patton C2 Charcoal Chef Operating and assembly instructions

Weber
Weber 77576 owner's guide

HEATSTRIP
HEATSTRIP Crossray TCS4FL operating instructions

Holland Grill
Holland Grill BH421SG-4 Tradition LS instruction manual

Napoleon
Napoleon Outdoor Modular Island series Assembly instructions

Cadac
Cadac 98250-31A User instructions

Napoleon
Napoleon ROGUE 425 manual

Blooma
Blooma Barker 450 Assembly instructions