1 2 3 4
5
6 7 8 9
SUPPLIED BY
0800 917 7533
www.tufferman.co.uk
Please recycle your packaging responsibly.
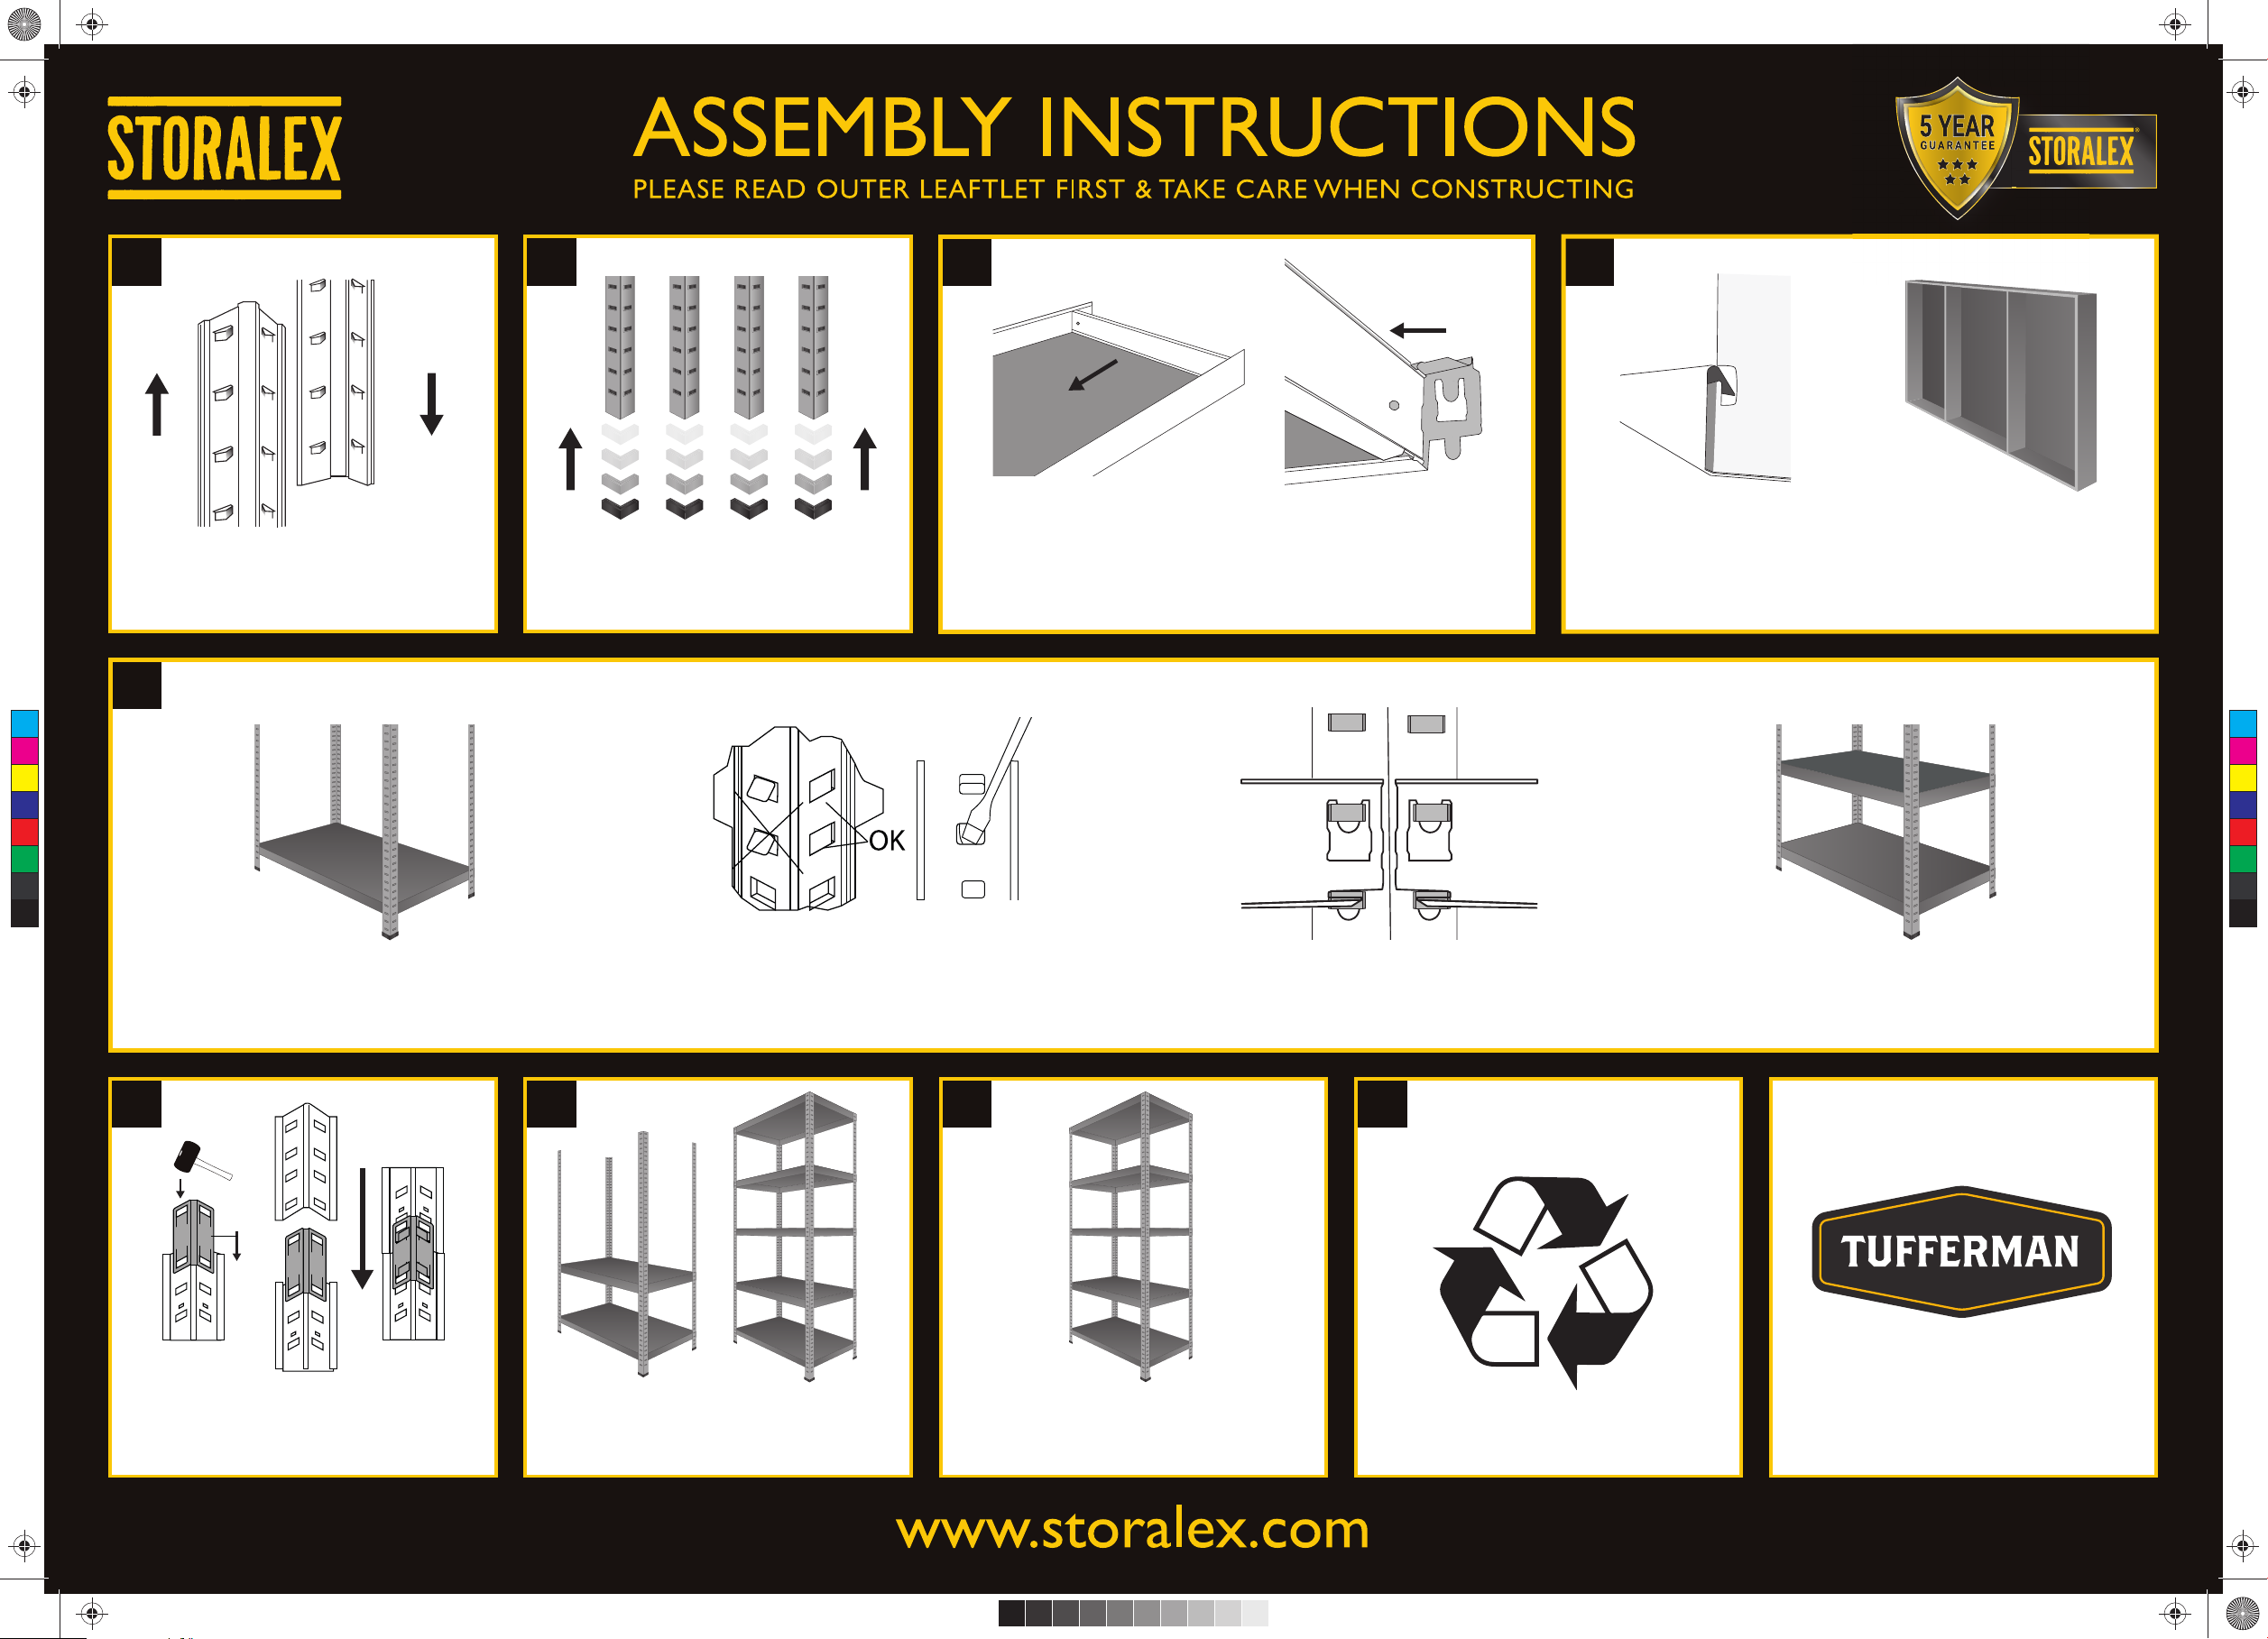
One final check that there aren’t any tabs
sticking out (see step 5) and the unit
is ready to use.
Add the remainder of the shelves to the unit.Insert the connectors into the uprights making
sure the tabs go correctly into the slots.
With the tabs correctly positioned tap them
gently with a mallet until they are firmly in place.
Once you’ve built up to two levels, pictured, it’s time to add the next
upright sections. Important to note that you can’t add a shelf right at
the top of the upright as that’s where the upright connectors join
When inserting the tabs into the slots you may
need a screwdriver to guide them into place.
Now insert the shelves into the uprights
by inserting the tabs into the slots.
Fit the plastic feet to each of the 4 uprights. you
will have four spare feet if it is used as a single bay
as this product can also make 2 workbenches.
This is the side profile once the
support beam has started to be
inserted into the metal shelf.
Now you have inserted all of the
support beams into the shelves you
are ready to start attaching the
uprights.
Now take both support beams and slide into the underside of each
metal shelf (2 supports per shelf). Centre the support beams
and repeat for the remaining shelves.
The arrows on the uprights must
be facing upwards
UP DOWN
Please read all illustrations in this stage before starting.
C
M
Y
CM
MY
CY
CMY
K
SM0365_TUF_DUAL_SUPPORT_SHELVING_INSTRUCTIONS.pdf 2 04/11/2019 09:30


