TULA HEALTH THG001 User manual

Part no.
311-4206XXX-XXX
Product name
Tula Health THG001
Spec
L148*W105mm/模造紙80P/4C/共48 頁/
騎馬釘
Writer
Peter Derrick
Color
◆
K: 100

THG001
Blood Glucose Monitoring System
Owner’s Manual


Dear THG001 System Owner:
Thank you for purchasing the Tula Health THG001 Blood Glucose
Monitoring System. This manual provides important information to
help you use the system properly. Before using this product, please
read the following instructions thoroughly and attentively.
Regular monitoring of your blood glucose levels can help you and
your doctor gain better control of your diabetes. You can use the
Tula Health THG001 to easily monitor your blood glucose levels by
yourself anywhere and anytime.
If you have other questions regarding this product, please contact the
local customer service at 1-855-352-7884 (24 hours a day, 7 days a
week) or place of purchase.
Intended Use
The Tula Health THG001 Blood Glucose Monitoring System consists of
the Tula Health THG001 meter, Tula Health THG001 test strips, and
the Tula Health THG001 mobile application as the display component
of the Tula Health THG001 Blood Glucose Monitoring System. The
Tula Health THG001 Blood Glucose Monitoring System is intended to
be used for the quantitative measurement of glucose (sugar) in fresh
capillary whole blood from the finger. This blood glucose monitoring
system is intended to be used by a single person and should not be
shared. The Tula Health THG001 Blood Glucose Monitoring System is
intended for self-testing outside the body (in vitro diagnostic use) by
people with diabetes at home as an aid to monitor the effectiveness of
diabetes control. This system should not be used for the diagnosis of or
screening for diabetes, nor for use on neonates.
Version 1.0
311-4206XXX-XXX

IMPORTANT SAFETY PRECAUTIONS
READ BEFORE USE
§ The meter and lancing device are for single patient use. Do
not share them with anyone including other family members!
Do not use on multiple patients!
§ All parts of the kit are considered biohazardous and can
potentially transmit infectious diseases, even after you have
performed cleaning and disinfection.
For more information, please visit the following:
1.
“FDA Public Health Notification: Use of Fingerstick Devices
on More than One Person Poses Risk for Transmitting
Bloodborne Pathogens: Initial Communication” (2010)
http://wayback.archive-it.org/7993/20170111013014/http://www.fda.gov/MedicalDevices/Safety/AlertsandNotices/ucm224025.htm
2.
“CDC Clinical Reminder: Use of Fingerstick Devices on More
than One Person Poses Risk for Transmitting Bloodborne
Pathogens” (2010)
http://www.cdc.gov/injectionsafety/Fingerstick-DevicesBGM.html
1. Use this device ONLY for the intended use described in this
manual.
2. Do NOT use accessories which are not specified by the
manufacturer.
3. Do NOT use the device if it is not working properly or if it is
damaged.
4. Do NOT, under any circumstances, use the device on
neonates or infants.
5. This device does NOT serve as a cure for any symptoms or
diseases. The data measured is for reference only.

6. Before using this device to test blood glucose, read all
instructions thoroughly. Carry out all the quality control checks
as directed.
7. Keep the device and testing equipment away from young
children. Small items such as the test strips, lancets and vial
caps are choking hazards.
8. Use this device in a dry environment. Be aware of the
presence of synthetic materials, such as clothing, carpets and
so on, which might give rise to damaging static discharges that
may produce incorrect results.
9. Do NOT use this instrument in close proximity to sources of
strong electromagnetic radiation (ex: an alternator) as these
may interfere with the accuracy.
10. This instrument is designed for handheld or remote use only. It
is NOT a cell phone. Do NOT use this device held against the
ear or head or within in 10mm distance.
11. Proper maintenance and periodic control solution tests are
essential to the durability of your device. If you are concerned
about its accuracy, please contact Tula Health at
855-352-7884 or place of purchase for help.
KEEP THESE INSTRUCTIONS IN A SAFE PLACE

TABLE OF CONTENTS
BEFORE YOU BEGIN ................................................................................................... 1
Important Information ......................................................................... 1
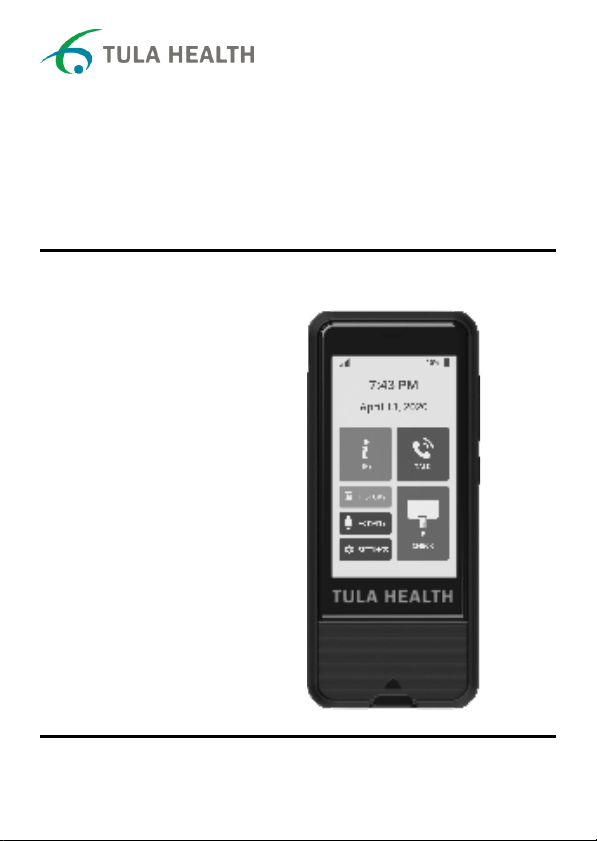
Meter Overview .................................................................................. 2
Contents of System ............................................................................ 3
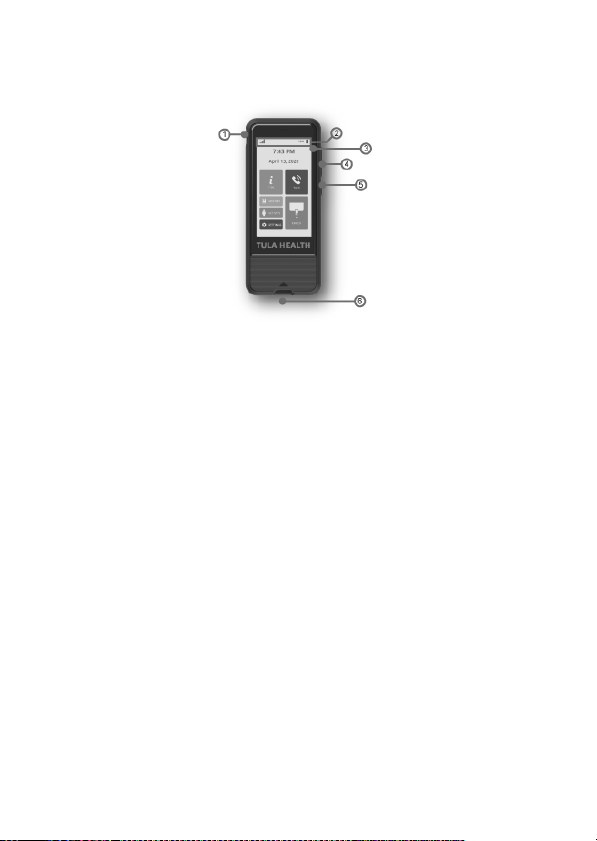
Display Screen ................................................................................... 4
Test Strip ............................................................................................ 5
SETTING THE METER .................................................................................................. 6
Airplane Mode .................................................................................... 7
Units ................................................................................................... 7
Volume ............................................................................................... 8
Reminders .......................................................................................... 8
Language ........................................................................................... 8
Control Solution .................................................................................. 8
Find watch .......................................................................................... 9
Brightness .......................................................................................... 9
About .................................................................................................. 9
Calling .............................................................................................. 10
QUALITY CONTROL TESTING .................................................................................. 12
When Should the Control Solution Test be Performed? .................. 12
Performing a Control Solution Check ............................................... 13
TESTING WITH BLOOD SAMPLE .............................................................................. 15
Preparing the Lancing Device for Blood Testing .............................. 15
Preparing the Puncture Site ............................................................. 15
Performing a Blood Test .................................................................. 17
METER HISTORY ........................................................................................................ 20
Reviewing Test Results .................................................................... 20
MAINTENANCE ........................................................................................................... 21
Battery .............................................................................................. 21
Caring for Your Meter ....................................................................... 22
Caring for Your Test Strips ............................................................... 25
Cleaning Your Lancing Device ......................................................... 26
Important Control Solution Information ............................................ 26
SYSTEM TROUBLESHOOTING ................................................................................. 27
Error Messages ................................................................................ 27
Troubleshooting ............................................................................... 29
DETAILED INFORMATION ......................................................................................... 30
Reference Values ............................................................................. 30
Comparing Meter and Laboratory Results ....................................... 30
SPECIFICATIONS ....................................................................................................... 32


1
LIMITATION
- Not for the screening or diagnosis of diabetes mellitus.
- Severe dehydration and excessive water loss may cause
inaccurate readings.
- Do NOT use the Tula Health THG001 Blood Glucose Monitoring
System on severely hypotensive individuals or patients in shock.
- Do NOT use the Tula Health THG001 Blood Glucose Monitoring
System on neonates, patients who are critically ill or patients in
hyperglycemic-hyperosmolar state, with or without ketosis.
- Use only fresh capillary whole blood from the fingertip.
- If your blood glucose results are lower or higher than expected,
and you do not have any symptoms of illness, first repeat the test.
If you have symptoms or continue to get results which are higher
or lower than expected, follow the treatment advice of your
healthcare professional.
BEFORE YOU BEGIN
Test Principle
Your system measures the amount of sugar (glucose) in whole blood.
The glucose testing is based on the measurement of electrical current
generated by the reaction of glucose with the reagent of the strip. The
meter measures the current, calculates the blood glucose level, and
displays the result. The strength of the current produced by the reaction
depends on the amount of glucose in the blood sample.

2
Meter Overview
1.
USB Port (only for charging)
For battery recharge
2.
Cellular Connection and Battery Level Indicator
3.
Display Window and Touchscreen
The touchscreen allows users to interact with what is displayed
directly by the finger.
4.
Volume Button
5.
Power Button
Press to turn on/off the meter.
6.
Test Strip Slot

3
Contents of System
Your new Tula Health THG001 system kit includes:
1. Meter
2. Owner’s Manual
3. Protective Wallet
4. Micro-USB cable
5. Adapter
NOTE:
If any items are missing from your kit or opened prior to use, please contact
Tula Health at 855-352-7884 for assistance.

4
Display Screen
The display window and touchscreen allows you to interact with what
is displayed. The meter features 3 main functions: measuring/check,
memory/history and setting, which are shown on the main page.
Other icons on the Main Page are introduced as below:
1. Cellular Signal
2. Battery Capacity
3. Time
4. Date
5. Call/Talk
6. Measuring/Check
7. Settings
8. Activity
9. History
10. Tips

5
Test Strip
1. Absorbent Hole
Apply a drop of blood here. The blood
will be automatically absorbed
2. Confirmation Window
This is where you confirm if enough
blood has been applied to the
absorbent opening in the test strip.
3. Test Strip Handle
Hold this part to insert the test strip into the slot.
4. Contact Bars
Insert this end of the test strip into the meter. Push it in firmly until it will go
no further.
ATTENTION:
! The front side of test strip should face up when inserting test strip.
! Test results might be wrong if the contact bar is not fully inserted into the
test slot.
NOTE:
The Tula Health THG001 monitor should only be used with Tula Health
THG001 Test Strips. Using other test strips with this meter can produce
inaccurate results.

6
SETTING THE METER
Before using your meter for the first time, you should check and
update these settings. The touchscreen allows users to
communicate with the meter by simply tapping on the screen
with fingers.
1. Start with the system off.
Press the power button for 1 second to activate the meter.
The meter displays the Tula Health logo then a welcome
page. Continuing past the welcome page, at the main page,
there are 6 features: (check or measuring), (tips),
(talk or call), (history), (activity) and (setting),
on the display.
2. Tap on , and there are nine sections: airplane mode, units,
volume, reminders, language, control readings, brightness, find
moko and about.

7
Airplane Mode
In the airplane mode, the meter’s cellular telephony and transmitting
functions will be terminated.
1. Tap on to enter its setting page.
2. Tap on the preferred mode (on or off) and then tap
"OK" to save and exit.
- airplane mode Off: activate the meter's
telecommunication
- airplane mode On: apply as necessary
Units
1. Tap on to set the measuring unit: mg/dL or
mmol/L.
2. Tap on the preferred one and then to save
and exit.
NOTE:
The airplane mode allows users to measure their blood glucose values in flight
or in places where radio-frequency signal transmission must be suspended.
The measuring result will be saved in the memory, and later be transmitted to
the server when the meter's telecommunication function is resumed.

8
Volume
1. Tap to set up the volume.
2. Slide the bar up and down to adjust the volume.
3. Tap on to save and exit.
Reminders
1. Tap on to set the reminder.
2. Tap on to create a new reminder.
3. Select the appropriate category for
the reminder.
4. Select the appropriate time for the
reminder.
4. Select whether to repeat the reminder and
then to save and exit.
Language
1. Tap on to set the displayed
language. The default language is
English.
2. Tap on the preferred language bar.
3. Tap to save and exit.
Control Readings
1. Tap on to view and test control
solution (see Quality Control
Testing).

9
2. Tap on “<” to exit.
Find MOKO
1. Tap on to find the biocheck.
2. Tap on “Find My Watch”.
3. The watch will vibrate. Tap to exit.
Brightness
1. Tap on to set the brightness.
2. Slide the bar to adjust the brightness.
3. Tap to save and exit.
About
1. Tap on to view device
info.
2. Tap to exit.
Congratulations! You have completed all settings!
NOTE:
These parameters can ONLY be changed in the setting mode.

10
Calling
Tula Health THG001 Blood Glucose Monitoring System is equipped
with cellular service that allows users to call Tula’s service center
directly, receive calls, or stream data to the server. Calling feature is
activated under the following conditions.
1. After every blood glucose measurement:
To transmit the test result to the server. Tula will contact you if the
uploaded result is atypical.
2. Talk:
Whenever the button on the home screen is pressed.
Appears when a call comes in.
Tap on to take or to reject. The
following display will be shown in the calling page
:
MESSAGE
WHAT IT MEANS
Press the green button to talk with the service center.
Appears when a call is connected.
Tap on the red button to end the call.
Appears when a call comes in.
Tap on the green button to take or the red button to
reject.
Tap on “-” or “+” to adjust the volume.

11
NOTE:
! The phone number of the service center is programmed prior to your receipt
of the meter. If not, please contact Tula Health at 855-352-7884 for
assistance.
! The connection quality may vary from each service provider.
! The calling and data transmission features are disabled when the meter is
set in the airplane mode.

12
QUALITY CONTROL TESTING
When Should the Control Solution Test be
Performed?
l if it is mandatory following the local regulations in your country,
l if you suspect the meter or test strips are not working properly,
l if your blood glucose test results are not consistent with how you
feel,
l if you think the results are not accurate,
l to practice the testing process, or
l if you have dropped or think you may have damaged the meter.
Test strips, control solutions, lancing device, or sterile lancets are
optional and may not come with the kit (please check the contents on
your product box). They can be purchased separately. Please make
sure you have those items needed for a blood glucose test beforehand.
Table of contents