Tunstall Universal Sensor User manual

t: 01977 661234
f: 01977 660562
e: enquiries@tunstall.co.uk
w: tunstall.co.uk
Version: V2.7
Universal ensor
Installation Guide
Insert a brief description here, to
provide the reader with a brief
summary about the product.

2
Contents
1.
Features and Introduction................................................................................... 3
Your Universal ensor ....................................................................................................3
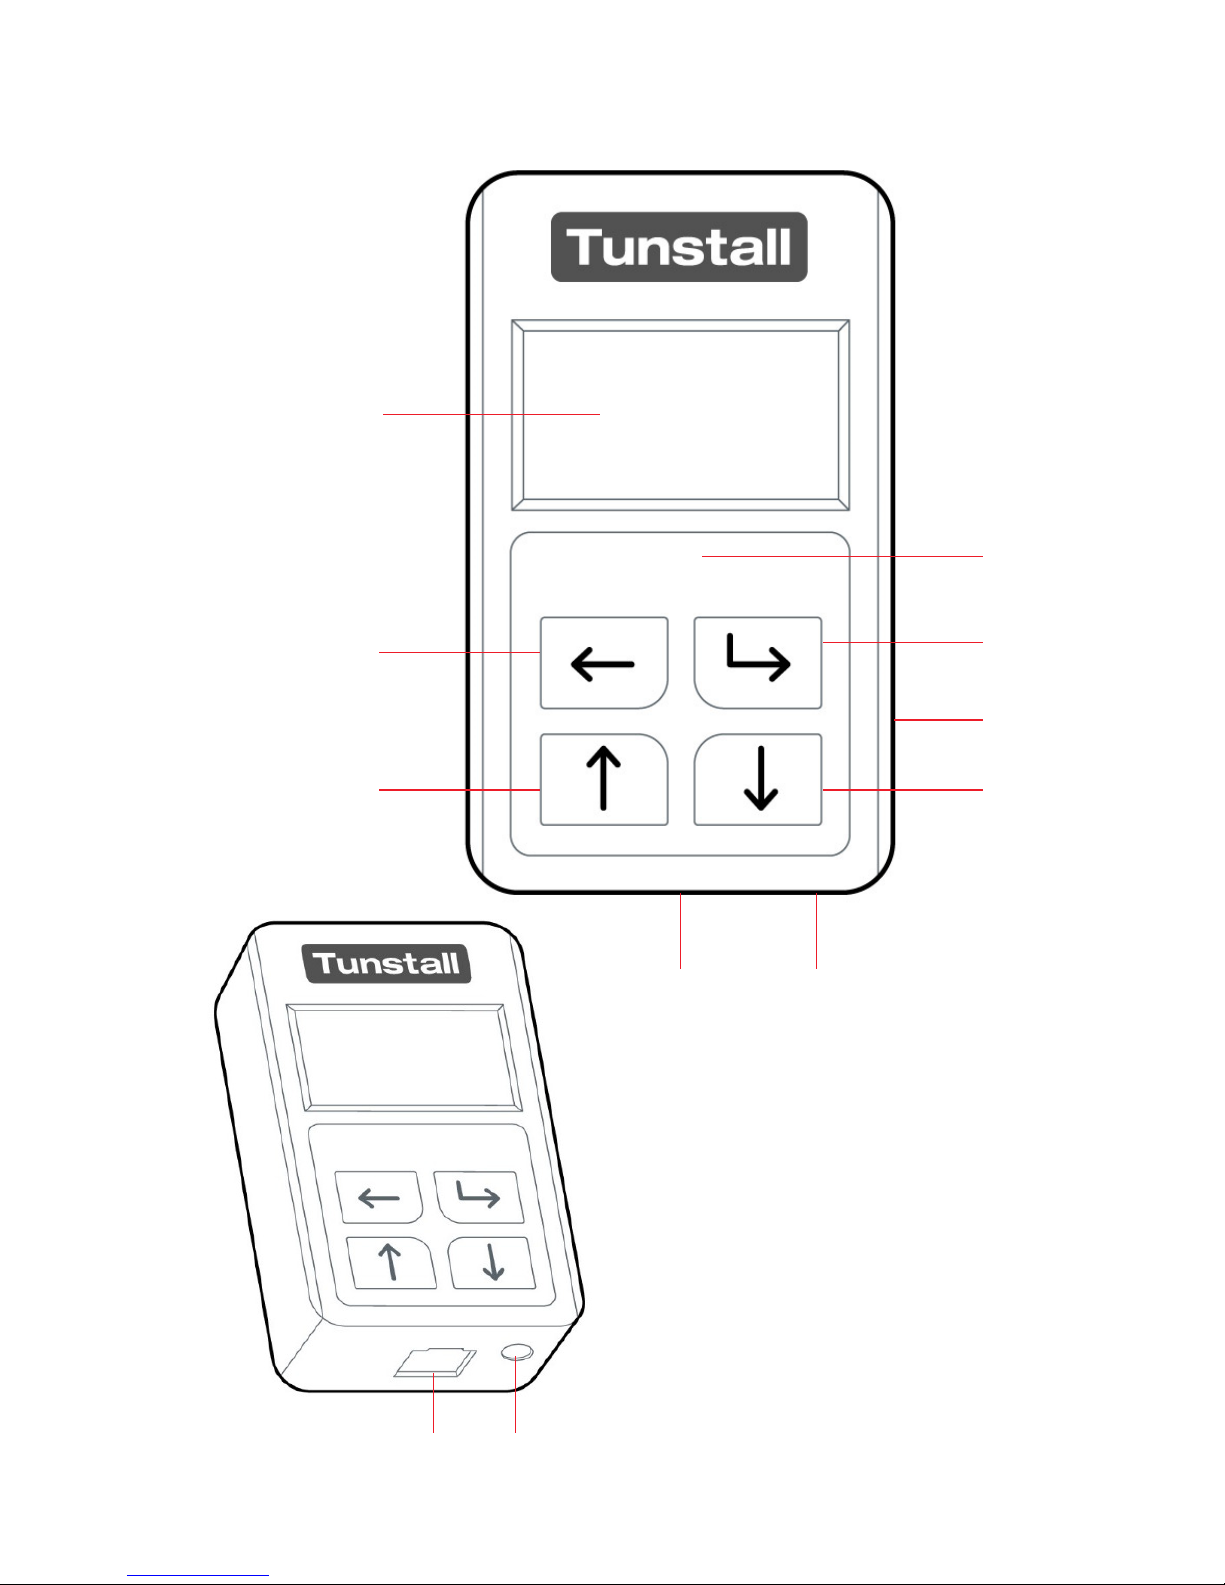
Universal ensor Illustration ........................................................................................4
2.
Getting Started ................................................................................................... 6
What’s in the box? .........................................................................................................6
How to install .................................................................................................................6
Unlocking the Universal ensor .....................................................................................7
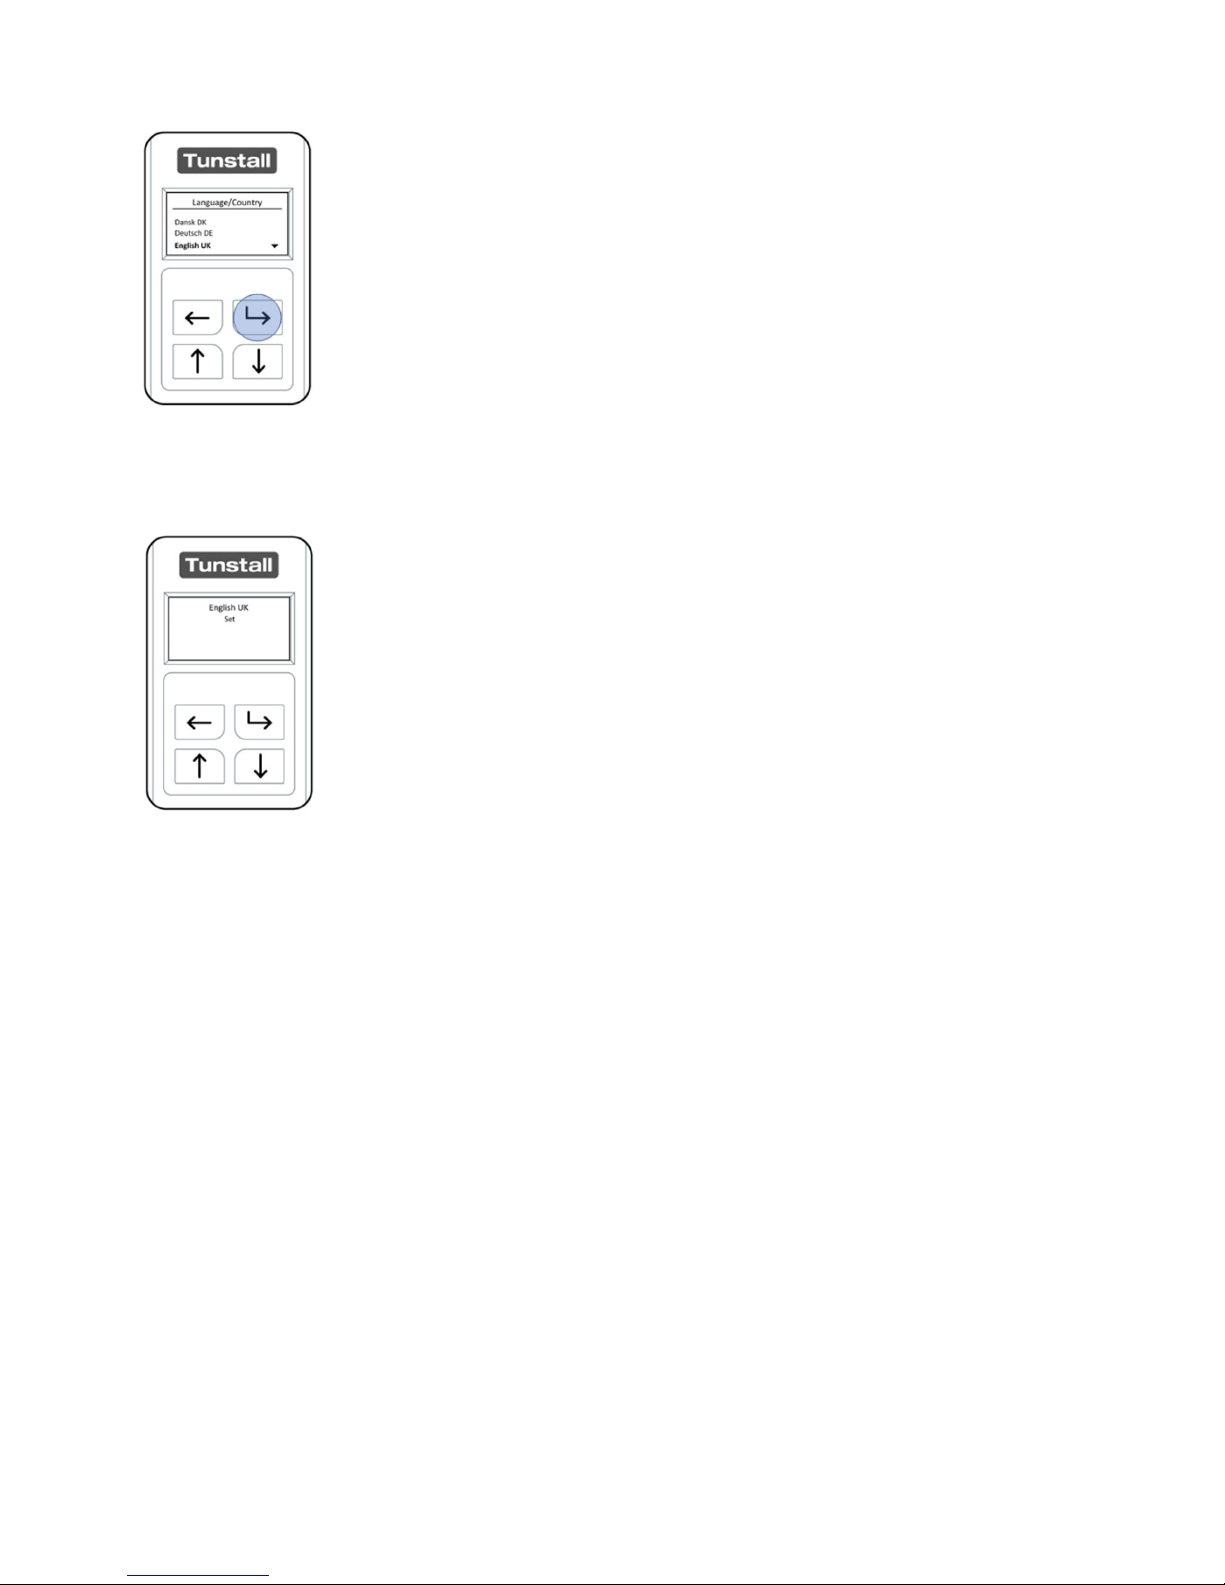
Language election ........................................................................................................8
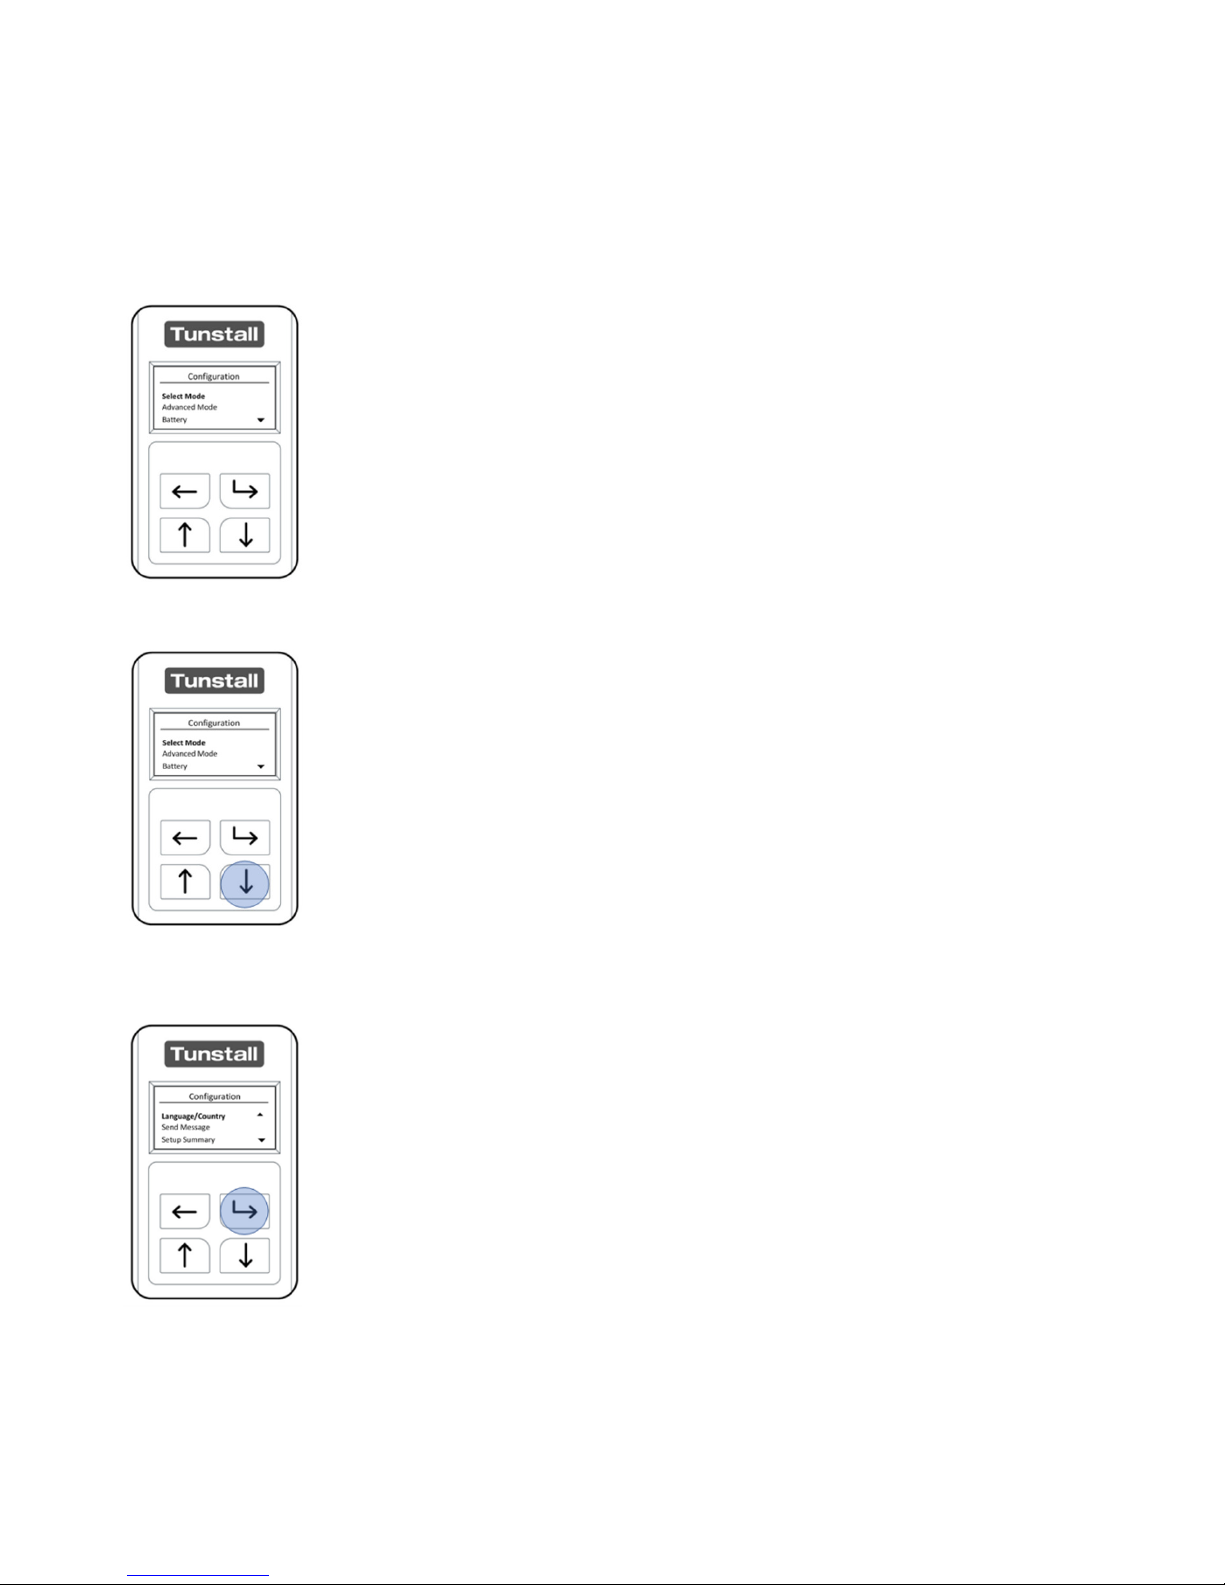
Configuration Menu .....................................................................................................10
elect Mode .................................................................................................................12
Advanced Mode ...........................................................................................................15
Passage Time ................................................................................................................16
Monitoring Deactivated ...............................................................................................17
Battery .........................................................................................................................19
ALB – Auto Low Battery ...............................................................................................20
AP – Auto Presence ......................................................................................................20
tatus – Battery ............................................................................................................20
end Message ..............................................................................................................21
etup ummary ............................................................................................................23
About ...........................................................................................................................24
Virtual Bed ...................................................................................................................25
Virtual Bed – attaching a pad. ......................................................................................26
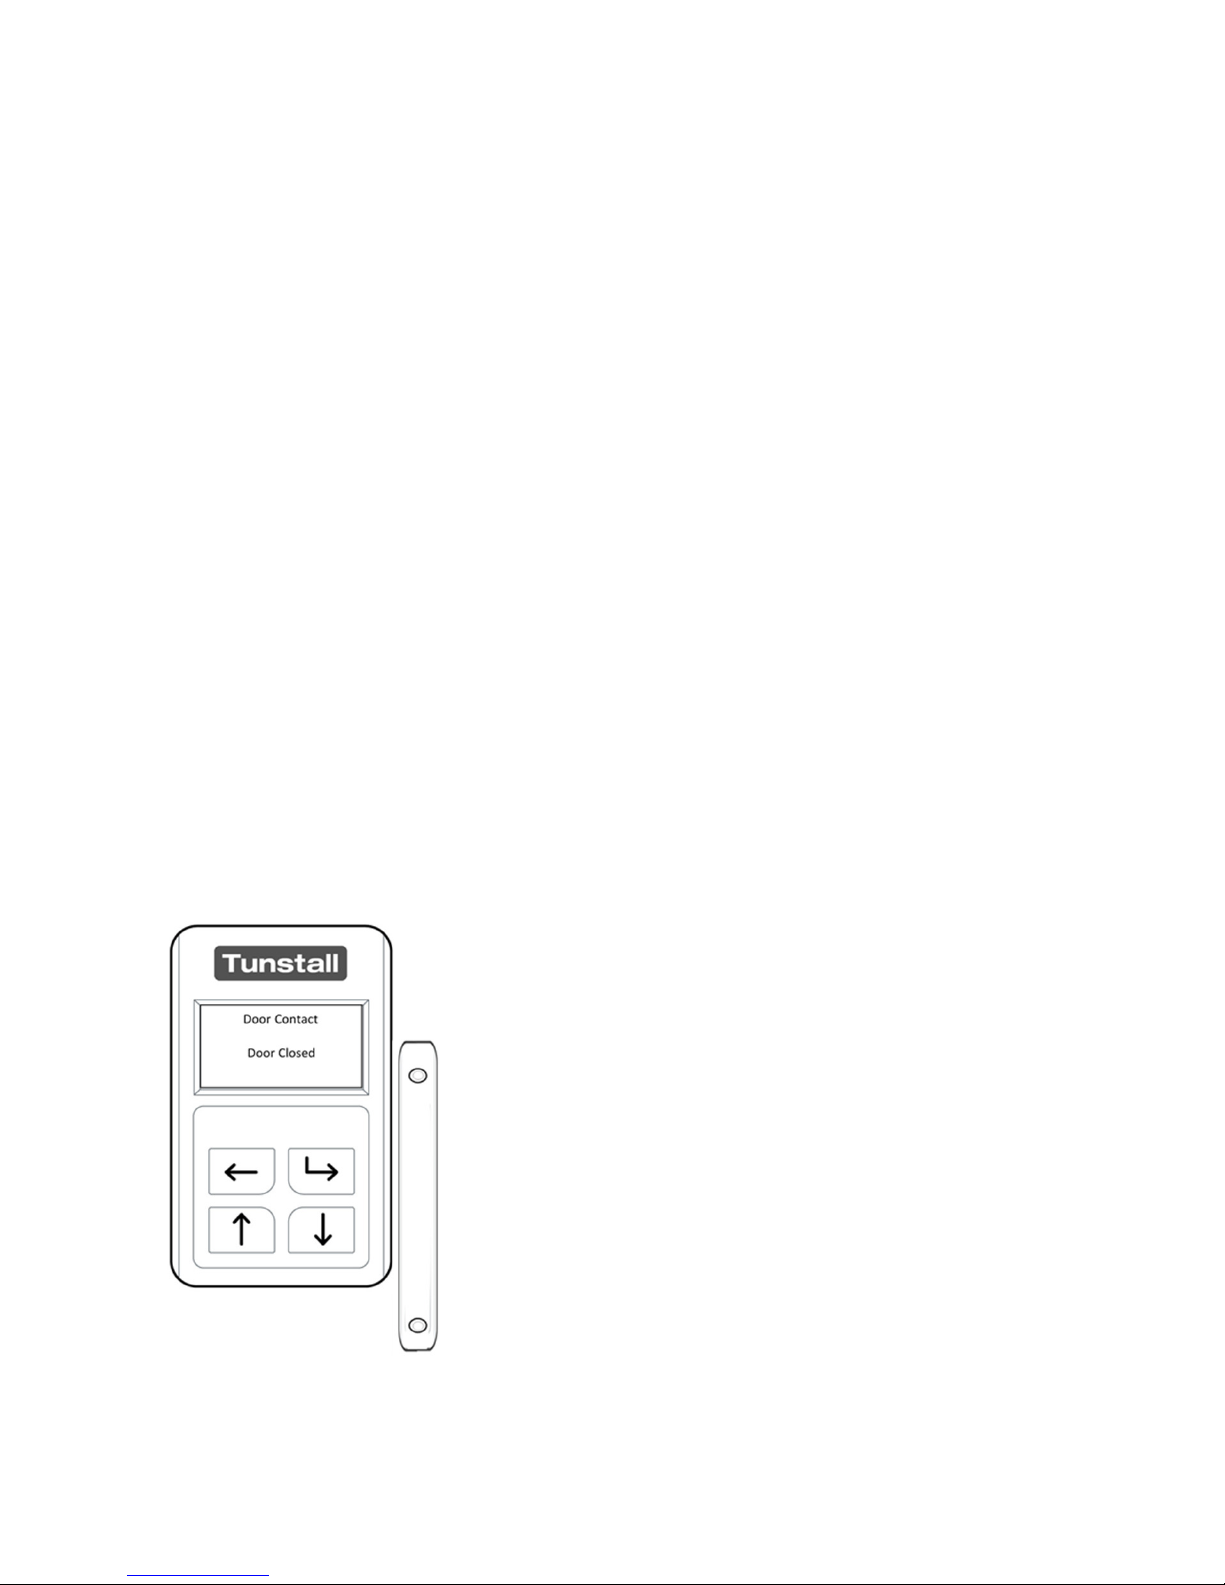
Door Contact ................................................................................................................27
Enuresis ensor ............................................................................................................28
Enuresis ensor – attaching the Moisture ensing Mat ..............................................29
Pendant ........................................................................................................................30
Epilepsy ensor ............................................................................................................31
CO Detector .................................................................................................................32
Door Guard ..................................................................................................................33
Gas Detector ................................................................................................................34
moke Detector ...........................................................................................................35
Bed Occupancy ensor .................................................................................................36
How to reset the Universal ensor ..............................................................................40
3.
How to program to the Tunstall Home Unit ...................................................... 41
4.
otes and Warnings .......................................................................................... 42
ervice Information......................................................................................................42
Changing the battery ...................................................................................................42
5.
Compliance and Standards ................................................................................ 43
Declaration of conformity ............................................................................................43

3
1. Features and Introduction
Your Universal ensor
The Universal ensor works as an interface between wired electrical devices and
Tunstall telecare enabled systems. These may include an existing intruder alarm
system, natural gas detector, carbon monoxide detector or pressure mat.
Programmed using the built-in buttons and LCD screen the Universal ensor is easily
set to send a message to the home unit identifying which type of device it is linked
to. When the attached device is triggered the Universal ensor sends the appropriate
message, providing the operator at the response centre with sufficient information
to respond accordingly.
The Universal ensor can also receive inputs from normally open or normally-closed
contacts enabling it to be connected to a wide range of devices.
Responsibility for suitability and relevant standards compliance lies with the ervice
Provider.

4
Universal ensor Illustration
9
1
8
6
5
4
3
2
7
5
4

5
Illustration Legend
Universal Sensor
1 LCD creen
2 Back Button
3 Up Button
4 RJ11 Input
5 3.5mm Input
6 Down Button
7 Reed witch
8 elect Button
9 Red LED

6
2. Getting Started
What’s in the box?
1No. Universal ensor
2No. Door Contacts
4No. Door Contact screws
2No. Velcro Pads
1No. RJ11 Cable
How to install
The Universal ensor should be installed in a clean, dry environment and for
optimum radio performance should be mounted away from metallic surfaces.
The Universal ensor can be fastened to the wall etc. by a variety of methods –
integral keyhole slots, sticky pads, Velcro etc. The installer should determine the
most appropriate method.
When installed using a Door Contact it is important to
line the top screw hole with the bottom of the
Universal ensor screen; this ensures that the built-in
reed switch and magnetic contact are correctly
aligned.

7
Unlocking the Universal ensor
To unlock the Universal ensor:
Press and hold the “ elect Button”
Whilst still pressing the ‘ elect Button’, press and hold the “Up
Button” until ‘Change ettings’ appears on the display.
Press the “ elect Button” to confirm you want to unlock the sensor.
The Universal ensor is now unlocked and can now be configured.

8
Language election
The Default language for a new Universal ensor is English (UK). You can change the
language setting on the Universal ensor if it is incorrect or if you have accidentally
changed the language to a language you do not understand.
After unlocking the Universal ensor, the “Configuration Menu will
be displayed.
elect ‘Language/Country’ from the ‘Configuration Menu’ by
pressing the “Down Button” 3 times, once highlighted press the
“ elect Button”.
The “Language/Country” menu is the first option on the second
screen page of the “Configuration Menu”. Open this menu by
pressing the “ elect Button”.

9
The “Language/Country” Menu displays a list of available
languages. Navigate this list using the “Up Button” and the “Down
Button” and use the “ elect Button” to choose the new language.
The Universal ensor will confirm on screen that the newly selected
language has been set. Once completed the Universal ensor will
return to “Configuration Menu”.

10
Configuration Menu
The “Configuration Menu” is accessed after unlocking the Universal Senor and
contains a list of the options used to set up the Universal ensor.
Select Mode: Used to select which
predefined sensor type the
Universal ensor should
operate as.
Advanced Mode: Changes can be made here to
the Input type (RJ11 or
3.5mm) and the contact
channel (Normally Open or
Normally Closed).
Battery: Used to configure AP and ALB
and displays the status of the
user changeable battery.
Language: Displays a list of selectable
display languages which the
Universal ensor can operate
in.
Send Message: ends a test radio message
from the Universal ensor.
This will raise an alarm on the
Tunstall device. Exits back to
the Configuration Menu.
Setup Summary: Displays the current
configuration of the Universal
enor.
About: Displays the current installed
firmware.
Exit: Exits the Configuration Menu
and puts the Universal ensor
into its configured mode.

11

12
elect Mode
“ elect Mode” is used to select which sensor type the Universal ensor should
operate as.
After unlocking the Universal ensor, the “Configuration Menu will
be displayed.
The “ elect Mode” menu will be selected when first opening the
“Configuration Menu” press the “ elect Button” to enter “ elect
Mode”

13
The Universal ensor can be configured to transmit to a Tunstall Telecare enabled
solution as the following device types:
Virtual Bed The Virtual Bed sensor sends an event call if a client
has got in or out of bed (or a chair).
Door Contact Normally used with the magnetic contact and the
built in Reed witch; this simulates the event call
when the door is opened and closed.
Enuresis Sensor When connected to an appropriate Enuresis ensor
(available separately) if moisture is detected the
Universal ensor will communicate with the Tunstall
Lifeline or Telecare Overlay ystem to enable care to
be delivered quickly.
Pendant The Universal ensor will simulate the call from a
personal alarm trigger. This is used to enable third
party devices to send a personal trigger alert to the
Tunstall Lifeline or Telecare Overlay system.
Epilepsy Sensor When connected to an appropriate Epilepsy ensor
(available separately) once movement is detected
the Universal ensor will communicate with the
Tunstall Lifeline or Telecare Overlay ystem to
enable care to be delivered quickly.
CO Detector The Universal ensor can be configured to work with
3
rd
party CO Detectors meaning when Carbon
Monoxide is detected the Universal ensor will
communicate with the Tunstall Lifeline or Telecare
Overlay ystem to enable care to be delivered
quickly.
Door Guard Like the Door Contact mode, but an alarm is raised
when the door is opened. A carer can use the built-in
pause monitoring facility to enter and exit the
property without raising an alarm call.
Gas Detector The Universal ensor can be configured to work with
3
rd
party Gas Detectors meaning when Natural Gas is
detected the Universal ensor will communicate
with the Tunstall Lifeline or Telecare Overlay ystem
to enable care to be delivered quickly.
Smoke Detector The Universal ensor can be configured to work with
3
rd
party moke Detectors meaning when moke
with the dwelling is detected the Universal ensor
will communicate with the Tunstall Lifeline or

14
Telecare Overlay ystem to enable care to be
delivered quickly.
Bed Occupancy Sensor The bed/chair absence sensor generates an alarm if
a client has got out of bed (or chair) during a
monitoring time window (e.g.
night)
The bed/chair absence sensor works like the
conventional bed/chair occupancy sensor,
generating an alarm if a client has got out of bed (or
chair) during a monitoring time window (e.g.
night) for longer than a considered safe period of
time (configurable). When the client gets out of the
bed/chair (during the monitoring period), the timer
is started. If the timer expires before the client has
got back into the bed/chair then a Bed/Chair
Absence event is generated. However, the sensor
also provides the ability to extend the time period if
user activity is detected elsewhere in the property
e.g. client has gone downstairs to make a drink,
therefore reducing false calls. The home unit
supports two Bed/Chair Absence sensors. It is also
possible to set an alarm to be raised if the user does
not go to bed or fails to get up out of bed at a
configurable time.

15
Advanced Mode
To access the Advanced menu:
After unlocking the Universal ensor, the “Configuration Menu will
be displayed.
The “ elect Mode” menu will be selected when first opening the
“Configuration Menu” Press the “Down Button” once to navigate to
the “Advanced” Menu and press the “ elect Button”.
The “Advanced Menu” options depend on the configuration of the
Universal ensor. The Input type and the Contact Channel can be
changed for all configurations and passage time can be configured.
Also the ability to set the times associated when used in Bed
Occupancy mode.

16
Passage Time
Passage time is used in Door Contact Mode. Using Passage Time; it is possible to stop
the Universal ensor from sending door events to the Tunstall Lifeline or Telecare
Overlay ystem for a maximum of 120 seconds, (this time is definable in the
“Advanced Mode”). After the Passage Time has elapsed the Universal ensor will
start to send radio messages to the Tunstall Home Unit.
Whilst the Universal ensor is assigned and operating as a Door
Contact ensor press and hold the “ elect Button” and the “Back
Button” together for 3 seconds.
The red LED will flash every 2 seconds and the Universal ensor
will begin counting down until it will begin monitoring and
sending alarms to the Tunstall Home Unit.

17
Monitoring Deactivated
In Bed Occupancy and Door Guard Modes it is possible to stop the
Universal ensor from sending alarms to the Tunstall Home Unit
for a maximum of 60 minutes.
After 60 minutes the Universal ensor will start to send radio
messages to the Tunstall Lifeline or Telecare Overlay ystem.
Whilst the Universal ensor is assigned and operating as a Bed Occupancy ensor or
Door Guard press and hold the “ elect Button” and the “Back Button” together for 3
seconds.
The Universal ensor will confirm that monitoring has been
deactivated. Whilst in this state the red LED will flash every 30
seconds. After 60 minutes the Universal ensor will return to
monitoring for activity and will raise an alarm via the Tunstall
Home Unit.

18
To activate monitoring press and hold the “ elect Button” and the
“Back Button” together for 3 seconds.
The Universal ensor will confirm that monitoring is activated and
will raise an alarm via the Tunstall Home Unit.

19
Battery
To access the Battery menu:
After unlocking the Universal ensor, the “Configuration Menu will
be displayed.
The “ elect Mode” menu will be selected when first opening the
“Configuration Menu” Press the “Down Button” twice to navigate to
the “Battery” Menu and press the “ elect Button”.
The Battery Menu” has 3 options; ALB, AP and Status. The
Universal ensor will only operate in ALB or AP Mode.

20
ALB – Auto Low Battery
When the battery is low the Universal ensor will automatically
notify the monitoring service. When a battery is low it is
recommended that the battery is replaced within 2 weeks.
AP – Auto Presence
Auto Presence provides additional checks that the Universal
ensor is functioning. When activated the Universal ensor sends
a signal to the home unit every 4 hours. If the Universal ensor is
then taken out of the property or has its battery removed, these
signals will not be received, and the Tunstall Home Unit will raise
an alert at the monitoring centre if configured to do so. If the
Universal sensor is used in AP mode, the device will need to be
deleted from the system if it is removed from the property,
otherwise alarms will be raised.
tatus – Battery
Using the “ tatus” menu it is possible to check the status of the internal battery. The
battery will either report “Normal” or “Low”. When “Low” is displayed the battery
should be replaced and at this stage the Universal ensor will have sent an ALB alarm
to the monitoring centre.
Table of contents
Other Tunstall Accessories manuals