Installation
7
Electrical Connection
Each oven should be connected to an adequately protected power
supply and an isolation switch mounted adjacent to, but not behind
the oven and must be readily accessible to the operator. This
switch must be clearly marked and readily accessible in case of fire.
Check the electricity supply is correct to as shown on the Technical
Data Plate on front right hand corner of oven side panel.
Ovens Supplied with Cordsets
Ensure that the oven is fitted with the appropriate power cord and
plug.
Ovens Supplied without Cordsets
NOTE: All electrical connections must only be carried
out by a suitably qualified person.
1. Remove oven rear cover panel.
2. Bring the supply cable up through
the grommet at rear of oven.
3. Connect the mains supply to the
appropriately marked terminals on
the terminal block.
4. Fit cable into cable clamp and
tighten clamp.
E23D Ovens.
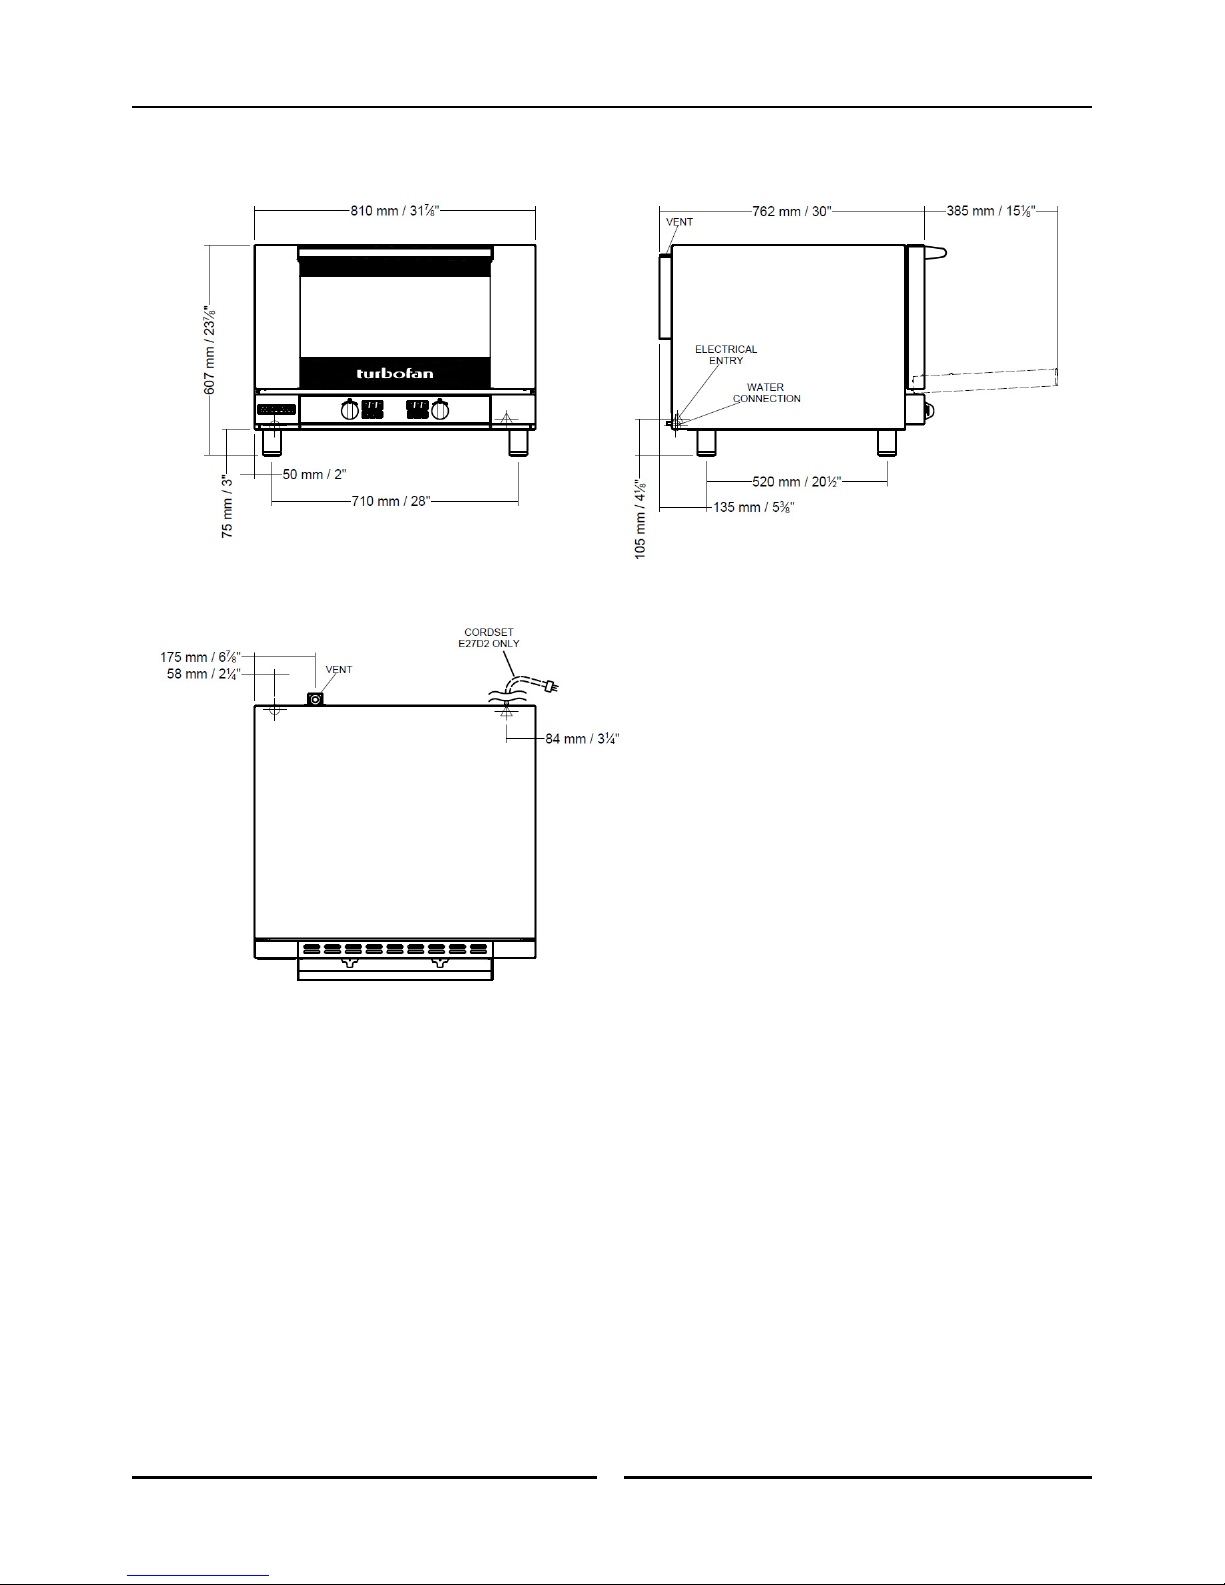
E27D / E28D Ovens.
NOTE:
Fixed wiring installations must incorporate an all-pole
disconnection switch.
This oven must be earthed / grounded.
If the supply cord is damaged, it must be replaced by a
suitably qualified person in order to avoid a hazard.
Warning
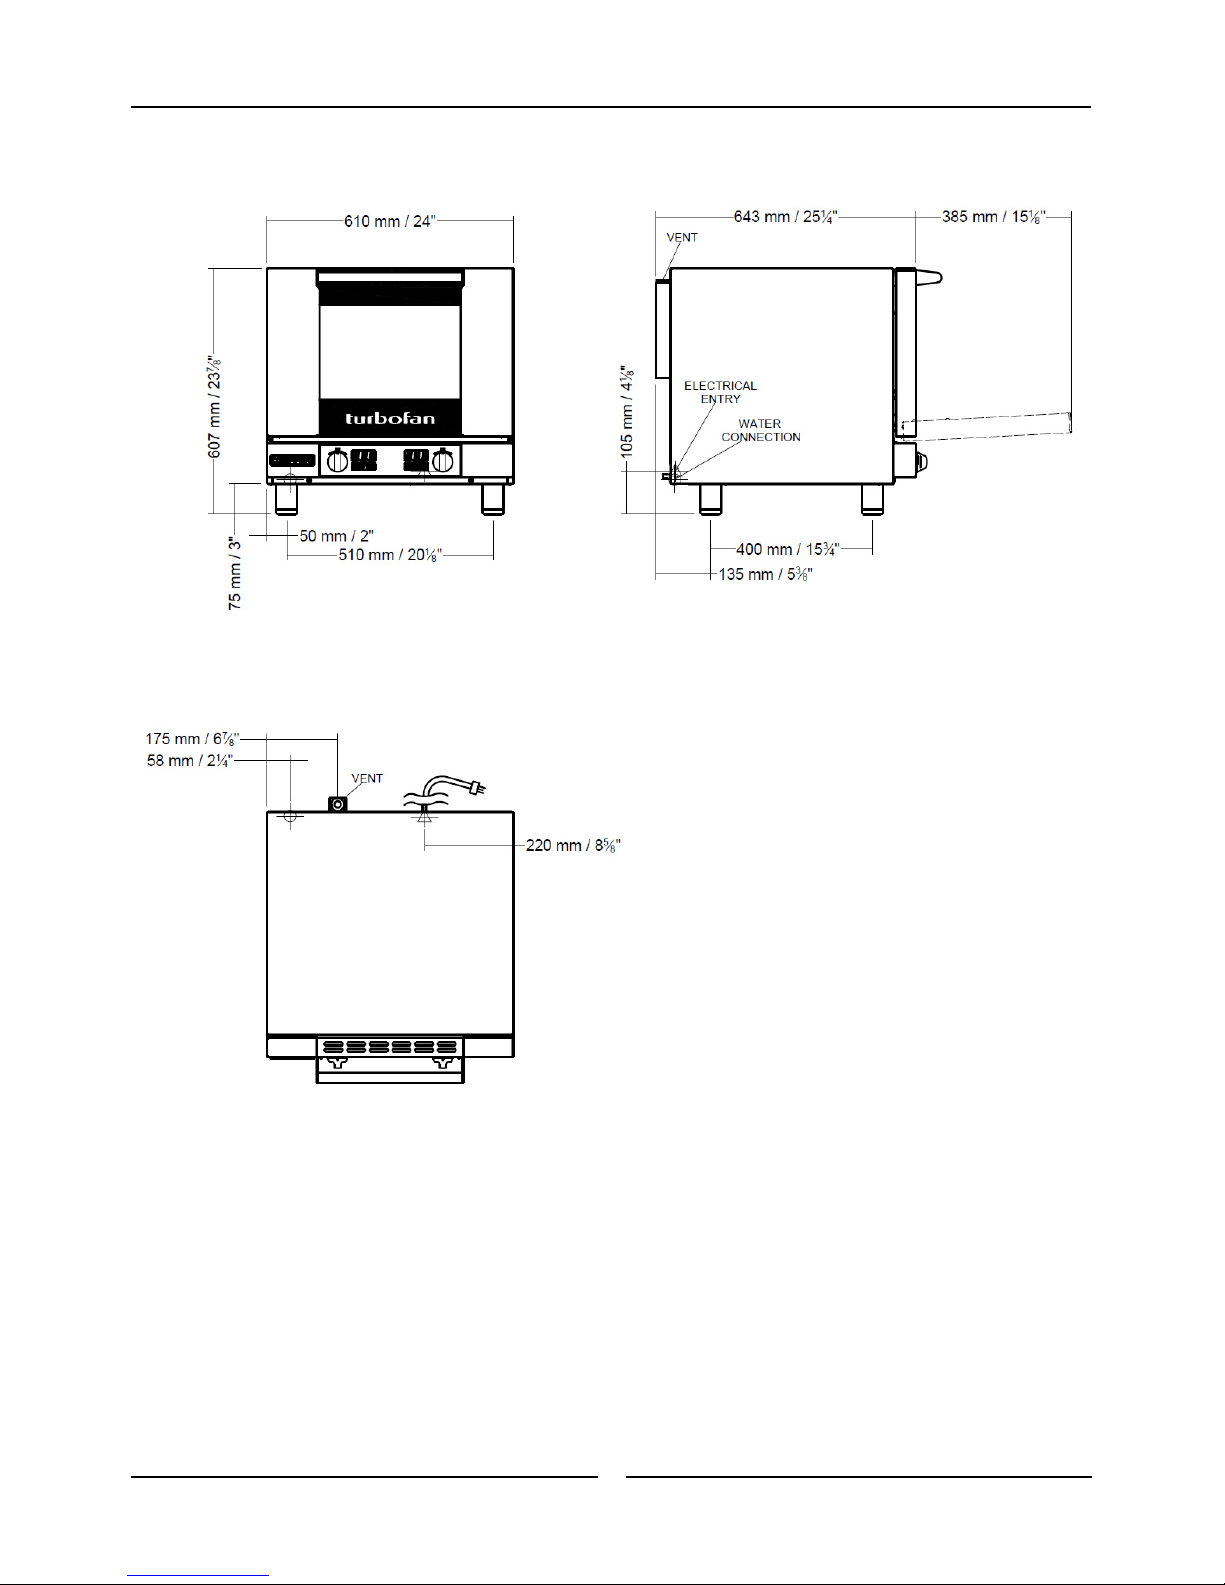
Water Connection
NOTE: If the Steam Mode cooking option is not
required, the oven does not need to be
connected to a water supply.
1. Connect a cold water supply
to the water inlet (R ¾”
Connector) at the rear of
the oven.
- Max Inlet Pressure 80psi / 550kPa.
2. Turn ‘On’ the water supply and check for leaks.
Recommended Water Specifications
In order to prevent corrosion or scaling in the oven and water
system due to supplying water that is either too soft or too hard,
the following recommendations should be used as a guideline.
Hardness: Between 60 and 90ppm.
PH: Greater than 7.5.
Chlorides: Less than 30 ppm.
Positioning and Levelling of Oven
Correctly locate the oven into its final operating position and using a
spirit level, adjust the oven legs so that the oven is level and at the
correct height.
Initial Start-Up
Before using the new oven;
1. For first time use of the oven, operate the oven for about one
hour at 200°C / 400°F to remove any fumes or odours which
may be present.
2. Please refer to the Operation Section of this manual for details
on how to correctly operate and shutdown the oven.
Cable Clamp
Power Cable
Electrical Connector Block
Cable Clamp
Power Cable
Electrical Connector Block