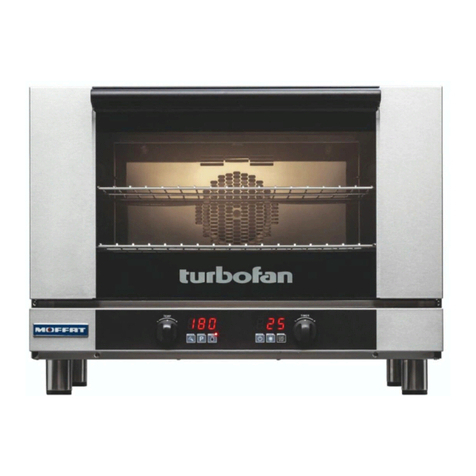
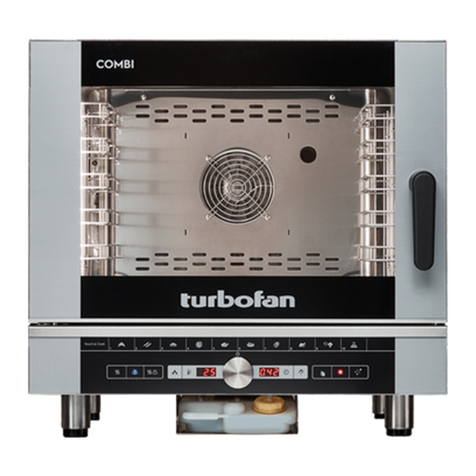
turbofan E32D4 User manual

Operation Manual
E32D4
(Digital Operation)
30D
SERIES
Any questions? Contact us at
www.eventservicesgroup.co.uk
Telephone: 03333 442062

Specifications
E32D4
Oven Power Ratings 208 - 220V, 50/60Hz, 6.5 kW
230 - 240V, 50/60Hz, 6.5 kW
E32 D4
Oven Tray Details
Tray Capacity 4, 18” x 26” / 460 x 660 Full Size Sheet Pan Capacity.
4, 600 x 400 Tray Capacity.
Tray Spacing 110 mm / 4⅜”
Water Connection
Max Water Pressure 80 psi / 550 kPa.
Connection Size 3/4” BSP
Any questions? Contact us at www.eventservicesgroup.co.uk
Telephone: 03333 442062

Installation
Installation Requirements
Location
1. Position the oven in its approximate working position.
2. The unit should be positioned so that the control panel
and oven shelves are easily reachable for loading and
unloading.
Clearances
To ensure correct ventilation for the motor and controls,
the following minimum installation clearances are to be
adhered to:-
Rear 50mm / 2”.
Left-hand side 50mm / 2”.
Right-hand side 75mm / 3”.
CLEARANCE FROM SOURCE OF HEAT.
A minimum distance of 300mm (12”) from the
appliance sides is required.
NOTE: Fixed installations require at least 500mm - 20”
clearance at the right hand side of oven for
service access.
Stand Mounted Oven
For ovens that are to be mounted to a stand, the oven feet
are used to level the oven on the stand. Refer to the
instructions supplied with separately ordered stands for
mounting details.
Important:
The vent located on the top of the oven must NOT be
obstructed.
Important:
Installation shall comply with local electrical, health and safety requirements.
It is most important that this oven is installed correctly and that oven operation is correct before use.
If you have any questions regarding the proper installation and / or operation of this oven, please contact your local
Turbofan distributor.
Technical Data Plate - Location.
Oven Vent Location
Any questions? Contact us at www.eventservicesgroup.co.uk
Telephone: 03333 442062

Installation
Electrical Connection
Each oven should be connected to an adequately protected
power supply with an appropriate three wire power cord.
An isolation switch must be mounted adjacent to, but not
behind the oven and must be readily accessible to the
operator. This switch must be clearly marked and readily
accessible in case of fire.
Check the electricity supply is correct to as shown on the
Technical Data Plate on the front right hand corner of the
oven side panel.
NOTE: All electrical connections must only be carried
out by a suitably qualified person.
1. Remove oven right hand side panel.
2. Bring the supply cable up through the grommet at the
back of oven and through the compression gland on the
electrical switchgear panel.
3. Connect the mains supply to the appropriately marked
terminals on the terminal block.
Water Connection - Optional -
(Not required for Main Oven Operation)
1. If the manual addition of water into the oven for
humidification or steaming effect on baked product is
required, the unit’s water connection can be used.
2. Tighten the 2 screws securing
the water connection to the rear
of the oven. (These have
purposely been left loose to
prevent damage to the water
connection during transit).
3. A cold water supply should be
fitted to the water inlet (¾” BSP hose connection)
which is located on the rear of the right hand side of
the oven.
4. Connect to the water supply.
- Max Inlet Pressure 80psi / 550kPa.
5. Turn ‘On’ the water supply and check for leaks.
Thisovenmust be earthed / grounded.
Warning
Positioning and Levelling of Oven
1. Correctly locate the oven into its final operating position
and using a spirit level, adjust the oven feet so that the
oven is level and at the correct height.
Tighten Screws.
Any questions? Contact us at www.eventservicesgroup.co.uk
Telephone: 03333 442062

Operation
Operation Guide
Turbofan Ovens have been designed to provide simple operation.
This oven is intended for use in a commercial kitchen and must only be put to the use for which it was intended, i.e.
cooking food product. To use this oven correctly please read the following sections carefully:-
Oven Control Panel
Starting the Oven
1. Turn ‘On’ electrical power to the oven. The controller
will carry out a self check of the LED’s.
2. Press the ‘On / Off’ Button.
3. The Heating Indicator will illuminate.
Oven Shut-Down
1. To turn ‘Off’ the oven, press and hold the ‘On / Off’
button for 3 seconds, the oven controller will go to
‘Stand-By’ mode.
Temperature Display - Shows the
preset chamber temperature.
When used with ‘Temperature’ button,
shows actual oven temperature for 5
seconds.
Shows Cooking Modes and Error
Codes.
Steam Button and LED - Activates
the ‘Steam Mode’.
Temperature Adjustment Control.
Time Display - Shows cook time in full
minutes only from 180 - 1, and
seconds for final minute only.
On / Off / Stand-By Button and
LED - Press ‘On / Off’ button once to
turn the oven ‘On’.
Press and hold ‘On / Off’ button for 2
seconds to turn the oven ‘Off’.
Time Adjustment Control.
Programming Button and LED -
Used to enter the ‘Programming’ Mode.
Temperature Button and LED -
Shows actual oven temperature for 5
seconds on the Temperature Display.
LED ‘On’ when heating; LED flashes
when showing actual temperature.
Light On / Off Button and LED -
Turns oven light ‘On / Off’.
Start / Stop Button and LED -
Pressing the ‘Start / Stop’ button oven
switches between ‘Time Start’ and
‘Temporary Pause’ Modes. LED will
flash when timer is paused.
When in the cooking cycle, pressing
the ‘Start / Stop’ button for 3 seconds
will end the cooking cycle.
Some parts of this oven will become VERY
HOT during use and could cause burns if
touched.
Warning
Take care when opening the oven door
during baking. Let hot air and steam escape
before removing or replacing food as the
steam produced can cause steam burns.
Warning
Any questions? Contact us at www.eventservicesgroup.co.uk
Telephone: 03333 442062
Operation
Using the Oven - Manual Mode
1. TURN ‘ON’.
Press ‘On-Off’ button.
Temperature Dislay.
Temperature Display will show Preset temperature.
2. SET TEMPERATURE.
+to increase the temperature.
-to decrease the temperature.
Time Display.
Time Display will show actual time set.
3. SET TIME.
+to increase the time.
-to decrease the time.
4. START TIMER.
Press ‘Start / Stop’ button to start timer operation.
Pressing the ‘Start / Stop’ button when timer is
operating will pause the timer and turn ‘Off’ Fan
and Heating. LED will flash when timer is paused.
Pressing and Holding ‘Start / Stop’ button for 3
seconds will reset the timer.
- Press any button, to cancel the ‘Alarm’.
- Press‘Steam’ button, to select the Steam mode.
- Press ‘Act Temp’ button, to check ‘Actual’ temperature of oven at any time during cooking.
- Press ‘Light’ button, to turn ‘On’ oven light. (refer - ‘Operator Accessible Parameters’).
- Press ‘Program’ button, to program the Oven refer to the ‘Installation and Operation Manual’.
- Press and hold ‘On / Off’ button, for 3 seconds to turn ‘Off’ the Oven.
Timer ‘On’
Indicator
Heating ‘On’
Indicator
To check actual oven temperature
during preheat or cooking, press
‘Temperature’ button. Actual
temperature will display briefly on
‘Temperature Display’ before the
display reverts to the pre-set
temperature.
At any time during cooking, time
and temperature can be adjusted
by using the ‘Time’ / ‘Temperature’
controls.
Opening the oven door during a
cooking cycle will pause the
cooking time. To continue
cooking, close the oven door.
This oven can be used without
using the ‘Timer’.
Steam; - Steam function can be selected at any time during the Manual Mode by pressing the ‘Steam’ button. Steam will be
injected for the pre-set time and the ‘Steam’ LED will illuminate.
If the ‘Timer’ is set to the ‘Infinity’
setting , the timer will count
elapsed time to a maximum of 999
minutes.
Power ‘On’
Indicator
Any questions? Contact us at www.eventservicesgroup.co.uk
Telephone: 03333 442062
Operation
Cooking in Program Mode
1. TURN ‘ON’.
Press ‘On-Off’ button.
Press ‘Programs’ button.
Temperature Dislay.
Temperature Display will
show program selected.
2. SELECT A PROGRAM.
+to scroll forward through programs.
-to scroll backward through programs.
Time Display.
Time Display will show ‘Pre-Heating’.
Program cannot be started until
pre-heating is completed.
Load Oven.
‘Time’ display will show
‘Ready’.
3. START PROGRAM.
Press ‘Start / Stop’ button to start cooking program.
Pressing the ‘Start / Stop’ button when timer is
operating will pause the timer and turn ‘Off’ Fan and
Heating. LED will flash when timer is paused.
Pressing and Holding ‘Start / Stop’ button for 3
seconds will cancel the program and return to Preset
Program.
- Press any button, to cancel the ‘Alarm’.
- Press ‘Steam’ button, to select the Steam mode.
-Press ‘Act Temp’ button, to check ‘Actual’ temperature of oven at any time during cooking.
- Press ‘Program’ button, to program the Oven refer to ‘Setting the Oven Programs’ overleaf.
- Press and hold ‘On / Off’ button, for 3 seconds to turn ‘Off’ the Oven.
To check actual oven temperature
during preheat or cooking, press
‘Temperature’ button. Pre-Set
temperature will display briefly on
‘Temperature Display’ before the
display reverts to the actual
temperature.
Opening the oven door during a
cooking cycle will pause the
cooking time. To continue
cooking, close the oven door.
Heating ‘On’
Indicator
When cooking in ‘Program’ mode,
the oven light will remain ‘On’ until
cooking is completed.
Program Mode
Indicator
Steam; - Steam function can be selected at any time during the Program Mode by pressing the ‘Steam’ button. Steam will be
injected for the pre-set time and the ‘Steam’ LED will illuminate.
Refer to ‘Operator Accessible Parameters’ for steam options.
Temperature and Time can be
adjusted when in Program Mode.
On program completion, oven
reverts to the pre-set temperature
for that program.
Light will remain ‘On’ by default
when cooking in ‘Program’ mode.
Any questions? Contact us at www.eventservicesgroup.co.uk
Telephone: 03333 442062
Operation
Setting the Oven Programs
Oven can be pre-programmed with up to 20 Program’s. Carry out the following for each program required:-
1. ENTER PROGRAMMING MODE.
Press ‘Programs’ button to enter
‘Programming’ mode.
2. SELECT PROGRAM REQUIRED.
Rotate ‘Temperature Control’ to
program required.
Temperature Display will show
program selected.
Press and hold ‘Temperature’ button
until ‘Time’ and ‘Temperature’ displays
and ‘Temperature’ LED flashes.
Change time and temperature
parameters.
3. ENTER COOK TEMPERATURE.
Rotate ‘Temperature Control’ to set
cook temperature.
+to increase the temperature.
-to decrease the temperature.
‘Temperature’ Display will show
temperature selected.
4. ENTER COOK TIME.
Rotate ‘Timer Control’ to set cook time.
+to increase the time.
-to decrease the time.
‘Time’ Display will show time
selected.
‘Time’ and ‘Temperature’ displays
and ‘Temperature’ LED flash.
Press ‘Temperature’ button to
confirm ‘Time’ and ‘Temperature’
settings.
5. SET STEAM OPTION.
Hold ‘Steam’ button pressed until
‘Steam’ LED flashes and present setting
displays in ‘Temperature’ display.
Rotate ‘Temperature Control’ to set
steam time required.
+to increase steam time.
-to decrease steam time.
Press ‘Steam’ button to confirm ‘Steam’
settings.
Timer ‘On’
Indicator
Heating ‘On’
Indicator
Any questions? Contact us at www.eventservicesgroup.co.uk
Telephone: 03333 442062
Operation
Oven Racks
The oven is supplied with four general purpose oven racks.
Self Supporting: When fitted, the oven racks are self supporting and will not drop or angle down when the racks are
withdrawn during operation, when loading and unloading products onto racks or when attending to the product being
cooked during it’s cook cycle.
NOTE: Ensure that the racks are correctly fitted to the oven with the raised part of the rack to the rear of the oven
and the hooks on the underside of the rack engaged below the rack runner.
E32D4 - Oven Racking
Ensure that these hooks are located under the rack
runners when fitting the shelves to the oven.
Fit racks with raised part of
rack to the rear of the oven
Any questions? Contact us at www.eventservicesgroup.co.uk
Telephone: 03333 442062
Operator Accessible Parameters
Setting the Operator Accessible Parameters
With the Oven in ‘Stand-By’ mode:-
1. ENTER THE OPERATOR PARAMETER MODE.
Press 'Steam' and 'Start / Stop' buttons together.
‘Temperature’ Display will show ‘PAS’.
The ‘Time’ Display will flash.
2. SET PASSWORD.
Rotate ‘Timer Control’ to set password;
(123) (Operator Password).
Press ‘Light On / Off’ button to confirm password.
‘Temperature’ Display will show one of Parameter Codes.
‘Time’ Display will show value of the parameter.
3. SETTING THE PARAMETERS.
Rotate ‘Timer Control’ to parameter required.
Press ‘Light’ button to confirm parameter. ‘Time’ display will flash.
While ‘Time’ display is flashing, rotate ‘Timer Control’ to
select value required.
Press ‘Light’ button to confirm value. ‘Time’ display will stop flashing.
4. EXITING THE PARAMETER MODE.
Press ‘On-Off’ button, to return to ‘Stand-By’ mode.
Table of Operator Accessible Parameters
Parameter
Number Description Default
Setting
Turn -On Pre-Heating temperature - (60 - 260˚C / 140 - 500˚F). 150ºC
(325ºF)
Light Auto ‘Off’ Setting Time -
0 = ‘On/Off’.
1 = 1 minute auto ‘Off’.
2 = 2 minutes auto ‘Off’, etc.
1
Steam Injection setting time -
0 = Steam will be emitted for as long as ‘Steam’ button is pressed.
1 = Steam will be emitted for 1 second.
2 = Steam will be emitted for 2 seconds, etc.
0
Buzzer Volume - Can be adjusted from ‘0’ to ‘10’. 5
Program Pre-Heating Condition - (Can be adjusted from 0 to 30ºC {0 to 54ºF} above pre-heat
temperature).
20ºC
(36ºF)
Any questions? Contact us at www.eventservicesgroup.co.uk
Telephone: 03333 442062
Table of contents
Other turbofan Oven manuals

turbofan
turbofan E32D5 User manual

turbofan
turbofan EC40D5 User manual

turbofan
turbofan EC40 Series Manual

turbofan
turbofan subway E32SUBC3 User manual

turbofan
turbofan E85 Prover User manual

turbofan
turbofan E30M3 User manual

turbofan
turbofan E20D Series User manual

turbofan
turbofan E23D3 User manual

turbofan
turbofan 30D Series E31D4 User manual

turbofan
turbofan PM Series User manual
Popular Oven manuals by other brands

Welbilt
Welbilt Convotherm OES 10.10 mini easyTouch installation manual

Range Master
Range Master RMB7245BL/SS user guide

V-ZUG
V-ZUG De Luxe S operating instructions

Alto-Shaam
Alto-Shaam Halo Heat 1200-TH/III/HD Specification sheet

V-ZUG
V-ZUG Combair XSE operating instructions

Alto-Shaam
Alto-Shaam 4-20 ESi Technical & service manual