TurboTronic TT-VS777 User manual

INSTRUCTION MANUAL
Model No:
100-240V~50/60Hz, 22.2V
www.zline-world.com
TT-VS777 STICK VACUUM
TT-VS777

▋Safety advices & cautions
Read all the instructions carefully before using the vacuum cleaner
This vacuum cleaner can only be used on dry purpose only. Water, liquid
and other wet objects are prohibited to be sucked into the product. Do not
water or spill liquid onto the vacuum cleaner. If that happens, it will
increase the risk of electric shock.
Do not use the vacuum cleaner to suck powders such as flour, cement or
other big objects, or the motor can be broken or make the vacuum cleaner
blocked.
Please use dry cloth to clean the vacuum cleaner. Please do not use gas
or liquid that can make the surface cracked or color faded such.
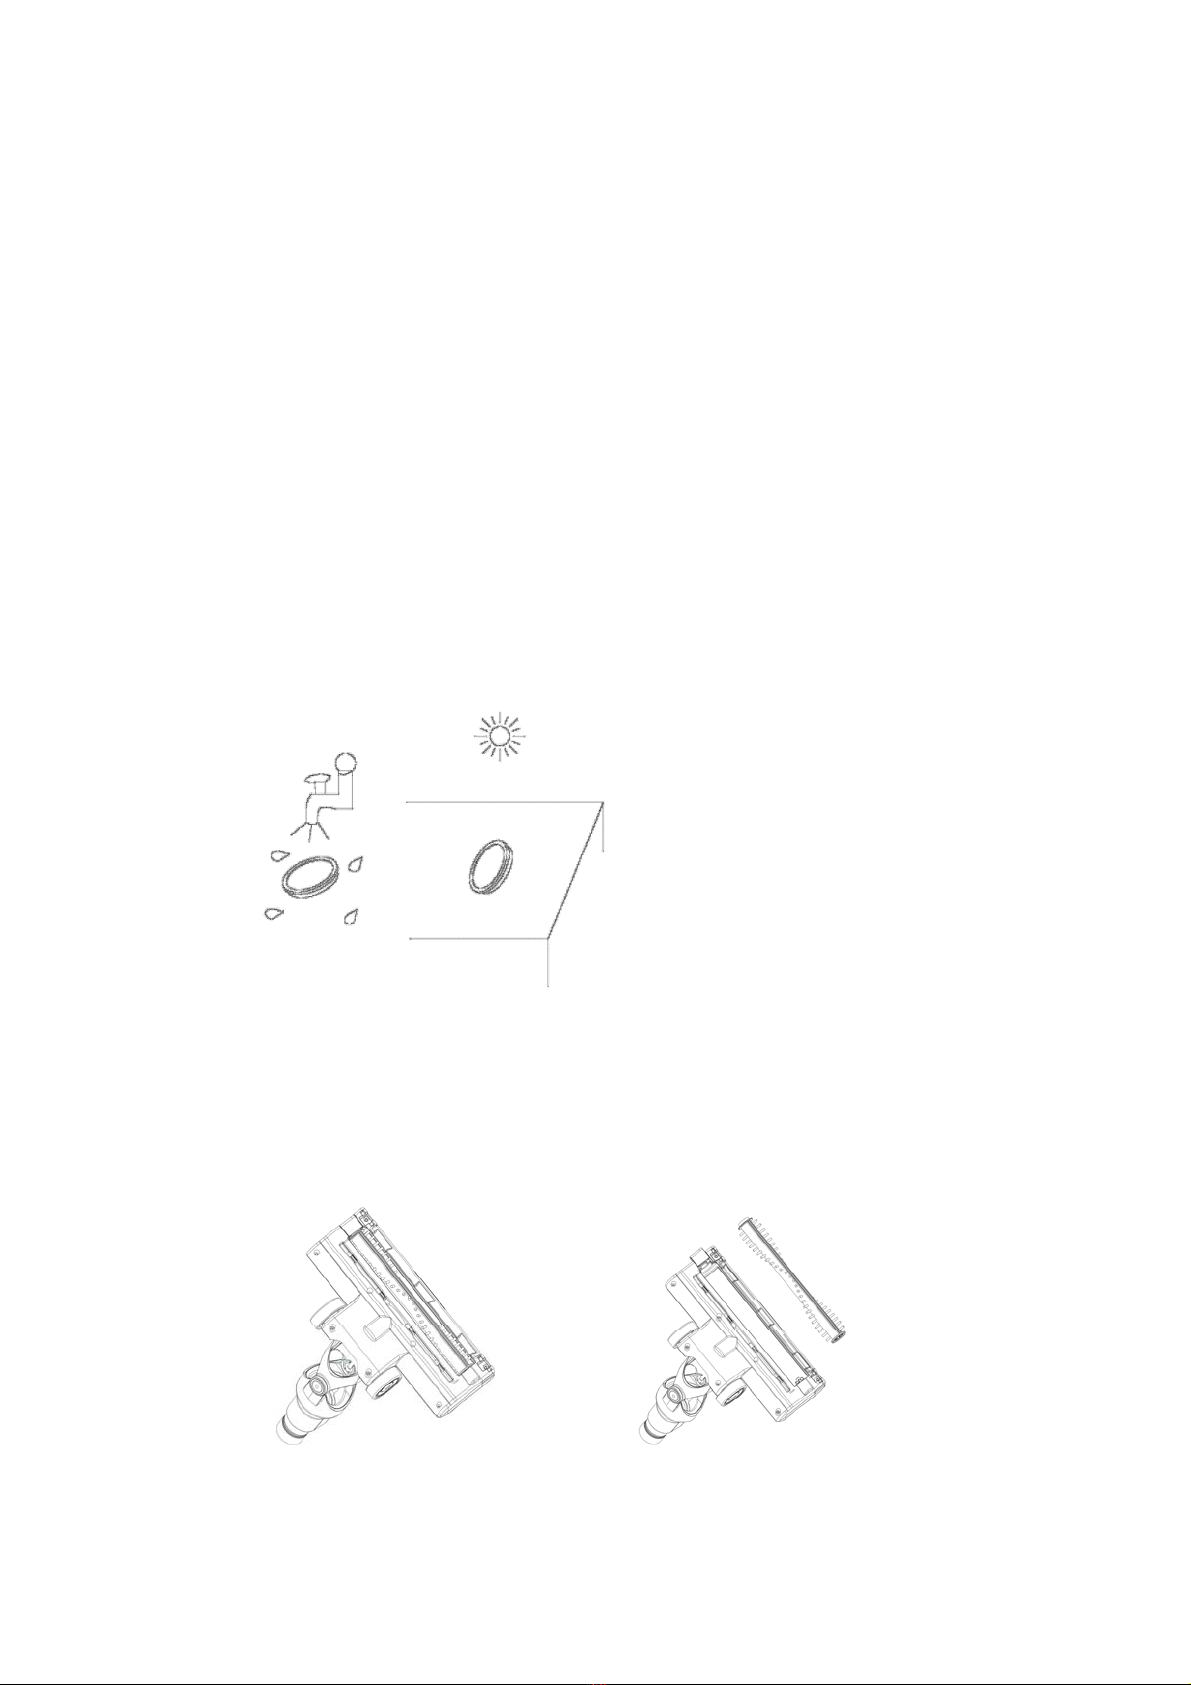
Please do not use or store the vacuum cleaner under high or low
temperature, suggested using temperature is 0。-40。C indoor. Please store
the product under cool and dry environment. Please avoid long-time
sunshine on the product.
Please fully recharge the battery, when first used or used after long time
storage. If the product is not used for long time, please make sure the
battery is recharged and used each three months at least.
When the vacuum cleaner fully recharged, please unplug the adaptor.
Please do not pull the power cord directly.
When working time goes shorter, caused by low battery capacity, please
buy new battery unit to replace it.
Do not litter the battery unit and it should be safely recycled.
Battery unit can only used for this vacuum cleaner, please do not use it on
other purposes, and can only charged with the adaptor with the vacuum
cleaner in the package, do not disassemble the battery unit in case of
damaging or short circuit. Do not place the battery unit close to the high
temperature objects or fire, do not insert the battery unit with sharpen
objects or break the battery in case of electric shock.
If the vacuum cleaner cannot work or some parts broken, in order to avoid
dangers, please do not disassemble it privately, sent it to the appointed
maintenance or service centre and get it repaired by professional after
sales
Please make sure the child can not touch or use the vacuum cleaner and
charge the battery unit in case of dangers.

▋PARTS LIST
1. ON/OFF
2. SPEED CONTROL BUTTON
3. BATTERY INDICATOR
4. MAIN BODY RELEASE BUTTON
5. ELECTRIC TUBE
13
14
15
7
6
5
1
2
3
4
12
11
9
10
8

6. BRUSH RELEASE BUTTON
7. POWER BRUSH
8. DUST TANK RELEASE BUTTON
9. DUST TANK
10. DUST RELEASE BUTTON
11. MOTOR UNIT
12. BATTERY UNIT RELASE BUTTON
13.2 IN 1 TOOL(CREVICE NOZZLE AND DUSTING NOZZLE)
14. ADAPTOR
15. WALL MOUNTING
▋packing list
Main unit Battery unit Tube Power
brushTool
1 1 1 1 1+1
Adaptor Wall
mounting——
1 1 ——
▋Assembling
·Assembly dust cup unit
1. Put filters intodust cup,twist the coneandmatch cone’s pins into the
groovesinside the dust cup.
2. Insert filter onto the cone

·Assembly dust tank with motor unit
1. Put the dust cup to pins on motorunit loweredge
2. Push the dust cup till“Click”soundheard
·Assemble main unit with battery unit
1. Press the batteryunitonto the mainunit. till a “click”soundheard
·Power brush , tube, and main body assembled
1. Insertupperend of powerbrush into lowerend of the tube, till
a click sound heard
2. Inserttheupperend of the tube into the lower end of battery unit
a click sound heard

▋How to assemble the accessories
·Accessory assembled into the main unit
2 in 1 tool just insert into the main unit hole and make them inserted
firmly
·Assemble the accessories to the tube.
Insertthe roundend of either 2 in1tool or furniture tool into
the lowerend of tube, till a click soundheard
Please refer to picture 8
·How to place the main unit
Wall mounting :
1.Fixed the wall mounting which near with the socket
2.Put the main unit on the wall mounting .

USING
·ON/OFF
PRESS THE ON/OFF BUTTON AND SPEED CONTROL BUTTON TO START THE
VACUUM CLEANER, PRESS THE BUTTON AGAIN TO ADJUST THE VACUUM CLEANER
WORK TO HIGH/LOW SPEED.
·ACCESSORY : 2 IN 1 TOOL
1. Insert 2 in 1 tool into main unit, then push the dusting head back.
This form can clean sofa gap, wall corners, stairs, keyboard and other
narrow places
2. Insert 2 in 1 tool into main unit, and then push the dusting head
back till it is locked. This form can clean furniture, home appliances
and bookshelf.
3. Insert 2 in 1 tool into tube and then push the dusting head back till
it is locked. Insert the other end of the tube into the main unit. This
form can clear roof or other high places.
·main motorized brush
Connect the brush with tube, then can use the motorized brush to clean.
·Charging
Before charging, make sure the adaptor is the right one.
Put the vacuum on the wall mounting , when charging, One LED light will be
turned on , when fully charged, three LED lights will be turn on.
When the battery is going to be power off, please charged it right now with
adaptor.

Picture 1o
▋Clean and store
·Empty dust
1. Press the motor unit release button to divide motor unit from battery unit.
2. Release button to empty the dust from the cup.
·Dust cup clean
1. Press the release dust tank button , Take it out .
2. disassemble the dust cup,Get out the HEPA and plastic filter from
dust cup.
3. Both HEPA and filers can be washed. After cleaning, dry them
naturally
·Clean the main brush
1. Glide the knob on brush bottom to left size, lift the brush roll cover
2. Get out of the roll and clean it(no water)

---Attention: after long time use, the roll may stick hair or other masses which
needs to be cleaned in time in order to keep the vacuum cleaner working efficiently.
TECHNICAL DATA
MODEL NO.
NOM. VOLTAGE 22.2V
NOM. INPUT POWER 120W
INPUT OF ADAPTOR 100-240V~50/60Hz,0.5A
OUTPUT OF ADAPTOR 27V,500mA
WORKING TIME 45±5min
TT-VS777

HANDLEIDING
Model Nr:
100-240V~50/60Hz, 22.2V
www.zline-world.com
TT-VS777 STICK VACUUM
TT-VS777

▋Veiligheid adviezen en voorzorgsmaatregelen
Lees alle instructies zorgvuldig voordat u de vacuüm
Deze vacuüm kan alleen worden gebruikt op droog als enige doel. Water,
worden vloeibare en andere natte voorwerpen verboden te worden
meegezogen in het product. Niet in water en mors geen vloeistof op de
vacuüm. Als dat gebeurt, zal het risico op een elektrische verhogen shock.
Gebruik de vacuüm om poeders zoals meel, cement of andere grote
objecten, of de motor kan worden gebroken of maak de vacuüm
geblokkeerd zuigen.
Gebruik een droge doek om de vacuüm te reinigen. Gebruik geen gas of
vloeistof die kunnen maken dat het oppervlak gebarsten of kleur
verschoten dergelijke.
Gelieve niet te gebruiken of bewaar de vacuüm onder hoge of lage
temperatuur, stelde met behulp van temperatuur 0. -40. C indoor. Bewaar
het product onder koele en droge omgeving. Vermijd lange tijd zon op het
product.
Gelieve de batterij bij het eerste gebruik of gebruik na langdurige opslag
volledig op te laden. Als het product niet wordt gebruikt voor lange tijd, dan
kunt u ervoor zorgen dat de batterij wordt opgeladen en ten minste
gebruikt elke drie maanden.
Wanneer de vacuüm volledig is opgeladen, dient u nu de adapter. Gelieve
niet direct aan het snoer.
Bij het werken korter gaat, veroorzaakt door lage capaciteit van de batterij,
dan koopt u nieuwe batterij unit te vervangen.
Laat geen afval achter de batterij-eenheid en het moet veilig worden
gerecycled.
Battery unit kan alleen gebruikt voor deze vacuüm, aarzel dan niet
gebruiken voor andere doeleinden, en kunnen alleen belast met de
adapter met de vacuüm in de verpakking, niet demonteren van de
accu-eenheid in het geval van beschadiging of kortsluiting. Do not plaats
de batterij toestel dichter bij de hoge temperatuur voorwerpen of brand,
niet plaats de batterij unit met verscherpen voorwerpen of breken van de
batterij in het geval van een elektrische schok.
Indien de vacuüm niet kan werken of sommige delen gebroken, om
gevaren te voorkomen, neem het niet persoonlijk demonteren, stuurde
hem naar de aangewezen onderhoud of service center en laten repareren
door professionele after sales
Zorg ervoor dat het kind niet kan aanraken of gebruik de vacuüm en de
batterij-eenheid op te laden in geval van gevaar.

▋ONDERDELEN LIJST
13
14
15
7
6
5
1
2
3
4
12
11
9
10
8

1. AAN / UIT
2. SNELHEID CONTROLEKNOP
3. DE BATTERIJINDICATOR
4. VOORNAAMSTE LICHAAM-ONTSPANKNOP
5. ELEKTRISCHE AANGEDREVEN BUIS
6. BORSTEL-ONTSPANKNOP
7. MACHT BORSTEL
8. STOF TANK-ONTSPANKNOP
9. STOF TANK
10. STOF-ONTSPANKNOP
11. MOTOR UNIT
12. BATTERIJ EENHEID RELASE KNOP
13.2 IN 1 TOOL (SPLEET NOZZLE EN MONDSTUK AFSTOFFEN)
14. ADAPTER
15. DE WANDMONTAGE
▋Paklijst
Hoofdeenheid Batterij
eenheid Buis Macht
Borstel Gereedsch
p
11111+1
Adapter Wandmon
tage ——
11 ——
▋Montage
·Montage van stofbakken
1. Zet filters in stofbeker, draai de kegel en draai de kegelpennen in de
groeven in de stofbeker.
2. Plaats de filter op de kegel

·Montage van stofreservoir met motor
1. Breng de stofbeker aan op de onderkant van de motor
2. Druk de stofbeker tot "Klik" geluid gehoord
·Monteer de hoofdunit met de batterijeenheid
1. Druk op de batterijeenheid op het apparaat. Tot een "klik" geluid gehoord
· Machtborstel, buis en hoofdtekst gemonteerd
1. Verstel het bovenste uiteinde van de energieborstel in het onderste
uiteinde van de buis totdat een klikgeluid wordt gehoord
2. Plaats het bovenste uiteinde van de buis in het onderste uiteinde van de
batterijeenheid, een klikgeluid dat u hebt gehoord

▋Hoe de accessoires monteren
·Toebehoren gemonteerd in het hoofdapparaat
2 in 1 gereedschap steek gewoon in het hoofdgat en zet ze stevig vast
·Monteer de accessoires aan de buis.
Plaats het ronde uiteinde van 2 of 1 in een gereedschap of
meubelgereedschap in het onderste uiteinde van de buis totdat een klikgeluid
is gehoord
Zie afbeelding 8
·Hoe u het apparaat instelt
Muurmontage :
1.Bevestig de wandmontage die dichtbij de stopcontact zit
2.Zet de hoofdunit op de wandmontage.

GEBRUIK MAKEND VAN
·AAN/UIT
DRUK OP ON/OFF KNOP EN CONTROLE VAN DE SNELHEID DE vacuüm, DRUK OP DE
KNOP OM OPNIEUW TE BEGINNEN OM HET WERK VAN DE vacuüm TE HOGE/LAGE
SNELHEID.
·ACCESSOIRES: 2 IN 1 TOOL
1. Steek 2 in 1 gereedschap in het apparaat in en druk de afstotkop
terug. Dit formulier kan de bankgap, muurhoeken, trappen,
toetsenbord en andere smalle plekken schoonmaken
2. Steek 2 in 1 gereedschap in het hoofdapparaat in en druk de
afstotkop terug totdat het is vergrendeld. Dit formulier kan meubels,
huishoudelijke apparaten en boekenplank schoonmaken.
3. Steek 2 in 1 gereedschap in de buis en druk de afstotkop terug tot
het is vergrendeld. Steek het andere uiteinde van de buis in het
hoofdapparaat. Dit formulier kan dak of andere hoge plaatsen

leegmaken.
·Hoofd gemotoriseerde borstel
Verbind de borstel met de buis, dan kan de gemotoriseerde borstel schoonmaken.
·Opladen
Zorg ervoor dat de adapter de juiste is voordat u opladen.
Zet het vacuüm op de wandmontage, als u opladen, zal er een LED-lampje
worden ingeschakeld, wanneer het volledig opgeladen is, zullen drie LED-lampjes
aanzetten.
Als de batterij wordt uitgeschakeld, gelievehetnuopteladenmetdeadapter.
▋Reinigen en opslaan
·Leeg stof
1. Druk op de ontgrendelknop van de motor unit om de motor van de batterij
eenheid te verdelen.
2. Ontgrendel knop om het stof uit de kop te legen.
·Stofbeker schoon
1. Druk op de afgifte stoftank knop, Neem het uit.
2. Demonteer de stofbeker, HEPA en plastic filter uit stofbeker
verwijderen.
3. Zowel HEPA als filters kunnen worden gewassen. Na het
schoonmaken, droog ze natuurlijk

Foto 1o
·Maak de hoofdborstel schoon
1. Glijden van de knop op borstel onder linker grootte, til de klep van de roll borstel
2. Haal het uit de rol en maak het schoon(geen water)
---Aandacht: na langdurig gebruik kan de rol haar of andere massa's vasthouden die
tijdig schoongemaakt moeten worden om de vacuüm efficiënt te laten werken.
TECHNISCHE DATA
MODEL NO.
NOM. SPANNING 22.2V
NOM. INVOER POWER 120W
INVOER VAN ADAPTER 100-240V~50/60Hz,0.5A
UITVOER VAN ADAPTER 27V,500mA
WERKTIJD 45±5min
TT-VS777

Manual de Instrucción
Número de modelo:
100-240V~50/60Hz, 22.2V
www.zline-world.com
TT-VS777 STICK VACUUM
TT-VS777

Consejos y advertencias de seguridad
Lea todas las instrucciones cuidadosamente antes de usar la aspiradora
de vacío
Esta aspiradora solamente se puede usar en seco. Está prohibido
introducir agua, líquidos u otros objetos húmedos en el producto. No eche
o derrame líquido sobre la aspiradora. Si esto sucede, aumentará el riesgo
de descarga eléctrica.
No utilice la aspiradora para aspirar polvos como harina, cemento u otros
objetos grandes, por lo contrario, el motor se puede romper o se bloquea
la aspiradora.
Utilice un paño seco para limpiar la aspiradora. Por favor, no utilice gas o
líquido que pueden hacer la superficie agrietada o descolorarse el color.
No utilice por favor ni almacene la aspiradora bajo temperatura alta o baja,
la temperatura sugerida del uso varia entre 0-40 centígrados. Guarde el
producto en lugar fresco y seco. Por favor, evite contacto con el sol
durante mucho tiempo.
Por favor, recargue completamente la batería, cuando se utiliza por
primera vez o se utiliza después de mucho tiempo de almacenamiento. Si
el producto no se utiliza durante mucho tiempo, asegúrese de que la
batería se recarga y se utiliza cada tres meses al menos.
Cuando la aspiradora se recargue por completo, desenchufe el adaptador.
Por favor, no tire del cable de alimentación directamente.
Cuando el tiempo de trabajo va más corto, causado por la capacidad baja
de la batería, compre por favor nueva unidad de batería para substituirla.
No ensucie la unidad de batería y debe reciclarla con seguridad.
La unidad de batería se puede utilizar solamente para esta aspiradora, no
la utilice por favor en otros propósitos, y se puede cargar solamente con el
adaptador equipado para la aspiradora en el paquete, no la desmonte en
caso de daño o cortocircuito. No coloque la unidad de la batería cerca de
los objetos de alta temperatura o fuego, ni la inserte con objetos afilados o
se romperá la batería en caso de descarga eléctrica.
Si la aspiradora no funciona o algunas piezas se rompen, para evitar
peligros, por favor no la desmonte en privado, envíela al centro de
mantenimiento o servicio técnico designado y consígalo reparado por
profesionales postventa
Asegúrese de que el niño no pueda tocar ni utilizar la aspiradora ni cargar
la unidad de batería en caso de peligros.
Table of contents
Languages:
Other TurboTronic Vacuum Cleaner manuals

TurboTronic
TurboTronic TT-VS10 User manual

TurboTronic
TurboTronic TT-X12 User manual

TurboTronic
TurboTronic Turbolux TT-LUX900 User manual

TurboTronic
TurboTronic Turbo Cyclonic TT-CV04 User manual

TurboTronic
TurboTronic CleanTech TT-CT20 User manual

TurboTronic
TurboTronic LUX500 User manual

TurboTronic
TurboTronic TURBO Cyclonic TT-CV07 User manual

TurboTronic
TurboTronic dirt SNIPER TT-AK47 User manual

TurboTronic
TurboTronic TT-EQ6 User manual

TurboTronic
TurboTronic Cyclone26 TT-C26 User manual