Twin Eagles TEPG36R Instructions for use

INNOVATION AND INSPIRATION ON FIRE™
INSTALLATION, USE & CARE MANUAL
Please read this enre manual before installaon and use of this pellet fuel-burning appliance.
Failure to follow these instrucons could result in property damage, bodily injury or even death.
Contact your local building or re ocials about restricons and installaon inspecon
requirements in your area. Save these instrucons.
WOOD FIRED PELLET GRILL & SMOKER
MODELS:
TEPG36G
TEPG36RP/N: 17543E 08/19

ii | Twin Eagles Technical Support (562) 263-3600
A SPECIAL MESSAGE TO OUR CUSTOMERS...
Congratulaons on the purchase of your Wood Fired Pellet Grill & Smoker! Our products are
engineered for precision and designed for style. Each Twin Eagles grill is manufactured in the
USA at our own state of the art facility in California.
This manual will give you easy to follow instrucons for installing, operang and maintaining
your grill. We recommend reading this manual before your rst use to ensure safety, proper
care and operaon.
At Twin Eagles, we want you to enjoy grilling and spending me together as much as we do –
making memories that linger long aer the grill cools down.
Thank you and welcome!
Dante Cantal
Owner and Founder
A MAJOR CAUSE OF FIRES IS FAILURE TO MAINTAIN
REQUIRED CLEARANCES (AIR SPACES) TO
COMBUSTIBLE MATERIALS.
IT IS OF UTMOST IMPORTANCE THAT THIS PRODUCT
BE INSTALLED ONLY IN
ACCORDANCE WITH THESE INSTRUCTIONS.

www.twineaglesgrills.com | iii
IMPORTANT SAFETY INSTRUCTIONS
Please read this enre manual before installaon and use of this pellet fuel-burning appliance. Failure
to follow these instrucons could result in property damage, bodily injury or even death.
Contact your local building or re ocials about restricons and installaon inspecon requirements in
your area. Save these instrucons.
• Placement and Location
◦ This grill is designed for outdoor use only.
◦ This grill is not designed to be installed in or
on recreaonal vehicles and / or boats.
◦ Do not locate your grill under or near windows
or vents that can be opened into your home.
◦ Grill should be installed on a level rm surface.
◦ Minimum clearance of 12 inches from the
back and sides of the grill to adjacent com-
busble construcon must be maintained.
This grill shall not be located under overhead
combusble construcon.
◦ Do not install grill on combusble ooring. It
is recommended that the grill is installed on
non-combusble ooring or on ooring pro-
tected with noncombusble surfaces where
the protecve surface has been approved by
the authority with jurisdicon.
◦ Keep your grill covered when not in use. Grill
covers are available and are designed to help
keep your grill safe from harmful elements.
◦ Care should be taken to ensure that no water
gets into the pellet hopper as wood pellets,
when wet or exposed to high humidity, ex-
pand greatly and break apart which can cause
blockage of the auger.
◦ Never use your grill in an excessively windy
area.
◦ Accessible parts of the grill will be very hot,
exercise cauon around the grill while it’s in
use.
◦ Keep young children away while grill is in use.
When children are present, adult supervision
is recommended.
• Set-up
◦ To prevent re and smoke damage, remove all
packaging materials before operang the grill.
◦ It is recommended that before using your grill
you wipe the inside clean with soap and water.
This is to remove any residual solvents, oil and
grease used in the manufacturing process. The
grates should also be thoroughly cleaned in
the same manner.
◦ This pellet grill is designed and approved for
pellezed, all-natural, wood fuel for cooking
only. DO NOT use pellets intended to heat
rooms, these may have harmful addives, and
are not suitable for cooking.
◦ Use only all natural wood pellets designed for
burning in grills. Do not use fuel labeled as
having addives.
◦ This barbecue requires a 110 Volt 60Hz 5amp,
3 prong grounded plug.
◦ The electrical cord installed on your grill is
equipped with a three-prong (grounding) plug
for your protecon against shock hazard and
should be plugged directly into a grounded
three-prong receptacle. Do not cut or remove
the grounding prong from this plug.
◦ Do not aempt to rewire or alter the wiring
of this grill in any way. The grill must be able
to either be unplugged or power to the unit
must be shut o before any servicing may be
performed.
◦ When the grill is not in use the grill should be
powered o.
◦ If the power cord is damaged, do not operate
the grill.
◦ Keep any electrical wires away from heated
surfaces.
◦ If an external electrical source is ulized, this
outdoor cooking appliance, when installed,
must be electrically grounded in accordance
with the local codes or, in absence of local
codes with the following:
• USA:
◦ Naonal Electrical Code, ANSI/NFPA70
• CANADA:
◦ Canadian Electrical Code, CSA C22.1

iv | Twin Eagles Technical Support (562) 263-3600
• Operation
◦ Do not use the grill for other than its intended
purpose.
◦ Do not use accessories not specied for use
with this appliance.
◦ This grill can operate automacally, but it is
strongly recommended that the grill is never
le unaended when in use.
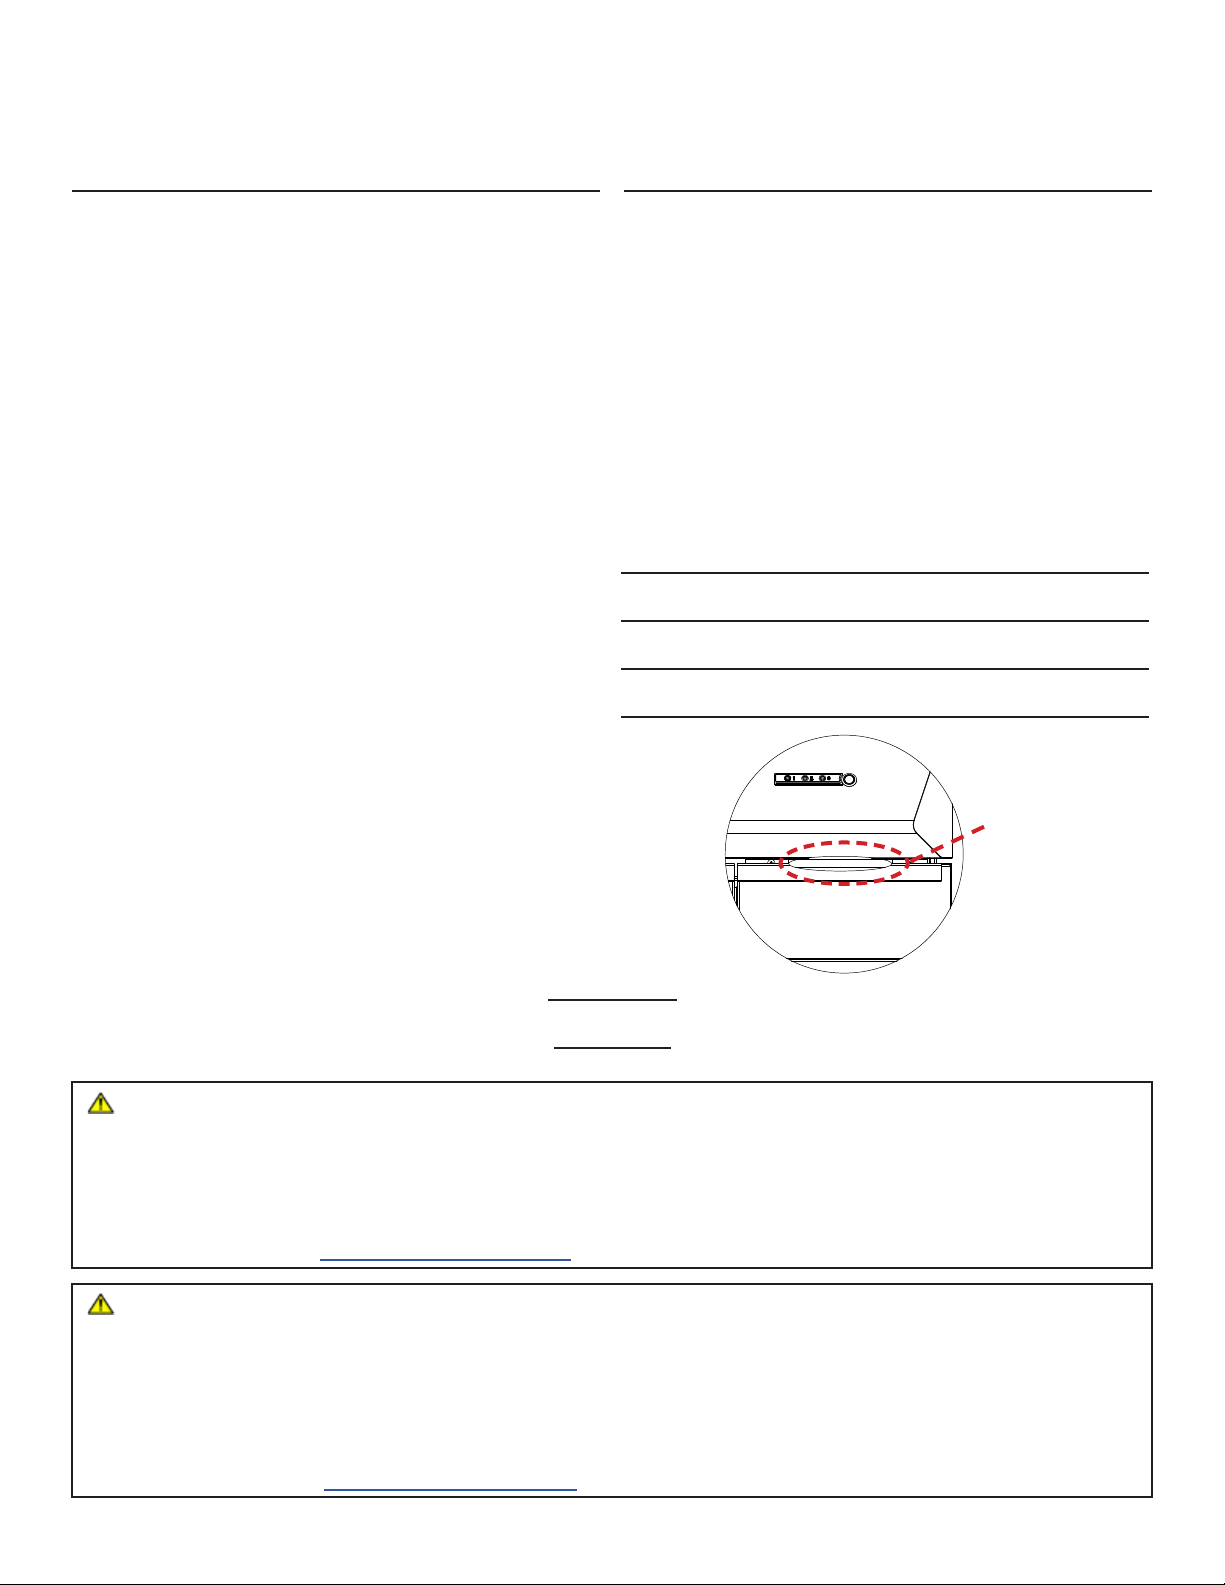
◦ Never use the grill if the Ash Drawer is not
installed or fully closed.
◦ Disposal of Ashes - Ashes should be placed in
a metal container with a ght-ng lid. The
closed container of ashes should be placed on
a non-combusble oor or on the ground, well
away from all other combusble materials,
pending nal disposal. When the ashes are
disposed by burial in soil or otherwise local-
ly dispersed, they should be retained in the
closed container unl all cinders have thor-
oughly cooled.
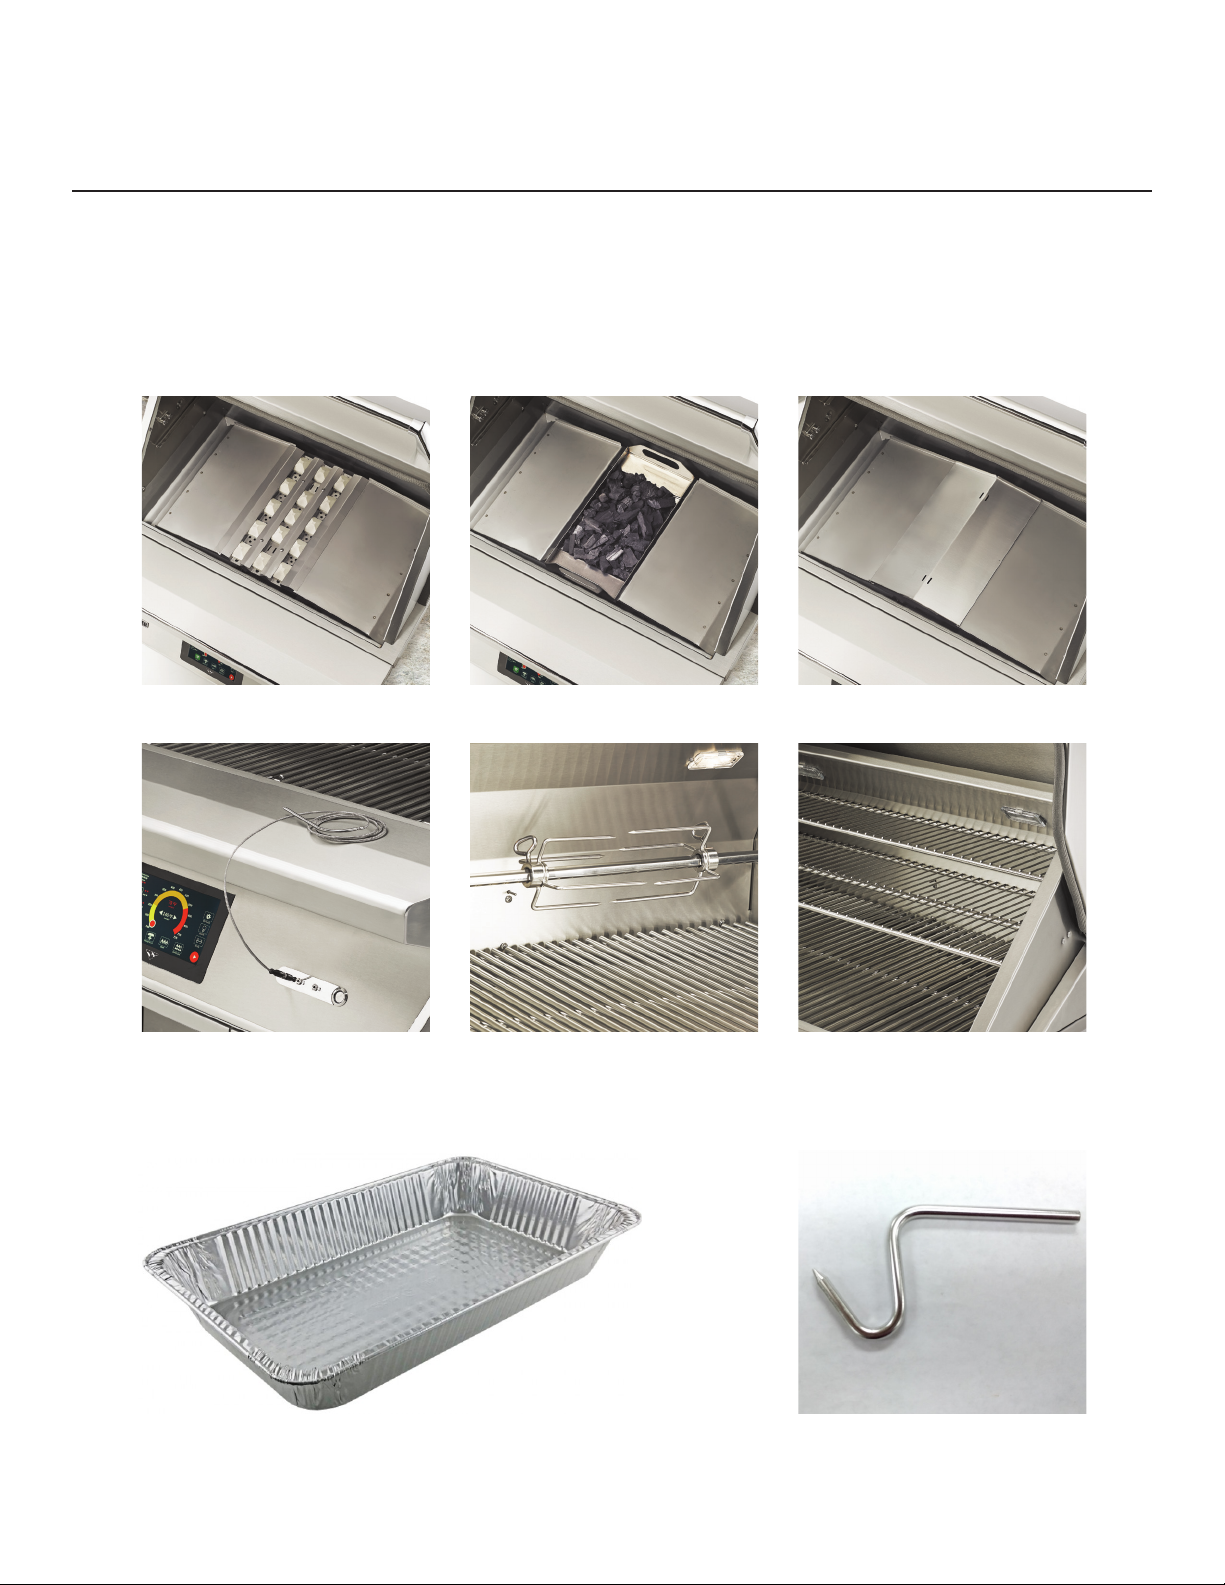
◦ Do not use charcoal in the burn pot, charcoal
is to be used with the Twin Eagles Charcoal
Tray accessory only.
◦ Use only Wood Pellet Fuel specied by Twin
Eagles. Do not use pellet fuel labeled as having
addives.
◦ Never use gasoline, gasoline-type lantern fuel,
kerosene, charcoal lighter uid, or similar
liquids to start or “freshen up” a re in this
appliance. Keep all such liquids well away from
the appliance when in use.
◦ It is strongly recommended that you regular-
ly check the repot for obstrucons to make
sure the air ow is properly maintained.
◦ Never wear loose ng or hanging garments
while using this grill.
◦ Use heat-resistant barbeque mis or gloves
when operang this grill.
◦ Never allow clothing, pot holders, or other
ammable materials to come into contact with
or be close to any grate or hot surface unl it
has fully cooled.
◦ To avoid serious injury, never lean on or reach
over an open grill surface, or place hands or
ngers on the front edge of the grill when hot.
IMPORTANT SAFETY INSTRUCTIONS - cont.
◦ Always operate the grill with the hood in the
closed posion, unless using a feature that
requires the hood in the open posion.
◦ Creosote - Formaon and need for removal.
When wood pellets are burned slowly, they
produce tar and other organic vapors that
combine with expelled moisture to form creo-
sote. The creosote vapors condense in a rela-
vely cool oven ue and exhaust hood. When
ignited, this creosote makes an extremely hot
re.
◦ The ue and interior of the grill should be
inspected at least twice a year to determine
when grease and/or creosote buildup has
occurred.
◦ When grease or creosote has accumulated, it
should be removed to reduce risk of re.
◦ DO NOT over-re your grill. To reduce the risk
of over-ring, never use the grill for anything
other than its intended purpose.
• CARBON MONOXIDE WARNING:
Follow these guidelines to prevent this colorless,
odorless gas from poisoning you, your family or
others.
◦ Know the symptoms of carbon monoxide
poisoning: headache, dizziness, weakness,
nausea, voming, sleepiness, and confusion.
Carbon monoxide reduces the blood’s ability
to carry oxygen. Low blood oxygen levels can
result in loss of consciousness and death.
◦ See a doctor if you or others develop a cold or
u-like symptoms while cooking or in the vicin-
ity of this appliance. Carbon monoxide poison-
ing, which can easily be mistaken for a cold or
u, is oen detected too late.
◦ Alcohol consumpon and drug use increase
the eects of carbon monoxide poisoning.
• Carbon monoxide is especially toxic to mother
and child during pregnancy, infants, the elderly,
smokers, and people with blood or circulato-
ry system problems, such as anemia, or heart
disease.

www.twineaglesgrills.com | v
TWIN EAGLES | PELLET GRILL
FEATURES:
1
2
3
4
5
6
7
8
910 11
PELLET HOPPER GUARD REMOVABLE
ALUMINUM ASH TRAYS
HOOD GASKETTEMPERATURE PROBES
1. HOOD
2. FOOD HOOKS
3. COOKING RACKS
4. ROTISSERIE SPROCKET
5. COOKING GRATES
6. PELLET HOPPER COVER
7. ON/OFF SWITCH
8. ASH DRAWERS
9. PELLET HOPPER
10. CONTROL PANEL
11. PROBE STATION

vi | Twin Eagles Technical Support (562) 263-3600
TABLE OF CONTENTS CUSTOMER CARE
Please record the product informaon below and
refer to it when contacng Twin Eagles.
This informaon is found on the data nameplate,
located under the right hand Ash Drawer. A second
label with model number and serial number is located
below the Front Panel above the right Ash Drawer,
shown below. Remove the right Ash Drawer to visually
access the nameplate from the front of the grill.
SERVICE INFORMATION
MODEL NUMBER
SERIAL NUMBER
DATE OF PURCHASE
PLACE OF PURCHASE
To the Installer:
Please read these instrucons completely and give this manual to the owner.
To the Owner:
Keep this manual in a safe place for future reference.
WARNING: CALIFORNIA PROPOSITION 65
This product can expose you to chemicals including carbon monoxide which is known to the State of Cali-
fornia to cause cancer and reproducve harm. To minimize exposure to the by-products of the burning fuel
or from combuson, always operate this unit according to the use and care manual and provide good ven-
laon. California law requires businesses to warn customers of potenal exposure to such substances. For
more informaon go to www.P65Warnings.ca.gov.
AVERTISSEMENT: PROPOSITION 65 DE L’ETAT DE LA CALIFORNIE
Cet appareil peut vous exposer aux produits chimiques et au gaz monoxyde de carbonne reconnue dans
l’Etat de la Californie pour causer le cancer et des problemes de ferlite. Pour minimiser l’exposion de ces-
sous produits combusbles ou de la combuson, uliser toujours cet appareil en conformitee au manuel
d’ulisaon et d’entreen en s’assurant egalement d’une bonne venlaon. La loi de la Californie exige aux
fabricants d’informer leurs clients aux risques d’exposion potenelle a de telles substances. Pour plus d’in-
formaon, visiter le site www.P65Warnings.ca.gov
SERIAL NUMBER /
MODEL NUMBER
TEPG36 SN: XXXX XXXXXX
GETTING STARTED 1
LOCATING THE GRILL 2
CUT-OUT DIMENSIONS 3
INSULATION JACKET 4
ELECTRICAL REQUIREMENTS 5
WINDY CONDITIONS 6
PELLET SMOKER MODE OVERVIEW 7-9
USING YOUR PELLET GRILL & SMOKER 10-13
RECOMMENDED PELLETS 14
PELLET SMOKING GUIDELINES 15
PELLET GRILLING TIMES AND TEMPS 16-17
CLEANING AND MAINTENANCE 18-19
EXPLODED VIEW 20-21
REPLACEMENT PARTS LIST 22-23
WIRING DIAGRAM 24
WARRANTY 25
HOW TO OBTAIN SERVICE 26

www.twineaglesgrills.com | 1
GETTING STARTED
1. Remove all packaging materials, labels and protecve lm. DO NOT LEAVE UNIT IN THE SUN WITH PRO-
TECTIVE PLASTIC FILM ON FOR AN EXTENDED PERIOD OF TIME AS IT WILL BECOME DIFFICULT TO RE-
MOVE.
2. Check to ensure all grill accessories listed below are included.
3. Fill out Warranty Registraon Card and mail it to the indicated address, or register Online. See page 23.
BRIQUETTE TRAY CHARCOAL TRAY INDIRECT/VAPORIZER PLATE
TEMPERATURE PROBES X3 MEAT FORKS X1 PAIR
&
ROTISSERIE ROD
COOKING RACKS X3
REMOVABLE ALUMINUM ASH TRAYS X2 FOOD HOOKS X3

2 | Twin Eagles Technical Support (562) 263-3600
LOCATING THE GRILL
This grill is designed for outdoor use only. Do not locate this grill under overhead combusble surfaces.
CAUTION should be taken when grills are used near glass, vinyl siding or other temperature sensive construc-
on materials. In some cases, it may be necessary to increase the clearance around the grill to avoid damage
to vinyl siding. Check with the manufacturer of the siding material for details.
DO NOT operate the grill inside a building, garage, recreaon vehicle or any enclosed area. When choosing an
area, consider exposure to wind, and proximity to trac paths. Keep the grill away from windy areas but keep
the grill in a well-venlated area. Do not obstruct the ow of combuson and venlaon air around the grill.
The supporng edges of the grill must be located level and at. The counter should also be leveled.
CLEARANCE TO COMBUSTIBLE CONSTRUCTION
A minimum clearance of 12” from the sides and 12”
from the back of the grill to adjacent vercal combus-
ble construcon must be maintained. For adjacent
combusble construcon extending above the count-
er-top surface, the minimum clearance from sides and
back of the grill is 18 inches.
DÉGAGEMENT de toute construcon combusble
Il faut maintenir une distance minimum de 12 po
(30.48 cm) sur les côtés et de 12 po (30.48 cm) sur
l’arrière du gril par rapport aux construcons com-
busbles vercales adjacentes. Pour une construc-
on combusble adjacente s’étendant au-dessus de
la surface du comptoir, le jeu minimal des côtés et de
l’arrière du gril est de 18 po (45.72 cm).
CLEARANCE TO NONCOMBUSTIBLE CONSTRUCTION
A minimum clearance of 3 1/4” from the back of the
grill above cooking surface to non-combusble con-
strucon is required to allow the grill hood to open
completely.
A minimum of 6” clearance to the sides of the grill
above cooking surface to non-combusble construc-
on is recommended. The grill can be installed direct-
ly next to non-combusble construcon below the
cooking surface.
DÉGAGEMENT DE TOUTE CONSTRUCTION IN-
COMBUSTIBLE
Une distance minimum de 3 1/4” po (8.25 cm) de
l’arrière du gril au-dessus de toute surface de cuisson
à la construcon incombusble est prescrite pour
permere à la hoe d’ouvrir complètement.
Une distance minimum de 6 po (15.24 cm) des
côtés du gril au-dessus de la surface de cuisson à la
construcon incombusble est recommandée pour
prévoir de l’espace pour le moteur de la rôssoire et
la poignée des broches de cuisson. Le gril peut être
installé directement à proximité d’une construcon
incombusble en-dessous de la surface de cuisson.
A MAJOR CAUSE OF FIRES IS FAILURE TO MAINTAIN
REQUIRED CLEARANCES (AIR SPACES) TO COMBUSTI-
BLE MATERIALS. IT IS OF UTMOST IMPORTANCE THAT
THIS PRODUCT BE INSTALLED ONLY IN ACCORDANCE
WITH THESE INSTRUCTIONS.

www.twineaglesgrills.com | 3
CUT-OUT DIMENSIONS
24.25
25
NOTE:
THIS IS FOR NON-COMBUSTIBLE ENCLOSURES
ONLY. FOR COMBUSTIBLE ENCLOSURES REFER
TO THE NEXT PAGE.
SEE COUNTERTOP
NOTCH DETAIL
TEPG36R
(TEPG36G)
TESD361-C
DETAIL
* ADD 3.25 TO ALLOW
FOR HOOD OPENING
COUNTERTOP
NOTCH DETAIL

4 | Twin Eagles Technical Support (562) 263-3600
INSULATION JACKET
INSULATION JACKET WARNING:
Do not build the grill under overhead combusble construcon. If the grill is to be placed into a com-
busble enclosure, an approved insulang jacket is necessary to prevent re, property damage and bodily
injury. Use only Twin Eagles Pellet Grill and Smoker insulang jacket (TEPIJ36).
To prevent damage to the power cord use the hole provided in the front right of the Insulang Jacket to
thread the power cord through.
TEPG36R
(TEPG36G)
TEPIJ36
40.85 28.1�
19
26
3�
36
18.50
25
*
APPLY
WATERPROOF
SEALANT
POWER
CORD
HOLE
NOTE:
THIS IS FOR COMBUSTIBLE ENCLOSURES ONLY.
FOR NON-COMBUSTIBLE ENCLOSURES REFER
TO PREVIOUS PAGE.
* ADD 1.50 TO ALLOW
FOR HOOD OPENING

www.twineaglesgrills.com | 5
ELECTRICAL REQUIREMENTS
This appliance should only be serviced by a qualied technician, or electrical shock may occur. It is rated
at 120V, 5A ,60Hz.
REMINDER:
Keep any electrical supply cord away from any heated surfaces.
WARNING
Electrical Grounding Instrucons:
This outdoor cooking appliance is equipped with a three prong (grounding) plug for your
protecon against shock hazard and should be plugged directly into properly grounded
three prong outlets. Do not cut or remove the third prong from this plug.
Electrical equipment provided with the outdoor cooking appliance shall follow these guidelines:
1. Do not use an outdoor wood red grill for purposes other than intended;
2. To protect against electrical shock, do not immerse cord or plugs in water or other liquid;
3. Unplug from the outlet when not in use and before cleaning. Allow to cool before pung on or taking o
parts;
4. Do not operate any outdoor wood red grill with a damaged cord, plug, or aer the appliance malfunc-
ons or has been damaged in any manner. Contact the manufacturer for repair;
5. Do not let cord hang over the edge or touch hot surfaces;
6. When connecng, rst plug appliance into outlet;
7. Use only Ground Fault Interrupter (GFI) protected circuit with this outdoor cooking appliance;
8. Never remove the grounding plug or use with an adapter of two prongs; and
9. Use only extension cords with three prong grounding plugs, rated for the power of the equipment, and
approved for outdoor use with a W-A marking.
!!
Storage:
During shipping the power plug for the Twin Eagles Pellet Grill and Smoker is located in the front right
ash drawer.

6 | Twin Eagles Technical Support (562) 263-3600
WINDY CONDITIONS
Your Wood Fired Pellet Grill and Smoker has been designed and engineered to produce smoke that
infuses your food with a smoky avor. The repot requires air for ecient combuson. This fresh air is pulled
through a vent in the front of your grill and the intense hot air and smoke produced by the pellets is expelled
through a vent in the rear. If you are using your grill in windy condions, the wind can disrupt this important
airow.
If the grill is set to a high heat seng and the hood is closed, wind can prevent the hot air from being
expelled through the rear vent – forcing heat to the front of the grill. This heat can make the hood handle and
front panel extremely hot. In some cases, this heat can damage important components.
To Prevent Overheang:
Install your grill in a locaon where a prevailing wind is less likely to hit the rear of the grill. If this is not
possible, install a windbreak behind your grill.
Damaged components such as wiring, heat probes, etc., and the discoloraon of the stainless steel by
using the grill in windy condions is not covered under the product warranty.
HOT AIR
FRESH AIR

www.twineaglesgrills.com | 7
PELLET GRILL OVERVIEW
START-UP
Your grill ulizes many advances in technology to bring greater control to your nger ps. Making use
of these advancements will help you perfect your techniques and get the most avor and best results every
me.
• Every perfect barbecue experience starts with selecng and lling the pellet hopper with your favorite all
natural wood cooking pellets. (Ensure they are completely dry) (See Page 9)
• Turn ON the switch to the right of the Probe Jacks; the grill will go into “STAND BY” mode. The display will
be locked by default. To unlock the display, tap the lock buon three mes.
Once in “STAND BY” mode you are able to set the temperature, recipe, and mer to the desired seng
that is opmal for the food you are cooking.
LIGHTS ON/OFF
ROTIS ON/OFF
PROBE 1
PROBE 2
PROBE 3
SETTINGS/WIFI
RUN TIME
TIMER
START/STOP
TARGET TEMPCURRENT TEMP
GRILL MODES
SEE Pg. 9
SEAR PLATE
MANUAL TEMP SETTING
ON/OFF
SWITCH
PROBE
JACKS
CURRENT TEMP
TARGET TEMP
LOW HEAT
ALARM
PROBE JACK INSERT
-Store in drawer
when not in use
LOCK BUTTON
LOCK / UNLOCK THE DISPLAY:
When the grill is turned on, the display will be locked. In the boom le
corner of the display screen is a yellow buon with a “LOCK” symbol in it, this is
the Lock buon. To unlock the display, tap the lock buon three mes in rapid
succession. The buon will now show that the display is unlocked by showing the
lock icon unlocked and the buon is gray. See images on the right. UNLOCKEDLOCKED

8 | Twin Eagles Technical Support (562) 263-3600
SETTINGS MENU
OVERVIEW - cont.
CONNECTING TO WIFI
Your new Wood Fired Pellet Grill and Smoker is made to connect to your homes WiFi to receive updates
and to monitor your grill with the companion mobile app. To connect to WiFi follow these steps:
DEFINITIONS TO KNOW:
WiFi ACCESS POINT - The grill is broadcasng a WiFi signal.
WiFi STATION MODE - The grill will look for and connect to the WiFi signal provided by the customer.
1. Go to the Sengs screen.
2. WiFi ACCESS POINT in the top right should be red.
3. At the boom le corner will be a box labeled “SETUP WIFI STATION MODE”. Inside are two elds to type
in your WIFI network name and password. (Your WiFi Network name can usually be found on your router
or if it has been renamed, enter your personalized network name.)
4. Once your network name and password are entered, press send.
5. At the top right of the Sengs screen there is a box labeled “WIFI STATION INFO”. Aer pressing send,
your network name and I.P. address will appear here with a colored message that will either say
• “CONNECTING” in yellow/orange (the grill is aempng to connect) or...
• “ESTABLISHED” in green (a connecon has been made).
6. If the connecon does not establish, double check the name and password to verify everything has been
entered correctly.
7. You have now connected your new Wood Fired Pellet Grill and Smoker to your WiFi!
IMPORTANT:
Establishing a connecon to your WiFi network will allow the grill to receive updates automacally. A dialogue
box will appear on the display nofying you of a new update. Please note, depending on the quality and speed
of your internet connecon, along with the size of the update le, the upload process may take up to 20 min-
utes. To save the update to the grill, simply turn the grill o and on again. The grill is now updated and ready
to use.
If WiFi is not readily available, email SERVICE@TwinEaglesGrills.com and request instrucons on how to update
the soware via the unit’s USB port.

www.twineaglesgrills.com | 9
GRILLING MODES
The Wood Fired Pellet Grill and Smoker has four dierent grilling modes:
• SMOKE - Most grilling/baking/roasng will take place using the SMOKE mode. In this
mode the grill will produce a moderate amount of smoke to infuse into your food.
• SMOKE PLUS - The Smoke Plus mode is for those that want an intense smoke avor im-
parted into the food. Uses a reduced fan speed to increase smoke producon.
• SEAR PLATE - Sear Plate sets the grill to HIGH, MEDIUM or LOW to sear the outside of your
food using the hot grill grates, sealing in the delicious juices and avor of your food.
• CHARCOAL - In the Charcoal mode the repot is used to start the charcoal in the Charcoal
Tray. Once the charcoal is started the fan assist is used to stoke the charcoal to higher tem-
peratures if desired. Can be turned on/o as needed.
OVERVIEW - cont.
ADDITIONAL FEATURES
The Twin Eagles Wood Fired Pellet Grill and Smoker comes equipped with two halogen lights and a
Rosserie.
• Halogen Lights - To turn the lights ON/OFF simply press the lights buon.
• Rosserie - To turn ON/OFF the Rosserie simply press the “ROTIS” buon.
INITIAL SET-UP - FILLING THE HOPPER AND AUGER
Before you can start smoking, you will need to ll the hopper and
prime the auger with pellets.
1. Open the hood.
2. Remove center grate and indirect plate to gain access to the repot.
3. Pull open hopper and ll with chosen blend of pellets. Then close hop-
per.
4. Go to SETTINGS screen
5. Press PELLET AUGER buon which is located at the top le of the set-
ngs menu. Leave the auger running unl pellets can be heard falling
into the repot.
6. Remove the pellets that have fallen into the repot. They may be reused
since they are not burned.
7. The auger is now primed and you are ready to smoke.
SEAR PLATE
PELLET HOPPER

10 | Twin Eagles Technical Support (562) 263-3600
USING YOUR PELLET GRILL & SMOKER
SMOKE
Using your Wood Fired Pellet Grill and Smoker is easy, and it is packed with features. Here’s how to use
them:
PROBE BUTTON
PRESET FOOD MENU
PROBE BUTTON AFTER
FOOD SELECTED
1. Turn on your grill.
2. The Control Panel will load the “STAND-BY” screen, which will have “SMOKE” preselected. Unlock the
Display Screen by tapping the “LOCK” three mes in rapid succession.
3. Set your target temp using the temperature adjustment slider or by tapping the arrows on either side
of the target temp, or by tapping the target temp and inpung the temperature on the keyboard that
appears.
4. Choose which probe you want to use. Tap the probe buon and select from the menu of preset food
temperatures/cooking mes and press enter. The picture of the selected food preset will appear in the
probe buon to the le of the temperature slider along with the current temperature in red and target
temperature in white.
5. Make sure there are no leover pellets or ash residue in the repot from any previous use. Tap the green
“GO” buon to light the grill, the hood must be in the closed posion when lighng the grill (Inially
there may be a bit of smoke but that will dissipate).
6. Once your grill has reached the target temperature, set up your mer. Tap “Timer” in the top le corner
of the control screen and type in the cooking me desired. NOTE: the “Run Time” is the overall me the
grill has been running.
7. Place your desired food into the grill, insert your probe into the center of the food not touching any bone.
If using the rosserie funcon of the grill, the probe must be removed aer every temperature taken.
8. Once your food has nished cooking, tap the red “STOP” buon to start the cooldown cycle.
IMPORTANT
Prior to operang the grill in any capacity, ensure that the repot is clear of any ash build-up or un-
burned pellets. Make sure the Firebox is clean of any ash build up or grease. Making sure that the inside of
your pellet grill is clean and clear. This will help with the longevity of your grill, so make sure this process is
done regularly.
IMPORTANT
No preheang or priming required. When switching types of pellets to cook, purge the pellet hopper
using the “PELLET AUGER” buon in the “SETTINGS” menu. To prevent misres, ll the auger using the “PEL-
LET AUGER” buon. Keep the auger running unl your hear pellets falling into the repot. Clear the repot of
pellets before cooking.

www.twineaglesgrills.com | 11
BRIQUETTE TRAY
SEAR PLATE
1. Turn on your grill. Unlock the Display Screen by tapping the “LOCK” three mes in rapid succession.
2. Make sure there are no leover pellets or ash residue in the repot from previous use.
3. Replace the Indirect/Vaporizer Plate with the Briquee Tray as shown.
4. Select SEAR PLATE Mode. A Sear Plate Mode menu will appear that will show HIGH, MEDIUM and LOW
seng.
5. Choose the desired cooking seng.
6. Close the hood. Tap the green “GO”
7. Once the target temperature has been reached, a READY icon will appear just below the LOW seng
buon signifying that the grill reached the desired temperature.
8. Open the hood and place desired food on the center grate to begin searing.
9. Once nished, hit the red “STOP” to start the cooldown cycle.
USING YOUR PELLET GRILL & SMOKER - cont.
USING THE ROTISSERIE:
1. Insert food on rod and secure with meat forks. If mulple pieces of food are to be
cooked at the same me, make sure the food is evenly balanced to ensure the food is
cooked evenly.
2. Follow direcons for using the SMOKE mode up to step 6.
3. Insert rod into the rosserie sprocket.
4. Turn on the ros motor by pressing the ros buon.
5. Cook food to desired doneness, then remove from grill.
NOTE: Rosserie is only to be used with “SMOKE” or “SMOKE PLUS” modes.

12 | Twin Eagles Technical Support (562) 263-3600
USING YOUR PELLET GRILL & SMOKER - cont.
1. Turn on your grill. Unlock the Display Screen by tapping the “LOCK” three mes in rapid succession.
2. Remove the Indirect/Vaporizer Plate assembly from above the repot. Make sure there are no leover
pellets or ash residue in the repot from previous use. Install in its place the Charcoal Tray Assembly and
above that install the Charcoal Tray Body.
3. Place a moderate amount of charcoal on the Tray Body. Spread out evenly one layer of charcoal bri-
quees.
4. Press CHARCOAL Mode. A message should appear that reads: “DURING CHARCOAL STARTER MODE, YOU
MUST KEEP THE LID OPEN. DO NOT USE CHARCOAL LIGHTER FLUIDS OR SELF LIGHTING CHARCOAL.” In
order to proceed to starng your charcoal you must tap the “AGREE” buon. From there you will see “IN
CHARCOAL MODE, YOU MUST OPEN THE LID,” along with a “CHARCOAL STARTER,” the “FAN HIGH” and
“FAN LOW” buons. You will also noce that there is no temperature slider, in CHARCOAL Mode the re-
pot is used to start the charcoal only. The buon “CHARCOAL STARTER” will feed pellets into the repot
to start the charcoal. This may take some me to occur, APPROXIMATELY 10-15 minutes.
5. Once the charcoal has turned mostly ashy gray, it has started.
Cooking with charcoal is a visual and physical experience. The Fan Assist buons (FAN HIGH / FAN LOW)
turn on/o the fan to help increase the temperature of the charcoal. The fan is used to provide more air to the
charcoal aer it is already going. Providing more air will produce more heat, so FAN HIGH will make the coals
produce more heat than FAN LOW.
CHARCOAL

www.twineaglesgrills.com | 13
You are nished cooking your food and now it is me to shut down
your Wood Fired Pellet Grill and Smoker. To shut down your grill, rst press
the red stop buon. This will shut the auger o and the fan speed will go up
to high. A dialog box will appear on the screen nofying you that the grill
has gone into Cooldown Mode. Cooldown Mode will proceed unl the tem-
perature of the unit reads 140°F internally. Once 140°F has been reached
the Cooldown feature has nished and the fan will shut o. It is now safe to
turn o your grill. There is an Exit buon to manually bypass the Cooldown
feature if you intend to connue grilling (it is not recommended to bypass
the Cooldown Mode).
COOLDOWN MODE
USING YOUR PELLET GRILL & SMOKER - cont.
LOW HEAT
LOW HEAT
Your grill comes equipped with a Low Heat Alarm. This noes you that the pellets in the
hopper may be insucient to maintain the target temperature and more pellets will need to be
added to the hopper. The alarm appears in the upper right hand corner of the control screen.
To clear the alarm, touch the alarm icon. A warning window and set of instrucons will appear.
Under sengs menu, press the calibraon buon locat-
ed at the top le (next to the auger pellet buon), and the Meat
Probe Calibraon Menu will appear.
To calibrate:
1. Plug the supplied probe/s into the probe jack. The temperature
will show under their respecve probe locaon.
2. Place the probes in ice water for 1 minute.
3. Using the le or right arrow above the probe name, match the
temperature readings across all three probes.
4. Press save to exit.
Temperature dropping.
Keep hood closed and check hopper for pellets.
If temperature connues to drop, open hood and allow grill to cool
down. Empty the repot and ensure the aeraon holes are clear.
Re-start grill and close hood.
LOW HEAT ALARM
MEAT PROBE CALIBRATION

14 | Twin Eagles Technical Support (562) 263-3600
RECOMMENDED PELLETS
When smoking your favorite foods, its important to make the best pellet selecon. Pellets can come
in all kinds of combinaons and avors including Apple, Cherry, Hickory, Maple, Mesquite and Oak. Pellet fuel
for cooking burns with an average of 8,200 BTU’s per pound and have very lile ash and moisture content (less
than 0.5% ash and less than 6% moisture). Avoid using pellets longer than 1” long.
PELLET FLAVOR GUIDELINES
• APPLE: Has a sweet, fruity smoky avor. Strongest Flavor of the fruit woods. Ideal for most foods.
• CHERRY: Has a mild, sweet fruity smoke avor. Tends to give meat a rosy nt of color.
• HICKORY: Has a strong, bacon avor.
• MAPLE: Has a very mild, sweet light smoky avor.
• MESQUITE: Has a strong, spicy avor. King of southwest smoking.
• OAK: Has a mild, wood-red avor. This is your roasng wood.
CAUTION:
Some wood pellets produced for heang fuel have a high chance of containing addives that are harmful when
burned. For opmum performance from your grill, ensure that any pellets intended to be used as fuel are free
of addives. Low quality pellets may adversely aect your grilling temperatures, me, and avor.
Avoid using so woods for pellet fuel as it will impart a turpenne-like taste.
RECOMMENDED PELLET STORAGE:
Some manufacturer’s pellet bags have slits or air holes in them, we recommend that any unused pel-
lets, or any pellets to be store for long periods of me, should be emped into a waterproof container. The
5-gallon buckets obtainable from your local hardware store make great waterproof containers, and lids can
easily be ed to the top to completely seal the bucket. Ensure that any locaon to be used for pellet storage
is dry and away from sources of heat.
This manual suits for next models
1
Table of contents
Popular Smoker manuals by other brands

Southern Pride
Southern Pride SPK-280 instruction manual

Great Outdoors Grill Company
Great Outdoors Grill Company Smoky Mountain Series 32934 Assembly and owner's manual

Kalamazoo
Kalamazoo K-SMOKE-42-R-PW Use and care guide

BBQ Expedition
BBQ Expedition BBQ PIT BOX GF-S user manual

Char-Broil
Char-Broil 14201571 Product guide

oklahoma joes
oklahoma joes 09201555-05 Product guide

Konifera
Konifera BD 476701 Assembly and operating instructions

Pit Boss
Pit Boss COPPERHEAD PBV3PM1 Assembly and operation

gascraft
gascraft OIL DRUM CHARCOAL user guide

Pit Boss
Pit Boss Competition Series owner's manual

Masterbuilt
Masterbuilt MWS 130S instructions

Char-Broil
Char-Broil 13201776 Product guide