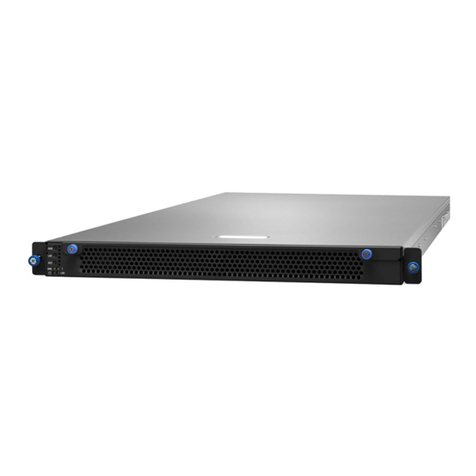
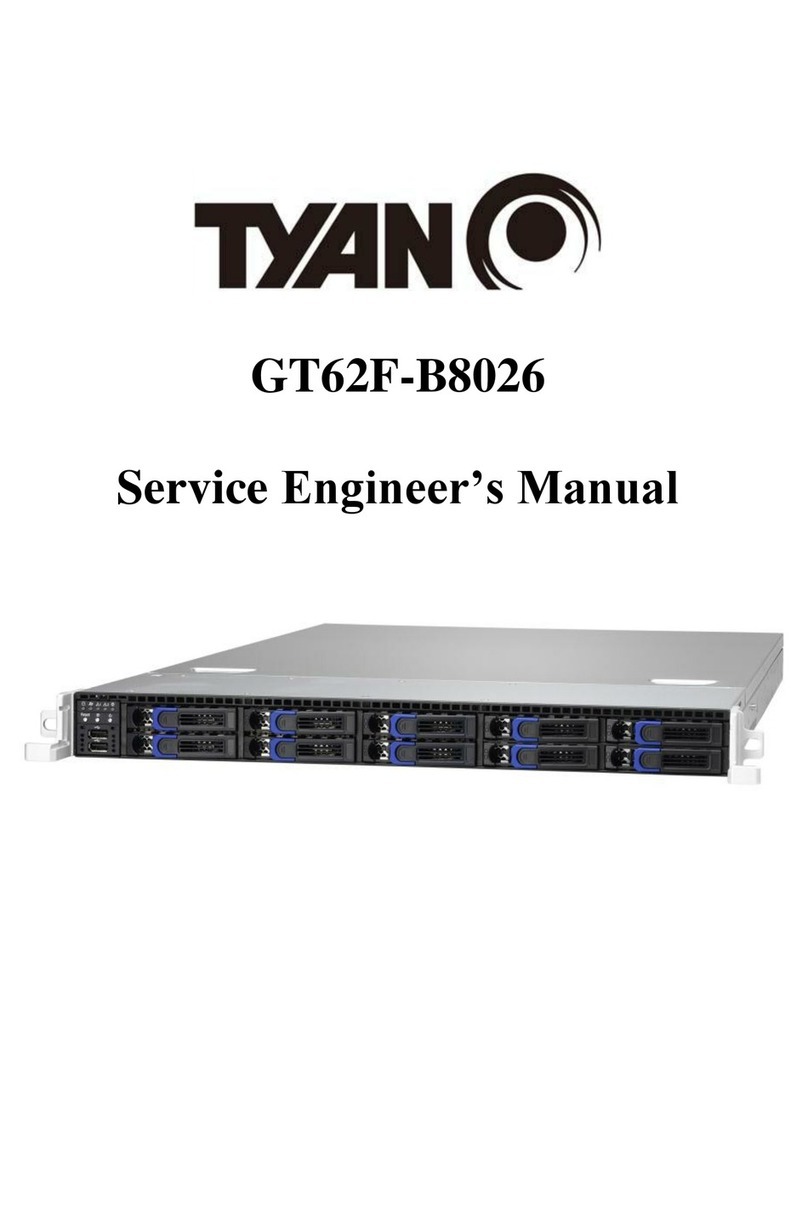
TYAN Transport Gl24 B2932 Quick start guide

8,2932
Transport GT24
Docunrent I'art li Dlll47 - I00
Rcvision 1.00
INDUSTRY-LEADING SYSTEM BOARD TECHNOLOGY
Distinguishing TYAN f.om thecompetilion is simple - engineering, lime-lo-ma*6i
and quality. With localdesign cenlers located worldwid€, TYAN enoineers work
closelywilh key suppliers and customers to provide high-quality designs and
exceplional time{o-ma*el advsnlages. To insure the highesl levels ofqualily, all
TYAN producls are designed and manufactured in lSO9001/9002 certified facilili€s,
and are covered by our ifldustry-leading manufacturor's wafiEnty.
TYAN Computer Corporalion designs, develops and manufacturcs innovalive
intemet platforms for high-performance, mission-critical compuiing environments,
Our award-winning product line includes awide variety ofsingls, dual, and multi-
'processor pla$oms lhal are p€rfectly suited 10 meetlh€ performence rcquirements
of tod€y's most demanding server, workslation and desktop applic€tioos
ABOUT TYAN
TYAN Computer Coeoratron, found€d in 1989 by loog-lime lnt€l and IBI\,4 execulive
Dr. T. Symon Chang, designs, manutuclurcs and markels advancod system board
technology. Ourproducts ar€ sold to OEMS, syslems lntegrators, VARS and Re_
sellers worldwide, Over the lasl decade, TYAN has consistenlly been one ofthe
fsslest growing technology companies in lhe Unjted Stales. TYAN was named lo the
prcsligious INC 500 in 1997 and '1998 (1gth tastesi growing U-S. company in 1997)
TYAN was also rankBd by Deloitte & Touche as ono of the USA'S "Fasl500", aswell
as oneol Silicon Valley's "Fasl 50 ' companies in 1998. For more informalion,
visit us on lhe World Wide Web sile at: htlpj rwwlyan.com
rvf,
TYAN Computer coDoration
3288 Laurelview Court
Fremonl. CA 94538
For more informalion aboui ryAN products, vislt our website at:
I
Hlgh Performance Barebone System
riTl::
.*l
www.tyan.co, lW Service Engineer's Manual

Transport Gl24
B.2932
Service Engineer's Manual
I

PREFACE
Copyright
This publicatjon, including all photographs, illuslralions, and soft-
ware, is prolecled under inlemational mpyright laws, with all dghts
reserved. Neither this manual, nor any malerial contained herein,
may be reproduced wilhout wrilien consenl of lhe manufadurer,.
Copydght 2007
Version 1.0
Disclaimer
lnformation contained in this document is tumashed by TYAN Com-
puter Corporation and has been reviewed for accuracy and reliability
pdor lo printing. TYAN assumes no liabilily whalsoever, and dis-
claams any express orimplied waranty, relating lo sale and/or use of
ryAN prcducts including liability or warranties relaling to filness for
a particular purpose or merchantability. TYAN retains the righl to
make changeslo producl descriptions and/or specirications at any
lime, without nolace. ln no ev6nt willTYAN be held liable for any
direct or indirect, incidental or consequenlial damage, loss of use,
loss of datra or other malady resultinq from enors or inaccuracies of
informalion contained in lhis docLlmenl.
Trademark Recognition
All regastered and unregistergd trademarks and company names
contained in this manual are property of lheh respective owners
including, butnot limiled tolhe following.
ryAN, Transport GT24 82932, and Thunder n3600M are trade-
marks of TYAN Computer Corporation.
A[,{D, Opteron, and combinations thereof are trad€marks of AldD
Corporalion.
Microsofr, Windows are trademarks of l\,4icrosolt Corporalion.
Marvell is a lrademark ol Broadcom CoQoration and/or its
subsidiaries-
nVlDlA and nForce arc tGdemarks of NVIDIA Corporation.
lBM, PC, AT, and PS/2 a.e lrademarfts of IBM Corporation.
Winbond is a trademark ofWinbond Electronics Corporation.
Porlable Document Format (PDF)is a trademark ofAdobe Corpora-
lion.
I

Federal Communications Commission (FCC) About this Manual
This manual provides you with instructions on instatting your
Transport GT24, and consists ofthe fotlowing sections:
Operalion is subject lo the following condilaons:
1)This device may not cause harmful interference, and
2)This device mustacceptany interference received including inleF
ference lhat may cause undesi.ed operation. lfthisequipmenl does
cause harmful inlerference to radio or lelevision reception, which
can be delermined by lurning the equipmenl offand on,lhe user is
encouraged to try one or more ofthefollowing measures:
- Reorient or relocate lhe receiving antenna.
- lncrease the separalion belween lhe equipment and the
receiver.
- Plug lhe equipment into an outlet on a circuit different Lom
that of lhe receiver.
Consult lhe dealeron an experienced radio/televasion technician for
help.
Notice for Canada
Notice for the IJSA Complianc€ lnformation Slate-
ment (Declaration of Confomity Procedure) DoC FCC
Parl 15: This device complies wilh part 15 ofthe FCC
This apparaius complies wilh lhe Class B limits for radio ifllerference
as specilied in the Canadian Departmenl of Communications Radio
lnterference Regulations. (Cet appareilest conforme aux norms de
Classe B d'interference radio tel que specilie par le l\,4inistere cana-
dien des Communications dans les reglements d'ineteference
radio.)
re Iifi :J%ff :i"#:Jy:'Il,:HErtSit: [#3'' "'*
\\ rEMc)
CAUTION:Lilhium baltery includedwith lhis board. Donol puncture,
mutilate, ordispose of ballery in fire. Danger ofexplosion if battery
is incorreclly replaced. Replace onlywilh lhe same orequivalenl
type recommended by manufacturer Dispose of used battery
according lo manufacturer inslructions and in accordance wilh your
localregulations.
Provides an lnlroduclion to the Transport cT24
82932 barebones, packing lisl, descrlbes lhe
external components, gives a table ot key compo-
nonts, and provides block diagrams of lhe system.
Covers procedures on installing lh6 CPU, mem-
ory modules, an optional PCLE card, and hard
Covers removal and replacement procedures for
pro-inslalled componenls.
Descdbes lhe differences betwoen mainboad
BIOS and system BIOS. The cabte connection
lables are also provided for reference of syslem
setup.
Chapt€.1:
Chapter2:
Chapter 3:
Appendix:
Conventions
The Following conventions are used in the manual:
NOte; Calls atlenlion to imporlanl inlormation.
Wafning: Provides information to prevenl harm
to user or damage to equipment.

SAFETY INFORMATION
Before inslalling and using the Transport GT24,lake nole of the fol_
lowing precautions:
Table of Contents
Chapter l:Overview
l.l About rhc TYAN Transport GT24 82932 ,l
- Read all inslructions carefully-
- Do not place the unil on an unslable surface, cart, or stand.
- Do not block the slols and opening on the unit, which are pro_
vided forventilation.
- Only use the power source indicaled on the marking label. lf
you are not sure, conlact the Power Company.
- The unit uses a lhree-wire ground c€ble, which is equipped
with a third pin to ground the unit and prevent electricshock.
Do nol defeat the purpose oflhis pin. lf your outlel does not
supportthis kind of plug, contact your electrician to replace
your obsolele outlet.
- Do nol place anylhing on the power cord. Place the power
cord where itwillnot be in the way of foot traffic.
Follow allwarnings and cautions in this manual and on the
- Do nol push objects in the ventilation slots as they may touch
high voltage components and result in shock and damage lo
- When replacing parts, ensurelhatyou use parts specified by
the manufacturet
- When service orrepairs have been done, perform routine
safely checks to verify that the system is operating correctly.
Avoid usang lhe system near water, in direct sunlight, or near
- Coverthe unitwhen not in use.
1.2 Product Models . . . . . . . . . . . . . . . . - - -2
1.3 Fcatures . . . - . . . . . . . . . . . . . - . . . . . . . 3
1.4 Unpacking . . . . . . . . ..............s
1.4.1 Accessories . . . . . . . . . . - . - . . . 5
1.4.2 FRUPans.....-. ......-...-7
1.5 About lhe Product . . ..............9
1.5.I Systcm Front view ..........9
1.5.2 System Rearvicw ... ....... .9
1.5.3 LED Definition . . .. .. . .. .. .10
1.5.4 System Intemal View. . .. . . . .. . . . . -.... - ..........12
1.5.5 CT24 82932 System Block Diagram . . .. .. .. . .. .. .. .14
1.5.6 52932 Board Parts, Jumpers, and Connectorc . . . . . . . . . . 15
Chapter 2:Setting Up
2.0.1 Before You Begin ..........17
2.0.2 WorkArea...... -.--.-.-.-17
2.0.3 Too1s.......... --.-.----.17
2.0-4 Precautions. . . . . . .........-18
2.1 RackMounting.... . . . . . . . . . . . . . . 19
2. L I Installing the Server in a Rack . . . . . . . . . . . - . - . . . . . . . . I 9
2.2 Installins Motherboard Components. . . . .. .. ....... -. - -. -. -24
2.2-1 Removing the Chassis Cover. . . . .. .. . . . .. .. -.. - --.-24
2.2-2 Installing the CPU, Heatsink and AirDuct. . .... . -. -. -25
2.2.3 lnstalling the Memory . . . . . . . . . . . . . . . . . . . . . . . . . . . .28
2.2.4 Installing a PCI-E Card . . . . . . . . . . . . . . . . . . . . . . . . . . . 3 I
2.3 Insta'ling thc Hard Drives...............................33
2.4 Installing the Slim FDD (Option) . . - . . . . . . . . . . . . . . . . . . . . . .35
Chapter 3:Replacing Pre-Installed Components
3.1 Introduction. . . . . . . . . . . . . . . . . . . . .37
3.1.1 Work tuea.. .. . . ..........37
3.1.2 Too1s.......... .........31
3.1.3 Precautions. . . . . . ..........18
3.2 Disassembly Flowchart. . . . . . . . -.... - . . . . . . . . . . . . . . . . . . . 39
3.3 Removing the Cove . . - . . . . . .. . . . . .40
3.4 Replacing Motherboard Components. - . . . . . . . .. . . . . . .. . . . .41
3.4.1 Disconnectjng AllMotherboard Cables . .. . . . . . . . . . . .41
3.4.2 Removing the Motherboard.. -...... -.... ..........43

3.5
3.6 Replacing the Slim DVD-ROM . . . . . . . . . . . . . . . . . . . . . . . -44
Rcplacing lhe LED Conlrol Board ........ .............. -.46
1.6.1 M1003 LED Control Board Fealures................ -48
3.6.2 M1003 LED Conlrol Board Conncclor Pin Dcfinilion. ..49
Replacing the M l0l2 Adapter Board.. .. . . . .. .. - .. . . . .. .. .50
3.7.1 Ml0l2 Adaplcr Board Features. . . . . . . . . . . . .......51
3.?.2 Ml0l2 Adaptcr Board Conneclor Pin Defi nition . . . . . . . 52
Replacing the SAS/SATA Backplane............. ........ 57
3.8.1 SAS/SATA Backplane (M 1208) Fcalurcs. . . . . . . . . . . . . 59
Replacingthe PowcrSupply. - . . . ......... -.. -......61
Chapter 1: Overview
About the TYAN- Transport Gf24 82932
Congratulalions on your purchase of the TYAN TransportTM
GT24 82932, a highly-optimized rack-mounlable barebone
syslem. The TYAN Transport GT24 82932 offers the latest in
dual processor server systems, providing a rich feature set
and incredible performance. Leveraging advanced technol-
ogy from AMD@, the TYAN T.anspon GT24 82932 based
server syslem are capable ofoffering scalable 32 and &'-bit
computing, high-bandwidlh memory design, and a ljghtning-
fast PCIX bus implementation. The TYAN TransportTM GT24
82932 not only empowers your company in today's demand-
ing lT environment but also offers a smooth path for future
applicalion usage.
The TYAN TransportrM GT24 82932 uses IYAN'S talest too!
ing-made chassis featuring a robust structure. tool-less and
modularized design, and a solid mechanical enclosure. Allof
this provides the ryAN TransportTM cT24 82932 the power
and flexibility to meet the needs of nearly any server applica-
tion.
3.7
t.1)
1.1
3.8
Appendix I: BIOS Diffcrences
Appendix II: Cablc Connection Tables
Appendir ll l: lnrtalling SMDC Card!
Techrical Support
Chapter l: Ovcrviow

1,2 Product Models
HDD Bays
4 HOOS
4 HODS
82932G24W4H
s2932G24V4H
1.3 Features
HDD
Supported HDD
Backplane
SAS/SATA
SAS/SATA
S2932WG2NR
. Duar 1207-pin ZIF L1 sockets
. Supports upto h{o AMD OpteronrM
2000/8000 series processors
Chipser
. nVlDlA nForce Pro 3600
. NEC nPD720400
. SMSC DI\,'IE5O17
. LSt 1068E
. Sixteen {16)240 pin DDRllDl[,4M
sockels (8 on CPUI and 8 on
CPU2),
. Supporls up to 64GB of Registered
of DDRII 667/553/400 memory
Expansion Slots
. One (1)x8 PCIE wiih riser (pre-
Back UO Ports
. One (1) PS/2 Keyboad and one (1)
. One (1)g-pin UART Seria port
. One 15 pin VGA porl
. Two USB 2.0 ports
. Two RJ45 10/100/1000 Base,T porl
w/ activily LED
Enclosure
. lndustry 19" rack-mountable 1U
- (1)slim CD,ROM bay
- (4)3.5" HDD bays
O 25-4xW 17.2 x H 1.72 inch
(645x436x43.6mm)
Front PanelFeaturos
.ro
- (2) USB 2.0 pons
. LED indicators
Power LED
- (2) LAN LEDS
- HDD active LED
- Waming LED
- ID LED
Chapter 1: Overview
Storage
. Model82932G24V4H
- Serial ATA llHost@ntrcllels
Supporls six (6) serialports run
ning al3.0cb/s
NV RAID O, 1, O+1, 5, ANd JBOD
. [,4odel 82932G24w4H
LSI 1068E SAS @nlroller
Supporis eighl (8)SAS pods run-
ning al3.0Gb/s
NV RAIO 0, 1 and JBOD supporl
Networking
. lTwo 10/100/1000 Base-T LAN
(nForce Prc 3600 inlesrated I'.{AC
wilh l',,larveil 88E1121 Gigabit Elher-
. ATI@ ES1000T[,4 PClgraphics con
. 32[,!B DDR Frame Burerolvideo
, 82932G24V4H
- TYAN Thunder n3600M
2932G2NR-L,B
. 82932G24\\4H
TYAN Thunder n36001,1
2932GWG2NR
. E ATX foolprint (T3" x 12")
Btos
. Al\,ll BIOS on SMbit LPC Flash RO[,,|
. Suppo6ACP|2.0
. Pne DI',{12.0, WrM2.0 power man-
' EPS 12V 1U,650W600W High
. '100V-240V AC input
82932G24V4H S2932WG2NR L B
Chapter l: Ovcrliclv

Server Manag€ment
. Automaiic fan speed conlrol
. Suppori Tyan Server lranagem€nl
(TSn )
. Option ryAN SMDC M3291, lPMl
v2.0 compliani remote seryer man-
System Cooling
. (2) 40'40'56rnm 15000'pm heavy-
duty fanswilh fan speed moni
. (3)40'40'28mm 15000rpm heala-
drly fans wilh fan speed moni-
. (2)Passive cPU Healsink
Regulatory
. FCC Class B (Declaration ofCon-
. CE (Declaration of Conformity)
1.4 Unpacking
'1.4.1 Accessories
CPUl He.tsini
Environment Temp€rature lf any items are missing or appeardamaged, coniacl your
retailer or browse to TYAN's Web site for service:
http://wwwlyan. com.
The Web site also provides information on other TYAN prod-
ucts, plus FAQS, compatibility lists, BtOS settjngs, and more.
operating temperalure (5oC-35oC)
Non'oporating temperature (-40oC_
70oC)
G
{-{D
Leftto right: Europe, US
Chaptor l: Overvicw
a
J

1.4.2 FRU Parts
B3UG
t
ilounting Bracket x 4
&
EDD-E!
FDD Bactplane cabte
FDD lnsralling Rails & Screws
4
$-t
$t"l ."^.";;.1
S2932G2NR
.L.B lTF-Motherboard Tyan S2932G2NR L
B(82932G24V4H SKU)
s2932WG2 1TF-Motherboard Tyan S2932WG2NR
(82932C24W4H Sr(U)
ccHA 0030 lTF.CHASSIS UNIlGT24
cPsu-0112 1TF-Delta 650W TOPS -650C8 C 1U
cPSU-0260 TF-Oe ta 600W TOPS -600C8 1U
CFAN 0066 2TF-Fan Assy: SanyoDenki 40x40x56
3TF Fan t6syiSunon 40x40x28
cHSA 0053 1
cHsK-0052 l
CDVD 0020 lTF-DVD DRIVEiDV-28E R93 TEAC
cPcA 0230 1TF-CD-ROM Adapier board wilh
M120A 1TF-PWA;PWA GT24 lM1208,
SATAJSAS BD
M1012-RS lTF-Front Panel Adaplor Board,
M1012-RS
MlOl]3 RS 1TF.LEO Boad, M1003 RS
M2083-RS 1TF PCI E RiserCard l',12083-RS
cRAL 0031 lTF-RAIL ASSY KlTi24",GT24
cEAR-0050 1TF l,lountino Ear Kit, for GT20/GT24
Chapttr Chrpter

ccBL-0326 TF SATA data 6ble L=250mm
HS/18GHS/180
ccBL 0340 1
TF-Froni panel C@lrol Board Cable
Hs2'l4PiaVH52'14 L=250mm(Flal
Cable)
ccBL,0409 l
ccBL-0419 1
ccBL,0433 TF,CD ROI\,I 4T466 FLAT CAALE
ccBL 0420 1TF-CD-RoM Power cab e S4P/S4P
L=80mm
ccBL-0652 1TF-FAN CABLE L=160mm
ccBL-0493
ccBL"0310
"""**-
1
1
1
TF SAS HDD FailCable
(82932G24W4H SKU)
TFPWR CORDT LJSJTsV
TFPV/R CORDT E]J, ,50V, HOsW
FX3C
Riser Card
Ctr""i" F."t
Mro6i-l
cLcM-oor0
cFBZ4070
Oprbnalt
tr
I'
t, F.""L!q "!f4.,
I LcD "r"d,l" kit l,o, GT *n6 t U
I F@t bezel assembly lor GT senes I U
1.5 About the Product
This section contains the hardware diagrams and a block dia-
gram of the GT24 system.
1.5.1 System Front View
HDD ac$vity LEO
IIO LED
1.5.2 System Rear view
2 USB ports
Chnptcr l: (\rr\ic\ ( lnDttr l: O\cnicl\ I
forcrs0pply
- PS/2 ilouse/Koyboard Porls
I uru poa rrtcsr I PclE slol
lr
I j'E===::-B-;-'ffi *:#$"i;-d.i'';.{
=I
2 x LAN LEO5

'1.5.3 LED Definition
Front Panel
Rear l/O LED
LEO
LEO
LAN 1/LAN2 L nkaqe/ Acl v
No LAN linked and acliv ly
LANnLAN2 Linkaqe/ A.rv-
NO LAN inked and aclivily
Note: ln 10 iabps, the Right LED bllnksy.llowonc. in Bp..t.nd @ itruou5.ction.
ln 100 Mbps,lhe Rlghl fED blink. y.llowtwic. in r.p.at and @ntinuous action.
So d66lh. condition in 1000 tlbps,
ON
AC p€*nuon y svsb ON
Pde. supply cilie evenl
Chxpt€r l: Overvicw
L
ll
Chapter 1: OYerview

1.5.4 System lnternalView
82932G21W4H I82932G24V4H
11
4
5
6
76
:=lrr* * ;
1. PCI-Slot (with riser card
M2083)
2. EPS 12V Power Supply
3. CPU Sockels
4. System Fans (Top-Right to
left: FANl, FAN2, FAN3,
FAN4, FAN5; Bottom-Right to
lefr: FAN6, FANT)
t2
5. Adapter Board
6. SAS/SATA Backplane
7. LED Control Board Cable
8. Four SATA HDDS
9. Slim DVD-ROM
10. DVD-ROM Cable
11. Memory Slots
1. PCI-Slot (with riser c€rd
M2083)
2. EPS 12V Power Supply
3. CPU Sockets
4. System Fans (Top-Right lo
left: FAN1, FAN2, FAN3,
FAN4, FANS; Bottom-Right to
lefl: FAN6, FANT)
Chapter 1: Overview
5. Adapter Board
6. SAS/SATA Backplane
7. LED Conkol Board Cable
8. Four SATA HDDS
9. Slim DVD-RO[,4
'10. DVD-ROM Cable
'11- l4emory Slots
------
Chaptcr 1: Overvicw I3
22
11
I
3

1.5.6 52932 Board Parts, Jumpers, and Connectors
'1.5.5 GT24-82932 System Block Diagram
C PU2
:
CPUl
J18 IPMB Prn Header
Fonl Pansl USB2.0 Cdrecto.
Pin 1-2 clGed: Norfial (D6laull)
Pin 2-3 clGsd: Clear CMOS
- PCI-Xl/PCl)e Sped Seting
Pin 1-2 cto6ed: 133MHz
Pin 2 3clc6d:looMHz
- ASF2.o/SiiOC Solect Jumper
Pin 1-2clos€d: ASF2.0 (Default)
VGA Enabl€/Oisablo Jufr per
Pin 1-2 clo6ed: Enable (Derault)
SLS Enable/Disable Jumper
Pin 1'2 closedi Enable (Derault)
TYAN Fronl Panel2 Conneclor
LCM Pin H€d.r (lor Barebone)
sGPtO Headd (for Baebo.e)
SAS Fault LED Pin Header
J17
JA
$a
J65
J66
Powor Supply
The s2932 is EPS]2V @mparibre
O 3 porer 6nnecto6: EPsl2v
(24-prn + 8-pin + 4-p n)
Check Us.r's Manual for details
J64 Fronl PanelHeader
3
k
'
Chaptcr l: Overview
t.l
r___iEaszE l
ffi
tdilt!!l
-,"-{*-FF-
- {r--
I I r!redq
{r -- -F
__ {L
Chaptrr l: Ovcrvi(r I5

Chapter 2: Setting Up
2.0.1 Before You Begin
This chapter explains how to install the CPU, CPU heatsink,
memory modules. and hard drives. lnslruclions on inlerting a
PCI-E card are also given.
Take note ofthe precautions mentioned in this section when
installing your syslem.
2.0.2 work Area
Make sure you have a stable, clean working environment.
Dust and dirt can get into componenls and cause malfunc-
lions. Use conlainers to keep smallcomponents separated.
Pulling all small componenls in separate containers prevents
them from becoming lost. Adequate lighting and proper lools
can prevent you from accidenlally damaging the internal
components.
2.0.3 Tools
The following procedures require only a few tools, including
the followjng:
' A cross head (Phillips) screwdriver
' A grounding strap or an anlislatic pad
l\,,lost ofthe electrical and mechanical connections can be dis-
connecled using yourfingers. lt is recommended that you do
not use needle-nosed pliers to remove connectors as these
can damage the sofl metal or plastic parts ofthe connectors.
chaetcrr:overview f chapt"lr:*.-**l6 t'l

2.0.4 Precautions
Components and eleclronic circuit boards can be damaged
by discharges ofstatic eleclricity. Working on a system that is
connected to a power supply can be extremely dangerous.
Follow the guidelines below to avoid damage to the
Transport GT24 or injury to yourself.
Ground yourself properly before removing the top
cover of the system. Unplug the powerfrom the
power supply and lhen touch a safely grounded
object to release static charge (i.e. power supply
case). lfavailable, weara grounded wrisl strap. Alter-
native,y, discharge any static electricity by touching
the bare metal chassis ofthe unit case, orthe bare
metal body of any other grounded appliance.
Avoid touching molherboard components, lC chips,
connectors, memory modules, and leads.
The motherboard is pre-installed in the system.
When removing the motherboard, always place it on
a grounded anti-static surface until you are ready to
reinstall il.
Hold eleckonic circuit boards by the edges only. Do
not touch the components on the board unless it is
necessary to do so, Do not flex or slress circuit
boards.
Leave all components inside the static-proof packag-
ing that they ship with unlil they are .eady for installa-
tion.
Afler replacing optional devices, make sure all
screws, springs, orother small parts are in place and
are not left loose inside the case. Metallic parts or
metal flakes can cause electrical shorts,
2,1 Rack Mounting
After installing lhe necessary components, the
Transport GT24 can be mounted in a rack using lhe supplied
rack mounting kit-
Rack mounting kit
Sliding Rails x 2
Sliding Brackets x 4 (Fronl x 2, Rear x 2)
Mounting Ears (including screws) x 2
Screws Kit x 1
Mounting Brackets x 4
2.1.1 lnstalling the Server in a Rack
Follow these inslructions to mount the Transport GT24 inlo
an industry standard 19" rack.
NOTE: Before mounting lhe Transport GT24 in a rack, ensure
that all internal components have been inslalled and that the
unit has been fully tested.
Screws List
Notes:
. All connectors are keyed to only attach one way.
. Always use the correct screw size as indicated in the
procedures.
l8 Chnptcr 2: Setting Up Chrptcr 2: Settirg Up 19
H
t
screw I size I o,untirv I
al-rl ;l
tt
C l**l '' I
I
Tl*,"1 ,l
4!
'fr

lnstallino the lnner Rails to Chassis
'1. Screw lhe mounting ear to each side of Transport GT24
as shown using 2 serews from the supplied screws kit.
4. Locate the front and rear brackets
E
Draw out the inner rails from railassembly. lnstall inner
rails to left and right sides of chassis using 1 M4-41(A)
screw for each side,
Secure the front bracket to outer railwith 2 M4-4L(A)
Reserve the distiance same as in Step 2 on rear bracket.
Secure the rear bracket to outer railwith 2 M4-4L(A)
Secure the outer rail to the rack using 2 brackets and 4
M5-81(B) screws for ea6h side. Secure the mounting
brackets from insrde, nol outside, ol lhe rach.
6.
5.
2_
lnstallinq Ouler Rails to the Rack
3. I\,,leasure the distance between inner side ofthe front and
rear mounting brackets in the rack-
Chapter 2: S€tting Up Chapter 2: Setting Up
r,j
I-t -i
^1
-+./-D
I
r
'{i1,
J
h
..r.r..
i 'l N
N
(
7.
t
1L
?
D
20 2t

Rackmountino lhe Server
8. Draw out lhe middle rail to the latch position.
Lift the chassis and then insert the inner slide
the middle rails.
tfG
Push the chassis in and press the latch key (A). Then
push the whole system into the rack (B).
11. Secure the mounting ears of chassis to the rack with 2
M5-151(C) screws.
NOTE: To avoid injury it is strongly recommended that two
people lift the Transport GT24 into the place while a third per-
son screws it to lhe rack.
rails into
10
t
..1.
22 Chapter 2: Setting Up Chlptcr 2: Setting Up 23
t
B

), Installing Motherboard Components
This section describes how to install components on lo the
motherboard, including CPU, memory modules and PCI_E
card,
2.2.1 Removing the Chassis Cover
Follow these instruclions to remove the Transport Gf24
chassis cover.
1. Release the screw on the back side. Then slide the chas_
sis cover in lhe drrection of arrow.
2. Lift the cover ofi.
2.2.2 lnstalling the CPU, Heatsink and Air Duct
Follow these inskuctions to installthe CPU. CPU heatsink
and air duct.
1. Afler removing the pre-installed air duct, locate the CPU
sockets.
2. Take off the CPU protection cap.
3. Pull the CPU lever up to unlock the CPU socket.
Chaptcr 2r Sctting Up
D
Ef
1-l
aF
-,N
tB
{
B
24 Chapter 2: S€tting Up 25

I
4. Open the sockel in the direction as shown.
Place the CPU in the CPU socket, ensuring that pin 'l is
localed as shown belou/.
Close the socket and press the CPU socket lever down to
secure lhe CPU.
Place the heatsink on top of the CPIJ and screw into
place as shown,
7.
5. 8. Place and screw lhe air duct back.
Chapter 2: Sclling Up
S1
\\ s
\!*l
S
16 27

2.2.3 Installing ihe Memory
Follow these instructions to installthe memory modules on
the motherboard.
1. Locate the memory slots on the motherboard.
2. Press the memory slot locking levers in the direction of
lhe arrows as shown in the following illustration.
3. Align the memory module with the slot. The module has
indentations that align with notches in the slots.
4. lnsert the memory module into the slot as shown.
When inserted properly, the memory slol locking levers lock
automatically onto the indentations at the ends of the module
Attention When lnstallino the Memorv!
Please be noticed always install memory DlN4Ms in pairs
starting from CPUI D|MN4o and CPUI DIMM1 and
CPU2 Dl[rMo and CPU2 DIM[i1.
28 Chaptcr 2: Setting Up Chapter 2: Setting Up 29
F
I
,/
C"
o' {
tl
Table of contents
Other TYAN Network Storage Server manuals
Popular Network Storage Server manuals by other brands

American Megatrends
American Megatrends StorTrends 3100n Specifications

Quantum
Quantum DXi4700 installation guide

NETGEAR
NETGEAR RNDU4000 Hardware manual

American Megatrends
American Megatrends StorTrends 1100n Specifications

JS Automation
JS Automation DC2010 user manual

Iomega
Iomega P400u - 32371 NAS 7200 RPM 160 GB Server Setup guide

QNAP
QNAP Turbo NAS TS-EC 80 Series Hardware user manual

Dell
Dell PowerVault 725N Information update

American Megatrends
American Megatrends StorTrends 1312-N quick hardware installation guide

Iomega
Iomega Ix2-200 - StorCenter Network Storage NAS... Specifications

HP
HP ProLiant ML110 G5 user guide

Planet
Planet NAS-3200 user manual