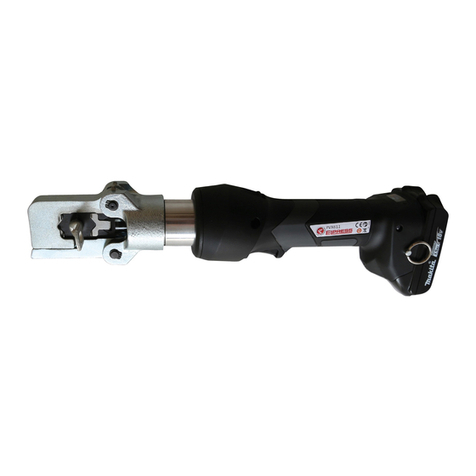
Tyco ERGOCRIMP 539 635-1 User manual

Instruction Sheet
ERGOCRIMP
Crimp-Handzange
PN 53 635-1
411-18087
15 Sept 2010 UL
Rev. E
Instruction Sheet
ERGOCRIMP
Crimp Hand Tool
P/N 53 635-1

Seite/Page 1
ERGOCRIMP Handzange
PN 539 635-1
411-18087 / Re . E
ERGOCRIMP Hand Tool
PN 539 635-1
411-18087 / Rev E
1 Using the
instruction sheet
The instruction sheet must be constantly within reach
at the hand tool
Each person who is working with the hand tool, must
be familiar with the instruction sheet and strictly
observe the instructions therein
Tyco Electronics declines to accept any liability for
damages that are incurred due to the fact that the
instructions on the hand tool or in the instruction sheet
have been disregarded
The user is responsible for supplementing the in-
struction sheet with any instructions resulting from
current national regulations for accident prevention
and protection of the environment
2 Basic safety instructions
The hand tool has been constructed according to
state-of-the-art technology and the acknowledged
technical safety regulations
2.1 Responsibilities
The hand tool may only be operated by trained and
authorized personnel
The user must clearly define and observe the respon-
sibilities of the personnel for operation, maintenance
and service
Should the user make any changes to the hand tool
without consulting the manufacturer or the supplier,
the latter will not be liable for any damage that may
result
2.2 Notes on setting up and
operating the hand tool
The hand tool may only be set up and operated in
perfect technical condition, observing all the safety
regulations and considering any possible danger
The hand tool may only be used for the purpose
specified in the instruction sheet
The manufacturers and suppliers will not be liable for
any damages which may result due to the hand tool
being used for a purpose other than that for which it
was intended This is done entirely at the user‘s own
risk
1 Umgang mit der
Betriebsanleitung
Die Betriebsanleitung muß ständig bei der Hand-
zange erfügbar sein.
Jeder, der mit der Handzange arbeitet, muß die
Betriebsanleitung kennen und beachten.
Die Firma Tyco Electronics lehnt jede Haftung für
Schaden ab, der durch Nichtbeachten on Hinweisen
auf der Handzange oder in der Betriebsanleitung
entsteht.
Die Betriebsanleitung ist om Benutzer der Hand-
zange um Anweisungen aufgrund bestehender natio-
naler Vorschriften zur Unfall erhütung und zum Um-
weltschutz zu ergänzen.
2 Grundlegende Sicherheitshinweise
Die Handzange ist nach dem Stand der Technik und
den anerkannten sicherheitstechnischen Regeln ge-
baut.
2.1 Zuständigkeiten
Die Handzange darf nur on eingewiesenem und
autorisiertem Personal betrieben werden.
Die Zuständigkeit des Personals für Bedienen, War-
ten und Instandhalten ist om Benutzer der Hand-
zange klar festzulegen und einzuhalten.
Eigenmächtige Veränderungen an der Handzange
schließen eine Haftung des Herstellers bzw. Lieferers
für daraus resultierende Schäden aus.
2.2 Hinweise zum Einrichten und
Betreiben der Handzange
Die Handzange darf nur in technisch einwandfreiem
Zustand sowie sicherheits- und gefahrenbewußt be-
nutzt werden.
Die Handzange ist ausschließlich nur für den in der
Betriebsanleitung beschriebenen Zweck zu erwen-
den.
Für Schäden, die aus nicht bestimmungsgemäßer
Verwendung entstehen, haftet der Hersteller bzw.
Lieferer nicht: das Risiko hierfür trägt allein der Benut-
zer.

Seite/Page 2
ERGOCRIMP Handzange
PN 539 635-1
411-18087 / Re . E
ERGOCRIMP Hand Tool
PN 539 635-1
411-18087 / Rev E
2.3 Hinweise zum nhalt
dieser Betriebsanleitung
Diese Betriebsanleitung beschreibt die Anwendung
und Bedienung der ERGOCRIMP Crimp-Handzange
539 635-1 sowie erforderliche Wartungsmaßnah-
men. Detaillierte Informationen zum Crimp erfahren,
zur Crimphöhen-Prüfung und Einstellung der
Crimpmatrizen sind den jeweils beigepackten Be-
triebsanleitungen der separat gelieferten Crimp-
matrizen zu entnehmen.
Für Informationen, die nicht in dieser Anleitung ent-
halten sind sowie zur Technischen Unterstützung,
wenden Sie sich bitte direkt an:
Kundendienst
Ampèrestraße 12-14
64625 Bensheim
2.3 Notes to the Contens of
this Manual
This IS describes the use and the operation of the
ERGOCRIMP Hand Tool 539 635-1 as well as
necessary maintenance measures Detailed
information concerning the crimp process, the crimp
height measurement and die adjustment should be
taken from the IS of the separately delivered Die
Sets
For further information, not included in this IS , and for
technical assistance please contact:
Field Service
Ampèrestraße 12-14
64625 Bensheim

Seite/Page 3
ERGOCRIMP Handzange
PN 539 635-1
411-18087 / Re . E
ERGOCRIMP Hand Tool
PN 539 635-1
411-18087 / Rev E
3 Verwendungszweck
Mit der ERGOCRIMP Crimp-Handzange können un-
ter Einsatz erschiedener Crimpmatrizen die unter-
schiedlichsten Crimpkontakte erarbeitet werden.
In den meisten Fällen wird die Crimp-Handzange als
Teil einer Werkzeugeinheit zusammen mit einer
produktspezifischen Crimpmatrize ausgeliefert.
H NWE S
Die ERGOCRIMP Crimp-Handzange ist für die
Aufnahme erschiedener Crimpmatrizen aus-
gelegt. Kontaktieren Sie den Tyco Electronics
Kundendienst bezüglich der Verfügbarkeit on
Crimpmatrizen für spezielle Anwendungen.
H NWE S
Alle Abmessungen in dieser Betriebsanlei-
tung werden in Millimeter 'mm' angegeben. Die
abgebildeten Komponenten sind nicht maß-
stabsgetreu dargestellt.
H NWE S ZUR ANWENDUNG
Kumulati e traumatische Beschwerden kön-
nen die Folge einer dauerhaften Anwendung
on Handzangen sein. Tyco Electronics Hand-
zangen sind für gelegentliche Anwendungen
und geringe Stückzahlen orgesehen. Für den
gesteigerten Bedarf bzw. für die Produktion
bietet Tyco Electronics eine große Auswahl
entsprechender Werkzeuge.
H NWE S
Die Werkzeuge sind ausschließlich für den
hier beschriebenen Zweck zu erwenden!
3 Application
The ERGOCRIMP Hand Tool applies various crimp
contacts using different die sets
In most of the cases, the crimp hand tool will be
delivered as part of a tool assembly together with a
product specific die set
NO E
The ERGOCRIMP Hand Tool has been
designed to accomodate different crimp die
sets For availability of die sets for special
applications please contact the Tyco
Electronics Field Service
NO E
Dimensions on this sheet are in millimeters
"mm" Figures and illustrations are not drawn
to scale
PROPER USE GUIDELINES
Cumulative Traume Disorders can result from
a prolonged use of manually powered hand
tools Tyco Electronics hand tools are
intended for occasional use and low volume
applications For extended use or production
operations, Tyco Electronics offers a wide
selection of powered application equipment
NO E
The tool may only be used for the described
purpose

Seite/Page 4
ERGOCRIMP Handzange
PN 539 635-1
411-18087 / Re . E
ERGOCRIMP Hand Tool
PN 539 635-1
411-18087 / Rev E
Bild / Figure 1
4 Beschreibung
Die Crimp-Handzange ERGOCRIMP besteht im we-
sentlichen aus zwei Crimpbacken, einer einstellba-
ren Ratsche, zwei selbstöffnenden Handgriffen, zwei
Befestigungsschrauben für Matrizen und der Rat-
schen-Notauslösung. Die geschlitzte Backen-
konstruktion erlaubt den einfachen Ein- und Ausbau
on Crimpmatrizen. Die Verstellung des Ratschen-
mechanismus erlaubt gleichzeitig die Einstellung der
erforderlichen Betätigungskraft und gewährleistet
damit die optimale Crimpkraft der Matrizen.
4 Description
The ERGOCRIMP tool consists of two crimping jaws,
an adjustable ratchet, spring-actuated handles, two
die retaining screws, and an emergency ratchet
release The slotted design of the crimping jaws
permits easy installation and removal of crimping
dies The adjustable ratchet allows handle pressure
to be set for optimum crimping die performance
feststehender Crimpbacken
stationary jaw
Matrizenbefestigungsschrauben
die retaining screws
Schaftschraube
screwed stop pin
beweglicherCrimpbacken
movable jaw
Sicherungsscheibe
retaining plate
Ratscheneinstellrad
ratchet adjustment wheel
Exzenterbolzen
eccentric bolt

Seite/Page 5
ERGOCRIMP Handzange
PN 539 635-1
411-18087 / Re . E
ERGOCRIMP Hand Tool
PN 539 635-1
411-18087 / Rev E
Sechskantmutter
Nut
Abschrägung
Chamfer
Matrizenbe-
festigungs-
schrauben
Die retaining
screws
Positioniereinheit
Locator assembly
Bild / Figure 2
5 Matrizen, Ein- und Ausbau
Wählen Sie den gewünschten Matrizensatz aus.
5 Die Installation and removal
Select the desired die assembly
Matrizen - Einbau
1. Öffnen Sie die Zangengriffe und entfernen Sie die
beiden Befestigungsschrauben aus den
Crimpbacken.
2. Positionieren Sie die Crimper-Matrize für Draht-
und Isolationscrimp in der feststehenden Crimp-
backe, so daß die Abschrägungen nach außen
zeigen.
3. Drehen Sie eine Matrizen-Befestigungsschraube
durch Backe und Matrize, ziehen Sie aber die
Schraube noch nicht fest.
4. Positionieren Sie die untere Matrize in der beweg-
lichen Crimpbacke der Handzange. Drehen Sie
eine Matrizen-Befestigungsschraube durch Bak-
ke und Matrize, ziehen Sie die Schraube aber
noch nicht fest.
Obere Matrize
Upper die
Untere Matrize
Lower die
Sechskantmutter
Nut
Die - Installation
1 Open the tool handles and remove the two die
retaining screws from the tool jaws
2 Move the wire and insulation crimper dies, with
the chamfers facing the front of the stationary
jaws
3 Insert a die retention screw through the jaw and
die and tighten the screw so that the die is held
in place, but do not tighten the screw completely
at this point
4 Place the lower die in the moving jaw of the tool
frame Install a die retention screw through the
jaw and die and tighten the screw so that the die
is held in place, but do not tighten the screw
completely at this point
Kontaktabstützung
Contact guide

Seite/Page 6
ERGOCRIMP Handzange
PN 539 635-1
411-18087 / Re . E
ERGOCRIMP Hand Tool
PN 539 635-1
411-18087 / Rev E
H NWE S
Der Ratschenmechanismus der Handzange
besitzt Raststufen, die beim Schließen der
Zangengriffe sieben hörbare 'Klicks' ergeben.
Beim sechsten (6.) 'Klick' wird der Ratchen-
mechanismus ausgelöst (geöffnet).
5. Drücken Sie die Zangengriffe langsam zusam-
men, so daß die Matrizen aneinandergefügt und
ausgerichtet werden. Drücken Sie die Zangen-
griffe bis zum fünften (5.) 'Klick' zusammen und
ziehen Sie dann die beiden Matrizen-Be-
festigungsschrauben fest.
6. Befestigen Sie die Positioniereinheit auf der fest-
stehenden bzw. die Kontaktabstützung auf der
beweglichen Crimpbacke mit der entsprechen-
den Sechskantmutter nach der Vorschrift für den
entsprechenden Matrizentyp.
Matrizen - Ausbau
1. Für den Ausbau des Matrizensatzes schließen
Sie die Zange bis der Ratschenmechanismus
auslöst und die Zangengriffe (ganz) öffnen. Lösen
und entfernen Sie die beiden Matrizen-Be-
festigungsschrauben und schieben Sie die Matri-
zen aus den Crimpbacken.
NO E
The ERGOCRIMP tool ratchet has detents
that are audible as seven "clicks" as the
handles are closed The ratchet releases on
the sixth "click"
5 Slowly close the tool handles, allowing the dies to
mate and/or align Continue closing the tool handles
until the ratchet makes the fifth "click", then
tighten both die retention screws until snug
6 Install the locator assembly on the stationary or
the contact guide on the movable jaw and tighten
the hex nut according the instruction for the
corresponding die
Die - removal
1 To remove the die assembly, close the tool
handles until the ratchet releases, and allow the
handles to open fully Loosen and remove the die
retention screws and slide the dies out of the tool
jaws

Seite/Page 7
ERGOCRIMP Handzange
PN 539 635-1
411-18087 / Re . E
ERGOCRIMP Hand Tool
PN 539 635-1
411-18087 / Rev E
Einstellrad
adjustment wheel
Schaftschraube
screw stop pin
Sicherungsscheibe
retaining plate
Bild / Figure 3
6 Einstellung der Crimphöhe
Die Crimp-Handzange besitzt einen Ratschen-
mechanismus mit einem Einstellrad, das einen be-
stimmten Einstellbereich aufweist. Durch den
Ratschenmechanismus wird sichergestellt, daß der
Crimpzyklus ollständig beendet wird. Über das Ein-
stellrad wird der Betätigungsweg ( or Öffnen der
Ratsche) und damit die erforderliche Crimpkraft ein-
gestellt. Auch trotz Voreinstellung ab Werk ist es
sehr wichtig, die Crimphöhe zu überprüfen. Üblicher
Gebrauch und Abnutzung sind ebenfalls Ursache für
eine Fehleinstellung der Crimphöhe. Es wird empfoh-
len, daß die Crimphöhe regelmäßig durch Qualitäts-
Kontroll-Personal überprüft und ggf. eingestellt wird.
H NWE S
Dies ist eine allgemeine Beschreibung des
Einstell erfahrens. Detaillierte Informationen
sind den Matrizen jeweils beigepackten Be-
triebsanleitungen zu entnehmen.
1. Crimpen Sie einen Kontakt an eine ordnungsge-
mäß orbereitete (abisolierte) Leitung korrekter
Größe (Querschnitt).
2. Ist die Crimphöhe größer als empfohlen, öffnen
Sie die Zange und entfernen mit einem Schrau-
bendreher die Schaftschraube. Drehen Sie das
Einstellrad GEGEN den Uhrzeigersinn (+).
Ist eine größere Crimphöhe erforderlich, so dre-
hen Sie das Einstellrad IM Uhrzeigersinn, um
einen 'niederen' Wert einzustellen (-).
3. Sichern Sie das Einstellrad mit der Schaftschrau-
be.
4. Crimpen Sie einen Kontakt und messen Sie die
Crimphöhe. Ist die Crimphöhe nicht akzeptabel,
so wiederholen Sie die Einstellung.
6 Crimp height adjustment
The tool frame assembly features a ratchet
mechanism and adjustment wheel with a range of
settings The ratchet mechanism ensures that the
tool has completed the cycle The adjustment wheel
controls the operating distance of the tool jaws
(before the ratchet opens) thereby controlling the
required crimp force Although the ratchet is preset
prior to shipment, it is important that you verify the
crimp height Also, general use and subsequent wear
may cause the tool to go out of adjustment It is
recommended that the crimp height be inspected -
and adjusted, if necessary - on a regular basis by
quality control personnel
NO E
This is a general explanation of the procedure
For specific information, refer to the
instruction sheet packaged with the die
assembly
1 Crimp a contact onto a properly- prepared wire of
the correct size
2 If the crimp height is greater than recommended,
open the plier and remove the screwed stop pin
with a screwdriver Rotate the adjustment wheel
COUNTERCLOCKWISE (+) If a looser crimp is
required, rotate the adjustment wheel CLOCK-
WISE (-)
3 Replace the screwed stop pin
4 Make a sample crimp and measure the crimp
height If the dimension is acceptable, replace
and secure the lockscrew If the dimension is
unacceptable, continue to adjust the ratchet, and
again measure a sample crimp

Seite/Page 8
ERGOCRIMP Handzange
PN 539 635-1
411-18087 / Re . E
ERGOCRIMP Hand Tool
PN 539 635-1
411-18087 / Rev E
7 Wartung, nstandhaltung
7.1 Tägliche Wartung
Zur täglichen Wartung sind om zuständigen Bedie-
ner die folgenden Schritte durchzuführen:
1. Entfernen Sie om Werkzeug Staub, Feuchtigkeit
und andere Rückstände mit einer sauberen, wei-
chen Bürste oder einem fusselfreien Tuch. Ver-
wenden Sie keine harten oder abschleifenden
Mittel, mit denen das Werkzeug beschädigt wer-
den könnte.
2. Stellen Sie sicher, daß die Lagerbolzen einge-
setzt und durch Sicherungsscheibe gehalten wer-
den.
3. Versehen Sie alle Stifte, Drehpunkte und Lager-
oberflächen mit einem dünnen Ölfilm eines guten
SAE 20 Motoröls. Ölen Sie aber nicht übermäßig.
4. Wird die Handzange nicht benötigt, dann schlie-
ßen Sie die Zangengriffe und lagern die Zange
sauber und trocken.
7.2 Periodische Überprüfung
Eine Überprüfung der Crimpzange sollte durch ent-
sprechend qualifiziertes Personal regelmäßig (je nach
Nutzung) durchgeführt und aufgezeichnet werden.
1. Entfernen Sie jegliche Schmiermittel und Rück-
stände, indem Sie die Handzange (Griffe teilweise
geschlossen) in ein Fett-Lösemittel eintauchen,
das Farbe und Kunststoffe nicht angreift.
2. Stellen Sie sicher, daß alle Lagerbolzen einge-
setzt und durch Sicherungsscheibe gehalten wer-
den.
3. Schließen Sie die Zangengriffe bis der Ratschen-
mechanismus auslöst bzw. öffnet, und lassen Sie
die Zangengriffe frei öffnen. Öffnen die Griffe nicht
schnell und ollständig, dann ist die Feder be-
schädigt und muß ersetzt werden.
4. Überprüfen Sie die Zange auf Abnutzung und
Beschädigung, insbesondere im Bereich der
Crimpbacken und Drehzapfen.
7 Maintenance / Inspection
7.1 Daily Maintenance
AMP recommends that operators of the tool be made
aware of and responsible for the following steps of
daily maintenance:
1 Remove dust, moisture, and any other
contaminants from the tool with a clean, soft
brush, or a clean, soft, lint-free cloth Do NOT use
hard or abrasive objects that could damage the
tool
2 Make certain that the pivot pins are in place and
that they are secured with the retaining plates
3 All pins, pivot points, and bearing surfaces should
be protected with a thin coat of any good SAE
No 20 motor oil Do not oil excessively
4 When the tool is not in use, keep handles closed
to prevent objects from becoming lodged in the
crimping jaws Store the tool in a clean, dry area
7.2 Periodic Inspection
Regular inspections of the tool should be performed
by quality control personnel A record of scheduled
inspections should remain with the tool or be supplied
to supervisory personnel responsible for the tool
Inspection frequency should be based upon amount
of usage, working conditions, operator training and
skill and established company standards
1 Remove all lubrication and accumulated film by
immersing the tool (handles partially closed) in a
suitable commercial degreaser that will not affect
paint or plastic material
2 Make certain that all pivot pins are in place and
secured with retaining plates
3 Close tool handles until ratchet releases and then
allow them to open freely If they do not open
quickly and fully, the spring is defective and
must be replaced
4 Inspect the tool frame for wear or damage, paying
particular attention to the tool jaws and pivot
points

Seite/Page 9
ERGOCRIMP Handzange
PN 539 635-1
411-18087 / Re . E
ERGOCRIMP Hand Tool
PN 539 635-1
411-18087 / Rev E
8 Ersatz- und Verschleißteile
In der folgenden Tabelle sind die Ersatzteile des
Reparaturkits 539 635-2 für die ERGOCRIMP Hand-
zange 539 635-1 aufgelistet.
Instruction Sheet 411-18087; PN 5-744 001-2
6
1
2
5
3 4
Teil Beschreibung Menge
1 Matrizen-Befestigungsschraube
M4x11 ISO 7380 1
2 Matrizen-Befestigungsschraube
M4x10 ISO 7380 1
3 Einstellrad 1
4 Sicherungsscheibe 4 DIN 6799 2
5 Schaftschraube M3x5 DIN 427 1
6 Zugfeder DIN 17223 C 1
Bei Montage on Kontaktaufnahmen sind die
Gewindeschrauben und Muttern in der Be-
schreibung für den speziellen Matrizentyp
angegeben.
8 Spare parts and wear and tear parts
The spare parts of the repair kit 539 635-2 for the
ERGOCRIMP Hand Tool 539 635-1 are listed in the
following table
Instruction Sheet 411-18087; PN 5-744 001-2
Item Description Qty
1 die retaining screw
M4x11 ISO 7380 1
2 die retaining screw
M4x10 ISO 7380 1
3 adjustment wheel 1
4 retaining plate 4 DIN 6799 2
5 screwed stop pin M3x5 DIN 4271
6 tension spring DIN 17223 C 1
Installing the terminal holding fixture use the thread
screws and nuts as described for the respective die
types
Bild / Figure 4

Europe, Middle East and
Africa
Wire Processing
Austria - Croatia - Serbia &
Montenegro
Bosnia & Herzegovina -
Macedonia - ugoslavia
Phone +43-1-90560-1236
Herbert.Wiesinger@
tycoelectronics.com
BeNeLux
Phone +31-(0 73-6246-362
nltoolingservicecentre@
tycoelectronics.com
BeNeLux
Product Information Center
Phone +31-(0 73-6246-999
Fax +31-(0 73-6246-931
Czech - Slovakia
Phone +420-541-162-150
Denmark
Phone +45-40179779
Finland
Phone +358-400413846
France
Phone +33-(0 1-3420-8770
France
Product Information Center
Phone +33-(0 1-3420-8943
Fax +33-(0 1-3420-8623
Germany
Phone +49-(0 6251-133-1376
KD-Hotline.ampde@
tycoelectronics.com
Germany
Product Information Center
Phone +49-(0 6251-133-1999
Fax +49-(0 6251-133-1998
germany-
Great Britain and
Republic of Ireland
Phone +44-(0 1237-428673
United Kingdom
Product Information Center
Phone +44-(0 800 267 666
Fax +44-(0 208 420 8383
Hungary
Phone +36-1-2891000
India - Pune
Phone +91-20-56071700
Italy
Phone +39-011-4012-272
Norway
Phone +47-66778889
Poland - Lithuania - Latvia -
Belarus
Phone +48-52-32-50-131
Poland
Product Information Center
Phone +48-(0 22-4576-704
Fax +48-(0 22-4576-720
South Africa
Phone +27-41-503-4509
Spain & Portugal
Phone +34-93-291-0396
Spain
Product Information Center
Phone +34-93-291-0330
Fax +34-93-200-3779
Sweden
Phone +46-8-50725000
Switzerland
Phone +41-71-447-0284
Detailed Field Service Information is available at the following Tyco Electronics Companies:
Europe, Middle East
and Africa
Board Processing
Great Britain
Phone +44-(0 7801-303735
Americas
Wire Processing
Brasil - Bragança Paulista,
São Paulo
Phone +55-11-4034 6021
Fax +55-11-4034 6088
Canada - Toronto
Phone +1-905-475-6222
Fax +1-905-474-5520
fieldservicenorthamerica@
tycoelectronics.com
Mexico - Mexico City
Phone +52-55-1106-0800
Fax +52-55-1106-0910
fieldservicenorthamerica@
tycoelectronics.com
USA - Harrisburg, PA
Phone +1-800-722-1111
Fax +1-717-810-2861
fieldservicenorthamerica@
tycoelectronics.com
Americas
Board Processing
USA - Willow Grove, PA
Phone +1-215-657-6202
Fax +1-215-706-3936
Asia / Pacific
Wire and Board Processing
Asia
Central Asia
China - Shenzhen
Phone +86-755-2515-4759
Fax +86-755-2598-0416
North Asia
Japan - Kawasaki
Phone +81-44-900-5026
Fax +81-44-900-5064
North Asia
Korea - Gyungsang
Phone +82-53-850-0083
Fax +82-53-850-0202
South Asia
Thailand - Bangkok
Phone +66-2-955-0500
Fax +66-2-955-0505
Australia - Kingsgrove
Phone +61-2-9554-2670
Fax +61-2-9150-7737
terry[email protected]
All specifications subject to change. Consult Tyco Electronics for latest specifications.
www.tooling.tycoelectronics.com/europe www.tycoelectronics.com
Issued 06-06
Table of contents
Popular Crimping Tools manuals by other brands

HRS
HRS HT601/TM21P-88P operating instructions

Westward
Westward 13H894 Operating instructions and parts manual

molex
molex 63811-9370 Specification sheet

Hilti
Hilti NPR 032 IE-A22 operating instructions

Belden
Belden lumbergautomation AWG 28-26 quick start guide

Emerson
Emerson Klauke ESM 50CFB quick start guide