UDI R/C UDI009 User manual

UDI009
User Manual

2
Important Statement 3
Safety Precautions 3
Safe Notice for Battery 4
Part installation and disassemble 8
Checklist before Flight 10
Boat and Transmitter instruction 5
Playing Steps 10
Boat function introduction 16
Maintenance and Repair 16
Spare Parts 17
Troubleshooting Guide 19
Catalogue
www.udirc.com

3
Important Statement
Thank you for buying Udirc's product. Our product is special control substances and
people who under 14 years old must not use the product. Please read this brochure
carefully before using the product. You are regarded as accepting all contents in this user
manual when using this product.
This product is not an ordinary toy but a piece of complicated remote boat model which is
integrated with professional knowledge by mechanic, electronic, air mechanics,
high-frequency emission etc. It’s supported to play the boat under legal laws and safety
water area. The users promise to be responsible for their behavior when using this product.
We undertake no liability for those accidents caused by environment, illegal behavior,
improper operation and refitting after sale of the product.
We have entrusted the distributor to provide technology support and after-sale service. If
you have any question about use, operation, repair etc., please contact the local distributor.
This product is suitable for experienced R/C model users aged 14 years or above.
This product contains small parts, please put it out of child’s reach.
The playing field must be legally approved by your local government. Do not play the boat
in the swimming pool or near the people who is swimming in the water area. Playing field
must spacious enough.
(1) Playing field
* Keep the package and user manual so as to refer to the important
information whenever.
* Only use the UDIRC’s original or authorized spare parts and accessories, otherwise,
we are not responsible for any injuries or damage(s) that may caused.
Safety Precautions
(3) Keep away from obstacles and crowd
The speed and status of a running RC boat is uncertain and it may cause potential danger.
So the user must keep away from crowd, obstacles in the water etc. when operating a
running RC boat. Do not play the boat in rainy, storm, thunder and lighting weather for the
safety of user, around people and their property.
(2) Use correctly
For safety elements, please only use UDIRC’s spare parts to replace the damaged parts.
Improper assembly, broken hull, defective electronic equipment or unskilled operation all
may cause unpredictable accidents such as boat damage or human injury. Please pay
special attention to safety operation and have good knowledge of accident responsibility
that the user may cause.
(4) Keep away from salt water environment
The boat inside is consisted of precise electronic components. Salt water may damage
electronic components and cause accident.
www.udirc.com
4
(5) Safe operation
Please operate the RC boat in accordance with your physical status and playing skill.
Fatigue, listlessness and improper operation may increase the rate of accident. Before
playing the boat, please make sure no water plants to avoid propeller from getting tangled
as this may cause damage to boat. It’s not suggested to play it under this condition.
(6) Keep away from rotating parts
After power on the boat, rotating parts like propellers may cause serious injury and
damage. Keep face and body away from rotating parts.
(7) Keep away from heat
(8) The boat should be controlled within max control distance. Do not play the
boat in place with signal interference. Or may cause signal interruption and
the boat will be out of control, which may result in accident.
(9) Do not touch the hot motor to avoid being burnt.
(10) Please use the recommended charger only. Power off the boat before
cleaning it. Check the charger, charging plug etc. regularly to ensure they can
work well. If there is any damage, stop using it immediately till it’s fixed well.
The RC boat is made of metal, fiber, plastic, electronic components etc. Keep away from
heat and sunshine to avoid distortion and damage.
Safe Notice for Battery
www.udirc.com
* Keep the battery away from children and animals.
* Discontinue charging if you notice the battery is swollen.
* Do not charge the battery once it is crashed or damaged.
* Check the battery if any damage after crash.
* Do not overcharge the battery.
* Keep the battery away from flammable material or liquid.
* Do not put the battery on high temperature place, store it in a proper container to avoid
damage or explode.
* Do not put the battery into your pocket or bag to avoid contacting with sharp objects or
metal.
* Do not dissemble, refit and repair the battery.
* Do not use the battery to crash or hit hard surface.
* Do not put the battery in water and keep it in dry place at ambient temperature.
* Do not leave the battery without supervision when charging.
* Make sure that there is no short circuit of the power wire.
* Please use the recommended charger only.
* Check the charger’s wire, plug, surface regularly. Do not use any broken charger.
* If do not play the boat more than one week, maintain the boat battery.

5
www.udirc.com
Boat and Transmitter instruction
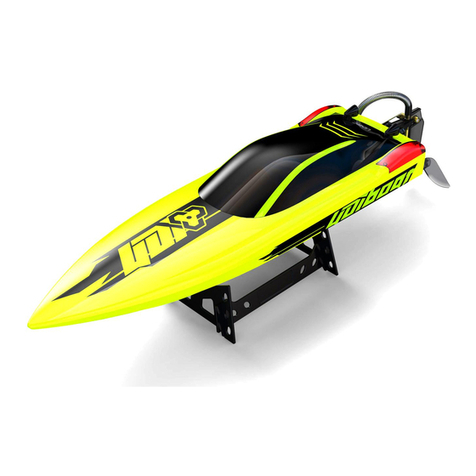
Boat
Main Parameter
Hull spec
Hull weight
Propeller diameter
Sailing time
424x114x89mm
About 565g
(battery not included)
35mm
6-8mins(full speed) Max Speed 30Km/H
100 m
220mins
Boat battery 7.4V 1500mAh
Lipo Battery
charging time
Control range
Support bracket
Cabin outer cover
Left navigation
Propeller
Water press
pieces
Outer cover
lock
Right
navigation
Tail rudder
bracket
Rods
Deck
Hull bottom
Outlet plug
Tail rudder
Spindle tube

6
www.udirc.com
11
Hull bottom
22
Tail rudder support frame
No. Name Name
Outlet plug
Name
1
Cabin outer cover
12
23
Tail rudder
2
Cabin inner cover
13
Inner lock
24
Steering engine
3
EVA waterproof ring
14
Inner cover lock press
25
Spindle tube
4
Boat surface cover
15
Boat re-position 3.5 round plug
26
Anti-slip nut
5
Waterproof tablet
16
Outer cover lock
27
Battery holder
6
Lithium battery
17
28
Silicone waterproof ring
7
Spindle tube holder
18
Outer cover lock press
8
Drive spindle
19
Right navigation Pressure water sheet
9
Receiver box
20
Servo holder
10
Main motor
21
Rod
No. No.
29
Left navigation
30
Silicone tube
Exploded diagram
12
13
01
02
03
04
05
06
07
08
09
10
11
14
15
16
17
18
29
30
19
20
21
22
23
24
25
26
27
28

7
www.udirc.com
Steering knob
Throttle trigger
Transmitter
Button Function
Forward trim
Press down this button to adjust the throttle forward deviation.
Backward trim
Press down this button to adjust the throttle backward deviation.
Left Rudder trim
Press down this button to adjust the tail rudder left turning deviation.
Right Rudder trim
Press down this button to adjust the tail rudder right turning deviation.
Power switch
Push left to power on the transmitter, and back to power off.
Steering knob
Twist forward the knob, the boat turns right. Twist backward the knob,
then turn left.
Throttle trigger
Pull down the throttle trigger and the boat goes forward. Push up the
trigger,then go backward.
Forward trim
Backward trim
Power indicator
Left Rudder trim
Right Rudder trim
Power switch
Open the battery cover on the back side of the transmitter and put 4 1.5V alkaline
batteries (AA, not included) into the box in accordance with electrode instructions.
Battery installation
Battery Cover
Battery Case

8
www.udirc.com
Safety Precautions
1. While charging, do not put the battery on high temperature place, such as fire
or heating device to avoid damage or explode.
2. While charging, the battery must be from the boat model.Someone needs to be
looked after in the charging process to avoid accident.
3. Don’t charge for the Lipo batteries at once after running, and the battery is still
not yet cooling down. Otherwise, it may cause battery to get swollen.
Li-Po Battery Disposal&Recycling
Wasted Lithium-Polymer batteries must not be placed with
household trash. Please contact local environmental or waste
agency or the supplier of your model or your nearest Li-Po
battery recycling center.
Charging Instruction for Lithium battery
Boat battery
* For faster charging, it is recommended to use adapter with 5V 2A output
current(not included) to charge the battery.
Power BankPhone Charger Computer Charging Car Charger
1. Connect the lithium battery with USB cable first and then choose one of the
method as below picture shown to connect with USB plug.
2. The USB red indicator light keeps bright when charging. And the light turns
green when fully charged.
Part installation and disassemble

9
www.udirc.com
Picture 3
Picture 4
3. Install the rod into the third hole of steering gear arm( picture 3).
4. Install the steering gear into its slot and lock the press pieces and rod screws
(picture 4).
( Replace the steering gear when powered on, please take care of the propeller
rotating accidentally )
Lock the screw when the
rudder is loaded into the
slot of the steering gear.
Tail rudder screw
Steering gear replacement
When the steering gear is damaged, you need to take out the steering gear holder,
and pick out the defective part, then loose the steering gear arm. When install the
new steering gear, power on the boat and install the arm to the steering gear,
lock the fasten parts, then it’s ok to play.
1. Disassemble the tail rudder screw, and then loose the steering gear press part
and take out the steering gear.(Picture 1)
2. When the new steering gear is powered on, install the arm and fasten the
screw, please take care of the vertical degree( picture 2).
(There is some tolerance which is normal)
Picture 2
Picture 1
Steering gear
screw
Steering fastener screw

10
www.udirc.com
Checklist before Flight
1. Make sure the boat battery and transmitter battery are fully charged.
2. Please make sure the transmitter throttle stick and rudder knob can be reset.
3. Please strictly obey the order of turn on and turn off before operation. Turn on the
transmitter power first and then turn on the boat power before playing; Turn off the boat
power first and then turn off the transmitter power when finish playing. Improper turn on
and turn off order may cause the boat out of control and threaten people’s safety.
Please cultivate a correct habit of turn on and turn off.
4. Make sure the connection is solid between battery and motor etc. The ongoing vibration
may cause bad connection of power terminal make the boat out of control,
5. Improper operation may cause impact to the boat and damage the hull or propeller,
then cause difficult control or unable to control. Please go to the local distributor to buy
new parts for replacement so that the boat will return to its best status.
Sailing steps
Boat battery installation method
1. Twist to left or right to open the outer cover lock (Picture 5), then open up the
cabin cover (Picture 6).
Picture 5
Picture 6
2. The three inner lid locks on the right and the tail turn left to unlock,two locked
inner locks on the left and unlocked to the right(Picture 7) then the inner cover
of the cabin can be removed(Picture 8).
Picture 7

11
www.udirc.com
Picture 9 Picture 10
Picture 12
Picture 11
Check before playing
4. Power on the transmitter, then the power indicator starts flashing and enter
code pairing.
1. After power on the boat, conduction the boat re-position equipment first
(Picture 11) .Check the rotation direction of propeller once power on. ( Picture 12)
Pull back the throttle trigger of transmitter slowly, the propeller will spin
counterclockwise. Push forward the throttle trigger slowly, the propeller will
spin clockwise.
Picture 8
3. Put the lithium battery into the battery holder of the hull(Picture 9).
The power line of the battery puts on the side of the hull,push the battery to the
end and stick to it . Connect the battery connector to hull plug(Picture 10).

12
www.udirc.com
Picture 13 Picture 14
2. Don’t fold the water-cooling hose and keep it smooth inside.
3. Twist the rudder knob towards counterclockwise, the steering gear will turn left
(Picture 13); Twist the Rudder Knob clockwise, the steering gear will turn right
(Picture 14).
4. Make sure that the boat cover is locked up and buckled. Make sure that the tail
rubber stopper is tight to prevent the water from entering.
5. Make sure the power plug and battery wire are connected correctly and tightly.
Keep the battery wire to the hull side to avoid it touching the motor.
Calibration
After a period of sailing, it may be difficult in control if the trimming is unavailable
in direction. Please carry out the following procedures to calibrate the direction.
1. After pairing the frequency, if the steering
gear is not vertically upward (Tolerance
within 10° is in the normal range.)(Picture 15),
please refer to the instruction for steering
gear replacement on page 9 and then
calibrate the steering gear. Picture 15
Picture 16
2. Turn on the power supply and conduction the boat re-positioning device.
Watch carefully whether the tail rudder is perpendicular to the boat. if it is
slightly not, use the remote-control to adjust to the hull perpendicular to the
hull; If the rudder is not vertical enough, refer to the P9 steering gear for
replacement and installation. Re-calibrate and lock the screw.
Tail rudder

13
www.udirc.com
3. In case of yaw on the boat, adjustment can be made through the remote control button.
Warning: 1. Keep away from the propeller when calibrating, so as to avoid
danger and loss.
2. The floating waste in water may easy to damage the steering gear
or propeller when the boat sailing at high speed. Please replace the
damaged steering gear or propeller in time.
How to operate the boat
To move forward
To move backward
To turn left
1. Pull back the throttle trigger of the transmitter. The boat moves forward.
2. Push forward the throttle trigger of the transmitter. The boat moves backwards.
3. Pull back the throttle trigger of the transmitter and move the steering knob
counterclockwise, then the boats turns left.

14
www.udirc.com
To turn right
4. Pull back the throttle trigger of the transmitter and move the steering knob
clockwise then the boat turns right.
Pull back
6. If the boat drifts to the right, press the left rudder trim on the transmitter and
the boat will gradually correct the rudder alignment. It will start moving straight.
7. If the boat drifts to the left, press the right rudder trim on the transmitter and
the boat will gradually correct the rudder alignment. It will start moving straight.
5. If the boat capsizes: Push forward and backward the throttle trigger of the
transmitter and then pull back at once. The boat will then return to normal.
(The capsize reset function will turn off automatically when the boat in low battery.)
Left Rudder trim
Right Rudder trim

15
www.udirc.com
9. If the boat still moves backwards when the throttle trigger is in the middle
position, press forward trim until the boat stops going backwards.
Forward trim
8. If the boat still moves forward when the throttle trigger is in the middle position,
press backward trim until the boat stops going forward.
Backward trim

16
www.udirc.com
1. When RC boat stops running, the battery must be removed.
2. After playing the boat, if any water inside the hull, then you need to pick out the
rubber stopper and tilt the boat to one side to pour out the water. Then put on
the rubber stopper and press tightly.
3. To avoid painted surfaces of the boat from getting damaged and long time
exposure to the sun. Every time after playing, you need to clean the boat and
dry the hull to make sure the boat is in good condition.
4. If the RC boat is not used for a long time, disconnect the boat battery from the
terminal and also remove the transmitter batteries to avoid leakage of the
battery as this may damage the transmitter or boat.
Maintenance and Repair
Low Battery Alarm
Boat function introduction
When the boat in low battery, the transmitter will beep” di.di.di...” constantly to
remind the user to remote back the boat as soon as possible. And the boat speed
will slow down to half and the battery only can last about 1 minute at such
condition. Otherwise then it may cause over discharge to damage the battery or
low battery to loose control. The capsize reset function will turn off automatically
when the boat in low battery.
Out of Range Alarm
When the boat is running out of the max remote control distance, the transmitter
will beep“didi...didi...didi...” to alarm the user to remote back the boat
immediately. Or the boat may be out of control and run away.
When the transmitter in low battery, the transmitter will beep ” di...di...di...” to
remind the user to remote back the boat to replace the batteries as soon as
possible. Or the boat may be out of control.

17
www.udirc.com
Spare Parts
For convenience, the spare parts are listed for you to choose, which can be
purchased from local distributor.
UDI009-01
Cabin outer cover
UDI009-02
Cabin inner cover
UDI009-03
Cabin cover
UDI009-04
Hull bottom
UDI009-05
Propeller set
UDI009-06
Left and right navigation
UDI009-07
Tail rudder set
UDI009-08
Balance Rudder
UDI009-09
Rudder set
UDI009-10
Motor set
UDI009-11
Circuit board
UDI009-12
Lithium battery

18
www.udirc.com
UDI009-13
Heat sink set
UDI009-14
Screw rod set
UDI009-15
Support bracket
UDI009-16
Spindle tube set
UDI009-17
Rudder rod
UDI009-18
USB cable
UDI009-19
silicon rubber
UDI009-20
battery holder
UDI009-21
transmitter
Important Notice
Our company's products are improving all the time, design and specifications are subject to
change without notice.
All the information in this manual has been carefully checked to ensure accuracy, if any
printing errors, our company reserve the final interpretation right.
Thank you again for your choice and your trust!

19
www.udirc.com
Troubleshooting Guide
Problem Problem Cause SolutionNo.
The
transmitter
indicator
light is off.
Fail to pair
the boat
with
transmitter.
The boat
is under-
powered
or can not
go forward.
The boat
tilts to
one side.
1
2
3
4
1. Low battery. 1. Replace the transmitter battery.
2. The battery positive pole and negative
pole are in reverse order.
2. Install the battery in accordance with
the user manual.
3. Poor Contact. 3. Clean the dirt between the battery and
the battery slice.
1. Indicator light is off. 1. The same as above 1.2.3.
2. There is interfering signal nearby. 2. Restart the boat and power on the
transmitter.
3. Improper operation. 3. Operate the boat step by step in
accordance with the user manual.
4. The electronic component is
damaged for frequent crash.
4. To buy spare parts from local seller
and replace damaged parts.
1. The propeller deformed seriously. 1. Replace the propeller.
2. Incorrect installation of propeller. 2. Install the propeller in accordance
with the user manual.
3. Low battery. 3. Recharge the drone battery as per
instruction.
4. The battery is expired or over
discharge protection.
4. Buy a new battery from local seller
to replace the battery.
5.Poor contact. 5. Disconnect the battery and then
connect it with the plug again.
1. The steering gear arm is not vertical
seriously.
1. Calibrate the steering gear arm as
per instruction.
2. The tail rudder is not vertical seriously.
2. Calibrate the tail rudder as per instruction.
3. The steering gear slips. 3. Replace the new steering gear as
per instruction.

FCC Information
This equipment has been tested and found to comply with the limits for a Class B
digital device, pursuant to part 15 of the FCC Rules.These limits are designed to
provide residential protection against harmful interference in a residential
installation. This equipment generates, uses and can radiate radio frequency
energy and, if not Installed and used in accordance with the instructions, may
cause harmful interference to radio communications. However, there is no
guarantee that interference will not occur in a particular installation. If this
equipment does cause harmful interference to radio or television reception. which
can be determined by turning the equipment off and on, the user is encouraged to
try to correct the interference by one or more of the following measures:
The equipment may generate or use radio frequency energy. Changes or
modifications to this equipment may cause harmful interference unless the
modifications are expressly approved in the instruction manual. Modifications not
authorized by the manufacturer may void user’s authority to operate this device.
This device complies with part 15 of the FCC Rules. Operation is subject to the
following two conditions:
(1)this device may not cause harmful interference,and
(2)this device must accept any interference received, including interference that
may cause undesired operation.
FCC WARNING:
●Reorient or relocate the receiving antenna.
●Increase the separation between the equipment and receiver.
●Connect the equipment into an outlet on the circuit different from that to which
the receiver is connected.
●Consult the dealer or an experienced radio/TV technician for help.
MADE IN CHINA
The device has been evaluated to meet general RF exposure requirement.
The device can be used in portable exposure condition with out restriction.
FCC Radiation Exposure Statement
Other manuals for UDI009
1
Table of contents
Other UDI R/C Toy manuals

UDI R/C
UDI R/C UDI023 User manual

UDI R/C
UDI R/C UDI009 User manual

UDI R/C
UDI R/C UDI017 User manual

UDI R/C
UDI R/C UDI003 User manual

UDI R/C
UDI R/C UDI002 User manual

UDI R/C
UDI R/C UDI008 User manual

UDI R/C
UDI R/C UDI010 User manual

UDI R/C
UDI R/C U12S User manual

UDI R/C
UDI R/C UDI009 User manual

UDI R/C
UDI R/C UDI018 User manual
Popular Toy manuals by other brands

Japan Remote Control
Japan Remote Control GSR260Z Sports Supplemental manual

Hasbro
Hasbro Littlest Pet Shop Digital Pen manual

marklin
marklin 29540 user manual

WowWee
WowWee MiP quick start guide

Faller
Faller HALF-TIMBERED HOUSE 131246 Assembly instructions

PLAYMOBIL
PLAYMOBIL City Action 70770 Assembly instruction