UfiSpace S9301-32DB Manual

Hardware Installation Guide
S9301-32DB
200GE/400GE
Spine & Leaf Switch
R1.0

S9301-32DB Hardware Installation Guide | i
Table of Contents
1Overview.............................................................................................................................1
2Preparation.........................................................................................................................2
Installation Tools......................................................................................................................2
Installation Environment Requirements..................................................................................3
Preparation Check List.............................................................................................................4
3Package Contents................................................................................................................5
Accessory List...........................................................................................................................5
Component Physical Information............................................................................................6
4Identifying Your System.......................................................................................................7
S9301-32DB DC Version Overview ..........................................................................................7
S9301-32DB AC Version Overview...........................................................................................9
DC Version PSU Overview......................................................................................................10
AC Version PSU Overview......................................................................................................11
Fan Overview .........................................................................................................................12
Port Overview ........................................................................................................................13
5Rack Mounting..................................................................................................................14
6Installing Fan Modules.......................................................................................................17
7Installing Power Supply Units ............................................................................................18
8Grounding the Switch........................................................................................................20
9Connecting Power .............................................................................................................22
DC Version..............................................................................................................................22
AC Version..............................................................................................................................25
10 Verifying System Operation...............................................................................................26
Front Panel LED....................................................................................................................26
PSU FRU LED........................................................................................................................27
Fan FRU LED.........................................................................................................................27
11 Initial System Setup...........................................................................................................28
12 Cable Connections.............................................................................................................29
Connecting the USB Cable ...................................................................................................29
Connecting the OOB Management Cables..........................................................................29

S9301-32DB Hardware Installation Guide | ii
Connecting the Transceivers ...............................................................................................30
13 Cautions............................................................................................................................31

S9301-32DB Hardware Installation Guide | 1
1Overview
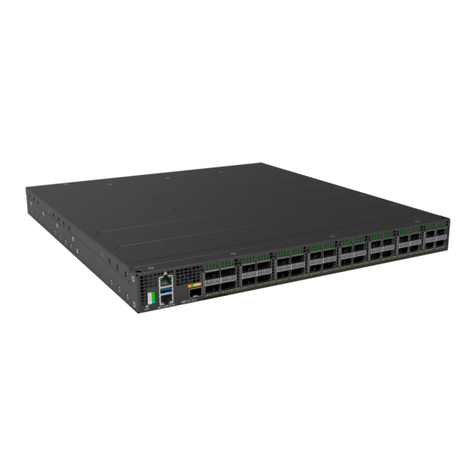
The UfiSpace S9301-32DB is a high-performance, versatile open networking white box
switch that is designed to address the fast growing segment of the Ethernet switching
market and the needs to push capacity to the next level.
With 24x200GE QSFP56 and 8x400GE QSFP-DD ports, the S9301-32DB switch is where
computer resources (servers or blade chassis) are centralized and managed in a structured
way utilizing high-efficiency Ethernet connectivity.
With advanced capabilities, these switches deliver performance and intelligence to the
network edge in a flexible 1RU form factor that helps reduce infrastructure and
administrative costs.
The S9301-32DB is the epitome of future networking with a powerful Intel Skylake 8-core
processor and Broadcom Trident4 X9 switching ASIC. It comes with redundant, hot
swappable components for convenience, increased availability, reliability and lower costs of
maintenance.
This document describes the hardware installation process for S9301-32DB.

S9301-32DB Hardware Installation Guide | 2
2Preparation
Installation Tools
Phillips #2 Screwdriver
Crimping tool
8 AWG wire with ring terminal for
DC power supply
6-AWG wire for grounding
Wire-stripping tools for
stripping 6-AWG copper wire
Console cable
All illustrations within this document are for reference purposes only. Actual
objects may differ.
•PC with terminal emulation software. Refer to the "Initial System Setup" section for
details.
•Baud rate: 115200 bps
•Data bits: 8
•Parity: None
•Stop bits: 1
•Flow control: None

S9301-32DB Hardware Installation Guide | 3
Installation Environment Requirements
•Power Reserve: The S9301-32DB power supply is available with:
1. DC Version: 1+1 Redundant and hot swappable, active-active, DC power supply field
replaceable unit or;
2. AC Version: 1+1 Redundant and hot swappable, active-active, AC power supply field
replaceable unit.
For power voltage range requirements, please see section 2.3.
To ensure the active-active feed power design functions properly, a field with dual power
circuit is recommend with a reserve of at least 1000 watts on each power circuit.
•Space Clearance: The S9301-32DB width is 17.16 inches (43.6cm) and shipped with a rack
mount brackets suitable for 19 inch (48.3cm) wide racks. The depth of the S9301-32DB
chassis is 25.4 inches (64.5cm) without the field replaceable units (FRUs) and comes with
adjustable mounting rails suitable for rack depths of 20 inches (55.3cm) to 35 inches
(88.9cm). The handle for the fan units will extend outwards by 1 inch (2.5cm) and the handle
for the power supplies will extend outwards by 1.5 inches (3.8cm). Therefore, to
accommodate the fan handles, power supply handles and cable routing, a minimum space
clearance of 6 inches (15.24cm) is needed at the front and back of the S9301-32DB. A total
minimum reserve depth of 37.4 inches (95cm) is required.
Figure 1.
Figure 2.

S9301-32DB Hardware Installation Guide | 4
•
Cooling: The S9301-32DB has two options for airflow direction. There is a back-to-front
option (Figure 3. Left) and a front-to-back option (Figure 3. Right). Make sure the
equipment on the same rack have the same airflow direction.
(Back-to-Front Airflow)
(Front-to-Back Airflow)
Figure 3.
Figure 4.
Preparation Check List
Task
Check
Date
Power voltage and electric current requirement
DC version: -40 to -75V DC, 40A maximum x2 or;
AC version: 100 to 240V, 12A maximum x2
Installation spacing requirement:
S9301-32DB is 1RU (1.75”/4.5cm) in height, 19” (48.3cm) in width,
and 37.4 inches (95cm) in depth
Thermal requirement
S9301-32DB working temperature is 0 to 40°C (32°F to 104°F),
airflow direction is front-to-back or back-to-front
Installation tools required
#2 Phillips Screwdriver, 6-AWG wire stripper, and crimping tool
Accessories required
PC with terminal emulation software

S9301-32DB Hardware Installation Guide | 5
3Package Contents
Accessory List
Item
Description
Spec. & Dimensions
Qty.
Weight
1
Grounding Lug
1.54” x 1.47” x 0.49”
(#6 AWG)
(39 x 37.5 x 12.5mm)
1 pcs
0.037lbs (17g)/pcs
2
DC Input Lug
(DC Only)
DC Version:
0.87’’ x 0.47’’ x 0.34 ‘’
(# 8 AWG)
(20 x 12 x 8.8mm)
4 pcs
0.09lbs (40.8g)/1pcs
3
Screw Kit
(for Ground Lug)
2 x Screws M4*L8.0mm
1 set
0.01lbs (2.6g)/set
4
Adjustable Mounting
Rail (for 4 posts)
26.03” x 1.72” x 0.88”
(20” to 35” rack depth)
(661.3 x 43.8 x 22.4mm)
2 pcs
3.39lbs(1.54kg)/pcs
5
Screw Kit
(for Adjustable
Mounting Rail)
2 x Screws M4.0*L5.5mm
1 set
0.004lbs (1.9g)/set
6
RJ45 to DB9 Female
Cable
8”(2.4m)
1pcs
0.27lbs(123.9g)/pcs
7
USB 3.0 Cable
7.8”(20cm)
1pcs
0.03lbs(16g)/pcs

S9301-32DB Hardware Installation Guide | 6
Component Physical Information
Specification
Item
Description
Weight
Total package contents
53.08lbs (24.1kg)
Chassis without FRU
24.67lbs (11.2kg)
DC/AC PSU
DC PSU: 2.2lbs (1.0kg)
AC PSU: 2.2lbs (1.0kg)
Fan module
0.41lbs (185g)
Grounding lug kit
0.037lbs (17g)
Adjustable mounting rail
7.62lbs (3.46kg)
USB extension cord
0.03lbs (16g)
AC power cord (AC version only)
0.7lbs (318g)
RJ45 to DB9 female cable
0.27lbs (123.9g)
Dimension
S9301-32DB (W x D x H)
17.17” x 25.4” x 1.72”(436 x 645 x 43.8mm)
PSU (W x D x H)
1.99” x 12.64” x 1.57” (50.5 x 321 x 40mm)
Fan module (W x D x H)
1.98” x 5.64” x 1.57” (50.4 x 143.2 x 40mm)

S9301-32DB Hardware Installation Guide | 7
4Identifying Your System
S9301-32DB DC Version Overview
Figure 5.

S9301-32DB Hardware Installation Guide | 8
Figure 6.

S9301-32DB Hardware Installation Guide | 9
S9301-32DB AC Version Overview
Figure 7.

S9301-32DB Hardware Installation Guide | 10
Figure 8.
DC Version PSU Overview
1+1 Redundant, hot swappable power supply unit (PSU), field replaceable unit (FRU).
There are two types of DC PSUs, exhaust type and intake type, which are depicted by the color of
the latch. The picture below on the left is the intake type DC PSU, which is for back-to-front airflow
and has a blue latch. The picture below on the right is the exhaust type DC PSU for front-to-back
airflow and has a red latch.
(Back-to-Front Airflow PSU)
(Front-to-Back Airflow PSU)
Figure 9.

S9301-32DB Hardware Installation Guide | 11
(Dimensions same for both DC PSU types)
Figure 10.
AC Version PSU Overview
1+1 Redundant, hot swappable power supply unit (PSU), field replaceable unit (FRU).
There are two types of AC PSUs, exhaust type and intake type, which are shown in Figure 11. The
picture on the left shows the intake type AC PSU, which is for back-to-front airflow and has a blue
latch. The picture on the right shows the exhaust type AC PSU for front-to-back airflow and has a
red latch.
(Back-to-Front Airflow PSU)
(Front-to-Back Airflow PSU)
Figure 11.

S9301-32DB Hardware Installation Guide | 12
(Dimensions same for both AC PSU types)
Figure 12.
Fan Overview
5+1 Hot swappable fans, field replaceable unit (FRU).
There are two types of fans represented in Figure 13. The top picture shows fans with back-to-
front airflow and has a blue handle. The picture on the bottom shows fans with front-to-back
airflow and has a red handle.
(Back-to-Front Airflow Fans)
(Front-to-Back Airflow Fans)
Figure 13.

S9301-32DB Hardware Installation Guide | 13
Port Overview
Port ID
Form Factor
Supported Distance
Support Speed
0 ~ 23
QSFP56
SR4, LR4, ER4, ZR4
200GE/100GE
24 ~ 31
QSFP-DD
SR8, LR8, ER8, ZR8
400GE/200GE/100GE
Figure 14.

S9301-32DB Hardware Installation Guide | 14
5Rack Mounting
It is recommended that installation be done by two trained professionals. One
individual should hold the equipment in position on the rack while the other
secures it in place.
1. Separate the adjustable rail slides.
1.1 Pull apart the inner and outer rails until it is locked in place. An audible click can be heard
when the rails are locked in place.
1.2 Pull the white tab forward to unlock the rails in order to completely separate the inner rail
from the outer rail. The white tab is located on the inner rail.
1.3 Once the inner rail is separated, push the tab located on the outer rail to unlock and slide
the middle rail back.
Figure 15.
2Install the inner rails onto the chassis.
2.1 The inner rail has key-shaped holes where attachment pins on the chassis can be aligned.
The chassis has 5 attachment pins on each side, for a total of 10 pins. Fit the key-shaped
holes with the attachment pins and pull back to hold the inner rack in place.
Make sure the captive screw of the inner rail is positioned at the front of the
chassis.
2.2 After the attachment pins are secured to the inner rail, lock the inner rail to the chassis
using two M4 screws (one on each chassis side). See Figure 16.

S9301-32DB Hardware Installation Guide | 15
Figure 16.
Figure 17.
3Fix the outer rails onto the rack.
3.1 The outer rails have two brackets on the front and rear. Pull back the clip of the rear
bracket to attach it onto the rack. An audible click can be hear when the bracket is secured
onto the rack.
3.2 Once the rear bracket is secured, pull back the clip of the front bracket attach it to the rack.
An audible click can be heard when the bracket is secured onto the rack.
Figure 18.

S9301-32DB Hardware Installation Guide | 16
4Insert the Chassis to complete the installation.
4.1 Pull the middle rail fully extended into lock position, an audible click can be heard when the
middle rail is fully extended and locked into position.
4.2 Insert the chassis by lining up the inner rails into the slot of the middle rail.
4.3 Slide the chassis into the middle rail until it hits a stop.
4.4 Push the blue release tab on each rail to unlock the rails and slide the chassis all the way
into the rack.
4.5 Lock the chassis into place by using the captive screw on the front of the inner rail.
Figure 19.

S9301-32DB Hardware Installation Guide | 17
6Installing Fan Modules
The fan modules are hot swappable field replaceable units (FRUs), which can be replaced while the
router is operating as long as all the remaining modules are installed and in operation. The fans
come pre-installed and the following steps are instructions on how to install a new fan module.
1. Loosen the captive screw located on the fan module.
Figure 20.
2. Grip the fan's handle and firmly pull it out of the fan bay.
Figure 21.
3. Align the new fan module with the fan bay.
4. Carefully slide the new fan module into the fan bay and gently push until it is flush with the
case.
5. Secure the captive screw on the fan module to lock the fan in place.
Figure 22.
Table of contents
Other UfiSpace Switch manuals