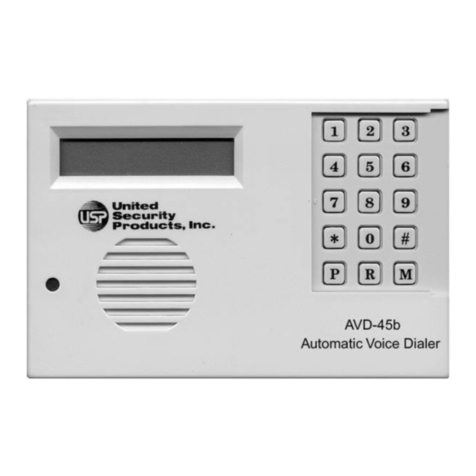
United Security Products AD-2000 User manual

Automatic Voic elPager
aler
th Ver
Not just the next generation...it's
United
SecuritY
Producls, lnc.
-
r-\
tem
tion
the next millennium !
E
tr
@:
@
/|.E-ETTg.CT
AutomaticVoice/Pager
Dialer
Versatile * Full-featured * Easy to Program
2-way
Listenin Verification
Operateswith all alarmsystems
Ideal
stand-alonedialer
Providesreliable
emergencynotification24hours
aday
Sys
i f i ca
Di
wi
--t!-f-,f-n R
l1l l2l lsll
l-.i l-./:
,E
ffi
tr
Er
t


THIS PACKAGE CONTAINS:
I ea.MODEL AD-2000
1ea.PHONE
CABLE
1ea.INSTRUCTIONMANUAL
4 ea.lK RESISTORS
Section Pagenumber
Packagecontents. .. 3
PanelDisplays..... 4
Installation
Hookups:Alarm Panel. 5
InstallationHookups:StandAlone 6
Programmingthe
Dialer 7-II
Overview. 1
Programming
Phone/PagerNumbers. 8
ProgrammingAuxiliary Information 9
Programming/RecordingOGMs. 10
Programming
Channels. 10-11
Testing
Your System I I
Operating
Your System 12
Additional
Features. 12
ProgrammingExample. 13
SampleProgram
Planner.
BlankProgram
Planner.
Specifications.....
DialerAccessories
ImportantInformation
13
14
15
15
16

MICROPHONE -\
TO RECORI)
VOICE MESSAGE
EASY PROGRAMMINC WITH
PROMPT LCD DISPLAY EASY TOUCH KEYPAD
SLIDING KEYPAD COVER
MODE - PROGRAM
TEST
OPERATE
OFF
RECORDVOICE
PAUSE DIGIT (2SIDIGIT)
PLAYBACK
SPEAKERFOR
OGM AND z_'IVAY
VOICE VERIFICATION
BREAK_OFFPANEL
FORWIRINGINPUT+
AD-2OOOFRONT
VIEW
AD_2OOO
BACKVIEW
I2VDC TEL
Lruor,ro,, ACCESS
AD-2OOOTOP
ON BACK
VIEW
Unlted
SecurltY
Product's,lnc.
@
@
@
@
@
@
@
mr
tr4l,
@
1800227
1592 ilrilll
12V
AUX
OUT
v

Alarm Panel
ALARMCONTROL
PANEL
WITH DRY CONTACTOUTPUTS
ALARM
CO\TROL PANELWITH
VOLTAGE
TRIGGEROUTPUTS
TNCOMTNG
.l
PHONE LINE IIINTF
rN HousE (""'"
PHONE LINE,]
SEIZUREHOOKUP
DRY CONTACTALARMPANTLINTTRFACE
TNCOMTNG l
PHONELINE
!Une SrtzunE HooKUp
IN*_HOT]SE
I
puoNrlrxp
J
INSTALL 1K RESISTORS (SUPPLIED)
IF TRIGGER VOLTAGE IS APPLIED
THROUGHRELAY CONTACT
r--r n
r ) /\
\--l AD-zooo REAR vrEw \-'i
TERMINAL ACCESS
/G\ /i
tq>t t<>l
vv
-NOTE: AUX AI"ARM OUTPUT
RATTNG I2VDCI0.3A MAX
AUX PANEL
N.O. or N.C.
DRY CONTACTS
(MOMENTARY
or CONTINUOUS
ACTIVATION)
AD_zOOO
REAR
VIEW
TERMINAL
ACCESS
@
_NOTE: AUX ALARMOUTPUT
RATTNGI2VDC/0.3A MAX
AUX PANEL
)L
MOM
TRIG: ISEC III\
CONT
TRIG: l0MI\ TI
MIN +5VDC
MAX +zBVDT'
VOLTAGITRIGGERALARM
PANELINTERFACE

OPTIONALACCESSORIES
AC-l: AC/DC ADAPTORFORUSE
IYITH
PP_1
AC-1P: AC/DC ADAPTOR
PP-1: PO1TERPACK
(RECHARGEABLE)
Stand
Alone
POWER& TTLIPHONE
LINE
INTERFACE
OPTIONALLINE INPUT
(TELEPHONE,
FAX, ETC.)
DISCONNECTS
WHEN
DIALER ACTIVATES
TEL LINE IN
12OVAC
60Hz
s-120
SIREN
MODEL
AC-2
rzvDc / o.5A
ll*l"JtL"ot
t"o*t'
tl
ll >r
lt : To TEL
WALL.IACK
lttl
\l--1 \fl
\.-J \,J
[.nt
SENSOR
lNPtlTS:
l",o
DOOR& rvlNDOw
''""
CONTACTS.TEMP
)^,,.
SENSoRS,
Erc. 1""
[cH4
*OPTIONAL
o
A
rA
!7
A
AD-zOOO
REAR
VIEW T''
TERMINAL
ACCESS @
NOTE: AUX ALARM OUTPUT
RATING 12VDc,/0.3A MAX
STAND-ALONE
INTERFACE

[::l'
\ -_' ',-) ' .- .t
Overview
Pleasestudythis sectionthoroughlybefore
beginningto program
thedialer,referring
to theSampleProgram
Planner
onpage13.Then,
selectfrom amongtheoptionsfor eachfeature,listingeach
choice
in pencilon the
blankProgramPlanner
onpage
14.Oncethedialeris correctly
programmed,
list eachchoicein ink. Onecopy
of thePlannershouldbekeptby theinstaller;
onecopyshould
remain
with theend
user.
A look At The Keypad
CALLOUTFOR
NUMERALS:
Press
these
keys
to entertelephone
numbers
andother
programming
information
as
specifiedin thismanual.A maximum
of 50digits
canbe
input
in each
phone/pager
location.
CALLOUTFORP:
Press
this
key
to
programina
pause.Each
"P"provides
a2-second
pause.
CALLOUT
FORR:
Press
this
keyto recordthecombinationof identificationand
directionaloutgoing
messages
(OGMs).
Thetotal
elapsedOGMtime
cannot
exceed5l seconds.
CALLOUT
FORM:
Press
thiskeytochangetheModeofthedialer,insequence:
PROGRAMTEST
OPERATEOFF.
tr
E
m
m
@;
tr:
tr
ffi.
mi
tr
tr
tr
tr
tr'
tr
ilr @_r
ri4
t[.)
Lqr
[-e]
LIjild|-#-l
iltl
ta't
@
Oncetheunit has
been
programmed,
removing
power
or placing
thedialer
in theOFFmodewill notaffectthe
programming.
Uniled
Saeurity
Pr'orluets, lrlc'
-.d-5.
AIT-f,TTtrTT
AutomaticVoice/Pager
Dialer

STEP 1 Apply
power
rotheunit. STEP ! Press
l.
TheLCDwillread: TheLCDwill changeroread:
NOTPROGRAMMED USPAD2OOOX.X
PRESSKEYPAD#1 tften..PROGRAM:
NUMBERS
then:SELECT:
l-8
O(DONE)
First TimeInstallationtoInitialize Dialer Follow Ste I&2.
Press
"*" to storethe
sequence.
Example:To storenumeric
pager
number
555-1212,a4-second
Pause
andcode3456:
Press r-El
@@[
Lll@
ttl]
@
l@
[F]
[-Eri
[tl i@{@]
@
STEP38- TELEPHONE
NUMBERS
If youpressed"2" and
wishtoprogram
in atelephone
number.
..
Pressthe digits of the number to be dialed. For long-distance
numbers,first press"l" followed by the areacodeandthenthe
number.Thenumberwill appearon the
LCD.
Press
"*" to storethesequence.
Exampl
e
: Storetelephone
number
I-800-555-
I2I2:
Press: @@l
(o-j
l@
:C
@
iltrlai!
i.i?r
Ui@l
E)
REMEMBER/NOTE: Before programming your dialer to call the police, fire
department 0r 9-1-1 directly, you must check with these agencies for their
approval.
STEP
3C
-VOICE PAGERS
If youpressed
"2" and
wishtoprogram
in avoicepager...
Pressthedigitsof the
pager
to becalled.
Press
"P" one or more times in accordancewith the numberof
secondsneeded
to accommodatethe
pager.
(Remembereach
"P" providesa 2-second
pause).
Press
"*" to storethe sequence.The numberwill appearon the
LCD.
Example:To storevoice
pager
555-1212anda4-second
pause:
Press: tO
tt4j
tO
LEI[r.litebll
STEP 4 Repeat
steps1-3fbreachnumbertobe
programmed
in
eachlocation.
Selectanyof8location
numbersinStep
1
(SELECT:
1-8)for
each
numberto
be
programmed.
STEP 5 When you are done programming all desired
telephoneand/or pager numbers, press tt0tt to exit this
section.
NOTE: IF YOU ENTER THE WRONG CHOICE, PRESS "M" KEY
REPEATEDLY AND RETURN TO THE *PROGRAM MODE", THEN
SELECT THE SECTION TO CHANGE C'T''
ACCEPT SECTION,"2''
FORNEXT SECTION).THEN ENTER
CORRECTINFORMATION,
ProgrammingTelephone
And/Or Pager
Numbers
You arenow readytobeginprogramming
thedialer.
All programming
canbe inputbefore
connectingthedialerto a
telephoneline. Checktheunit's LCD asyou program
numbers
in the dialer to ensure accuracy. Please complete all
programming instructionsbeforeattemptingto operatetheunit.
Before programming your dialer to call the police, fire
department or 9-l-l directly, you must check with these
agencies
fortheirapprova..
A maximumof 50 digits(including
pauses)
canbeprogrammed
in ateachlocation.
*PROGRAM: NUMBERS SELECT:1-8
r(YES) 2(NO ) O(DONE)
+This
prompt will apper aftera number
hasbeen
programmed
andthissec-
tion hasbeenexited.
STEP I Press location number l-8 to program the first
number. This can be any location l-8. You do not have to
programlocationsin sequence.For example,
you canprogram
numbers in locations 3 and 5. When you are done
programming all the desired telephone and/or pager
numbers, press
"Ot'to exit this section.
TheLCD will read: PAGER
I(YES) 2(NO)
STEP 2 Press
"1" if you wish to program
in a numericpager
number (step 3A). Press"2" if you wish to program in a
telephonenumber
(step
3B), cellular
phone
numer
(step
3B), or
avoice
pager
(step
3C).
STEP3A. NUMERIC
PAGERS
NOTE: WHEN PROGRAMMINGNUMERIC PAGERS, YOU MUST
PROGRAMIN ONE OR MOREPAUSES.
EACH'P" PROVIDESA 2-
SECONDPAUSE.BEFOREPROGRAMMINGIN A PAGER.
CALL THE
NUMBER
TODETERMINE
THE
NUMBEROF2-SECONDPAUSESTOBE
PROGRAMMEDIN,
Ifyou pressed
"l" to program
in a numericpager...
Press the digits of the pager to be called. The numbers will
appear on the LCD, as will the following key designations.
Press "P" one or more times in accordance with the number of
seconds needed to accommodate the pager.
(Remember, each "P" provides a 2-second pause).
Pressthe digits ofthe numeric pager code.
NOTE: SOME PACER SERVICES REQUIRE A "#" SIGN FOR
SEPARATIONOF THE NUMERICCODEOR AT THE END OF THE
NUMERIC
CODE
FORPROPERTRANSMISSION.

Programming
Auxiliary Information
Thedialerispresetatthe
factory
to typicaltelephoneline(T-
LINE),PBX,DialingAttempts
andMessageRepeat
options.lf
you choose
to accept
thefollowing
default
prompts,
simply
press
"2" to scroll
to the
nextsection.If your phone
system
requiresdialing a digit to get an outsideline or dial tone,
similar to PBX, then turn PBX on and enter digit to
program.
PRESETS
T-LINE................TONE
PBX......................OFF
ATTEMPTS..
..............2
MESSAGE..................2
Tochangethe
presets,follow
thesesteps.
T-LINE
TheLCDwill display: PROGRAM:
T-LINE
I(YES) 2(NO)
Press
"l " to
program
T-LINE.
Press
"2"toscrollto
the
nextsection.
TheLCDwilldisplay: PROGRAM:T-LINE
I(TONE) 2(PULSE)
Press
"1"for
TONE.
Press
"2" forPULSE.
PBX
TheLCDwill display: PROGRAM:PBX
l(ON)2(OFF)
Step
l: Press
"1" fbr
ON.
Press
"2" forOFF.
Step
2:If "1"isentered,theLCD
will
display:
PROGRAM:PBX
ENTERPBX
NUMBER
EnterPBXnumber
(
| dieit).
ATTEMPTS
ATTEMPTSrefers
to the
numberof times
the
dialer
will call
each
designatednumber.Both successfuland unsuccessful
(busy
orno
answer)
callareconsideredattempts.
TheLCDwill display: PROGRAM:ATTEMPTS
ENTER1-9
Step1: Pressthedigit(l-9) correspondingto thenumberof
times
you
wishthedialertocalleachnumber.
MESSAGE
MESSAGEreferstothe
number
of timeseachmessasewill be
deliveredtoeachdesignated
number.
TheLCDwill display: PROGRAM:
MESSAGE
REPEATENTER1.3
Step
1: Pressthedigits
(l-3) correspondingto thenumberof
times
you
wishthe
message(s)to
bedelivered.
Afterselectingthenumberof messagerepeats,thedialerwill
automaticallyexitthissection.
StructuringYourOutgoingMessages
The AD-2000 dialer was designedwith optimum versatilityand
functionalityin mind. Nowhere is this more apparentthanin the
matrix of outgoingmessages
(OGMs). The user'sability to "mix
and match" OGMs allows complete system customizationand
provides
ultimate
efficiency.
TotalOGM timeis51seconds.
A beginningidentification
(ID) messageof up to l5 seconds
can
be programmed
in (options#4, #6, and #8). Your ID message
should clearly state your name, addressand other pertinent
emergencyinformation.
Typically, eachOGM will havea specific
purpose.
For instance,
OGM I canalert thepersonnotified to contactthe fire department
while OGM 2 can alerl the person to contact the police
department.Typically the dialer is programmed to notify family,
friends or anotherresponsibleparty. Before programmingyour
dialertocallthe
police,
fire department
or 9-l-l directly,
you must
checkwith theseagencies
for theirapproval.
OPTION #l No OGM. Selectthis optionif you do not wish to
record
anyoutgoingmessages.
OPTION #2 I OGM. Selectthis option if you wish to record
one
OGM, whichmaybeaslong as5l seconds.
OPTION #3 2 OGMs. Select
this option if you wish to record
two OGMs, eachof which may beaslong as25.5
seconds.
OPTION #4 ID plus2 OGMs. Selectthis optionif you wish to
recordone ID of up to 15 secondsin length,
and
two OGMs, eachof which may be aslong as 18
seconds.
*
OPTION #5 3 OGMs. Selectthis option if you wish to record
threeOGMs, eachof which may be aslong as 17
seconds.
OPTION #6 ID plus3 OGMs. Selectthis option if you wish to
recordone ID of up to 15 secondsin length,and
threeOGMs, eachof which may be as
long as 12
seconds.
x
OPTION #7 4 OGMs. Select
this option if you wish to record
four OGMs, each of which may be as long as
12.75
seconds.
OPTION #8 ID plus4 OGMs. Selectthis option if you wish to
record
oneID of up 15
secondsin length,
andfour
OGMs, eachof which may be as long as 9 sec-
onds.x
*lfyour ID messageis lessthan l5 secondsin length,the remaining time will be
evenlvdividedamongtheOCMs.
Exunple:OPTION#4:ID plus
2OGMs.
lf theID is l0 seconds,theneachOGM canbe (51minusl0
equals4l dividedby2equals)20.5secondsinlength.

Programming
And Recording
Your
Outgoing
Messages
Follow these steps to program and record your outgoing
messages.
Skip this portion if you have programmed
in only
numeric
pagers,
which rely on codedDTMF messages.As with
all AD-2000 programming, the unit neednot be connectedto a
phone
line when information
is programmed
in. Remember
that
"OPT" on the LCD stands for option: "OGM" stands for
outgoing
message.
NOTE: IF YOU ENTER THE WRONG CHOICE, PRESS"M" KEY
REPEATEDLY AND RETURN TO THE "PROGRAM MODE", THEN
SELECT THE SECTION TO CHANGE C'1" ACCEPT SECTION, *2"
FOR NEXT SECTION).THEN ENTER CORRECT INFORMATION.
STEP L Decidewhichof theeightoptions
youprefer.
STEP 2 Beforeprogrammingin this option, write down all
your messages.Time them carefully, changing them if
necessaryto fit the alotted time frame. Practice saying them,
clearlyenunciatingeachmessagefor maximum clarity in case
of anemergency.Keep
afinal recordingscript.
STBP 3 Program
youroption.
A) TheLCD will read: PROGRAM: OGMS
l(YES) 2(NO)
B) Press
"1" to programyour OGMs. Press
"2" to scrollto the
nextsection.
C) Press
"l" to selectthe option (#l- #8) displayedor press
"2" to scroll
to the
desiredoption.
STBP 4 After selecting
youroptionasexplainedabove.record
yourmessage.
A) The word RECORD will appearin theupperleft cornerof
the LCD, above the instruction: PRESS R. The option
selectedwill appear
in theupper
right corner.For instance,
if you selectedoption#2,theLCD will read:
RECORD OGMI
PRESSR
B) Speak6-12inchesawayfrom themicrophone.Referring
to
your scriptandspeakingin a normalvoice,
press
andhold
R (the
word RECORDING will bedisplayed),releasingthe
key afteryou havecompletedenunciating
your messages.
The word DONE will appear on the LCD when the
maximumallottedtimehas
beenreached.
C) TheLCD will read: PLAY OGM(S)
1(YES)2(NO)
Press
"1" to playback
yourrecording
D) TheLCD will read: ACCEPT
1(YES)2(NO)
Press
" l" to accepttherecorded
OGM(s).Press
"2" if you
wishto re-record
themessages,beginningwith Step4.
Changing The OGMs
After your systemis up andoperating,
you may change
oneor
more of the recorded OGMs and/or choose a completely
diff'erentoption. To do so, simply scroll to the programming
sectiononyourdisplay: PROGRAM: OGMS
l(YES) 2(NO)
Selecttheoption,thenbeginagainfrom Step3 aboveto record
yournewmessage(s).
ProgrammingTheChannels
The AD-2000 is designedto be adaptableto a complete range of
personalized
applications.Each
of thefour input channelscanbe
programmed individually for full system customization. ln
addition to setting enable/disableoptions, entry/exit delays and
typeof activation
(N.O.,N.C., & momentaryor continuous),each
usercan specify which emergencymessageswill be delivered and
which numberswill be dialed.The first channelactivatedwill be
the
priority channel.Numbersprogrammed
to thatchannelwill be
completedbeforethedialermoves
on to thenext
channel(s).
Although comprehensivein scope,thesystemis easyto program.
Justfbllow these
simolesteos.
NOTE: IF YOU ENTER THE WRONG CHOICE, PRESS
"M" KEY
REPEATEDLY AND RETURN TO THE "PROGRAM MODE'" THEN
SELECTTHE SECTIONTO CIIANGE ('T" ACCEPTSECTION,
"2"
FOR NEXT SECTION).THEN ENTER CORRECT INFORMATION.
STEP 1ttreLCI will read: PROGRAM:
CHANNELS
1(YES)2(NO)
Press
"1"to
begin
programming
thechannels.
STEP 2 TheLCDwill read: SELECT:
l-4
O(DONE)
Enterthechannel
you
wishto
program
(1-4).
Enable/Disable
STEP 3 tne r-Cnwill read: CHX: ENABLE
I(YES)2(NO)
("CH
)C'beingthechannel
selected)
Press
"l" toenablethechannel.Press
"2" todisablethechannel.
Exit/Entry
Delays
Capableof programming
up to a maximum of 3 minutes
and 20
secondseach.
STEP 4 TheLCo will read: CH X: EXIT DELAY
1(YES)2(NO)
Proceed
with A) if you wishtoprogram
anexitdelay.
Proceed
with B) if youdo not.
A) To program
exitdelay,
press"1".
TheLCD will read: ENTER
0-199THEN
PRESS*
Enterthedigits corresponding
to the numberof seconds
you
wish to install.(For example,
press
"l20" thenpress
"*", if
you wishto installa 120-secondexit delay).
B) Ifyou donot wishto program
anexit delay,
press
"2".
STEP 5 ttre LCO will read: CH X: ENTRY DELAY
1(YES)2(NO)
Proceedwith A) if youwish to program
anentrydelay.
Proceedwith B) if you donot.
A) To program
anentrydelay,
press
"1".
TheLCD will read: ENTER 0-199THEN
PRESS*
Press "l" to program a delay. Then enter the digits
corresponding
to the numberof seconds
you wish to install.
(Forexample,
press"90" then
press
"*", if you wish to install
a90-seconddelay).
B) If you donot wishtoprogram
anentry
delay,
press"2".
10

Normally Open/I.{ormally Closed
STEP6 rneLco willread:
CHX:N.O./i.{.C.
1(N.O.)2(N.C.)
A) Press
"1" to select
anormally
openchannel.
B) Press
"2" to select
anormallyclosed
channel.
Momentary/ContinuousActivation
STEP7 rne
Lco willread:
CH
X:MOIWCONT
I(MOM)2(CONT)
A) Press
"1" to select
amomentary
trigger.
B) Press
"2" toselectcontinuousactivation.
NumbersDialed/OutgoingMessages
Following thesestepsallowsyou to choosewhich OGM(s) will
bedeliveredand
whichnumberswill bedialedfor each
channel.
NOTE: Dialer LCD will only show programmed
numbersand
OGM options.
STEP 8 rne I-co will read:
CHX:
DIAL#X
1(YES)2(NO)
("Dial
#X"beingthe
numberinphone/pager
location
I
-8)
A) Press
"l" to
dial
phone/pager#X
tobedialedwhen
the
se-
lected
channel
isactivated.Press
"2"if you
do
notwish
this
numbertobedialed.
B) Continue the above procedure for each of the up to eight
phone/pager
numbersprogrammedin.
STEP 9 ttre LCO will read:
CHX: OGMX
I(YES) 2(NO)
("OGM X'being theOGM recorded
in OGM options#2 -#8)
A) Press
"l" to deliver OGM X when the channelis activated.
Press
"2" if youdonot wishthisOGM to be
delivered.
B) Continuetheabove
procedure
for eachChannel/OGM.If you
have programmed in and recorded an ID messageas one of
yourOGM options,thisID will bedeliveredto all channels.It
will notappearin the
Channeldisplay.
NOTE:ID ANDOGM(S)
WILL
ONLYBEDELIVEREDTOTELEPHONE
NUMBERS,
CELLULAR
NUMBERS,
AND
VOICE
PAGERS.
CompletingThe Programming
Once you have programmed in all dialing and OGM options for
eachchannel,the
LCD will read:
ACCEPT
1(YES)2(NO)
STEP 10 Press
"1" to acceptthe Channel
programming.
Press
"2" to re-programor to revertto previously programmedsetting.
You are
now ready
to review your programming
andtestthesys-
tem. PRESS"M'' TO EXIT PROGRAMMING MODE.
Test
your systembeforean emergenc!occurs.
Do not neglectto reviewprogrammed
informationand
verify all
elementsof your systemthoroughlybefore
relyingon thedialer
to deliverthenecessaryinfbrmation
to thedesired
parties
accu-
ratelyandcompletely.
We stronglyrecommendtestingthesystem
in test
modebefore
connecting
to a telephoneline. The testmode teststhe stored
information,not the full tunctionality
of the dialer.To testthe
full functionalityof thedialer,theunit mustbetestedin theop-
eratemode.
In thetest
mode.
thedialer
will not makemorethan
one attemptper numberdialed or play any OGM more than
once.
NOTE: IF YOU ENTER THE WRONG CHOICE. PRESS
"M" KEY
REPEATEDLYAND RETURNTO THE'PROGRAM MODE'" THEN
SELECTTHE SECTIONTO CHANGE ('T" ACCEPTSECTION,
"2''
FORNEXT SECTION).THEN ENTERCORRECTINFORMATION.
STEP I Pressthe
"M" Modekey
until
theLCDreads:
TEST:T-LINE
rffES) 2(NO)
STEP 2 Press
"l
" todisplaythe
T-Line
configuration.
The
data
will scroll
throughall
selections.
Press
"2"toscroll
to
thenext
section.
STEP 3 tne LCo willread:
TEST:
CHANNEL(S)
1(YES)2(NO)
Press
"l" to
test
channels.
Press
"2" toscrolltothenext
section.
STEP 4 ttre LCO will read:
SELECT: 1-4
5(ALL) O(DONE)
Selectthechannel
you wish to test
(l-4).
Press
"5" to test
"all"
Channels.Once a channelis selected
(or "all") the programmed
channelinformation will be displayed
on the LCD. Verify data
accuracyastheLCD scrollsthrough
by comparingtheinformation
displayed
with thatspecifiedon your ProgramPlanner.Listen to
your recordedmessage(s)to ensurethatthecorrectOGM (if pro-
grammed)
isdelivered.Press
"0" to exit testing.
STEP 5 Now connect
your dialerto thetelephone
line you will
be using and test the systemagain,to determineif it functions
correctlyinanactualemergencysituation.
Make
sure
you
notify
the
receiving
party
ofyour
intenttocallthem,
andtellthemitis
iust
atest.
STEP 6 To testtheoperationof your entiresystem,set
Mode to
OPERATE andproceed
asexplained
in the nextsection:
Operat-
ing Your System.
Test your system on a regular basis,at least oncea week.
11


Sample
ProgramPlanner
ADzOOOPROGRAM PLANNER
(exclude PBX digit, include numeric pager code) NAME OF PARTY TO BE REACHED
2345674 John Johnson s house
J456789PP4455 John Johnson s
3456789PP5544 Jol^e Joh"sor: oooo' ire "ode
LINE
TONE PULSE PBX ATTEMPTS MESSAGE REPEAT
ON OFF 1 THROUGH 9 1 THROUGH 3
NUMBER 22
BRIEFLY DESCRIBE TYPE OF VOICE MESSAG
lD + 2 OGMS lD: lr,4ynome is lvlory
Smithond I needhe
p. OGMl:Co the police
deportment. OGM2:Collthe fire deportment.
ID + 3 OGMS
Programming Example for Quick Setup
Before programming the dialer, study the example shown on this page.
This "quick setup" example programs in one telephone number, two
numeric pagernumbers.two attempts,two repeats,an ID plus two
additionalOGMs, andchannelsI and.{.
Once you understandthe setup.use the blank Program Planneron
page l4 to begin programming your dialer.We recommendmaking
severalblank copiesof the Plannerbefbre beginning the process.It
alsois advisableto fill in thePlannerin oencil
initiallv.
STEP 1Press
"l".
STEP 2 When theLCD readsSELECT l-8, press
"1" to installthe
first phonenumberin location I press
"2" to indicateno pager;
then
press,
in sequence,
(fictitious) phone
number*2345678" followed by
the"x" signto storethe
programmingprocessfor that
number.
STEP 3 Press
"5" to installthe second
phone
numberin location5;
press "1" to indicate numeric pager; then press'in sequence,
"3456189PP4455#" followed by the "x" sign. The first seven digits
represent
the
pager
numberdialed;eachP standsfor a2-second
pause;
the next four digits followed by the # sign represent the pager code
andthe * storestheprogramming processfor that number.
Now press "6" to install the third phone number in location 6; press
"1" to indicate numeric pager; then press, in sequence,
"3456789PP5544#"
followedby the"E" sign.
STEP 4 Press
"0" to exit PROGRAM NUMBERS.
STEP 5 At the PROGRAM: T-LINE prompt, press
"1" to choose
tone;
press
"2" to indicateno PBX; press
"2" to programin two dial-
ing attempts
per emergencynumber called; press
"2" to program in
two messagerepeatsfor eachcall.
STEP 6 Press
"l" to PROGRAM OGM(S). Press
"2" threetrmesto
Scrollto option#4; press
"l" to programin anID messageandtwo
specificoutgoingmessages
(OGMs).
STEP 7 Using a prepared script and speaking six-to-eight inches
from the dialer's microphoneon the front ofthe unit, press
"R" when
you are ready to enunciate your l5-second identification messageand
your two l8-second messages.Dialer automatically
prompts to next
OGM. Make OGMI a messagetelling the receiving party to call the
police department.Make OGM2 a messageto call the fire department.
STEP 8 Press
"l" to playbackall recordedmessages;
press
"1" again
to accept. (NOTE: DIALER LCD WILL ONLY SHOW
PROGRAMMED NUMBERS AND OGM OPTIONS).
STEP 9 Press
"l" to PROGRAM CHANNELS.
STEP l0 Press
"1" to programChannel 1. Press
"1" to ENABLE.
Press
"l" thenenter"30" then press
"x" for a 3O-secondEXIT delay;
press
"1" then enter"15" then press
"x" for a l5-secondentry delay.
Now press"2" for NORMALLY CLOSED and then "1" for MOMEN-
TARY activation.
Press
"l" to select
phone/pagernumber 1 to be di-
aled.Press
"1" againto selectphone/pager
number 5 to be dialed. Press
"2" to not select
phone/pagernumber
6 to bedialed.
Press
"1" to select
OGM1 to be delivered and press"2" to not select OGM2 to be deliv-
ered.
Press
"1" to acceptthechannelconfiguration.
STEP 11 Press
"4" to programChannel4. Press
"1" to ENABLE.
Press
"2" twice to indicateno EXIT or ENTRY delay.Now press
"1"
for NORMALLY OPEN and the "2" for CONTINUOUS activation.
Press
"1" to seiectphone/pagernumber 1 to be dialed. Press
"2" to not
select
phone/pager
5 to bedialed.Press
"1" to select
phone/pager
num-
ber 6 to be dialed.Press
"2" to not select
OGMI to be deliveredand
press
"1" to selectOGM2 to bedelivered.
Press
"l" to acceptthechan-
nel configuration.
STEP 12 Press
"0" to exit PROGRAM: CHANNELS.
Press "M" to exit programming mode.
13

Fill outthisProgramPlanner
inpencilinitially
ADzOOOPROGRAM
PLANNER Io"t". - --__l
NUMBER PAGER .I'ELTJPHON-tJ N UMBER
(exclude PBX digit, include numeric pager code) NAME OF PARTY TO BE REACI{ED
YES NO
I
2
+
5
7
PROGRAM: T_LINE
TONE PULSE PBX ATTEMPTS MESSAGE REPEAT
ON OFF 1 THROUGH 9 1 THROUGH 3
NUMBER
PROGRAM: OGMs
]N BRIEFLY DESCRIBE TYPE OF VOICE MES
NO OGM
I OGM
32 OGMs
ID + ? OGMS
3 OGMs
ID + 3 OGMS
74 OGMS
ID + 4 OGMS
CH ENABLE EXIT DELAY(SEC) ENTRYDELAY(SEC} ACl'IVA't'ION DIAL NUMBER PLAY OGM
YES NO YES NO o-199 YES NO o-199 NO NC I MOM CONT 23D7BI
I
3
4
ADzOOOPROGRAM
PLANNER l5;t",----------l
NUMBER PAGER TELEPHONE NUMBER
(exclude PBX digit, include numeric pager code) NAME OF PARTY TO BE REACHED
YES NO
I
3
4
5
6
7
PROGRAM:T-LINE
TONE PULSE PtsX ATTEMPTS MESSAGE REPEAT
ON OFF THROUGH 9 T THROUGH 3
NUMBER
PROGRAM: OGMS
NS'I'YLE BRIEFLY DESCRIBE
TYPE OF VOICE
MESSACE(S
INO OGM
21 OGM
2 OGMS
4ID + 2 OGMS
53 OGMS
6lD + 3 OGMS
74 OGMs
IID + 4 OGMS
CH ENABLE IT DELAY(SEC) ENTRYDELAY(SEC) ACtlVAl'toN DIAL NUMBER PLAY OGM
YES NO YES NO o-199 YES NO NC MOM coN'r 4 7 BI234
I
2
3
4
After thoroughlytesting
your system,redo
yourProgramPlannerin ink.
Onecopyshouldbekeptin asafe
place
bytheenduser;
onecopyshould
beretained
bytheinstaller.
14


CareAnd Precautions
LOCATION
Placethe dialer on a flat level surfaceor mount the unit on the
wall, awayfrom extreme
coldor heat,directsunlight,excessive
humidity and away from equipment that generate
strong mag-
netic fields. Avoid placing near large metal objects and areas
thatproducesmoke,dustandmechanicalvibrations.
CARE
Clean the housing with a soft cloth lightly moistenedwith
water or mild detergentsolution.Never use solventssuchas
alcoholor thinner.Do not allow liquidsto spill intotheunit.
OPTIONALBACKUP
To ensurecontinuousoperationduringpoweroutages,hookup
to a I2VDC backup battery pack is recommended.
(PP-l)
Availablefrom UnitedSecurityProducts.
CAUTION
Do not usethedialerif a gas
leakis suspectedor during light-
ning.
PROBLEMS
If liquid or a foreign objectpenetrates
the unit, disconnectit
immediately
andcontact
your installer
or otherqualifiedtech-
nician.
Before
callingUSP,
pleasemake
sure...
. You haveread this manual and understandhow to operate
thedialer.
o Your phonelineisworking.
o You checkout theentiresystem,
includingexternalhook-
up wiring and sensorsattached.
If you still havequestionsor concerns,
call our USP Technical
ServiceDepartment
betweenthe hoursof 7:30 AM and 4:00
PM, PST,Monday throughFriday.
Federal Communications Commission Radio And Televi-
sion Interference Statement For A Class 'B' Device
This equipmentgenerates
and usesradio frequency energy and
ifnot installedandused
properly,
thatis,in strictaccordance
United Security Products
Issue date: 4127/98
with the manufacturer's instructions, may causeinterference to
radio and television reception. It has beentype testedand found
to comply with the limits for a Class 'B' computingdevice in
accordancewith the specifications in Subpart B of FCC Rules
and Regulations(as outlined in the Code of Federal Regulation,
Tirle 4'7),which are designed to provide reasonableprotection
againstsuch
interference
in aresidentialinstallation.
User Instructions
If this equipmentdoescauseinterference
to radio or television
reception,which canbe determinedby turning the equipmentoff,
then on, the user is encouraged
to try to correct the interference
byoneor more
of thefollowingmeasures:
r Reorientor relocateradio
or television.
r Increasetheseparationbetweentheequipmentandreceiver.
o Connect the equipment into a different outlet so that the
equipmentandreceiverareon different branchcircuits.
. Consult the dealeror an exoeriencedradio/TV technicianfor
help.
Changesor modificationsnot expresslyapprovedby United se-
curityProducts,Inc.couldvoid theuser'sauthorityto operatethe
equipment.
16
Table of contents
Other United Security Products Security System manuals
Popular Security System manuals by other brands

Internet Security Systems
Internet Security Systems PROVENTIA Network GX5108 user manual

Fire Burglary
Fire Burglary XL-31 Series owner's manual

Honeywell
Honeywell 702 Installation instructions manual

Lorex
Lorex SG15F6584 Specifications

Axis
Axis Intrusion Switch B installation guide

ADEMCO
ADEMCO via30+ user manual