UNITED DVBT9070 User manual


User Manual
High DefinitionDigital SetTopBox
Please read thisUser Manual carefullyto ensure properuse of thisproduct and keepthis manual
for future reference.
DVBT9070

1) Read these instructions.
2) Keep these instructions.
3) Heed all warnings.
4) Follow all instructions.
5) Do notuse this apparatusnear water.
6) Clean onlywith dry cloth.
7) Do notblock any ventilationopenings, install inaccordance with the
instructions.
8) Do not installnear any heat sourcessuch as radiations, heatregisters,
stoves, or other apparatus(including amplifiers) that produceheat.
9) Do notdefeat the safetypurpose of thepolarized plug. Ifthe provided
plug does notfit into youroutlet, consult anelectrician for replacement
of the obsolete outlet.
10) Protected thepower cord frombeing walked onor pinched particularly
at plugs, conveniencereceptacles, and thepoint where theyexit from
the apparatus.
11) Onlyuse attachments/accessories specifiedby the manufacturer.
12) Unplug thisapparatus during lightingstorms or whenunused for long
periods of time.
13) Refer allservicing to qualifiedservice personnel. Servicingis required
when the apparatushas been damaged inany way,such as power-
supply cord orplug is damaged, liquidhas been spilled orobjects have
fallen into theapparatus, the apparatushas been exposedto rain or
moisture, does notoperate normally,or has beendropped.
14) Mains plug isused as the disconnectdevice, the disconnect device
shall remain readilyoperable.
15) The ventilationshould not beimpeded by coveringthe ventilation
openings with items, suchas newspapers, table-cloth, curtains,etc.
16) No nakedflame sources, suchas lighted candles,should be placedon
the apparatus.
17) Attention shouldbe drawn to the environmental aspects ofbattery
disposal.
18) The useof apparatus inmoderate climate.
WARNING: To reduce the riskof fire orelectric shock, donot expose
this apparatus torain or moisture.
WARNING: Thebatteries shall not beexposed to excessive heatsuch
as sunshine, fireor the like.
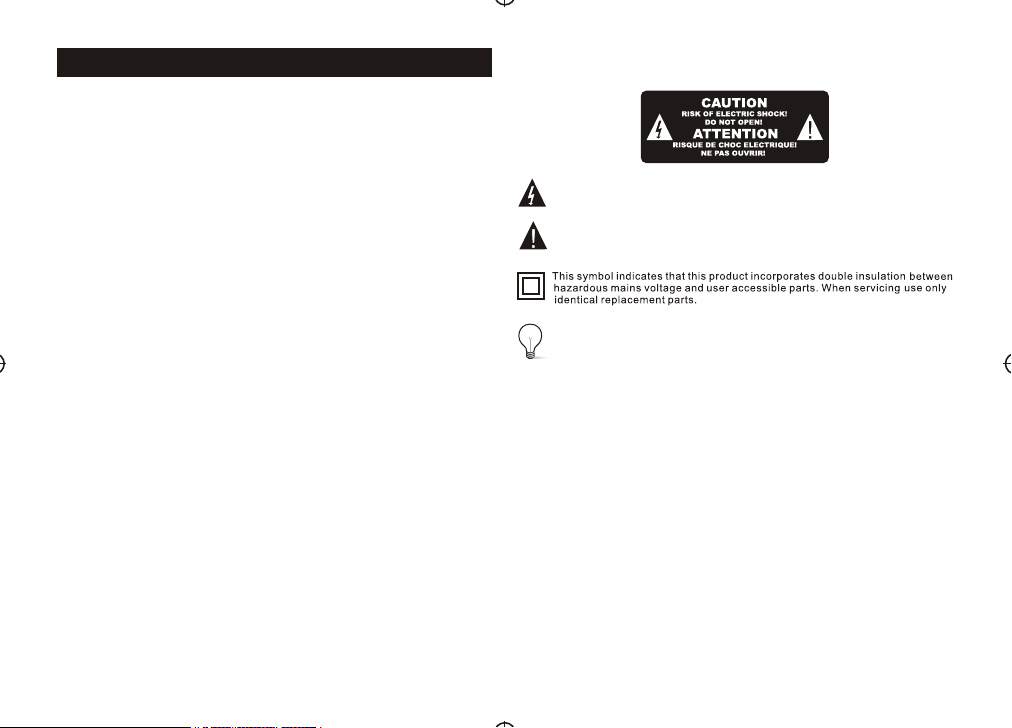
Important Safety Instructions
The symbol indicates that there are important operating and
maintenance instructions in the literature accompanying this unit.
The symbol indicates that dangerous voltages constituting a risk of
electric shock are present within this unit.
CAUTION:
When the apparatuswas in electrostaticcircumstance, it maybe
malfunction and needto reset byuser.

Tableof Contents
1
1. Front panel
2. Rear panel
Front and Rear Panel
1 RF IN : This socket connects to your external aerial.
2 RF LOOPTHROUGH: This socket willbypass the RFsignal to either
your TV oranother video system.
3 COAXIAL: This socket connectsto a coaxialsocket on yoursurround
sound system.
4 TV SCART: This socket connectsto your TV.
5 VCR SCART: This socket connectsto either a DVDor other video system.
6 HDMI OUT This socket connectsto HDMI indevice.
7MAINS CABLE: This is usedto connect toyour main powersupply.
Front and Rear Panel........................................................................... 1
Remote Control.... ............................................................................... 2
Connections.........................................................................................3
First Time Installation...........................................................................3
Troubleshooting...................................................................................7
Technical Specifications.......................................................................8 1 POWER BUTTON: Used to turn on/off the main power supply.
2 REMOTE CONTROL SENSOR: Used to receive the signal from the
remote control.
3
4STANDBY INDICATOR: Used to visually show power state of the
set top box, the LED will turn red if the set top box enter standby mode.
5 USB:
6 CHANNEL UP/DOWN: Used to change channels without using the
remote control.
LED DISPLAY WINDOW: Used to display channel number.
Data input from USB storage devices.
3456

2
Installing the Batteries
Remove the battery cover from the and put 2xAAA size
batteries inside the compartment.
The diagram inside the Battery Compartment shows thecorrect way to
install the batteries.
Remote Control
OPEN
CLOSE
1.Open thecover 2.Install batteries 3.Close thecover
Using theRemote Control
Touse theRemote Control, point it towards the frontof theDigital Set Top Box.
The Remote Controlhas arange ofup to7 metresfrom theSet Top Boxat an
angle ofup to60 degrees.
The Remote Controlwill notoperate ifits pathis blocked.
Sunlight or very bright light will decrease the sensitivity of the
Remote Control.
Remote Control
1. MUTE: Mute or Restore Audio Output.
2. INFO: Displays additional channel information.
3. TTX: DisplaysTeletext Information.
4. DTV/VCR: Switches the product to VCR input
if it is in DTV state. Switches the product to
DTV if it is in VCR state.
5. SUBTITLE: Selects Subtitles Language.
6. EXIT: Exits the current Menu or returns to the
previous Menu.
7. OK: Confirms an entry or selection. Displays
the list of channels.
8. RIGHT / LEFT: Navigates through the Menus.
Increases or decreases volume.
9. TV/RADIO: Switches from TV function to Radio
function and from Radio to TV.
10. RECALL:
11. GOTO: Selects the play time of media.
12. PREV: Skips to the previous track during.
playing media and skips to the previous channel
during playing DTV.
13. NEXT: Skips to the next track during playing
media and skips to the next channel during playing
DTV.
14. REPEAT: Selects Repeat or turn off Repeat
mode.
15. STOP: Stops media play.
16. STANDBY:
17. EPG: (Electronic Program Guide)T urns the
program guide on.
18. AUDIO: Selects an Audio Language or Audio Mode.
19. UP / DOWN: Navigates through the Menus. Selects the next or previous
Channel.
20. MENU: Turns on Main Menu.
21. FAVOURITE: Turns on Favourite Menu
22. 0-9 (Numeric Buttons): Selects a channel or setting.
23. FWD: Searches forwards during media play.
24. REV: Searches backwards during media play.
25. PLAY: Starts or resumes media play.
26. PAUSE: Pauses media play.
27. COLOUR BUTTONS:
Used to switch between the last
two viewed channels.
Switch the product to on or standby.
Operate different function in TEXTscreen.

3
First Time Installation
(1) Select [OSDLanguage] and press RIGHT/LEFTkeytoselect an language
(2) Select [Country] and pressRIGHT/LEFTkey to select your countryof
residence
(3) Select [ChannelSearch]and press RIGHT or OKkey to begin Automatic
channel search
(4) Once channeltuningis complete, youarenow ready to watch TV
After all connections havebeen made properly, switch onTV and make
sure the receiver isconnected to the MainPower. Press Powerbutton to
switch receiver on. If you are usingthe receiver forthe first timeor
restored to Factory Default,the Main Menu willappear on yourTV
screen.
Basic Operation
(1) Program ManageSettings
Toaccess the Menu,press the MENUbutton and select[Program]. The
Menu provides optionsto adjust theProgram Manage Settings.Select an
option and press OKor RIGHT toadjust that setting.Press the EXIT
button to exitthe Menu.
Connections
Caution: Make sure tocheck the voltagespecification of thewall outlet
is the same ratingwith the receiver.Toprevent the risk ofelectric shock,
do not openthe cover orthe back ofthe receiver.
Note: When connecting the receiverto other equipment, e.g.,TV,
VCR and amplifier, make sureto refer torelevant user manualfor
instruction. Also,make sure youdisconnect all theequipments from
the mains supplybefore the connection.

4
(2) Program Edit
Toedit your programpreferences (lock, skip,favourite, move ordelete),
you will needto enter theProgram Edit Menu.This Menu requiresa
password to access.Enter the defaultpassword '000000'.
Move a TVor Radio Program
1. Select thepreferred program thenpress the REDbutton. Amove symbol
will appear
2. Press UP/DOWNto move theprogram
3. Press OKto confirm
4. Repeat theabove steps tomove more channels
Lock Program
You canlock selected programsfor restricted view.
Lock a TVor Radio Program:
1.Select the preferredprogram then pressthe YELLOW button. A lock-
shaped symbol isdisplayed. The programis now markedas locked
2. Repeat theprevious step toselect more programs
3. To confirm andexit the menu,press the EXITbutton
4. Press theYELLOW button todisable the lockedprogram
5. To view thelocked program, youwill be requireto enter eitherthe default
password '000000' oryour last setpassword.
(3) EPG (Electronicprogram guide)
The EPG isan on-screen TVguide that showsscheduled programs seven
days in advancefor every tunedchannel. Press theEPG button onthe
Remote Control toaccess guide.
You canuse the UP/DOWNkey to selectthe preferred program.If there is
more than onepage of information,use the BLUEbutton for pageup and
the YELLOW buttonfor page down.
(4) Sort
Sort your channelsfrom the followingoptions:
[LCN] - Sortthe channels inascending order
[Name] - Sortthe channels inalphabetical order
[Service ID] -Sort the channelsaccording to thestation
(5) LCN (Logicalchannel number)
Set LCN onor off.
Set Favourite Program
You cancreate a shortlist offavourite programs that youcan easily access.
Set Favourite TVor Radio program:
1. Select the preferred program then pressthe FAVOURITE button.
A heart-shapedsymbol will appear andthe program is markedas a
favourite.
2. Repeat the previousstep to select moreFavourite programs.
3. To confirm and exitthe Menu, press theEXIT key
Disable favourite TVor Radio Program:
Press the FAVOURITE button on theRemote Control with the
heart-shaped symbol.
View Favourite Program
1. Press the Favouritebutton and the FavouriteMenu will appear.
2. Press UP/DOWN toselect your Favourite Programs.
3. Press OK toselect your favourite program.
Delete a TV orRadio Program
1. Select the Programand then press theBLUE button
A messagewill appear. PressOK to delete theprogram
2. Repeat the previousstep to select moreprograms to delete.
Skip TV or RadioProgram
1. Select the programyou would like toskip and press theGREEN button.
A skipsymbol is displayed.The program is markedas a skip.
2. Repeat the previousstep to select moreprograms.
3. To confirm and exitthe menu, press EXITkey.
Disable a skipTV or Radio program:
Press the GREEN buttonon the skip programwith the skip symbol.

5
(1). Aspect Ratio
(2). Resolution
(3). TV format
(4). Video output
You mustset the displayformat to either4:3 PanScan, 4:3Letter Box,16:9
Full Screen or Auto toget the maximumdisplay when watchingTV.
If the videodoes not appearcorrectly, changethe setting. Thissetting is
to
match the mostcommon setting forHDMI.
[480i]: for NTSCsystem TV.
[480P]: for NTSCsystem TV.
[576i] for PAL systemTV.
[576P]: for PAL systemTV.
[720P]: for NTSCor PALsystem TV.
[1080I]: for NTSCor PALsystem TV.
If the videodoes not appearcorrectly, youneed to changethe settings.
This should matchthe most commonsetting for TVsin your country.
[NTSC]: for NTSCsystem TV.
[PAL]: forPALsystem TV.
[CVBS]: CVBS output.
[RGB]: RGB output.
(6) Video Setting
To accessthe Menu, press MENUthen select [Picture].The Menu
provides options toadjust the videosettings. Press UP/DOWNto select an
option and press RIGHT/LEFTto adjust that setting. Press EXITto exit the
menu.
1 . AutoSearch
Search and installall channels automatically. This optionoverwrites all
preset channels.
1. Select [AutoSearch] and pressOK or RIGHTto start channelsearch.
2. To cancel channel search,press EXIT.
2. Manual Search
Install new channelsmanually. Thisoption adds newchannels without
changing the current channelslist.
1. Select [ManualSearch] then press OK or RIGHT. The channel search
screen will appear.
(7) Channel Search
and M
SC s
to exit M
To access the menu,press MENU select [Search Channel].The enu
provides options toadjust the earch hannel settings.
Select an optionand press RIGHT/LEFTto adjust thesetting .
Press EXIT the enu

6
2. Press the RIGHT/LEFTkey to select thechannel frequency
Enable Antenna Powerif an external activeantenna is connected.
(8) Time Setting
M then M
Press UP/DOWN to s
s .
3. Press OK tostart searching channels
If a channel isfound, it is savedand added to thechannels list. If channels
can’t be found, thenexit the menu.
(3) Country
Select your country ofresidence.
(4) Antenna power
To accessthe enu, press MENU select [Time]. The enu provides
options to adjust thetime settings.
elect an option andpress RIGHT/LEFT toadjust the
setting . Press EXIT toexit the menu
(1) Time offset
(2) Country Region
Select the CountryRegion when [TimeOffset] is setto Auto.
To access the enu, press MENU select [Option]. Themenu provides
options to adjustthe
Select an optionand press to adjust thesetting.
Press EXIT the enu
Select auto or manualfor GMT offsetadjustments.
(3) Time Zone
Select the Time Zone Offsetwhen [Time Offset] is setto Manual.
(3) Sleep
If this setting isoff, this functiondoes not work. Ifthis setting is not off,
a message will popup after your preferredtime to inform you,that the device
will go in to sleep mode.
This message willappear under noany operation.Auto-off function canbe
set in a timeperiodat 0-12 hours.
Standard setting is 3hours.
Press STANDBYbutton to exitsleep / auto-offmode.
(9) Option M and
OSD Language, SubtitleLanguage and Audio Language.
RIGHT/LEFT
to exit M
(1). OSDLanguage
(2). AudioLanguage
(3). SubtitleLanguage
(4). Digital Audio
Toaccess the enu, press MENU select [System].The menu
provides options to adjustthe system settings.
elect an option andpress RIGHT/LEFT to
adjust the setting.
Press EXIT toexit the enu .
Select an OSDlanguage
Select the preferred audiolanguage for watchingTV channels.
If the languageis not available,the default programlanguage will beused.
Select the preferredsubtitle language.
Select digital audiooutput mode.
(10) System Setting
M and
Press the UP/DOWN keyto s
M
(1) Parental Guidance
You canrestrict access tochannels that are unsuitable
for children. To restrict/lock thechannel you will needto enter either the
default password '000000' oryour own password.

7
(3) Restore Factory Default
Reset your SetTop Boxto the Default FactorySettings.
In Main Menu select[Restore Factory Default] andpress OK or RIGHTto
select. Enter your passwordor the default password'000000' and press
OK to confirm.This option will deleteall preset channels andsettings.
(4) Information
View model, hardwareand software information.
(5) Software update
If the status isset 'ON ', itwill scan new softwarefrom broadcast according
to your preferred timein ' 'Start time' '.
(11)USB
To accessthe Menu, press theMENU button and select [USB].The menu
provides options to playbackMusic and Photo files,it can support
MP3,WMA,JPEG,BMP files, Theunit will only supportUSB device with
FATand FAT32 file system. Itwill not support NTFSfile system.
(1)Multimedia: if no USBdevice plug in,a warningmessage "No USB Device
is Found" displays, otherwiseyou can select theMusic or Photo typein this
menu and press OKto enter the filebrowser and select thefile to playback.
(2) Set Password
Set or changethe password forlocked programs. Enteryour old
password or the defaultpassword '000000'. You will then beasked to
enter your newpassword. To confirm re-enteryour new password.Once it
is confirmed, pressEXIT to exitthe Menu.
Note:
cannot guarantee compatibility (operation and/or bus power) with all
USB mass storage devices and assumes no responsibility for any loss of
data that may occur when connected to this unit.
large amounts of data, it may take longer for the system to read the
contents of a USBdevice.
USB devices may not be properly recognized.
when they are in a supported format, some files may not play or
display depending onthe content.
- We
- With
- Some
- Even
(2)Photo configure:
-Slide Time: adjust slide show interval to1~8 seconds.
-Slide Mode: adjust slide show effect as mode 0~59 or random.
-Aspect Ratio: Keep displays the picture as its original aspect,
Discard displays the picture in full screen mode.
(3) Movie Configure
- Subtitle Font:
[Small]: Displays the subtitle as small mode.
[Normal]: Displays the subtitle as normal mode.
[Big]: Displays the subtitle as big mode.
- Subtitle Background:
[White]: Displays the subtitle in white background.
[Transparent]: Displays the subtitle in transparent background.
[Grey]: Displays the subtitle in grey background.
[Yellowgreen]: Displays the subtitle in yellowgreen background.
- Subtitle Color:
[Red]: Displays Subtitle in red font.
[Blue]: Displays Subtitle in blue font.
[Green]: Displays Subtitle in green font.

8
Technical Specifications
Video Decoder Format MPEG4 AVC/H.264HP@L4
MPEG2 [email protected]
Output Format 576P , 720P, 1080i, 4:3 and16:9
Output Port HDMI, Dual SCART
Audio Decoder Format MPEG-1 (layer1&2)
Audio output Digital audio: S/PDIF
Power Voltage 100~240V~ 50/60Hz
Power Max 8W
Item Sub Item Parameter
Tuner Input Frequency 170~230MHz
470~860MHz
RF Input level -25~-82dBm
IF Bandwidth 7MHz and 8MHz
Modulation QPSK,16QAM,64QAM
Troubleshooting
The image stop
suddenly or mosaic
Problem Potential Reasons Whatto do
No picture Power isn't connected Connect the power
The power switch isnot on Switch on the power
Screen shows
No Signal Not connect DVB-Tcable Plug in the DVB-Tcable
Incorrect setting Set up correct parameter
No sound from
speaker No or incorrect connection
with audio cable Connect the audio cable
correctly
Mute the sound Switch on the correct
volume control
Incorrect sound track Try another soundtrack
Only sound, no
image on the
screen
No or incorrect connection
with AVcable. Connect the audio cable
correctly
The program is aradio
program Press <TV/RADIO> key to
shift into TVmode.
Remote control
unit is not workable The battery is exhausted. Change new battery.
Remote control unit isnot
in the right oppositeof the
front panel or toofar from
it.
Adjust the way ofholding
remote control unit and
near from the panel.
The signal is tooweak. Strengthen the signal.
Table of contents