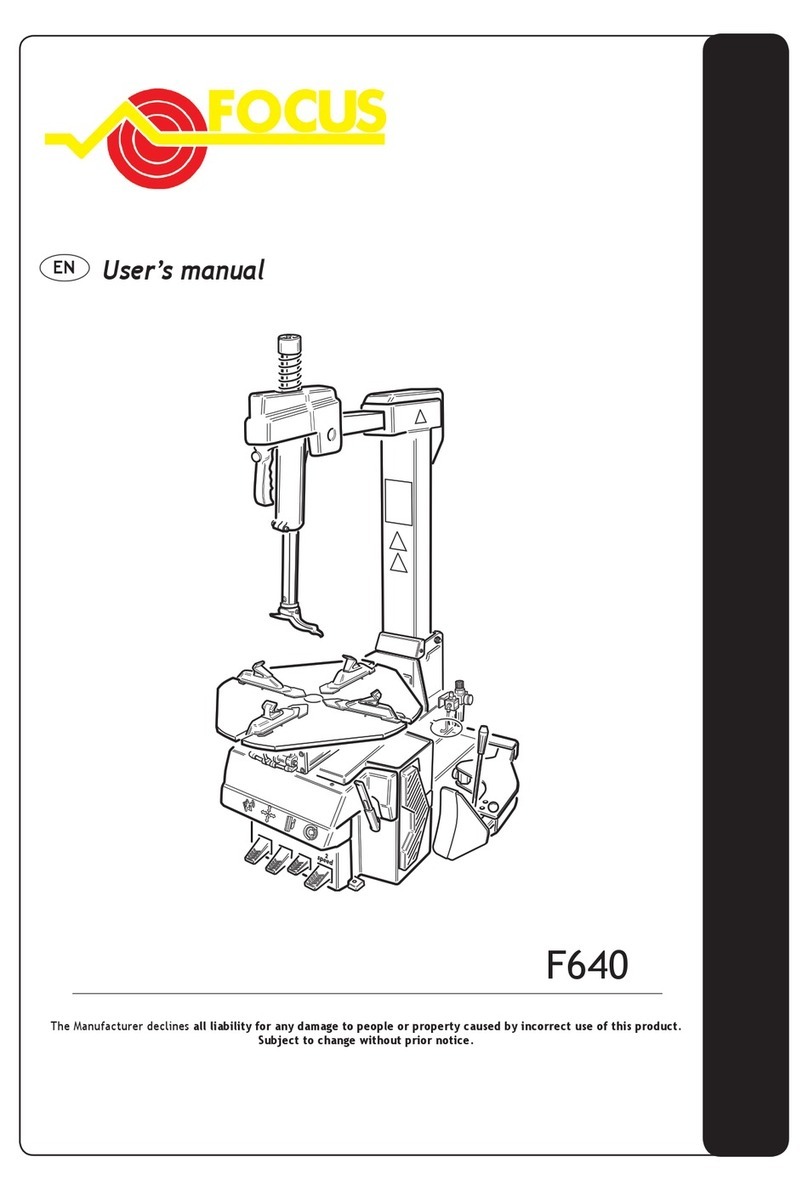
Unitrol MANAGER User manual

1
MANAGER
THE MANUAL
ENGLISH
AUTOMATIC TYRE-CHANGER

2
Sale Date :
Seller Company;
Machines manufactured by UNI-TROL are warranted against defects in material and
workmanship for a period of one (1) year from the date of sale.
Our company is not responsible for any damage or defects resulting from improper use
of the device.
If defects and damage occur during the warranty, after analysis by technical personnel,
in case of material and production defects the damaged parts will be replaced with
new ones.
The warranty covers all parts of the machine.
NOTE: for the electric motor to be under warranty a thermal switch matching the
motor current must be placed in the electric wiring, otherwise in case of any fault the
electric motor will not be covered by the warranty.
Perform maintenance on the machine periodically, monthly, once a year. Defects and
damage caused by lack of maintenance are not under the warranty.
The manufacturer reserves the right to make changes to the equipment without
notifying the customer.

3
ATTENTION !
• This manual is an integral part of the machine. Read carefully the content of the manual and its appendices.
• The information contained in this manual is important for machine’s safe use and maintenance.
• Keep this maual in order to avoid problems with the machine in the future.
DIMENSIONS:
Height ...................................................................1.763 –2.242 mm
Depth .....................................................................1.175 –1.693 mm
Width......................................................................1.139 –1.393 mm
Weight Netto.....................................................................380 kg
Rim dimensions................................................................10” – 24”
Wheel clamp.....................................................................Pneumatic
Bead-breaker system........................................................Pneumaic
Tilting system ...................................................................Pneumaic
Head clamping system .............................................. .....Pneumatic
Max. working pressure.....................................................8 bar
The machine is used for the automatic assembly and disassembly of tyres for passenger cars and vans. The machine is designed
to work only in accordance with the instructions given in this manual. The machine may only be used for activities for which it was
designed. Any other use is improper and not permitted. The manufacturer is not responsible for any damage or accidents resulting
from improper, incorrect or forbidden use of the machine.
IMPORTANT !
• Only trained and experienced personnel may use, repair and service this machine.
• The service life of the machine is 10 years.
TABLE OF CONTENT
page
1. General information .................................................................3
2. Technical data .........................................................................3
3. Machine components ............................................................. 4
4. Packaging, Transport, Storage .............................................. 4
5. Introduction ............................................................................ 5
6. Safety measures ................................................................. 5-6
7. Installation .............................................................................. 7
8. Electric diagram ..................................................................... 8
9. Operations and use ........................................................... 9-10
10. Maintenance .................................................................. 10-11
11. Technical service and warranty .......................................... 11
12. Service Notes ..................................................................... 12
13. Machine diagram ........................................................... 13-15
14. Spare parts list .......…………….....………...……………. 16-19
TECHNICAL DATA
MOTOR DATA
POWER
VOLTAGE
PHASE
H Z
0,75 kw
1,1 kw
110 V
220 V
380 V
400 V
415 V
1
2
50 Hz
60 Hz
VELOCITY
50 Hz / 1500 d/d
60 Hz / 1750 d/d
NOISE LEVEL
............. db
1763 mm
1175 mm
1139 mm
1388 mm
2242 mm
1693 mm

4
MACHINE COMPONENTS
BEAD BREAKER SYSTEM quickly and easily detaches the tire from
the rim 10" to 24".
1 –BEAD-BREAKER PAD: supports the tyre during the bead-
breaking process.
2–TYRE ROLLER: rolls the tyre during the process.
3–BEAD BREAKER : detaches the tire from the rim
WORKING HEAD
1 –LOCKING VALVE
2 –AUTOMATIC LEVERLESS FINGER.
TABLE 10” –24” clamps all rims from the inside and outside
1 –JAW
2 –SLIDER
INFLATOR
Please read this manual carefully before packing, transporting and unpacking the machine. The above-mentioned activities should be performed
by authorized, qualified personnel who understand all the instructions and warnings contained in the manual.
PACKAGE
The machine is stored on a wooden pallet in a wooden crate.
LIFTING AND MOVING
The machine should be transported / moved with a forklift / hoist in compliance with all safety rules. The machines’s dimensions and weight
should be taken into account.
STORAGE
The machine is stored in the temperature range from -10 ° C to + 40 ° C in closed and secured rooms. The machine should be protected from
direct sunlight and moisture.
UNPACKING
On machine arrival check that it is not damaged and that all parts are complete. When unpacking, be careful not to damage the machine and
protect its elements against falling.
DISPOSAL OF PACKAGING
The packaging is reusable. Comply with local regulations when disposing of it.
PACKAGING, TRANSPORT, STORAGE

5
f
ATTENTION !
This manual is intended for qualified personnel who routinely use this equipment, service,
inspect and repair it. Be sure to read the instruction manual before operating this unit.
The manual should be kept near the machine in a place easily accessible for the user /
service technician. Transport, commissioning, maintenance and repair of the device
should be performed by authorized specialists. The manufacturer bears no responsibility
for injuries and damages resulting from operations inconsistent with these operating
instructions.
ATTENTION !
THE VOLTAGE
SHOULD BE
ACCORDING
TO THE
TECHNICAL
DATA
Read the manual before starting
to work with the machine
Do not work without
gloves and glasses
Keep hands away from
the machine shaft.
Do not open the cover of the machine under voltage. It could
cause an accident. If necessary, contact the manufacturer's
service department.
WARNING !
BEFORE OPENING THE COVERS DISCONNECT THE POWER SUPPLY.
Do not get your hands or feet between the
bead-breaker and the tyre.
Do not put your hands between the
jaws on the table.
Do not put your hands between the rim
and the working head
Max. working pressure 8 bar.
INTRODUCTION
INTRODUCTIONIN
TRODUCTION
INTRODUCTION
SAFETY MEASURES
TO PREVENT ACCIDENTS
KEEP HANDS AND OTHER
BODY PARTS AS POSSIBLE
FROM THE WORKING HEAD
ARMS WHILE OPERATING
WITH THE TABLE.
DO NOT PUT YOUR HANDS UNDER THE RIM
WHILE CLAMPING IT. PLACE THE WHEEL
EXACTLY IN THE CENTER OF THE TABLE AND
MAKE SURE IT IS FIXED WELL WITH ALL FOUR
JAWS
DİKKAT
ÇALIŞMA BASINCI : MAX 8 BAR
ŞARTLANDIRICISIZ
ÇALIŞTIRMAYINIZ

6
The voltage should correspond to the value on the nameplate.
Connecting the machine to electric supply should be made by an experienced electrician.
Please read the manual carefully before using the machine.
Do not touch the square shaft of the machine.
Do not work without glasses and gloves
Do not let unqualified personnel operate the machine.
Keep your hands away from moving parts while the machine is in operation.
Do not open the cover of the machine while it is under the voltage . It could cause an accident. If necessary contact the manufacturer's service
department.
During the bead-breaking process do not put your hands and feet between the bead-breaker and the tyre.
When working with the rim do not put your hands between the table jaws
Do not keep your hand between the working head and the rim when mounting and dismounting the tyre.
Do not stand behind the column while the machine is working.
If there is any abnormal noise or an undesirable situation during operation contact the technical service.
Protect the machine cable from mechanical and chemical damage. Don't let it get damaged.
Do not use the cable if it is partially or completely damaged, torn contact our technical service for replacement.
Always keep the machine clean.
Do not use the pressure washer when cleaning and maintaining the machine. Do not use conductive or semi-conductive materials such as
water. Protect the machine from moisture, rain, snow, hail or fog.
The machine has been designed and built for mounting and dismounting tyres, use it only for this purpose and use only the accessories
specified.
Follow the directions on the labels.
Itis not allowedto make changesto the construction andfactory settings of themachine on your own. Use only originalspare parts. If necessary,
contact the technical service.
Nobody, except the user of the machine, may approach it closer than 1.5 m.
Unqualified personnel cannot operate the machine.
Keep your hands away from moving parts while the machine is in operation.
Do not stand behind the column during
operation.
BEAD-BREAKING MUST BE DONE WITH
THE GREATEST CARE. EVERYTHING
THAT'S IN THE BEAD BREAKER AREA
MAY BE EXPOSED TO BREAKING OR
DAMAGE
NEVER TOUCH THE RIM WITH YOUR
HANDS DURING THE BEAD-BREAKING
BE AWARE OF THE FAST MOVING ELEMENTS OF THE
BEAD-BREAKER SYSTEM.

7
When unpacking the machine check that it has not been damaged during
transport and that parts and accessories are not missing.
Insert the appropriate plug into the device, the plug must be three-phase, the four cells
should contain these 3 phases + 1 neutral wire.
After connecting to the power supply the machine is ready for operation.
When the machine is in operation no one except the user of the machine may approach it
closer than 1.5 m.
INSTALLATION
1,5m
1,5m
1,5m
1,5m

8
ELECTRIC DIAGRAM
1 PHASE
3 PHASES
21
1 136 3 11 8
2
L3
142 5
1
L1
0
L2
PE
1 - 0 - 2
TR S MP

9
OPERATIONS AND USE
1 –BEAD-BREAKING
Pull the bead-breaker lever with your hand, insert the wheel between
the bead-breaker shovel and the rubber pad on the wall of the
mounting machine and move the shovel to the tyre, right next to the
rim edge. While holding the shovel in the correct position, depress the
pedal and keep it pressed until the tyre breaks away from the rim
edge. If necessary, repeat this operation at several points around the
circumference of the circle. Then turn the wheel over and release the
tyre in the same way from the rim on the other side of the wheel.
2 –ТYRE DEMOUNTING
- Set the locking valve to position 1 and after lifting the
mounting head set to position 3 and lock it.
- Press the pedal to tilt the column.
- Put the tyre on the table
- While pressing the pedal clamp the rim with the jaws (from the outside for steel
rims and from the inside and outside for aluminum rims).
- Raise the pedal to return the column to the vertical.
- Set the locking valve to the middle position, place the foot on the rim and
turn the valve counterclockwise to lock it.
3
-To open the valve of the automatic mount /
dismount lever pull the valve down so that the
head rests on the tyre surface.
- Next raise the valve and make it rest on the heel
of the working head presser.
1 2 3
1. Opens the lock on the mounting
head and allows it to be lifted.
2. Disconnects the mounting head
and allows it to fall off.
3. Locks the mounting head and
prevents it from moving in all
directions.
A
A
A
A
A
A

10
- Remove the inner tube if the tyre has one.
- The lower edge of the tyre is removed from the rim without changing the wheel or mounting head position.
3 –TYRE MOUNTING
Use the pedal to tilt the column back.
Use the pedal to open the table jaws.
Place the rim on the assembly table.
Check that the jaws of the jaws firmly clamp the edge of the rim.
Move the pedal to the up position - the column will return to the vertical
Lay the tyre on the rim.
By extending the bolt to the appropriate distance and pressing the tip of the vertical bolt,
make the working head rest on the edge of the rim inside the tyre.
Place the tyre foot on the bead fin and press it under the head.
Pressing the side of the tyre with your hand in the place where its edge sticks out over the
edge of the rim, cause it to jam and hold with your hand.
While depressing the pedal turn the table clockwise placing the edge of the tyre in the
groove of the rim until the lower tyre edge is placed on the rim.
In case of any abnormalities while installing the tyre such as a jam, release the pedal and
then lift it with your foot upwards.
The table will then turn to the left and release the jammed tyre.
Fit the inner tube.
Place the top edge of the tyre on the rim in the same way as for the bottom edge.
DURING MOUNTING/DEMOUNTING WHEN THE TYRE SPLINKS, HOLD THE PEDAL UP AND ADJUST THE TYRE.
MAINTENANCE
UNI-TROL is not responsible for claims resulting from the use of non-original parts or accessories.
Before carrying out any adjustments or maintenance to the machine disconnect the power supply and check that all moving
parts are properly secured.
Do not disassemble or modify any part of the device. This does not apply to servicing.
Check that the jaws move freely daily. Contamination accumulated during the operation of the machine may significantly
deteriorate the sliding of the jaws, thus creating a hazard for the user.
Check on an ongoing basis whether the table jaws and the sliders move freely. Contamination accumulated during the
operation of the machine may significantly deteriorate its sliding, limiting its wear and creating a hazard to the user.
Therefore if necessary wash the rails and bolts with a petroleum solvent and then moisten with thin oil or silicone preparation.
Monthly check:
Clean (gasoline only) and lubricate the horizontal and vertical slide in the right places.
Check the oil level in the grease gun and, if necessary, add HL 32 (hydraulic) or a parametric equivalent of a different
manufacturer.
Keep the workplace clean. Do not clean the device with pressurized water. Avoid generating dust when cleaning.
The assembly table is powered by an electric motor via a worm gear lubricated with Shell OMALA oil 680 or a parametric
equivalent of a different manufacturer's oil. After 4,000 hours of work (after deduction of breaks), the gear must be cleaned and
the oil changed.
Periodically you should also remove the oil from the inside of the housing box. Exhalation of the lubricated air, as in all devices
of this type, takes place inside the housing, which causes the oil to settle on its internal surfaces, and as a result to leak it.

11
• THE WARRANTED IS 1 YEAR;
• IN CASE OF PROBLEMS PLEASE CHECK THE SERVICE NOTES SECTION;
• IF THE PROBLEM CANNOT BE SOLVED CALL THE MANUFACTURER'S AFTER-SALES SERVICE PROVIDING THE MACHINE MODEL
AND ITS SERIAL NUMBER.
*** THE ELECTRIC MOTOR IS NOT COVERED BY THE WARRANTY.
WHEN ORDERING SPARE PARTS PROVIDE:
• SERIAL NUMBER AND YEAR OF PRODUCTION.
• PART CODE AND QUANTITY
TECHNICAL SERVICE AND WARRANTY
OIL
Lubricate and clean the machine regularly and on time. During
the lubrication process keep the tools away from dust and
water, do not lubricate unnecessary parts with oil.
JAWS SYSTEM
Clean the jaw system regularly with compressed air.
WARNING !
ALL WORK WITH THE MACHINE SHOULD BE PERFORMED BY AUTHORIZED TRAINED PERSONNEL.
WARNING !
ONLY ORIGINAL SPARE PARTS SHOULD BE USED. THE MANUFACTURER SHALL NOT BE LIABLE FOR DEFECTS CAUSED BY THE
USE OF NON-ORIGINAL SPARE PARTS.

12
FAULT
POSSIBLE CAUSES
TROUBLE SHOOTING
The fuses are blown when you press
the table rotation pedal
Short circuit of the motor power cable to
ground. Short circuit in the motor
Check the wires
The table rotation pedal does not return
to the center position
Broken pedal spring
Replace the spring
The bead-breaker pedal and table pedal
do not return to initial position
No oil in the grease gun
Fill the lubricator with HL 32
(hydraulic) oil
Broken pedal spring
Replace the spring
Air escapes at the bead-breaker piston
Worn air seal
Replace the gasket
Difficulties with the table when
dismantling and installing tyres
Belt tension insufficient
Adjust belt tension or replace belt
Pressure gauge indicator does not
return to 0
Defective pressure gauge
Replace the pressure gauge
The wheel does not stay on the table
Low air supply pressure
Adjust (check) the pressure of the
supplied air
Jaws are worn
Replace jaws
The table does not turn in either
direction
No electric power
Check electric supply
Damaged motor
Replace the motor
Broken belt
Replace belt
SERVICE NOTES

13
MACHINE DIAGRAM
48 00000
11 00 005
01 0117 016
11 00 006
01 0031 37
47 28 000
01 0139 022
01 0114 43
47 29 000
01 0112 12
01 0117 012
01 0073 020
01 0112 08
01 0160 19
01 0014 15
01 0070 010
01 0112 004
91 00 012
01 0014 15
01 0014 207
01 0198 13.5
01 0014 54
01 0014 91-M
01 0014 80
01 0052 56
93 00 003
93 00 004
80 11 004
01 0073 016
01 0117 008
01 0014 99-PL
11 00 020 48 09 000
11 00 019
01 0064 100 12.9
01 0115 010-1,5
01 0052 107
01 0082 025
80 11 002
80 11 003A
01 0072 010
01 0014 55 PC
93TÝ 00 001
01 0107 033
01 0014 56 PC
01 0014 55 PC
01 0105 016
11TÝ 23 001
01 0123 025
93 00 009
43 00 011
01 0063 200
01 0112 10
01 0550 01
01 0117 010
01 0029 14 (DAMING)
01 0014 157
93 01 000
11 22 001
01 0024 065-3
01 0062 025
11 00 003
01 0013 0650
91 00 020
72 00 001
01 0278 63
01 0550 06
48 01 010
01 0139 014
01 0139 018
01 0117 006
11TÝ 20 003
01 0014 12
01 0112 06
11 12 005
01 0024 008-4
01 0031 34
11TÝ 20 007
11TÝ 20 000
01 0112 1001 0072 016
01 0107 033
11TÝ 20 002
11 12 010
11 12 007
11 12 008
01 0122 010
01 0117 010
01 0031 06
01 0112 08
01 0072 016
01 0135 1-4
01 0141 04-024
01 0014 61 PST
11 12 004
93TÝ 00 002

14
93 00 010
01 0023 016
01 0021 012-20x5.5
80 08 001
01 0024 022-2
59 06 004
01 0124 040
01 0117 010
93 00 001
01 0031 32
01 0124 016-B
01 0115 010-1,5
01 0112 10
01 0063 040
01 0117 006
01 0122 016
01 0035 65A
01 0035 65B
01 0083 035
01 0107 033
93 00 007
91 06 000
80 00 007
91 00 018
01 0031 32 91 00 007
91 00 002
01 0112 18
93 00 011 01 0123 025
93 00 005
91 00 011
01 0130 018-025-1
01 0139 018
93 03 000
91 00 016
01 0117 008
01 0139 012
01 0063 040
93 00 006
01 0115 018
01 0014 01
01 0117 018-1.5
91 00 006
91 00 005
91 00 004
80 00 012
01 0031 136
01 0014 269
93 02 000
01 0162 01
91 00 013
01 0117 010
01 0124 040
01 0360 060-045-10
11 16 001
01 0014 138
01 0117 010
01 0112 10
11 16 002
80 08 002
80 08 003
59 06 003
01 0112 08
01 0117 008
01 0139 040
01 0130 040-50-1
01 0014 62 NSE
01 0073 025
01 0112 08
93 00 002
93 00 008
01 0117 008
01 0112 08
01 0048 17
93 00 001-ML
01 0112 08
01 0073 035
80 00 017-ML
01 0024 042-6
01 0550 03
91 00 021
01 0071 010
91 00 0022 01 0024 014-3
01 0073 016
70 06 001
41 23 018
41 23 019
41 23 004
41 23 019B
70 06 004
01 0014 110
01 0139 014
01 0112 12
01 0550 10-1
01 0130 014-020-0.5
41 23 005
01 0086 080
41 23 013
70 06 003
47 23 016
47 23 015
47 23 020
41 23 010
70 06 002E
01 0139 070
01 0130 070-90-0.5
01 0115 008
11 10 003
70 06 002F
01 0082 025
01 0130 070-90-0.5
01 0064 080
01 0064 080
70 06 002D
01 0014 181

15
01 0152 1-4 EK
01 0014 92
01 0014 63 IPD
01 0153 1-4SN
01 0014 99-PL
01 0014 92 01 0153 1-4SN
01 0014 92
01 0014 14
11 12 005
01 0024 008-4
01 0115 008-04 59 07 009
01 0141 04-016
16 06 005A
01 0072 020
01 0112 06
01 0550 13
91 05 001
01 0031 134
01 0031 139
01 0072 010
01 0117 006
01 0072 016
91 05 009
00 01 0001
91 05 020
01 0081 016
01 0072 035
91 05 013
91 05 006
91 05 012
91 05 019
01 0081 016
01 0130 012-018-0.5
91 05 014
91 05 005
91 05 025
01 0031 135
01 0200 32
59 07 013
01 0073 055
01 0139 006
91 05 026
01 0072 020
01 0139 012
91 05 008B
01 0112 08
01 0117 008
91 05 022
91 05 022
91 05 007
91 05 023
91 05 009
01 0072 030
01 0112 06
91 05 011
91 05 024
11 12 004

16
SPARE PARTS LIST
Number
CODE
DESCRIPTION
1
93 01 000
LOWER BODY GROUP
2
93 02 000
PILLAR GROUP
3
93 03 000
TYRE MOUNTING ARM GROUP
4
70 06 000
FLANGE GROUP
5
70 06 001
FLANGE BODY GROUP
6
70 06 002
CROSS GROUP
7
01 0130 070-90-0.5
RAYNEL WASHER
8
41 23 013
PRESS METAL SLIDING BEAR
9
01 0130 014-020-0.5
RAYNEL WASHER
10
01 0139 014
MILE SEGMENT
11
01 0112 12
WASHER
12
01 0064 080
BOLT
13
41 23 004
JAWS
14
41 23 005
JAWS PLASTIC
15
01 0139 070
MILE SEGMENT
16
70 06 003
LEG CONNECTION METAL GROUP
17
47 23 020
LEG CONNECTION GROUP
18
41 23 019
RIM HOLDING LEG GROUP
19
41 23 018
LEG LOWER PROTECTING METAL SHEET
20
70 06 004
RIM HOLDING ARM
21
47 23 016
RIM HOLDING LEG METAL SHEET THIN
22
47 23 015
RIM HOLDING LEG METAL SHEET
23
01 0064 045
BOLT
24
01 055010
BRAVA MAXI FLANGE CYLINDER DAMING
25
01 0014 110
RECORD
26
01 0072 016
BOLT
27
01 0112 06
WASHER
28
01 0035 65
HAND REMOTE VALVE GROUP
29
01 0070 010
BOLT
30
01 0112 004
WASHER
31
01 0160 19
FILTER + REGULATOR
32
01 0073 020
BOLT
33
01 0052 56
PROFILE LEG
34
48 09 000
SIDE BODY HEIGHT GAUGE GROUP
35
93 00 011
VALVE LOWER CONNECTION MEATL SHEET
36
01 0063 025
BOLT
37
01 0083 035
BOLT
38
80 00 007
AUTOMATIC LEVER LOWER PRESSING WASHER
39
93 00 001-ML
HOLD ARM GROUP
40
01 0048 17
PLASTIC HANDLE
41
80 00 017-ML
BURSH
42
01 0024 042-6
O –RING
43
01 0550 03
MOUNTING FOOT
44
48 00 000
PLUS MAIN BODY
45
93 00 004
RIGHT LOWER CAP
46
93 00 003
RIGHT UPPER CAP
47
93 00 008
MANAGER SQUARE MILE UPPER CAP
48
93 00 009
PILLAR LOWER ABS
49
93 00 010
MANAGER SQUARE ABS
50
01 0073 025
BOLT
51
01 0112 08
WASHER
52
01 0115 010-1,5
NUT
53
01 0124 016-B
SETSCREW WITH BALL
54
93 00 006
VALVE STOPPER METAL SHEET
55
93 00 002
CYLINDER UPPER CONNECT METAL
56
93 00 005
SQUARE MILE
57
93 00 001
SQUARE UPPER SHEET
58
80 08 000
HEXAGON MILE CYLINDER GROUP
59
80 11 000
TYRE REEL GROUP
60
01 0278 63
MOTOR
61
93Tİ 00 001
COVER
62
01 0130 018-025-1
RAYNEL WASHER
63
91 00 022
DISTANCE SETTING BUSHER
64
91 06 000
PROFESSIONAL AIR GAUGE
65
01 0123 025
SETSCREW
66
01 0122 016
SETSCREW
67
01 0117 008
NUT
68
01 0117 006
NUT
69
91 00 016
SQUARE LOWER WEDGE METAL
70
01 0107 033
METAL SHEET SCREW
71
91 00 001
PEDAL SYSTEM CAP GROUP
72
01 0162 02
TYRE INFLATOR

17
SPARE PARTS LIST
Number
CODE
DESCRIPTION
73
01 0013 0650
V –BELT
74
72 00 001
MOTOR PULLEY GROUP
75
01 0115 008
NUT
76
01 0062 025
BOLT
77
01 0139 022
MILE SEGMENT
78
01 0082 025
BOLT
79
01 0052 107
TYRE CHANGER BEAD BREAKER RUBBER
80
01 0031 37
ARM PULLING SPRING
81
01 0117 016
NUT
82
11 00 006
BEAD BREAKER PULLING METAL
83
11 00 005
BEAD BREAKER CONNECT PIN
84
47 30 000
BEAD BREAKER GROUP
85
01 0014 91-M
QUICK CAPLIN RECORD MALE
86
01 0014 54
RECORD
87
01 0198 13.5
PLASTIC CABLE RECORD
88
01 0014 99-PL
RECORD
89
01 0014 207
RECORD
90
11 00 020
NUT
91
11 00 019
REDUCTION
92
01 0014 80
SLEEVE
93
01 0014 15
RECORD
94
43 00 011
BEAD BREAKER CYLINDER CONNECT BOLT
95
01 0550 01
BEAD BREAKER CYLINDER GROUP
96
01 0063 030
BOLT
97
01 0139 014
MILE SEGMENT
98
48 01 010
PISTON CONNECTION MILE
99
01 0139 018
MILE SEGMENT
100
01 0139 012
MILE SEGMENT
101
01 0139 040
MILE SEGMENT
102
01 0031 136
BACK STRECHING METAL PUSHING SPRING
103
91 00 013
STRECHING METAL GAUGE PIN
104
01 0014 269
NIPPEL
105
91 00 002
STRECH MOVEMENT METAL SHEET
106
91 00 011
HOSE WAY PIPE
107
01 0031 32
BACK STRECH SPRING
108
01 0124 040
SETSCREW
109
01 0014 01
RECORD
110
01 0014 138
RECORD
111
01 0063 040
BOLT
112
01 0117 010
NUT
113
01 0130 040-50-1
RAYNEL WASHER
114
01 0117 018-1.5
NUT
115
01 0115 018
NUT
116
01 0112 18
WASHER
117
80 00 012
PILLAR SLIDING MILE
118
91 00 007
TYRE MOUNTING ARM STRECTHING METAL
119
59 09 000
BACK STRECHING CYLINDER GROUP
120
11 16 000
STRECHING CYLINDER GROUP
121
91 00 005
SLIDING REEL MILE
122
91 00 004
SQUARE SLIDING REEL
123
91 00 006
FRONT STRECHING MILE
124
11 00 003
MOTOR CONNECT METAL SHEET
125
01 0063 170
BOLT
126
01 0112 10
WASHER
127
01 0063 200
BOLT
128
01 0086 080
BOLT
129
01 0029 14 (DAMING)
BRAVA REDUCTION
130
01 0073 016
BOLT
131
91 00 012
HEAD REMOVAL CYLINDER LOWER CONNECTION MILE
132
91 00 020
UPPER BIG ABS
133
91 00 018
PILLAR UPPER ABS
134
11TI 23 000
AIR DISTRIBUTOR GROUP
135
91 05 000
PEDAL GROUP
136
01 0550 06
HEAD REMOVAL CYLINDER
137
91 05 001
PEDAL BODY GROUP
138
91 05 002
HEAD BREAKING AND FLANGE PEDAL GROUP
139
91 05 003
BEAD BREAKER PEDAL GROUP
140
91 05 004
POWER SWITCH PEDAL GROUP
141
91 05 007
PEDAL CONNECTION MILE
142
91 05 010
PEDAL INTERMEDIATE METAL BIG
143
91 05 011
PEDAL INTERMEDIATE METAL SMALL
144
91 05 018
BEAD BREAKER VALVE GROUP
145
91 05 017
FLANGE CYLINDER VALVE GROUP
146
91 05 016
HEAD REMOVAL CYLINDER VALVE GROUP
147
01 0072 025
BOLT

18
SPARE PARS LIST
Number
CODE
DESCRIPTION
148
01 0031 139
BEAD BREAKER PEDAL PULLING SPRING
149
01 0122 010
SETSCREW
150
11 12 010
PLASTIC PEDAL
151
01 0072 035
BOLT
152
01 0072 020
BOLT
153
91 05 012
DISTANCE GAUGE MILE
154
91 05 006
POWER SWITCH SPRING CAP METAL SHEET
155
72 02 002
BOLT
156
91 05 013
CAP CONNECTION METAL
157
01 0081 016
BOLT
158
91 05 009
POWER SWITCH LOCATION MOVEMENT METAL SHEET
159
01 0130 012-018-0.5
RAYNEL WASHER
160
91 05 014
POWER SWITCH METAL SHEET SLIDING METAL
161
91 05 005
POWER SWITCH SPRING BEARING METAL
162
01 0031 135
SINGLE AND DOUBLE CYCLE POWER SWITCH SPRING
163
59 07 013
POWER SWITCH CAP OPERATION PICTURE
164
00 01 0001
POWER SWITCH LATCH
165
01 0200 23
POWER SWITCH
166
01 0031 134
PEDAL PULLING SPRING
167
01 0072 055
BOLT
168
01 0072 040
BOLT
169
01 0031 29
GAUGE MILE PRESS SPRING
170
01 0117 008
NUT
171
01 0073 055
BOLT
172
01 0112 10
WASHER
173
91 05 008
MOVEMENT GUIDE METAL SHEET GROUP
174
01 0115 005
NUT
175
01 0071 010
BOLT
176
01 0072 010
BOLT
177
01 0139 012
MILE SEGMENT
178
01 0117 006
NUT
179
01 0112 06
WASHER
180
01 0550 13
PEDAL MOVEMENT GUIDE
181
01 0105 016
METAL SHEET SCREW
182
01 0123 025
SETSCREW
183
01 0014 56 PC
RECORD
184
01 0014 157
RECORD
185
01 0014 55 PC
RECORD
186
01 0024 090-2.5
O-RING
187
01 0024 065-3
O-RING
188
00 01 0028
AIR DISTRIBUTOR EXIT INJECTION
189
00 01 0027
AIR DISTRIBUTOR ENTER INJECTION
190
11 16 001
RUBBER HEAD
191
11 16 002
CYLINDER
192
01 0360 060-045-10
NUT-RING
193
47 28 000
BEAD BREAKER ARM GROUP
194
47 29 000
CRESCENT GROUP
195
01 0117 012
NUT
196
01 0064 100 12.9
BOLT
197
01 0114 43
BAKALITE NUT
198
80 11 002
TYRE REEL BODY METAL SHEET
199
80 11 003
TYRE REEL BODY GROUP
200
80 11 004
TYRE REEL CONNECTION METAL SHEET
201
80 08 001
CYLINDER
202
80 08 002
CYLINDER MAIN MILE
203
59 06 004
CYLINDER BACK CAP
204
59 06 003
CYLINDER FRONT CAP
205
01 0024 022-2
O-RING
206
01 0023 016
DUST SEAL
207
01 0021 012-20x5.5
NUT-RING
208
01 0014 62 NSE
RECORD
209
80 08 003
RUBBER HEAD
210
91 00 021
HOSE DIRECTION SHEET METAL
211
01 0073 016
BOLT
212
01 0024 014-3
O-RING
213
47 23 008-F
CROSS TOP SHEET METAL
214
47 23 008-D
CROSS BOTTOM SHEET METAL
215
47 23 008-E
SHEET BAR
216
91 05 026
PIN
217
01 0072 030
OBOLT
218
91 05 019
BUSHER
219
59 07 014
PULL GROUP
220
01 0115 008-04
NUT
221
59 07 009
SHAFT
222
01 0152 1-4 EK
VALVE

19
SPARE PARTS LIST
Number
CODE
DESCRIPTION
223
01 0014 63 IPD
RECORD
224
01 0014 92
RECORD
225
11 12 005
RECORD
226
01 0024 008-4
O-RING
227
11 12 004
RECORD
228
01 0153 1-4SN
RECORD
229
01 0014 14
RECORD
230
11 00 022
TRADLE LINK BOLT
231
11Tİ 20 002
SHOCK TREADLE
232
11 12 010
FOOT TREADLE
233
01 0122 010
SETSCREW
234
11Tİ 20 007
SHEET METAL
235
11Tİ 20 000
FLANGE CYLINDER VALVE GROUP
236
11Tİ 20 003
SHOCK SHAFT
237
01 0031 06
SPRING
238
93Tİ 00 002
TREADLE PROJECT SHEET METAL
239
01 0014 13
RECORD
240
01 0014 12
RECORD
241
01 0014 61 PST
RECORD
242
01 0031 34
SPRING
243
01 0141 04-024
PIN
244
11 12 007
SHEET BAR
245
11 12 008
BUSHER
246
11 22 001
DISTRIBUTOR INLET GROUP
247
11Tİ 23 001
DISTRIBUTOR OUTLET GROUP
248
11 22 000
AIR DISTRIBUTOR GROUP
249
01 0014 181
RECORD

20
UNI -TROL®UNI - TROL Co. Ltd.
MANUFACTURING PLANT & STORE ul . Estrady 56 , 01 - 932 Warsaw , Poland
tel.(+4822) 8179422 or 8349013 or 8349014 int. 117
http://www.unitrol.com.pl.fax(+4822) 8179422 or 8349013 or 8349014 int. 115
WHEEL BALANCING MACHINES RIM STRAIGHTENING MACHINES TYRE CHANGERS EQUIPMENT FOR TYRESHOPS
Statistic no. : 008132994 EC VAT no. : PL5270205246 Register no. : KRS 0000111731 EORI no. : PL527020524600000
Account : for EURO : ALIOR BANK SA for EURO: no. PL 96 2490 0005 0000 4600 4784 6179 (swift code: ALBPPLPW)
EU Declaration of Conformity
in accordance with directives : 2006/42/EU, 2014/35/EU, 2014/30/EU and 2014/68/EU
We : Uni-trol Co. Ltd.
Ul. Estrady 56
01-932 Warsaw
Poland
declare, on our joint responsibility with the manufacturer, that the product:
Tyre changer
Electro-mechanical-pneumatic device,
Type: MANAGER,
Serial number………..………
concerned by this declaration, complies with all relevant requirements of the Machinery Directive:
- directive 2006/42/EU (safety machines),
applicable in the essential requirements and relevant conformity assessment procedures, as well as on the essential
requirements of the following directives:
- directive 2014/35/EU (the low voltage);
- directive 2014/30/EU (the electromagnetic compatibility);
- directive 2014/68/EU (pressure).
In order to verification of compliance with the applicable legal regulations have been consulted
harmonized standards and other normative documents:
PN-EN ISO 12100:2012P
Safety of machinery -- General principles for design –Risk assessment and risk reduction
PN-EN 61000-6-3:2008P
Electromagnetic compatibility (EMC) -- Part 6-3: General standards -- Emission standard for environments: residential,
commercial and light industrial
PN-EN 61000-6-4:2008P
Electromagnetic compatibility (EMC) -- Part 6-4: General standards -- Emission standard for industrial environments
PN-EN ISO 13857:2010P
Safety of machinery - Safety distances to prevent hazard zones being reached by upper and lower limbs
PN-EN 349+A1:2010P
Safety of machinery - Minimum gaps to avoid crushing of parts of the human body
PN-EN 60204-1:2018P
Safety of machinery -- Electrical equipment of machines -- Part 1: General requirements
PN-EN 61293:2000P
Marking of electrical equipment with ratings related to electrical supply -- Safety requirements
PN-EN ISO 4414:2011E
Pneumatic fluid power - General rules and safety requirements for systems and their components
PN-EN ISO 11201:2012P
Acoustics -- Noise emitted by machinery and equipment -- Determination of emission sound pressure levels at a work station and
at other specified positions in an essentially free field over a reflecting plane with negligible environmental corrections
Table of contents
Popular Tyre Changer manuals by other brands

TMG
TMG LC889NV user manual

HENNESSY INDUSTRIES
HENNESSY INDUSTRIES Coats 4050A Safety Instructions, Operating Instructions, Installation Instructions, Maintenance Instructions

Fasep
Fasep RASE.2234 instruction manual

Cormach
Cormach CM 550 Use and maintenance manual

Coats
Coats 90C manual

CEMB
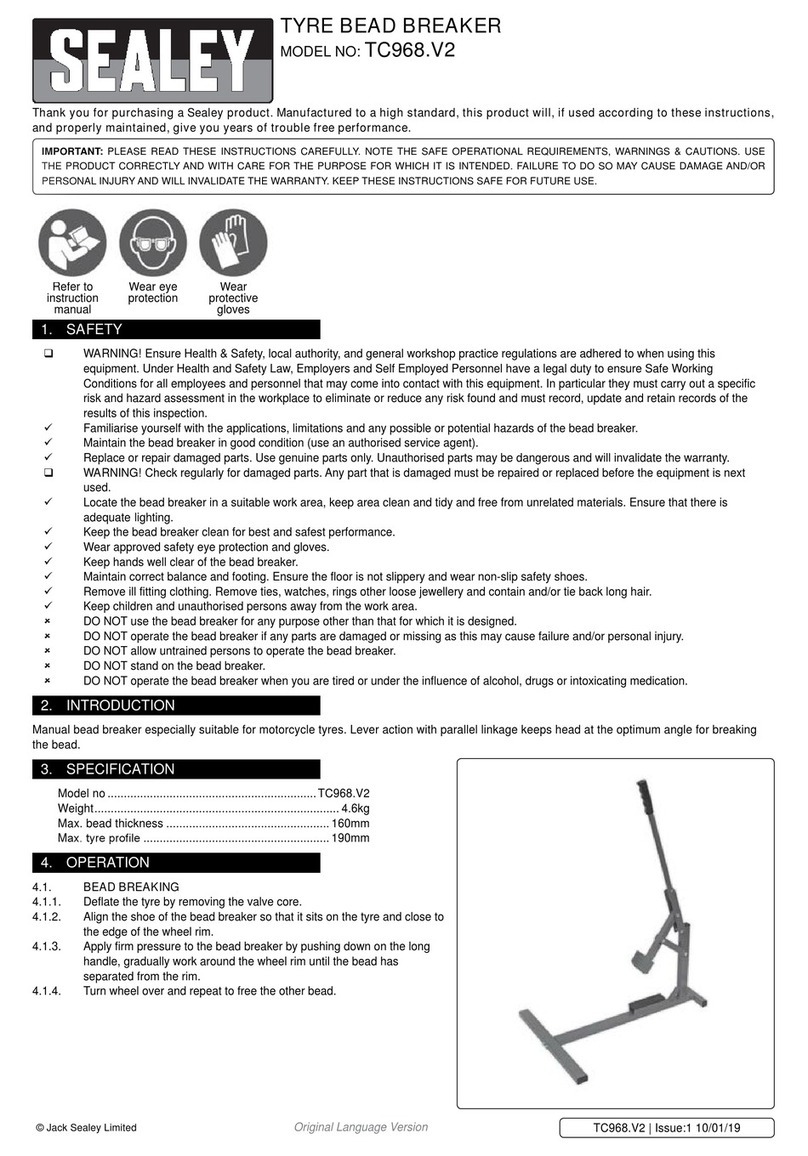
CEMB SM645 Installation, operation and maintenance guide - Original instructions