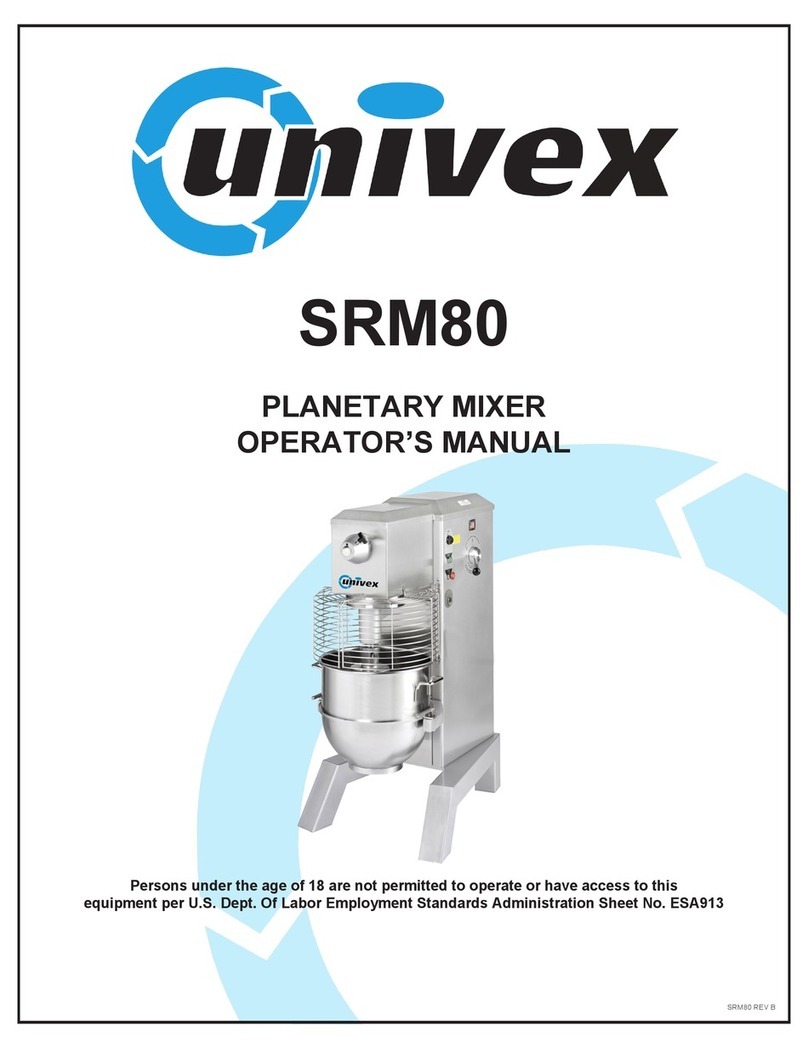
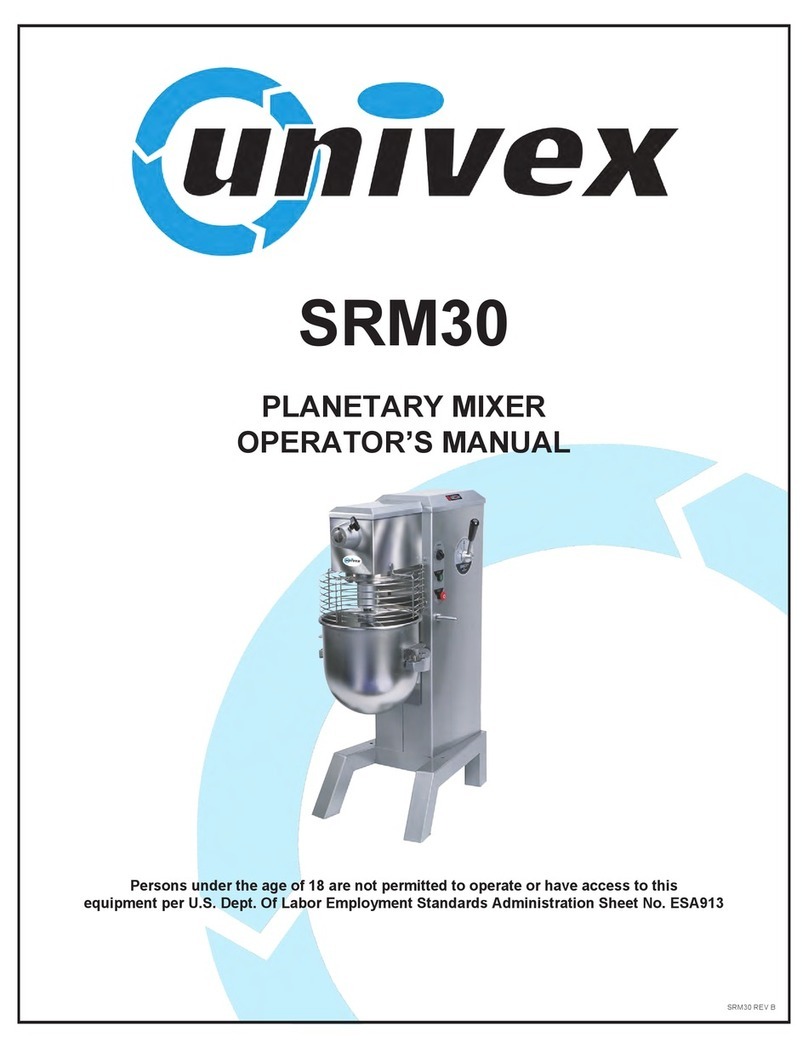
Univex SRM30+ Quick start guide

SRM30+
PLANETARY MIXER
PARTS AND SERVICE MANUAL
Persons under the age of 18 are not permitted to operate or have access to this
equipment per U.S. Dept. Of Labor Employment Standards Administration Sheet No. ESA913
SRM30 SERVICE REV D

TABLE OF CONTENTS
DESCRIPTION
PAGE
TABLE OF CONTENTS............................................................................................................I
LIST OF ILLUSTRATIONS.....................................................................................................II
1. TROUBLE SHOOTING GUIDE ...........................................................................................1.1
2. MECHANICS MAINTENANCE
BELTS...............................................................................................................................2.1
MOTOR ............................................................................................................................2.2
BOWL LIFT ADJUSTMENT...........................................................................................2.2
LUBRICATION................................................................................................................2.3
REMOVAL OF TOP COVER ..........................................................................................2.4
3. TRANSMISSION
REMOVAL .......................................................................................................................3.1
TRANSMISSION PARTS LIST.......................................................................................3.2
BEATER HEAD ASSEMBLY..........................................................................................3.3
BEATER HEAD PARTS LIST .........................................................................................3.4
INPUTASSEMBLY ASSEMBLY....................................................................................3.5
INPUTASSEMBLY PARTS LIST ...................................................................................3.6
POWER TAKE OFF ASSEMBLY ...................................................................................3.7
POWER TAKE OFF ASSEMBLY PARTS LIST .............................................................3.8
VERTICAL SHAFT ASSEMBLY....................................................................................3.9
VERTICAL SHAFT ASSEMBLY PARTS LIST .............................................................3.10
REASSEMBLY.................................................................................................................3.11
4. BOWL SUPPORT & SLIDE ASSEMBLY
BOWL SUPPORT REMOVAL AND DISASSEMBLY...................................................4.1
SLIDE ASSEMBLY REMOVAL AND DISASSEMBLY................................................4.2
BOWL SUPPORT & SLIDE ASSEMBLY PARTS LIST ................................................4.3
5. BOWL LIFT ASSEMBLY
REMOVAL AND DISASSEMBLY..................................................................................5.1
BOWL LIFT ASSEMBLY PARTS LIST..........................................................................5.2
6. VARI-SPEED ASSEMBLY
REMOVAL AND DISASSEMBLY..................................................................................6.1
REASSEMBLY ................................................................................................................6.4
VARI-SPEED ASSEMBLY PARTS LIST........................................................................6.5
7. SPEED CONTROL ASSEMBLY
REMOVAL AND DISASSEMBLY..................................................................................7.1
SPEED CONTROL ASSEMBLY PARTS LIST...............................................................7.3
8. MIXER HOUSING ASSEMBLY
MIXER HOUSING...........................................................................................................8.1
MIXER HOUSING ASSEMBLY PARTS LIST...............................................................8.2
9. APPENDIX.............................................................................................................................8.1
Page I
LIST OF ILLUSTRATIONS
DESCRIPTION PAGE
FIGURE 1 OVERALL VIEW OF MIXER....................................................................................III
FIGURE 2 LUBRICATION DIAGRAM......................................................................................2.3
FIGURE 3 TRANSMISSION ASSEMBLY .................................................................................3.2
FIGURE 4 BEATER HEAD ASSEMBLY....................................................................................3.4
FIGURE 5 INPUT ASSEMBLY ...................................................................................................3.6
FIGURE 6 POWERTAKE-OFFASSEMBLY...............................................................................3.8
FIGURE 7 VERTICAL SHAFT ASSEMBLY............................................................................3.10
FIGURE 8 BOWL SUPPORT & SLIDE ASSEMBLY ................................................................4.3
FIGURE 9 BOWL LIFT ASSEMBLY..........................................................................................5.2
FIGURE 10VARI-SPEED ASSEMBLY ........................................................................................6.6
FIGURE 11SPEED CONTROL ASSEMBLY..............................................................................7.3
FIGURE 12MIXER HOUSING ASSEMBLY...............................................................................8.3
FIGURE 13CUTAWAY VIEW OF MIXER ..................................................................................9.1
FIGURE 14A WIRING DIAGRAM 115/208-240V, 60HZ, 1PH 220-240V, 50HZ, 1PH ...............9.2
FIGURE 14B WIRING DIAGRAM 380-400V, 50HZ, 3PH 460V, 60HZ, 3PH..............................9.3
FIGURE 14C WIRING DIAGRAM 208-240V, 60HZ, 3PH 220-240V, 50HZ, 3PH ......................9.4
Page II

OVERALL VIEW OF MIXER
FIGURE 1
1. BEATER HEAD 12. START BUTTON
2. CHUTE 13. STOP BUTTON
3. SAFETY RING ASSEMBLY 14. BOWL LIFT HANDLE
4. MAGNET 15. REAR ACCESS PANEL
5. No.12 HUB 16. CAP
6. THUMB SCREW 17. BOWL SUPPORT
7. UPPER MOUNTING BRACKET 18. BOWL CLAMP
8. TIMER (OPTIONAL) 19. BOWL
9. SPEED CONTROL LEVER 20. BOWL SUPPORT PIN
10. SPEED INDICATOR LABEL 21. BOWL MOUNTING BRACKET
11. CORD 22. LOWER MOUNTING BRACKET
Page III

SRM30+ TROUBLESHOOTING GUIDE
TROUBLE POSSIBLE CAUSE REMEDY
1. Mixer will not operate. 1.1 Timer not turned on.
1.2 Burned switch contacts.
1.3 Electrical service down.
1.4 Motor capacitor defective.
(1 HP only)
1.5 Burned out motor.
1.6 Magnetic starter tripped
due to overload.
1.7 Safety ring not mounted
or closed.
1.8 Bowl not raised.
1.1 Turn timer on.
1.2 Replace.
1.3 Check electrical service.
Replace fuse or reset circuit
breaker if necessary.
1.4 Replace motor.
1.5 Remove, test, repair or
replace.
1.6 Wait several minutes and
push start button.
1.7 Install safety ring.
1.8 Raise bowl completely.
2. Mixer runs but agitator
will not turn.
2.1 Drive belt off pulley.
2.2 Key or pin sheared on
input shaft, input gear,
bevel pinion, bevel gear,
vertical shaft or beater
head.
2.3 Shifting speed with mixer
not running.
2.1 Reinstall drive belt on motor
pulley and adjust mounting
center distance.
2.2 Locate by step inspection and
replace defective part.
2.3 With mixer running, slowly
move speed control lever
fully forward then backward
to re-engage belt.
3. Agitator stalls during
mixing.
3.1 Mixer bowl is overloaded.
3.2 Speed is set to high for
the mix.
3.3 Loose belt.
3.4 Contamination of belt
with grease.
3.1 Adjust contents of bowl.
3.2 Shift speed lower till action
rotates smoothly.
3.3 Readjust pulley center
distance to tighten belt.
3.4 Clean pulleys and replace
belt.
4. Speed does not change
properly.
4.1 Loose belts.
4.2 Vari-speed pulley
inoperative.
4.1 Tighten or replace belts.
4.2 Remove, clean and lubricate
or replace.
5. Mixer runs, but
repeatedly cuts out and
stops.
5.1 Bowl overloaded.
5.2 Speed is set too high for
the mix.
5.3 Service voltage too low or
fluctuating.
5.4 Starter improperly set.
5.1 Adjust contents of bowl.
5.2 Reduce speed.
5.3 Check electrical voltage.
5.4 Adjust amp setting on starter.
6. Attachments contact
bottom of bowl.
6.1 Dented bowl.
6.2 Bowl height is set too
high.
6.1 Remove dent or replace bowl.
6.2 Reset bowl height.
Page 1.1

SRM30+ TROUBLESHOOTING GUIDE (CONTINUED)
7. Attachments contact
side of bowl
7.1 Dented bowl.
7.2 Insufficient clearance
between bottom of bowl
and beater.
7.1 Remove dents or replace bowl.
7.2 Adjust bowl height.
8. Excessive noise 8.1 Gears need to be repacked
with grease.
8.2 Badly worn or frayed drive
belts.
8.3 Attachments hitting bowl.
8.4 Overloaded mixing bowl.
8.1 Locate source by inspection
and repack with grease.
8.2 Replace belts.
8.3 Inspect for cause in items
6 & 7 above.
8.4 Adjust contents of bowl.
Page 1.2

MECHANICS MAINTENANCE
Every six months a mechanic should perform the following inspection and maintenance.
1. BELTS:
a. WARNING: Start the mixer and adjust the speed control (Figure 1 [9]) to speed 4. Stop the
mixer.
FOR SAFETY, DISCONNECT THE ELECTRICAL POWER CORD.
b. Remove the top cover (Figure 12 [4]) per section 2 mechanics maintenance “REMOVAL OF
TOP COVER” on page 2.4.
c. Remove the rear access cover (Figure 12 [5]).
d. Check the belts (Figure 10 [11 & 22]). If broken, glazed or worn, replace them.
e. Check the belt (Figure 10 [11]) for proper tension. The outer edge of the belt should be flush
with the outer diameter of the variable speed pulley (Figure 10 [10]). If not, adjust it by
loosening the jam nut (Figure 11 [16]) and turning the connecting rod (Figure 11 [17]) until the
outer edge of the belt is flush with the outer diameter of the variable speed pulley. Retighten the
jam nut.
f. Plug in the electrical power supply cord and turn the mixer on. Adjust the speed control to speed
1. Stop the mixer and DISCONNECT THE ELECTRICAL POWER SUPPLY CORD.
g. Check the belt (Figure 10 [22]) for proper tension. The outer edge of the belt should be flush
with the outer diameter of the variable speed pulley (Figure 10 [10]). If not, adjust it by
loosening the four 5/16-18 Kep nuts (Figure 10 [14]), securing the motor to the mixer housing,
raise or lower the motor until the outer edge of the belt is flush with the outer diameter of the
variable speed pulley. Retighten the nuts.
belt flush with pulley flange
Page2.1

MECHANICS MAINTENANCE
2. MOTOR:
Check the motor (Figure 10 [29]) for overheating, noise and excessive end play of the shaft.
Replace the motor if defective.
3. BOWL LIFT ADJUSTMENT: (Figure 8 and 9)
a. Place the 30 quart mixing bowl on the bowl support (Figure 1 [17]) and the 30 quart batter beater
on the beater head shaft (Figure 1 [1]).
b. Raise the bowl support to the up position.
c. Check the clearance between the bottom of the bowl and the lowest point of the batter beater.
The clearance should be 3/16 inch, plus or minus 1/16 inch.
d. If adjustment is required, disconnect the electrical power supply cord, loosen the lock nut
(Figure 9 [11]) and turn the connecting rod Figure 9 [12]) until the correct clearance is obtained.
Retighten the lock nut.
connecting rod
Page 2.2

LUBRICATION
The lubrication instructions are in Figure 2. The motor has pre-lubricated bearings with a service
interval of ten years. The transmission and beater head gearing are packed with Nevastane 5P7 grease.
WARNING: NEVER WORK ON THE TRANSMISSION WITH THE MIXER RUNNING.
IT IS RECOMMENDED THAT THE ELECTRICAL SERVICE POWER CORD BE DISCON-
NECTED TO PREVENT ACCIDENTAL START UP.
LUBRICATION INSTRUCTIONS
FIGURE 2
B
B
Bevel Gear
A
Bearing
Bowl Lift Bearing
ASpeed Control
Spur Gear
performed on the
B
B
C
C
Internal Gear
beater head assembly.
Slide
Bowl Lift
Redistribute grease
as needed or when
maintenance is
AOil yearly medium
30 weight)
machine oil or
Molykote BR-2 Plus
Grease yearly with
Molykote BR-2 plus
Page 2.3

MECHANICS MAINTENANCE
REMOVAL OF TOP COVER
a. The top cover (Figure 12 [4]) must be removed to perform maintenance operations on the mixer.
It is secured by a spring clip at its front end and a screw in back. Before removing the top cover
DISCONNECT THE ELECTRICAL POWER CORD. Remove the screw in the rear, lift the rear
of the cover and push it forward about 2 inches and lift it off.
b. Reinstall the top cover in the reverse of the above procedures using care to insure that the cover
sits squarely and uniformly on the mixer housing.
rear access panel
top cover screw
top cover
Page 2.4

REPAIR INSTRUCTIONS
TRANSMISSION: (Figure 3)
REMOVAL
1.
:
WARNING:
2. Remove the mixer top cover (Figure 12 [4]) per section 2, mechanics maintenance “REMOVAL
DISCONNECT THE ELECTRICAL POWER SUPPLY CORD.
OF TOP COVER” instructions on page 2.4
3. Remove the transmission cover (Figure 3 [2]) by removing the four phillips pan head screws
(Figure 3 [3]) and sliding it towards the rear and lifting up.
4. Rotate the gear train by hand and inspect it for worn or chipped gears, bent shafts, worn bearings
and excessive backlash. Removal of grease may be necessary. Backlash, measured at the gear
teeth, exceeding .030 inch is considered excessive. After inspecting the gear train to isolate any
problems, proceed to disassembly.
5. Remove the kep nut and washer and remove the upper belt retainer.
6. Adjust the speed control lever (Figure 1 [9]) to low speed, then back to high speed. Loosen the
two set screws in the upper pulley (Figure 10 [1]) and remove the upper pulley and the belt.
7. CAUTION
Remove the four 1/2-20 hex head cap screws (Figure 3 [8]) securing the transmission housing to
: The transmission assembly is heavy and must be supported prior to removing it.
the mixer housing. Remove the transmission assembly and pace it on a workbench.
Set screws Upper Belt Retainer ½-20 Hex Head Screws
Page 3.1

Transmission Assembly
Figure 3
Illus Part No Description Qty
11035044 Transmission Housing 1
1035015A Transmission Cover Assembly (Includes 2-6)
21035015 Transmission Cover 1
31200012 Phillips Pan Head Screw 10-32 X 1/2 6
41024041 Spring Clip 1
51200076 Flat Washer #10 2
64400065 Lock Washer #10 2
78800022 Foam Strip 1
81200057 Hex Head Cap Screw 1/2-20 X 1 4
91200085 Lock Washer 1/2 4
10 1200084 Flat Washer 1/2 4
11 4400194 Dowel Pin 1/4 Dia X 1/2 2
1030174A Internal Gear Kit (Includes 12 - 14)
12 1200437 Socket Head Cap Screw 1/4-20 X 1-1/8 Nyloc 4
13 4400005 Lock Washer 1/4 4
14 1030174 Internal Gear 1
1012439A Magnet Kit (Includes 15 - 16)
15 1012439 Magnet 2
16 1012438 Holder, Magnet 2
1035048A Transmission Wrap Assembly (Includes 17 - 18)
17 1035048 Transmission Wrap 1
18 4400503 Label, Univex Logo 1
Page 3.2

Beater head assembly: (Figure 4)
1. Remove the 3/8-24 hex head cap screw (Figure 4 [14]), (left hand thread), and remove the
beater head assembly using the two jack screws (Figure 4 [10]) if necessary.
2. Remove the drive pin (Figure 4 [3]).
3. Remove the retaining ring [9], beater head pinion gear [8] and the key [4] from the
beater head shaft.
Jack Screws
Page 3.3
4.
Remove the internal retaining ring [7] and press the shaft assembly upwards out of the housing.
NOTE: If the gear requires replacement, always replace it’s mating gear.
3/8-24 Cap Screw
Note: Left hand thread

Illus Part No Description Qty
1000443A Beaterhead Assembly (Includes 1 - 12, 15 - 17)
11030173 Beaterhead Housing 1
21033236 Shaft, Beaterhead 1
31200110 Pin, Dowel 3/8 X 1-3/8 1
41200113 Key, Woodruff #9 1
51030148 Bearing 6205 LL 2
61030149 Spacer, Beaterhead Shaft 1
1012003A Beaterhead Pinion Gear Assembly (Includes 4, 7 - 9)
71200254 Retaining Ring, Internal 1
81031039 Beater Head Gear, Pinion 1
91200253 Retaining Ring, External 3
10 8900038 Socket Head Set Screw 3/8-16 X 1-1/4 2
11 4400399 Flat Washer 7/16 X 1-1/4 X 5/64 1
12 1200051 Hex Head Cap Screw 3/8-24 X 1-1/4 Left Hand Thread 1
13 1030209 Ring, Splash 1
14 4400269 Label, Rotation 1
15
1200406
Pin, Roll 1
16
1000438
Shaft, Bowl Scraper 1
17 1200110 Pin, Bowl Scraper 1
Beaterhead Assembly
Figure 4
Page 3.4
9
8
7
6
5
3
2
10
1
15
11
17
13
12
14
16
5
99
10
4
BOWL SCRAPER:
POLY - 1000423
SUPPORT - 1000422

INPUTASSEMBLY: (Figure5)
1. Remove the 1/4-20 hex head cap screw (Figure5[8]) and the washers [9 & 10] to detach
the grease retainer [14] from the input housing [13].
2. Remove the two 1/4-20 hex head cap screws [11] and remove the input assembly from
the transmission housing.
3. Remove the retaining rings [1], gear [2] and woodruff key [5] from the input shaft [6].
NOTE: The grease retainer can only be removed from the gearbox when the power take-off
gear (Figure6[15]) has been removed.
spur gear 1/4-20 hex screw 1/4-20 hex screw
grease retainer
Page 3.5
input assembly
input pinion gear
input housing
input shaft

Input Assembly
Figure 5
Illus Part No Description Qty
1035055 Input Assembly (Includes All)
1020010A Pinion Gear Assembly (Includes 1, 2, 5)
11200119 Retaining Ring, External 5101-78 6
21020010 Pinion Gear 1
31200117 Retaining Ring, Internal N5002-185 2
41030019 Bearing, 6204 LL 2
51200113 Woodruff Key #9 1
61035021 Input Shaft 1
74400230 Key 3/16 Square X 1-1/2 1
81200328 Hex Head Cap Screw 1/4-20 X 5/16 1
94400005 Lock Washer 1/4 3
10 1200075 Flat Washer 1/4 1
11 1200022H Hex Head Cap Screw 1/4-20 X 1 2
12 4400003 Strap Washer 1/4 2
13 1038017 Input Housing 1
14 1035028 Grease Retainer 1
Page 3.6

POWER TAKE-OFF ASSEMBLY: (Figure 6)
1. Remove the retaining ring Figure 6[10]) from the end of the PTO shaft [14] and remove the
spur gear [15] from the PTO shaft.
2. Remove the three 1/4-20 hex head cap screws (Figure 6 [9 & 18]), Washers (8 & 19]),
deflector [7], retaining ring [10] at the gear [15] end of the shaft. Thread two of the 1/4-20
screws into the threaded holes in the transmission housing and turning the screws alternatly,
jack the power take-off assembly from the transmission housing.
NOTE: Gear [15] should be replaced as a set with the input spur gear PN1020010.
bevel gear
1/4-20 hex screws
lubrication deflector
spur gear
Page 3.7
power take-off assembly
power take-off housing bevel gear power take-off shaft

Power Take Off Assembly
Figure 6
Illus Part No Description Qty
1035501 Power Take Off Assembly (Includes All)
18800033 PTO Cover 1
28900019 Screw, SFHD 6-32 X 3/8 2
34400210 PTO Washer 1
48800012 PTO Adaptor 1
54400030 PTO Housing 1
64400229 PTO Knob Assembly 1
71035025 Lubrication Deflector 1
84400005 Lock Washer 1/4 3
91200022HHex Head Cap Screw 1/4-20 X 12
10 1200119 Retaining Ring, External 5101-78 6
11 1030019 Ball Bearing 6204 LL 2
12 1200117 Retaining Ring, Internal N5002-185 1
13 1035016 Bevel Pinion Gear 1
14 1035019 PTO Shaft 1
15 1020004 Spur Gear 1
16 1200113 Woodruff Key #9 1
17 4400232 Key, 3/16 Square X 1" Rounded Ends 1
181200075 Flat Washer 1/4 1
Page 3.8

VERTICAL SHAFT ASSEMBLY: (Figure 7)
1. Remove the retaining ring (Figure 7 [1]) from the vertical shaft [6] and remove the bevel
gear [2] from the vertical shaft..
2. Press the vertical shaft [6] and lower bearing [3] downward out of the transmission
housing.
NOTE: If the bevel gear requires replacement, the bevel pinion gear (Figure 5[13]) should
also be replaced.
retaining ring bevel gear
Page 3.9
vertical shaft assembly
bevel gear bearings vertical shaft

Vertical Shaft Assembly
Figure 7
Illus Part No Description Qty
1035502 Vertical Shaft Assembly (Includes All)
11200253 Retaining Ring, External (5101-98) 1
21035018 Bevel Gear 1
31030142 Bearing 5205DR 2
41200254 Retaining Ring, Internal (N5002-206) 1
54400500 Key 1/4 Square X 1-1/2 Rounded Ends 1
61035017 Vertical Shaft 1
74400230 Key 3/16 Square X 1-1/2 1
Page 3.10
Table of contents
Other Univex Kitchen Appliance manuals

Univex
Univex Duro 7510 User manual

Univex
Univex 1404 User manual

Univex
Univex Potenza VS300 User manual

Univex
Univex 6509 User manual

Univex
Univex PREP SAVER 6512 SERIES User manual

Univex
Univex MAX 8512 User manual

Univex
Univex 1000M Signature Series User manual

Univex
Univex UNV-2054 User manual

Univex
Univex 4612 User manual

Univex
Univex VS2000 User manual

Univex
Univex 1000S Premium User manual

Univex
Univex VS9 User manual

Univex
Univex 4509 User manual

Univex
Univex DOME47RT Guide

Univex
Univex 8713S User manual

Univex
Univex VS2000 User manual

Univex
Univex DURO 6512 User manual

Univex
Univex Prep Saver 4509 User manual

Univex
Univex Duro 7510 User manual

Univex
Univex Max series 8512 User manual