6DS4119-002
Utilizzare l’adattatore CA per collegare il ripetitore alla presa di corrente. (Non usare una presa attivata
da un interruttore da parete). Il ripetitore si registrerà automaticamente sulla base.
Se il LED continua a lampeggiare rosso, provare a registrare nuovamente il ripetitore.
Utilizzare ESCLUSIVAMENTE l’adattatore di alimentazione fornito con il ripetitore. Un adattatore
di alimentazione diverso può causare pericoli di natura elettrica o danneggiare il ripetitore.
Il ripetitore è registrato sulla base e pronto per l’uso.
È ora possibile scollegare l’alimentatore e spostare il ripetitore nella posizione desiderata; il ripetitore rimarrà
registrato sulla base.
2.3.2 REGISTRAZIONE MANUALE (OPZIONALE)
È possibile inoltre seguire le istruzioni seguenti per registrare il ripetitore in modo manuale.
Vericare che il ripetitore sia spento (controllando che l’adattatore di alimentazione CA sia scollegato).
Accendere la modalità ripetitore sulla base e quindi impostare la base in modalità registrazione.
Utilizzare l’adattatore di alimentazione CA per collegare il ripetitore a una presa di corrente.
Tenere premuto il pulsante SETUP per 5 secondi. Il ripetitore avvierà la registrazione sulla base.
La procedura di registrazione deve essere eseguita entro 30’ dall’accensione del ripetitore.
2.3.3 DEREGISTRAZIONE / IMPOSTAZIONI DI FABBRICA
È inoltre possibile deregistrare e riregistrare il ripetitore se il segnale non passa o se si desidera registrarlo
su un’altra base. Se non si esegue la deregistrazione, una volta completata la registrazione a un’altra base,
il registro della base precedente viene sovrascritto.
Per deregistrare il ripetitore seguire le istruzioni di seguito:
Scollegare il ripetitore dall’alimentatore CA.
Tenere premuto il pulsante SETUP, quindi collegare l’alimentatore CA e tenere premuto per 5 secondi.
Il ripetitore è stato deregistrato (ritorno alle impostazioni di fabbrica).
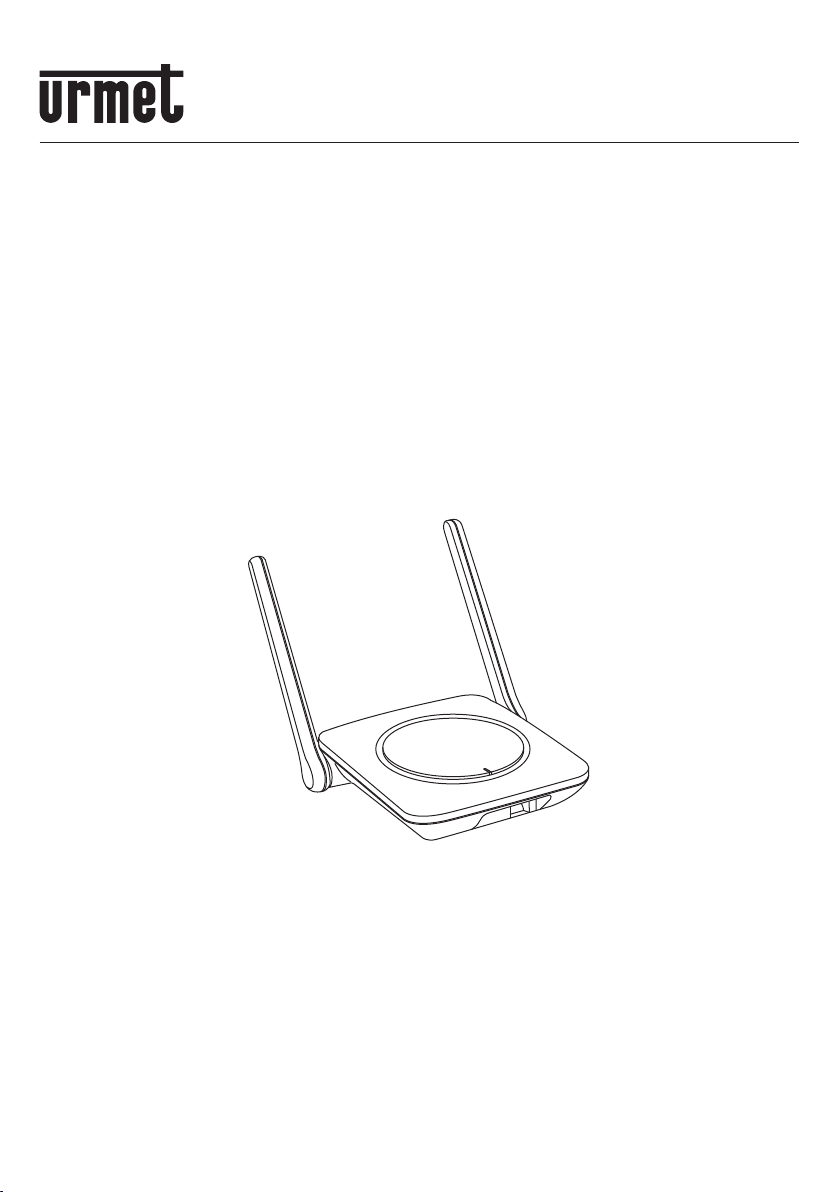
2.4 INSTALLARE IL RIPETITORE
Attivare la modalità ripetitore sulla base prima di installare il ripetitore, quindi registrare il ripetitore sulla
base.
2.4.1 POSIZIONE
Per ottenere risultati ottimali, posizionare il ripetitore in un luogo adatto. È possibile localizzare il ripetitore
attraverso le informazioni dell’indicatore LED.
È importante posizionare correttamente il ripetitore per ottenere prestazioni ottimali. Di seguito alcuni
suggerimenti per il posizionamento del ripetitore:
Posizionare il ripetitore nel luogo più elevato possibile, ma a non meno di 180 cm dal pavimento.
Vericare che ci sia buona ricezione dalla base.
Vericare che la posizione sia vicina a una presa di corrente. Non installare cavi elettrici in un’area di
passaggio: possono creare rischi di inciampo o danneggiarsi e causare incendi o pericoli di natura
elettrica.
Distanziare i ripetitori di almeno 10 metri. In caso di installazioni su diversi piani, lasciare almeno 10
metri in verticale.
Evitare fonti di interferenze elettriche come sistemi hi-, macchine per ufcio o forni a microonde.
Evitare fonti di calore e la luce diretta del sole.
Evitare oggetti che possano interferire con segnali radio, come porte in metallo, muri spessi, nicchie e
armadi.
2.4.2 MAPPARE L’AREA DI COPERTURA DELLA BASE
Per trovare la posizione ideale per il ripetitore occorre determinare l’area di copertura della base. Posizionarsi
vicino alla base e fare una telefonata. Allontanarsi dalla base con il ricevitore e prendere nota del punto in
cui il segnale diventa debole. La posizione ideale per il ripetitore è il punto più lontano dalla base in cui ci sia
un buon segnale, o il punto in cui il segnale diventa debole.
3.
1.
2.
3.
4.
1.
2.
3.
•
•
•
•
•
•
•