Referencia de cocina:
TIPO DE PREPARACION TEMPERATURA NIVEL BANDEJA TIEMPO
Bread 180 3 9-13
Cake 180 2 25-35
Fish 250 2 10-15
Chicken/Duck 220-250 2 30-45
Pancake 160 1 7-10
Beef 250 2 8-15
Egg/Peanut 125-150 2 6-10
Hot Dog 200 2 6-10
Hamburger 240 2 10-14
Instrucciones de operación:
Antes de utilizar la unidad por primera vez:
Calentar el horno vacío.
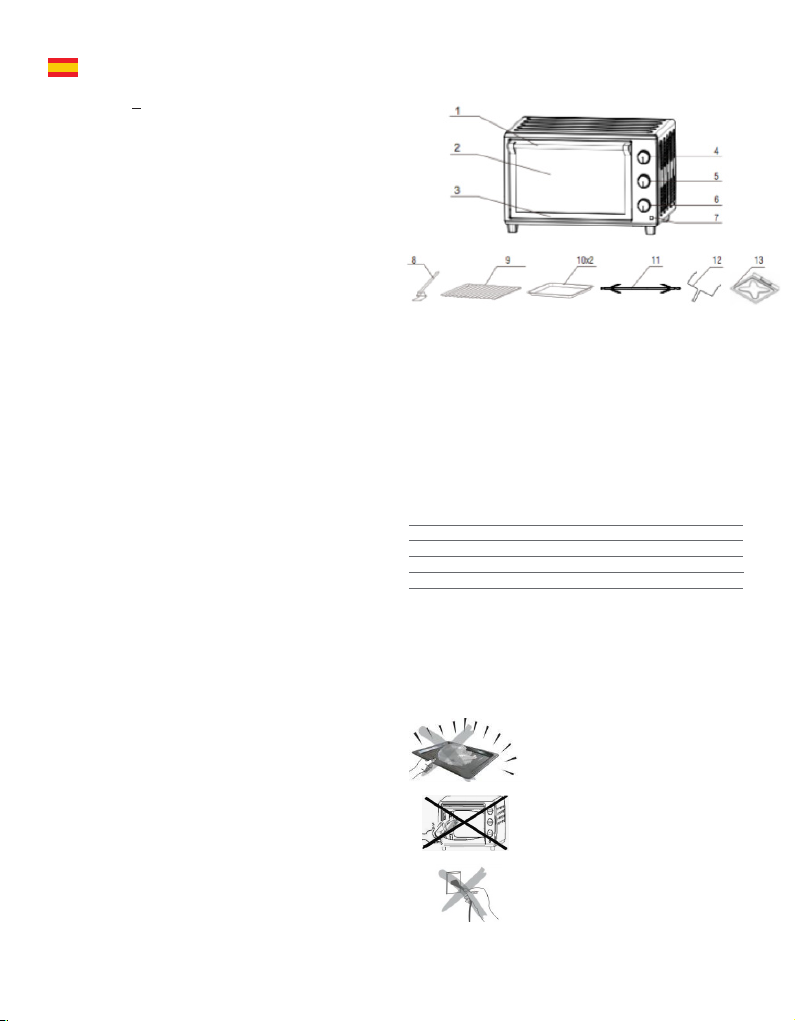
(1) Inserte la bandeja y la red de horneado.
(2) Coloque el interruptor de funcionamiento del
calentador en “UPPER & LOWER”, ajuste el dial de
control de temperatura a “250ºC” y caliente el horno
vacío durante unos 10 minutos.
Nota:
Puede haber algo de humo y un olor a quemado en el
primer uso, pero esto no es un mal funcionamiento.
Dial de control de temperatura:
Ajuste el dial de control de temperatura para los
platos que va a cocinar.
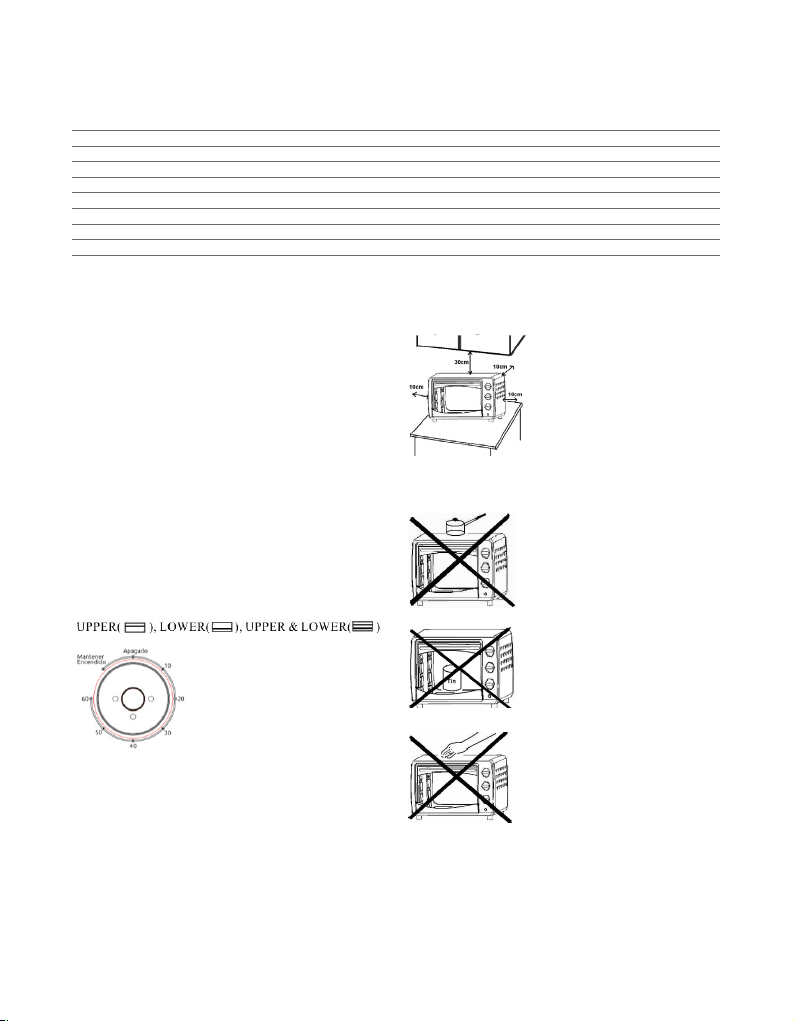
Interruptor de funcionamiento del calor:
Seleccione “superior” “inferior” o “superior e inferior”
de acuerdo a los platos que va a cocinar.Puede
observar si los calentadores están funcionando o no,
observando la luz indicadora frontal.
1. Coloque la echa en el
mando del temporizador en el
número que indica el tiempo
de cocción (minutos) según
los platos que va a cocinar.
2. Ajuste el temporizador
girándolo en el sentido de las
agujas del reloj.
El horno se apagará
automáticamente al nal de
la hora seleccionada y sonará
una campana
• Cuando ajuste el
temporizador a menos de 5
minutos, gírelo a más de 6
min. Y luego volver al tiempo
seleccionado.
3. El horno se puede apagar
manualmente durante
la cocción girando el
“temporizador” en sentido
antihorario a la posición “OFF”.
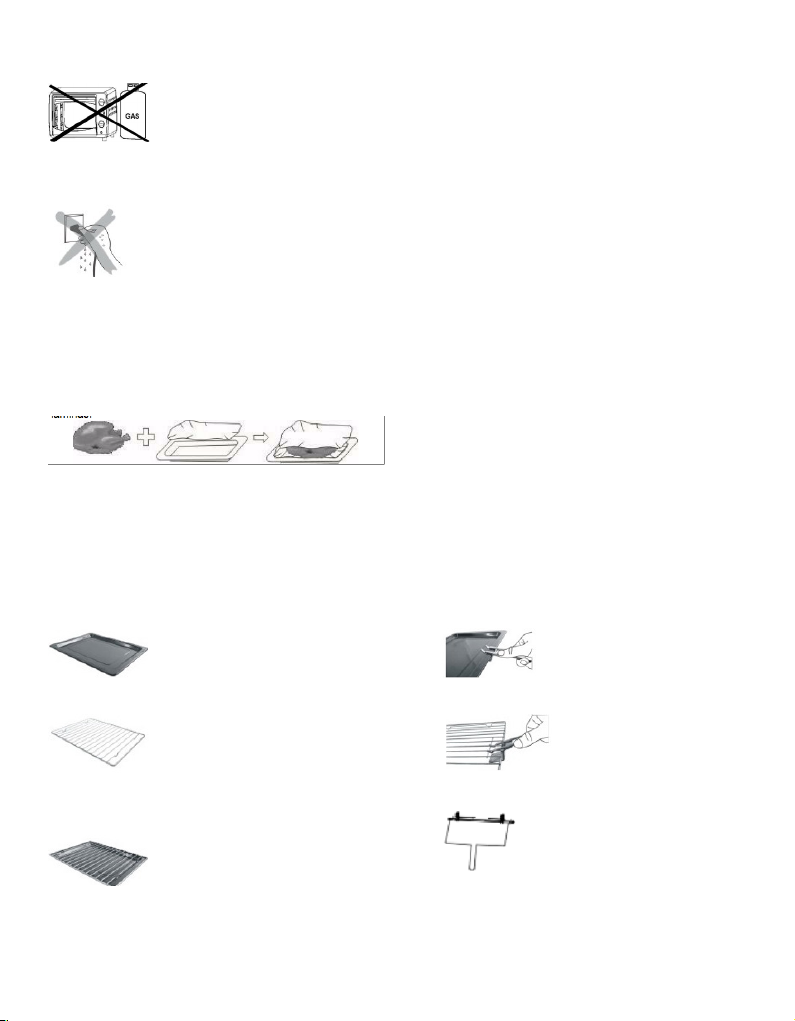
Precaución:
Si el horno está colocado
cerca de una pared, la pared
será quemada o manchada.
Asegúrese de que la cortina,
etc, no están en contacto con
el cuerpo.
No coloque nada entre la
parte inferior del cuerpo y
la supercie sobre la que
está colocado, un objeto
así colocado podría ser
quemado.
No ponga nada en el horno
mientras lo usa, el calor
podría causar deformación,
grietas, etc.
Cualquier comida
embotellada o enlatada no se
puede calentar directamente
como la botella b o estaño
se rompería y escaldar a la
persona.
Ten cuidado! No toque
usted mismo durante el
uso o inmediatamente
después del uso. Las piezas
metálicas y la ventana de
cristal de la puerta se vuelven
extremadamente calientes
durante el uso. Tenga
cuidado de no tocarlos al
abrir y cerrar la puerta.