manuals.online logo
Brands
  1. Home
  2. •
  3. Brands
  4. •
  5. USB
  6. •
  7. Power Supply
  8. •
  9. USB XY-UMPD User manual

USB XY-UMPD User manual

声明:本说明书著作权归青岛欣易云联电子科技有限公司所有,未经允许任何单位或个人不得用于商业用途。
USB Color screen charging tester
Numerical control voltage Buck and boost power supply
Applicable model:XY-UMPD
Dear users, thank you for purchasing the USB color screen charging tester / USB
numerical control voltage Buck and boost power supply. In order to let you know all the
functions of this product faster, get a better use experience, and avoid misoperation,
please carefully read and keep this instruction before use, so that you can check it in the
future.
声明:本说明书著作权归青岛欣易云联电子科技有限公司所有,未经允许任何单位或个人不得用于商业用途。
USB power system (PER) application:
声明:本说明书著作权归青岛欣易云联电子科技有限公司所有,未经允许任何单位或个人不得用于商业用途。
2. The product has constant current function, which can charge all kinds of small
rechargeable batteries within 0.6V~30V within 10~20W;
Charging steps:
(1) Determine the floating charge voltage and charging current of your rechargeable
battery; (if the parameter of lithium battery is 3.7V/2200mAh, the floating charge voltage
is 4.2V; if it is 12V rechargeable battery, generally set the floating charge voltage to about
14V)
(2) Under no-load condition, set the output voltage to floating charge voltage; (if 3.7V
lithium battery is charged, adjust the output voltage to 4.2V)
(3) Set the charging current (constant current value) and set the current directly. Note:
when setting the current, calculate the lower power, charge within the power range, and
use the super power, the product will enter the protection state.
(4) Connect the battery for charging.
3. The product has constant current function, which can directly
drive 0.6-30V,0-15W LED lamp;
To drive the LED lamp:
(1) Determine the working current and maximum working voltage you need to drive the
LED;
(2) Under no-load condition, set the voltage value and current value to make the output
voltage reach the maximum working voltage and current of LED (Note: calculate the power
when setting the current, charge within the power range, use over power, the product will
enter the protection state.)
(3) Connect the LED and test the machine.
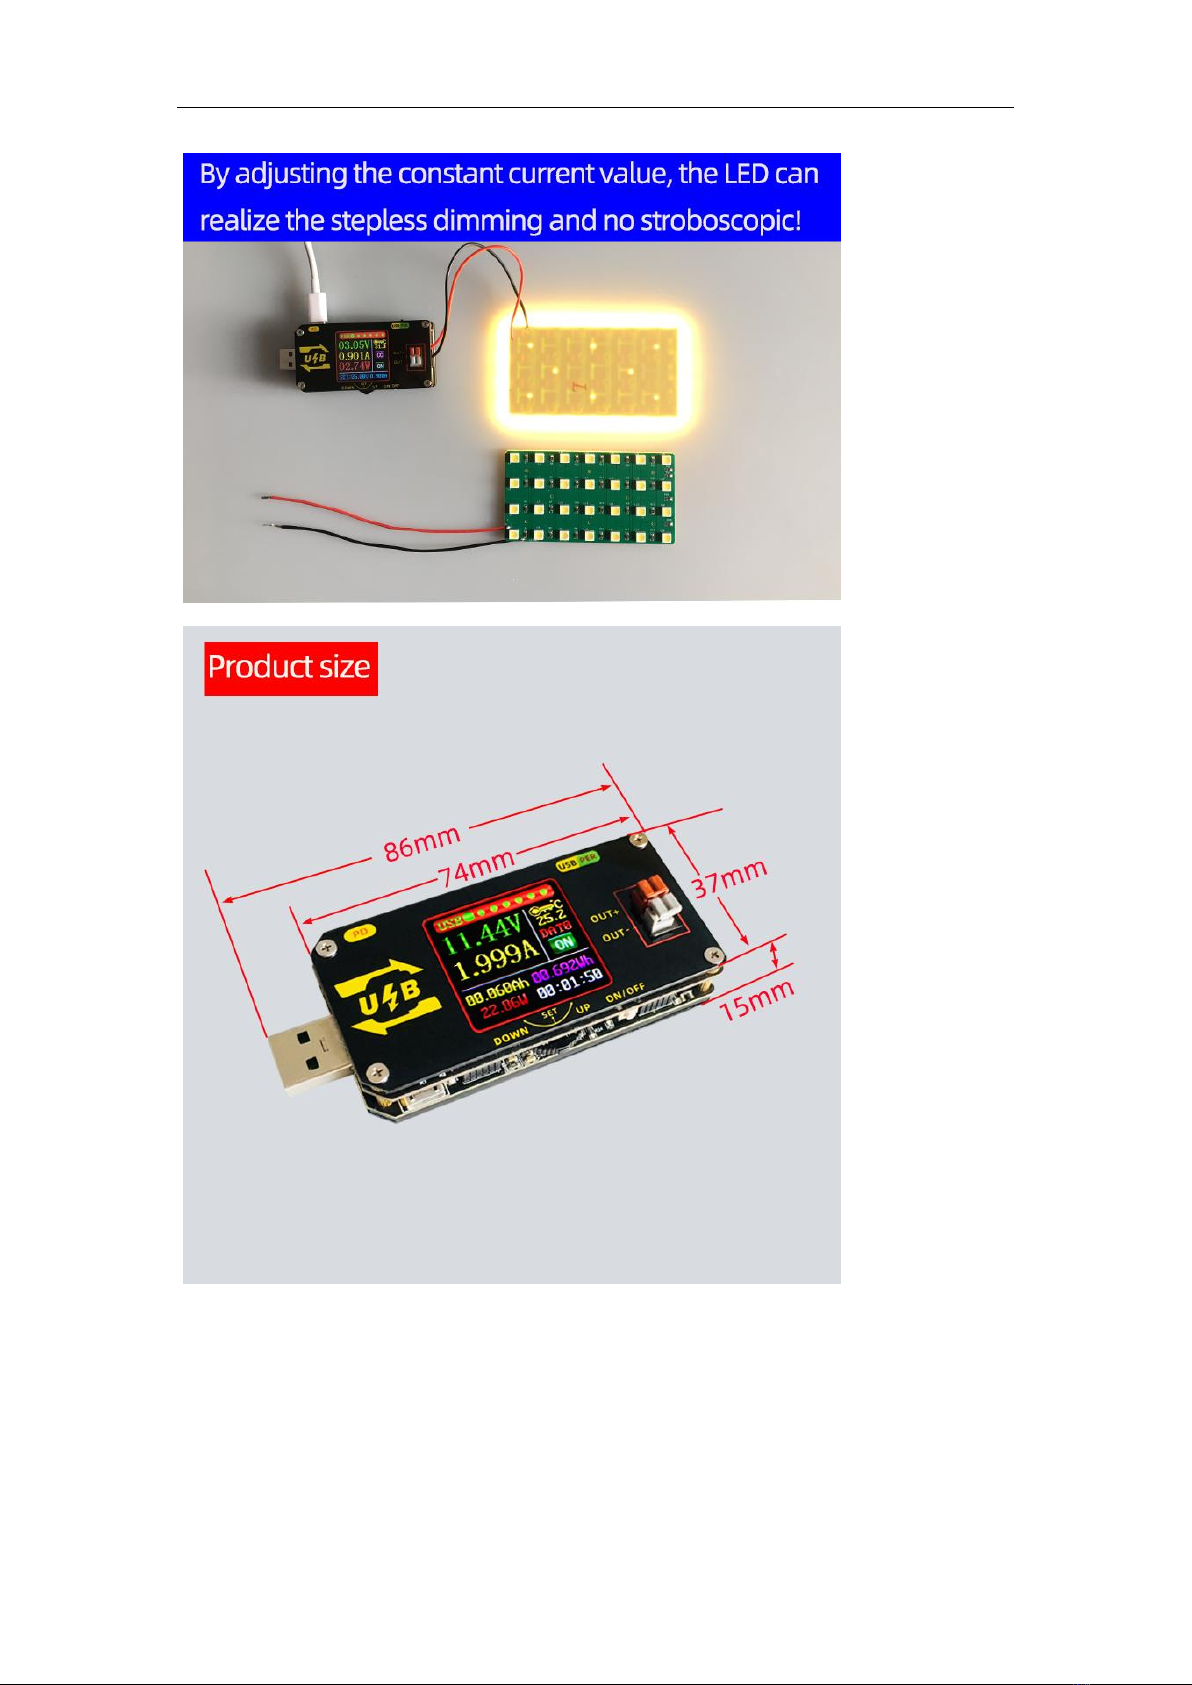
This product can adjust the constant current value (between 0 - working current) to realize
the LED's stepless dimming and no stroboscopic!!
声明:本说明书著作权归青岛欣易云联电子科技有限公司所有,未经允许任何单位或个人不得用于商业用途。
Details of interface and key functions
USB tester system
Short press the " ON/OFF " button to turn on and off the USB output, long press the "
ON/OFF " button for 2 seconds, the screen can rotate, 360 °four-way rotation.
Short press the " UP/DOWN " key to turn pages with one key。
声明:本说明书著作权归青岛欣易云联电子科技有限公司所有,未经允许任何单位或个人不得用于商业用途。
USB measurement main interface:
Press the "set" key briefly, select "capacity / energy / time / data group" all, and the
corresponding will be displayed in reverse blue after selecting all. Use the "up / down" key
to switch the parameters to be cleared / set, and then press the "set" key briefly to clear /
set the corresponding parameters; after selecting, press the "set" key for 2 seconds or
more, and the operation without keys will exit automatically.
Dat0: only flicker to remind the value of Ah and Wh in the previous stage, and do not
accumulate to the next stage. When the current Ah is greater than 0.010Ah, stop flickering
and display the current value of Ah and Wh;
DAT1: the value of Ah and Wh in the previous stage will be added automatically.
Note: it is a stage from ON to OFF
声明:本说明书著作权归青岛欣易云联电子科技有限公司所有,未经允许任何单位或个人不得用于商业用途。
Quick charge identification interface:
This interface 'set' button has no function
Measurement curve interface:
声明:本说明书著作权归青岛欣易云联电子科技有限公司所有,未经允许任何单位或个人不得用于商业用途。
This interface 'set' button has no function
USB parameter setting interface:
Press the "set" key briefly to activate the parameters to be set;
Short press the "set" key to switch between parameter name and bit selection;
After the parameter name is selected, the parameter name will be displayed in reverse blue,
and the parameter to be set will be switched by pressing "up / down";
After the bit is selected, the corresponding bit will be displayed in reverse blue, and the
parameter can be set by pressing the "up / down" key. The "up / down" key supports long
press, and long press can quickly increase / decrease the parameter;
After setting, long press the "set" button for 2 seconds or more, and no key operation will
automatically exit the setting;
All parameters are saved automatically after exiting.
Input undervoltage protection LVP default: 0.0V, can be set by itself;
Output overvoltage protection OVP default: 24V, can be set by yourself;
Output over-current protection OCP default: 5.1A, can be set by yourself;
Output over power protection OPP default: 125W, can be set by yourself;
Maximum operation time OHP: when the parameter is not set to 0, turn on this function.
When the operation reaches the set time, the power will automatically turn off the output;
Maximum capacity OAH: when the parameter is not 0, turn on this function, when the
capacity reaches the set parameter, the power will automatically turn off the output;
OHP and OAH functions can well realize timing / quantitative power supply.
声明:本说明书著作权归青岛欣易云联电子科技有限公司所有,未经允许任何单位或个人不得用于商业用途。
Quick charge detection interface:
Short press the 'set' button to start automatic detection, and the corresponding protocol
will start flashing. After the detection, if it is supported, it will turn green, if it is not
supported, it will turn red.
Quick charge activation interface:
Press the "set" key briefly to select the protocol to be activated on the left side, and press
the "up / down" key to switch the protocol to be activated. After selection, press the "set"
key again to activate the selected fast charging protocol. The protocol content will be
displayed in the right column. If the activation is successful, the "OK" will be displayed. If
the activation is successful, the "fal" will be displayed. After the activation is successful, the
声明:本说明书著作权归青岛欣易云联电子科技有限公司所有,未经允许任何单位或个人不得用于商业用途。
corresponding gear can be selected by pressing the "up / down" key Adjust the voltage;
Press and hold the "set" key to exit the active selection.
In PPS mode of PD protocol, press "set" to select step unit (1V / 100mV / 20mV) to select
step unit, and then modify the voltage through "up / down"; if you want to switch to other
voltage modes at this time, press "set" to select "gear" to switch to other gears through
"up / down";
Note: when the protocol is activated, please do not connect the output terminal with USB
device, so as not to cause activation failure;
Please follow the prompts when activating PD;
There are many different manufacturers of charging head on the market. This product can
not guarantee 100% support for activation.
System parameter setting interface:
Press the "set" key briefly to select / switch the parameter to be set. After selection, the
parameter will be displayed in reverse green, and the parameter will be set by pressing the
"up / down" key;
After setting, long press the "set" button for 2 seconds or more, and no key operation will
automatically exit the setting;
All parameters are saved automatically after exiting.
Night mode setting screen rest time: it can be set to rest screen after 1-9 minutes, and
wake up with any key.
声明:本说明书著作权归青岛欣易云联电子科技有限公司所有,未经允许任何单位或个人不得用于商业用途。
USB power system (per)
Main power interface:
Press the "set" key briefly to activate the parameter to be set (voltage / current);
Short press "set" key to switch between full selection and bit selection;
When all is selected, the blue display will be reversed, and the set voltage / current will be
switched through the "up / down" button;
After the bit is selected, the corresponding bit will be displayed in reverse blue, and the
parameter can be set by pressing the "up / down" key. The "up / down" key supports long
press, and long press can quickly increase / decrease the parameter;
After setting, long press the "set" button for 2 seconds or more, and no key operation will
automatically exit the setting;
All parameters are saved automatically after exiting.
声明:本说明书著作权归青岛欣易云联电子科技有限公司所有,未经允许任何单位或个人不得用于商业用途。
Capacity recording interface:
Press the "set" key briefly, and select "capacity / energy / time" for all. After selecting all,
the corresponding parameters will be displayed in reverse blue. Press the "up / down" key
to switch the parameters to be cleared. After selecting, press the "set" key briefly to clear
the corresponding parameters. After selecting, press the "set" key for 2 seconds or more or
no key operation for more than 6 seconds will exit automatically.
Voltage current curve interface:
"SET" button has no function
声明:本说明书著作权归青岛欣易云联电子科技有限公司所有,未经允许任何单位或个人不得用于商业用途。
Power parameter setting interface:
Press the "set" key briefly to activate the parameters to be set;
Short press the "set" key to switch between parameter name and bit selection;
After the parameter name is selected, the parameter name will be displayed in reverse blue,
and the parameter to be set will be switched by pressing "up / down";
After the bit is selected, the corresponding bit will be displayed in reverse blue, and the
parameter can be set by pressing the "up / down" key. The "up / down" key supports long
press, and long press can quickly increase / decrease the parameter;
After setting, long press the "set" button for 2 seconds or more, and no key operation will
automatically exit the setting;
All parameters are saved automatically after exiting.
Input undervoltage protection LVP default: 4.8V, self setting, minimum 2.5V;
Output overvoltage protection OVP default: 32V, can be set by yourself;
Output over-current protection OCP default: 2.1a, can be set by yourself;
Output over power protection OPP default: 20.5w, self setting;
Maximum operation time OHP: when the parameter is not set to 0, turn on this function.
When the operation reaches the set time, the power will automatically turn off the output;
Maximum capacity OAH: when the parameter is not 0, turn on this function, when the
capacity reaches the set parameter, the power will automatically turn off the output;
OHP and OAH functions can well realize timing / quantitative power supply。
The quick charge activation interface operates the same as the USB system.
The operation of power system setting interface is the same as that of USB system setting
interface.

Popular Power Supply manuals by other brands

NETGEAR APS135W - ProSafe Auxillary Power Supply install guide

NETGEAR

NETGEAR APS135W - ProSafe Auxillary Power Supply install guide

Lambda 303 Series Operator's manual

Lambda

Lambda 303 Series Operator's manual

PurePower 700 user guide

PurePower

PurePower 700 user guide

Novus NVE-PS200 installation manual

Novus

Novus NVE-PS200 installation manual

Chicago Electric CHICAGO ELECTRIC 38391 Set up and operating instructions

Chicago Electric

Chicago Electric CHICAGO ELECTRIC 38391 Set up and operating instructions

Block PSRA 3 quick start guide

Block

Block PSRA 3 quick start guide

DuraComm RMF-4012 owner's guide

DuraComm

DuraComm RMF-4012 owner's guide

Camtec HSEUiREG04801 manual

Camtec

Camtec HSEUiREG04801 manual

Kramer VA-102P5 user manual

Kramer

Kramer VA-102P5 user manual

Cebora WF4-R6 instruction manual

Cebora

Cebora WF4-R6 instruction manual

Optimal Power OPR150-12S manual

Optimal Power

Optimal Power OPR150-12S manual

Extron electronics PS 128 Setup guide

Extron electronics

Extron electronics PS 128 Setup guide

BCP PUOOOU1CWWH How to install

BCP

BCP PUOOOU1CWWH How to install

Goobay 57290 user manual

Goobay

Goobay 57290 user manual

Apex Digital APP2 Usage instructions

Apex Digital

Apex Digital APP2 Usage instructions

Kenwood PS-33 instruction manual

Kenwood

Kenwood PS-33 instruction manual

Omron S8JC-Z - datasheet

Omron

Omron S8JC-Z - datasheet

OCZ OCZ-Z1000M - MECHANICAL DRAWING manual

OCZ

OCZ OCZ-Z1000M - MECHANICAL DRAWING manual

manuals.online logo
manuals.online logoBrands
  • About & Mission
  • Contact us
  • Privacy Policy
  • Terms and Conditions

Copyright 2025 Manuals.Online. All Rights Reserved.