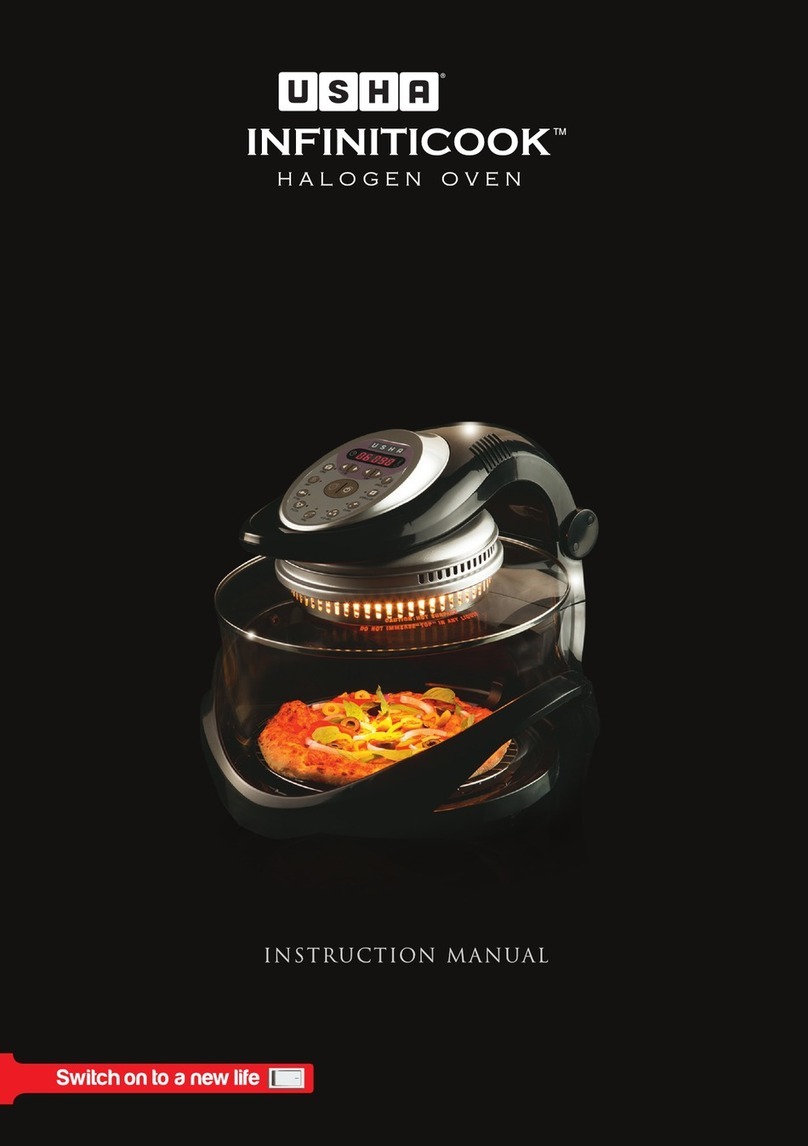
usha HO 3515i User manual


Dear Customer,
Congratulations!
We would like to congratulate you on becoming the proud owner of
Usha InnitiCook 360R Halogen Oven, one of the most advanced cooking appliances with versatile
cooking applications.
Usha InnitiCook Halogen Oven is innovatively designed keeping in mind todays lifestyle, to help
you cook food that is tasty yet healthy.
The product comes with Usha assurance of best in class quality and superior after sales service.
In order to get the best out of the product, please read this Instruction Manual carefully before using.
Please call Usha customer care for any queries and concerns.
Best Wishes
fiz; xzkgd
eqckjdckn!
ge vkidks vusd izdkj ds iz;ksxksa ls ;qDr vR;k/kqfud [kkuk idkus ds midj.kksa esa ls ,d Usha InnitiCook 360R
gSykstsu vksou dk xkSjokfUor ekfyd cuus ij c/kkbZ nsrs gSaA m"kk bfUQfuVhdqd gSykstu vksou dks vkt dh thou'kSyh dks
/;ku esa j[kdj uohu rjhds ls fMt+kbu fd;k x;k gS tks vkidks Lokfn"V ysfdu lsgrean [kkuk idkus esa enn djrk gSA
mRikn loksZRre DokfyVh vkSj mRd‘"V vk¶+Vj lsYl lfoZl ds m"kk vk'oklu ds lkFk feyrk gSA
mRikn dk loksZRre :i ls mi;ksx djus ds fy, d‘i;k bLrseky djus ls iwoZ bl funsZ'k iqfLrdk dks lko/kkuhiwoZd i<+saA
fdlh iwNrkN vkSj 'kadk ds fy, d‘i;k m"kk dLVej ds;j dks dkWy djsaA
'kqHkdkeuk;sa

3
INTRODUCTION
InnitiCook 360R Halogen Oven is a multi-utility appliance that can Roast, Grill, Bake, Air Fry, Braise,
Barbecue, Thaw, Slow Cook and Toast. It allows you to prepare a wide variety of delicious and healthy meals
in lesser time than traditional appliances, and with less or no oil. This is possible because of the state of the
art technology being used. InnitiCook Halogen Oven cooks via dual modes:
Instant Heating from Halogen Lamp- It harnesses the power of light as a natural source of energy for
eective and ecient cooking. The direct heat from the lamp penetrates deep inside the food and cooks it
evenly on the outside and inside.
Convection heating- InnitiCook Halogen Oven improves upon traditional oven cooking by using a
powerful fan to heat air in the oven, providing fast and even cooking from all sides. Convection heating is
best for baking, pued pastries and cakes.
InnitiCook 360R comes with exclusive Rotisserie accessories such as Rotisserie, Grill, Basket and
Skewers that allow you to Cook like a Pro with no eort. Motorized Rotisserie inside the Halogen Oven cooks
food evenly because of a 360oexposure of food to halogen heat exposed to rotating grill cage. So you get
exceptionally well cooked dishes without having to ip the food. All this while it saves you time spent on
ipping the dish and reheating the oven after opening it to ip. Faster & even cooking in the InnitiCook 360R
oven retains more taste and nutrients, and allows you to experience the wholeness of the food you prepare.
IMPORTANT SAFEGUARDS
Use the oven on a at surface.
Supervise the use of the oven by children. Do not attempt using the oven without a proper working knowledge.
In case of any malfunction faced or any technical challenges, kindly take assistance from the authorized
service centre or call USHA CARE at 1800 1033 111.
Handle the supply cord with caution. Any damage to the cord may expose the wiring.
Immersing the cord in water or any liquid must be avoided. Both may result in an electric shock.
Disconnect the power cord when the oven is not in use or immediately after it has been used.
The accessories provided with the oven can be placed inside the cavity after usage. If any accessory apart
from the ones given with the halogen oven is used kindly ensure utmost caution so as to avoid injuries.
Use the tongs to remove the rotisserie accessory after cooking as the accessory would be very hot.
The appliance is intended for household usage only.
Usage leads to heating up of the oven body. Be cautious of holding/ lifting/touching the oven surface after
immediate usage till the time the oven cools down. Cool Touch Handles and knobs provided on the oven can
instead be used to avoid burning of hands. During usage please ensure to keep the oven at a safe distance from any
running burners (gas or electrical). Also while using the oven maintain at least 8 cm of space around the oven so as
to avoid conduction of heat to objects in close proximity.
MAINTAINING & CLEANING YOUR 360R
IMPORTANT: Before cleaning any part, ensure that the Oven is switched OFF, unplugged, and cool.
Light Cleaning
Use a clean sponge or dish cloth with a little mild dishwashing detergent and warm water to wipe bowl clean
Rinse well to remove all detergent. Wipe dry
Note: Never immerse the lid in any liquid.
Normal Cleaning
Wipe lid and fan housing using a damp, clean dish cloth or sponge with a little mild dishwashing detergent.
Do not clean with steel wool pads or abrasive materials
Wash wire racks in mild dishwashing detergent and water.
Clean metal parts using a sponge or dishcloth with mild dishwashing detergent, then wipe clean.
If scrubbing is necessary, use a nylon or polyester mesh pad or a pod brush.
Storage
The Halogen Oven has a detachable cord which can be removed to store the product safely.
This also prevents any physical damage to the cord.
When not in use disconnect the Halogen Oven and store in a dry, safe place, out of reach of children.

4
ifjp;
InnitiCook 360R gSykstsu vksou ,d cgq&mn~ns';h midj.k gS tks jksLV] fxzy] csd] ,;j ÝkbZ] czst+] ckcsZD;w] FkkW] Lyks dqd vkSj
VksLV dj ldrk gSA ;g vkidh Lokfn"V vkSj lsgrean [kkus dh vusd fdLeksa dks ikjEifjd midj.kksa dh rqyuk esa de le; esa vkSj fcuk
rsy ;k de rsy ds lkFk cukus esa enn djrk gSA ;g blesa iz;ksx dh tk jgh vR;k/kqfud rduhdh ds dkj.k lEHko gSA bufQfuVhdqd
gSykstu vksou nksgjh fof/k;ksa ds ek/;e ls idkrk gS%
gSykstu ySEi ls rqjUr xeZ djuk&;g izHkkoh vkSj n{k dqfdax ds fy, izdk'k dh ÅtkZ dks ,d izkd`frd lzksr ds :i esa iz;ksx djrk gSA
ySEi ls lh/kh Å"ek [kkus ds vUnj izos'k djrh gS vkSj bls ckgj rFkk vUnj nksuksa rjQ+ ls leku :i ls idkrh gSA
ikjEifjd ghfVax&bfUQfuVhdqd gSykstu vksou] vksou ds vUnj gok dks xeZ djus ds fy, 'kfDr'kkyh ia[ks dk iz;ksx djds lHkh rjQ
ls rst+ vkSj ,d leku dqfdax iznku djrs gq, ikjEifjd :i ls [kkuk idkus ds rjhds dks mUur cukrk gSA ikjEifjd ghfVax csfdax] Qwyh
gqbZ isLVªhvksa rFkk dsd ds fy, loksZRre gSA
InnitiCook 360R fo'ks"k jksVhLlsjh ,Dlsljht+] tSls] jksVhLlsjh] fxzy] ckLdsV vkSj LD;wolZ ds lkFk vkrk gS tks vkidks fcuk
fdlh iz;kl ds ,d is'ksoj dh rjg idkus esa enn djrk gSA ?kwers fxzy fiatjs dks xeZ djrh gSykstu xehZ ds lkFk [kkus dk 360 fMxzh
lEidZ gksus ds dkj.k gSykstu vksou ds vUnj eksVj;qDr jksVhLlsjh [kkus dks leku :i ls idkrk gSA vr%] vki [kkus dks fcuk myVs&iyVs
vklk/kkj.k :i ls ids O;atuksa dk vkuUn izkIr djrs gSaA blds lkFk gh ;g O;atu dks myVus&iyVus rFkk myVus&iyVus ds fy, bls
[kksyus ds ckn vksou dks nqckjk xeZ djus esa yxus okyk le; cpkrk gSA InnitiCook 360R vksou esa vf/kd rst+ vkSj leku :i ls
idkus ls vf/kd Lokn vkSj iks"kd rRo cuk jgrk gS vkSj vkidks vkids }kjk cuk;s x;s Hkkstu dh lEiw.kZrk dk vglkl iznku djkus esa
enn djrk gSA
egRoiw.kZ lko/kkfu;k¡
vksou dks lery lrg ij j[ksaA
cPpksa }kjk vksou dk iz;ksx djrs le; fuxjkuh j[ksaA dke djus dh mfpr tkudkjh ds fcuk vksou dk iz;ksx djus dk iz;kl u djsaA
fdlh [kjkch ;k rduhdh leL;k dh fLFkfr esa d‘i;k vf/kd‘r lfoZl lsUVj ls lg;ksx ysa ;k USHA CARE 1800 103 111 dks dkWy djsaA
lIykbZ rkj dks lko/kkuh ds lkFk bLrseky djsaA rkj esa fdlh Hkh izdkj {kfr ok;fjax dks [kksy ldrh gSA rkj dks ikuh ;k fdlh nzo
esa Mwcus ls vo'; cpk;saA nksuksa ls fctyh dk >Vdk yx ldrk gSA
vksou dks bLrseky ugha djus ds nkSjku ;k iz;ksx djus ds rqjUr ckn ikoj dkMZ dks Iyx ls fudky nsaA
vksou ds lkFk nh x;ha ,Dlsljht+ dks iz;ksx ds ckn dSfoVh ds vUnj j[kk tk ldrk gSA ;fn gSykstu vksou ds lkFk nh x;h fdlh
,Dlsljht+ ds vykok dksbZ ,Dlsljh iz;ksx dh tkrh gS rks d`i;k pksV ls cpus ds fy, iwjh lko/kkuh cjrsaA
idkus ds ckn jksVsLljh ,Dlsljh dks gVkus ds fy, fpeVs dk iz;ksx djsa tSlk fd ,Dlsljh cgqr xeZ gksxhA
midj.k dsoy ?kjsyw iz;ksx ds fy, visf{kr gSA
iz;ksx djus ls vksou dh ckWMh xeZ gks tkrh gSA iz;ksx djus ds rqjUr ckn vksou ds BaMk gksus rd vksou dh lrg dks idM+us@mBkus@Nwus esa
lko/kkuh cjrsaA blds vykok vksou esa fn;s x;s dwy Vp gSaMy vkSj ukWcksa dk iz;ksx gkFkksa dks tyus ls cpkus ds fy, fd;k tk ldrk gSA iz;ksx
djrs le; d‘i;k vksou dks fdlh pkyw cuZj ¼xSl ;k fctyh½ ls ,d lqjf{kr nwjh ij j[ksaA
ikl j[kh oLrqvksa esa xehZ ds lapkyu dks jksdus ds fy, vksou dk iz;ksx djrs le; mlds pkjksa rjQ de ls de 8lseh- dk LFkku cuk;s j[ksaA
360R dk j[kj[kko o lQkbZ fuZns'k
egRoiw.kZ% fdlh Hkh Hkkx dks lkQ djus ls iwoZ] vksou dks fLop vkWQ] Iyx ls vyx vkSj BaMk vo'; djsaA
gYdh lQkbZ
dVksjs dks lkQ djus ds fy, ,d de gYds crZu /kksus okys fMVstsZaV rFkk xeZ ikuh ds lkFk ,d lkQ+ LikWUt ;k fM'k DykWFk dk iz;ksx djsaA
lkjk fMVstsZaV lkQ djus ds fy, HkyhHkk¡fr /kks;saA iksaN dj lq[kk;saA
uksV% <Ddu dks fdlh nzo esa dHkh u Mqck;saA
lkekU; lQkbZ
,d de gYds crZu /kksus okys fMVstsZaV ds lkFk ,d ue] lkQ+ fM'k DykWFk ;k LikWUt dk iz;ksx djrs gq, <Ddu vkSj ia[ks okys Hkkx dks iksNsaA
LVhy mu iSM ;k [kqjnjs inkFkksZa ls u lkQ djsaA
Okk;j jSdksa dks gYds crZu /kksus okys fMVstsZaV vkSj ikuh ls /kks;saA
/kkrq okys fgLlksa dks gYds crZu /kksus okys fMVstsZaV ds lkFk LikWUt ;k fM'k DykWFk dk iz;ksx djds lkQ+ djsaA blds ckn iksaNdj lkQ djsaA
;fn jxMdj lkQ djuk vko';d gS] rks ,d uk;ykWu ;k ikWfy;sLVj es'k iSM ;k ,d ikWM cz'k dk iz;ksx djsaA
j[kko
gSykstu vksou esa ,d vyx gks ldus okyk dkMZ gksrk gS tks mRikn dks lqjf{kr j[kus ds fy, vyx fd;k tk ldrk gSA ;g dkMZ dks
fdlh Hkh izdkj dh HkkSfrd {kfr ls Hkh cpkrk gSA
iz;ksx u djus ds le; gSykstu vksou dks vyx dj nsa vkSj ,d lw[ks] lqjf{kr LFkku ij cPpksa dh igq¡p ls nwj j[ksaA

5
HOW TO USE DIGITAL PANEL lapkyu funsZ'ku
250 30
29
240
28
230
Fig-1. Stand-by Mode
Fig-2a. Press 'TIME' for adujstment
Fig-3a. Press 'TEMP' for adjustment
Fig-2b. Increase time
Fig-3b. Increase temperature
Fig-2c. Decrease time
Fig-3c. Decrease temperature
1. STAND-BY MODE – When the
appliance is powered on, the LCD displays
time and temperature symbols. This is the
stand- by mode with the default time and
temperature set at 250° C and 30 minutes.
Fig - 1.
1. LVS.M&ckbZ&eksM – midj.k dk
ikoj pkyw gksus ij ,ylhMh le; vkSj
rkieku izrhdksa dks n'kkZrk gSA
;g 250° C vkSj 30 feuV ij fu/
kkZfjr fMQ+kWYV le; vkSj rkieku ds
lkFk LVS.M&ckbZ eksM gSA
2. le; lek;kstu*– iSuy ij 'TIME'cVu nckus ij LCD
ij le; izrhd txexkuk 'kq: dj nsrk gS (Fig - 2a)A1 ls 60
feuV rd dk ,sfPNd le; fu/kkZfjr djus ds fy, $ ;k & cVu
dk iz;ksx djsaA ^$* (Fig - 2b) ;k ^&* (Fig - 2c) cVu dks nckus
vkSj idM+s j[kus ij 10 feuV ds vUrjky rd fu/kkZj.k dh xfr
rst+ gksrh gSA lcls yEck le; fu/kkZj.k 1 ?kaVk gSA
3. rkieku lek;kstu*– iSuy ij ‘TEMP’ cVu nckus ij LCD
ij le; izrhd 'kq: dj nsrk gS (Fig - 3a) A 50 ls 250° C rd
dk ,sfPNd le; fu/kkZfjr djus ds fy, $ ;k & cVu dk iz;ksx djsaA
^$* (Fig - 3b) ;k ^&* (Fig - 3c) cVu dks nckus vkSj idM+s j[kus ij
lek;kstu dh xfr rst+ gksrh gSA
2. TIME ADJUSTMENT*– Upon pressing the‘TIME’
key on the panel, the time symbol on LCD starts
blinking (Fig - 2a). Use the + and – buttons to set the
desired time from 1 to 60 minutes. Pressing and holding
‘+’(Fig - 2b) or‘-‘ (Fig - 2c). button accelerates the setting
to 10 minutes interval. The longest time setting is 1
hour.
3. TEMPERATURE ADJUSTMENT *– Upon pressing
the‘TEMP’key on the panel, the temperature symbol
on LCD starts blinking (Fig - 3a). Use the + and – buttons
to set the desired temperature from 50 degree to 250
degree Celsius. Pressing and holding‘+’(Fig - 3b) or‘-‘
(Fig - 3c) button accelerates the speed of adjustment.
,d ckj vksou ds Hkkxksa dks tksM+us ds ckn vksou dks daVªksy iSuy ds ek/;e ls lapkfyr djus ds fy, fuEufyf[kr funsZ'kksa
dk vuqlj.k djsaA
Once the oven is assembled, follow the below instructions to operate the oven through the control panel.
30
250

6
Fig-4. Start
Fig-5. Cancel
Fig-6. Rotisserie
4. START*– After setting the timer and
temperature, press the 'START ' button
to begin functioning of the appliance
(Fig - 4). The time and temperature can
also be adjusted even when the appliance
is in operation.
5. CANCEL – Upon pressing the 'CANCEL'
button the time and temperature is reset
to 00:00 (Fig - 5). If the Rotisserie had
been turned on, it will keep rotating till
the temperature inside the oven drops
down to 100° C. If you wish to continue
cooking even after pressing 'CANCEL',
it can be done by resetting the time/
temperature and pressing 'START'.
6. ROTISSERIE*– The Rotisserie motor
does not switch on automatically. After
the appliances starts, press the‘Rotisserie’
button and motor starts working. Pressing
‘Rotisserie’again stops the Rotisserie
motor (Fig - 6).
4. vkjEHk*– Vkbej vkSj rkieku dks
fu/kkZfjr djus ds ckn midj.k ds dke
djus dks 'kq: djus ds fy, 'START
'cVu dks nck;sa (Fig - 4) A midj.k ds
pkyw jgus ij Hkh le; vkSj rkieku dks
lek;ksftr fd;k tk ldrk gSA
5. fujLr – 'CANCEL' cVu dks nckus
ij le; o rkieku 00%00 ij iqu% lsV gks
tkrs gSa (Fig - 5)A ;fn jksVhLlsjh pkyw gks
pqdk Fkk rks ;g vksou ds vUnj dk rkieku
100° C rd fxjus rd ?kwerk jgsxkA ;fn
vki 'CANCEL' nckus ds ckn Hkh idkus
dh izfØ;k tkjh j[kuk pkgrs gSa bls le;@
rkieku dks iqu% lsV djds vkSj 'START'
dks nckdj fd;k tk ldrk gSA
6. jksVhLlsjh *– jksVhLlsjh eksVj
Lor% pkyw ugha gksrh gSA midj.k ds
'kq: gksus ds ckn] ‘Rotisserie’ dks
nck;sa vkSj eksVj dke djuk 'kq:
dj nsxkA ‘Rotisserie’ dks nckus
ij jksVsLljheksVj iqu% #d tk;sxh
(Fig - 6)A
7. OPENING THE LID (FUNCTION OF MICRO
SWITCH) – If the Halogen Oven lid is lifted, the micro
switch cuts o power putting the LCD display o.
The time and temperature of earlier operation is saved
automatically. The appliance resumes automatically
from the saved time and temperature once the lid is
closed again.
7. <Ddu dks [kksyuk (FUNCTION OF MICRO
SWITCH) – ;fn gSykstu vksou <Ddu mBk gS rks NksVk
fLop ,ylhMh fMLIys dks can djds ikoj dks dkV nsrk gSA iwoZ
lapkyu dk le; vkSj rkieku Lor% jf{kr gks tkrk gSA ,d ckj
<Ddu ds iqu% can gksus ij midj.k jf{kr le; vkSj rkieku
ij Lopkfyr :i ls dk;Z djus 'kq: djrk gSA
Ensure that the voltage indicated on the identication plate corresponds with the mains voltage.
TECHNICAL SPECIFICATIONS
Model No HO 3515i
Voltage 220-240V AC, 50 Hz
Wattage 1300 W
Capacity 10.5 L
The Time and Temperature shown are indicative only and not xed for these functions.
*le; vkSj rkieku dk mi;ksx dsoy dkYifud gSA
230
o
25
00 00
200
o
15

7
ACCESSORIES
1. ROTISSERIE STICK– The rotisserie stick is used for
Roasting full Chicken/ Duck. The forks are to be used
to hold the food securely on the stick.
2. ROTISSERIE GRILL– The Rotisserie Grill is used
to grill food. The food item is placed inside the grill,
and the grill cover is closed. The rotisserie grill is then
xed in the rotisserie socket for grilling the food.
3. ROTISSERIE BASKET– The rotisserie basket can
be used to make tumble fries, grilled vegetables
and popcorn etc. Fries or veggies can be placed
inside the basket. The basket is then xed into the
rotisserie socket. There is no need to ip the food
since the basket itself is rotating.
4. ROTISSERIE SKEWERS– The Rotisserie Skewers
are used to make paneer tikka, chicken tikka
etc. There are 8 skewer rods provided with the
accessory. The food is positioned on each of the
skewer and the entire accessory is xed in the
rotisserie socket for delectable tikka.
5. FRYING PAN– Shallow frying of chicken, prawns,
paneer etc. can be done in the Halogen Oven by
using the frying pan. Mist of oil from the oil spray
bottle accessory can be sprayed on the frying pan
and the pan can be pre-heated for 3-4 minutes in
the Halogen Oven. Food can then be placed on the
frying pan for a delicious shallow fried food.
8. OIL SPRAY BOTTLE – The Oil Spray bottle sprays
a thin mist of oil when required. The Halogen Oven
does 100% oil free cooking but if the user wishes to
add some oil, the oil spray bottle gives a ne oil mist
which gives just the right amount of oil you need.
6. GRILL RACK – The grill rack and be used as a high
and low rack which can be used to grill, barbecue
or air fry.
7. TONGS – A handy tool that assists in lifting the
frying pan or grill rack from inside the cooking bowl.

8
1. jksVsLljh fLVd & jksVsLljh fLVd dk iz;ksx Qqy fpdu@
cr[k dks Hkwuus ds fy, fd;k tkrk gSA Q+ksdZ dk iz;ksx fLVd ij
[kkus dks lqjf{kr <+ax ls idM+us ds fy, fd;k tkrk gSA
2. jksVsLljh fxzy & jksVsLljh fxzy dk iz;ksx [kkus dks fxzy
djus ds fy, fd;k tkrk gSA [kkus ds lkeku dks fxzy ds vUnj
j[kk tkrk gS vkSj fxzy ds <Ddu dks can dj fn;k tkrk gSA
fQj jksVsLljh fxzy dks [kkus dks fxzy djus ds fy, jksVsLljh
lkWdsV esa fQ+V dj fn;k tkrk gSA
3. jksVsLljh ckLdsV & jksVsLljh ckLdsV dk iz;ksx vkM+s frjNs
Ýkbt] fxzy dh gqbZ lfCt+;ksa vkSj ikWidkWuZ vkfn dks cukus ds
fy, fd;k tk ldrk gSA Ý+kbt+ ;k osthl dks ckLdsV ds vUnj
j[kk tk ldrk gSA blds ckn ckLdsV dks jksVsLljh lkWdsV esa
yxk fn;k tkrk gSA [kkus dks iyVus dh dksbZ vko';drk ugha
gksrh D;ksafd ckLdsV Lo;a ?kwerh jgrh gSA
4. jksVsLljh LD;wvlZ & jksVsLljh LD;wvlZ dk iz;ksx iuhj
fVDdk] fpdu fVDdk vkfn cukus ds fy, fd;k tkrk gSA
,Dlsljht+ ds lkFk 8 LD;wvj NM+sa iznku dh tkrh gSaA [kkus dks
izR;sd LD;wvj ij j[kk tkrk gS vkSj Lokfn"V fVDds ds fy, iwjh
,Dlsljh dks vksou ds vUnj j[kk tkrk gSA
5. Ýkbax iSu & fpdu] izkWu] iuhj vkfn dks gYdk ryus ds
fy, gSykstu vksou esa Ý+kbax iSu dk iz;ksx djds fd;k tk
ldrk gSA vkW;y Lizs cksry ,Dlsljh ls Ý+kbax iSu esa rsy dh
ijr fNM+dh tk ldrh gS vkSj iSu dks gSykstsu vksou esa 3 - 4
feuVksa rd xeZ fd;k tk ldrk gSA blds ckn ,d Lokfn"V de
rys [kkus ds fy, [kkus dks Ý+kbax iSu esa j[kk tk ldrk gSA
8. vkW;y Lizs cksry & vkW;y Lizs cksry vko';drk ds le;
rsy dh ,d iryh ijr fNM+drh gSA gSykstsu vksou 100 % izfr'kr
rsyjfgr [kkuk idkrk gS ysfdu ;fn iz;ksxdrkZ dqN rsy feykuk pkgs]
rks vkW;y Lizs cksry ,d iryh rsy dh ijr iznku djrh gS] tks
vkidks vko';d rsy dh ,d lgh ek=k iznku djrh gSA
6. fxzy jSd & fxzy jSd dk iz;ksx Å¡ph vkSj uhph jSd ds :i
esa fd;k tk ldrk gS] ftUgsa fxzy] ckcsZD;w ;k ,;j ÝkbZ djus ds
fy, iz;ksx fd;k tk ldrk gSA
7. fpeVk & ,d mi;ksxh Vwy tks dqfdax ckmy ds vUnj ls
Ý+kbax iSu ;k fxzy jSd dks mBkus esa enn djrk gSA
,Dlsljht+

9
HOW TO USE ACCESSORIES
1. OPENING OF LID – Hold the lid
(Step 1). Push upwards to open
(Step 2).
<Ddu dks [kksyuk & <Ddu dks dksus ls
idM+s (Step 1)A blds mijkar <Ddu dks
Åij dh vksj mBk,sa (Step 2)A
2. CLOSING OF LID – Press the
‘PUSH’ button on the arm of the
lid (Step 1). With the ‘PUSH’ button
pressed, push the lid down (Step 2).
3. CLEANING OF POT – Take the
pot out (Step 1). Wipe with a clean
and dry cloth (Step 2).
4. OIL SPRAY BOTTLE – Fill the
oil spray bottle with oil (Step 1).
Spray oil over the food as desired
(Step 2).
<Ddu dks can djuk & fdukjs ij fn,
x;s ‘PUSH’ cVu dks nck;s (Step 1)A
blds mijkar <Ddu dks uhps dh vksj
/kdsyas (Step 2)A
crZu dh lQkbZ & crZu dks ckgj fudkys
(Step 1) A fQj lq[ks diM+s ls crZu dks
lkQ djsa (Step 2) A
rsy Lisz dh cksry & nh xbZ cksry esa
rsy Hkjsa (Step 1)A viuh bPNkuqlkj [kkusa
ds Åij rsy dk Lizs djas (Step 2)A
Step -1
Step -1
Step -1
Step -1
Step -2
Step -2
Step -2
Step -2
,Dlsljht+ dk mi;ksx dSls djsa

10
5. DETACHABLE CORD – Switch
o the appliance. Hold the plug of
the cord (Step 1). Pull out the plug
(Step 2). Store safely.
fctyh dh rkj & midj.k dks can djus
ds mijkar] fctyh dh rkj dks lgh txg ls
idMsa (Step 1) A fQj rkj dks ckgj dh vksj
[khaps (Step 2)A
6. ROTESSERIE STICK – Place food on the rotisserie
stick. Insert the forks inside the rotisserie stick (Step 1).
Tighten the screws as indicated (Step 2). Place inside
the pot (Step 3).
7. ROTESSERIE BASKET – Insert
the rotisserie stick inside the
rotisserie basket as shown (Step 1
and 2). Place the rotisserie basket
inside the pot (Step 3 and 4).
jksVsLljh ckLdsV & jksVsLljh fLVd dks
ckLdsV esa Mkysa (Step 1 and 2)AckLdsV
dks crZu esa yxk,s (Step 3 and 4)A
jksVsLljh fLVd & [kkus dks jksVsLljh fLVd ij yxkbZ;sa vksj
dkaVkas dks fLVd esa Mkysa (Step 1)- dkaVkas dks fLVd ij pkch ls
dlsa (Step 2)A dlus ds ckn crZu esa yxk,s (Step 3)A
Step -1
Step -1
Step -1
Step -3
Step -2
Step -2 Step -3
Step -2
Step -4

11
8. ROTESSERIE GRILL – Place the food inside the
grill (Step 1). Close the grill (Step 2). Place the grill
inside the pot (Step 3).
jksVsLljh fxzy & [kkus dks jksVsLljh fxzy esa yxkus ds ckn
(Step 1) jksVsLljh fxzy dks can dj fnft;s (Step 2)A
jksVsLljh fxzy dks crZu esa yxk,s (Step 3)A
Step -1 Step -2 Step -3
9. ROTESSERIE SKEWERS – Place
food on the skewer rods. One
by one insert pointed tip of
each skewer inside the holes of
indicated plate (Step 1a). Lock each
of the skewer head as indicated on
the second plate (Step 1b). Place
the skewer assembly inside the pot
(Step 2).
jksVsLljh LD;wvlZ & [kkus dks jksVsLljh
LD;wvlZ esa yxkus ds ckn LD;wvj jksM+ dks
fn[kkbZ xbZ IysV esa Mkysa (Step 1a)A
LD;wvj jksM+ ds Åijh Hkkx dks fn[kkbZ xbZ
IysV esa lgh izdkj ls dlsa (Step 1b).
blds ckn jksVsLljh LD;wvlZ crZu esa yxk,s
(Step 2)A
Step -1
Parts of skewers
Skewers
Assembly
Step -2
10. TONG – Use the tongs to take
out grill rack, rotisserie basket from
inside the pot with ease (Step 1).
fpeVk & ,d mi;ksxh Vwy tks dqfdax
ckmy ds vUnj ls Ý+kbax iSu ;k fxzy jSd
dks mBkus esa enn djrk gS (Step 1)A
1a
1b
Step -1

12
This appliance is warranted for 2 Years against all manufacturing defects from the date of sale.
In the event of any complaint, please contact at Usha Care Toll Free No. 1800 1033 111.
THE WARRANTY IS VALID ONLY WHEN:
1. The appliance has been installed, used and maintained in accordance with the instruction manual.
2. The warranty card and cash memo duly signed by the authorized dealer are presented with the
complaint.
3. The appliance has not been opened or tampered with, by any unauthorized person.
THIS WARRANTY DOES NOT APPLY FOR:
1. Damages due to chipping, peeling, plating and denting.
2. Breakage or damage to components made out of Bakelite, Urea, ABS, SAN and such plastic
materials, rubber parts and cord.
3. Normal wear and tear of parts.
4. Damage resulting from accidents, mishandling or negligence on part of the customer.
Liability for consequential loss or damage is neither accepted nor implied.
S.NO:
CASH MEMO DATE:
WARRANTY CARD
DEALER’S NAME AND ADDRESS:
OWNER’S NAME & ADDRESS:
Website: www.usha.com
www.facebook.com/ushainternational
Table of contents
Other usha Oven manuals
