USP DuraMax Eco Pent User manual

(FR) MANUEL D’INSTRUCTION /
Instructions pour l'Assemblage
Dimension 8 Pieds x 4 Pieds / 2.6 Mètre x 1.2 Mètre
Ver: 0.0
(PT) MANUAL DO PROPRIETARIO/
Intruções de montagem.
Tamanho 8 pés x 4 pés / 2.6 Metro x 1.2Metro
Ver: 0.0
(ES) MANUAL DE USO /
Instrucciones de montaje
Tamaño 8 Pies x 4 Pies / 2.6 Metros x 1.2 Metros
Ver: 0.0
(EN) OWNER’S MANUAL /
Instructions for Assembly
Size 8 Ft x 4 Ft / 2.6 m x 1.2 m
Ver: 0.0
(DE) BENUTZERHANDBUCH /
Montageanleitung
Größe: 8 Ft x 4 Ft / 2.6 m x 1.2 m
Version: 0.0
(NL) GEBRUIKSAANWIJZING VOOR EIGENAAR/
Instructies voor bouw
Maat 8 voet x 4 voet / 2.6 Meter x 1.2Meter
Versie: 0.0
(PL) PODRĘCZNIK UŻYTKOWNIKA /
Instrukcja montażu
Wymiary 8 Stopy x 4 Stopy / 2.6 Metr x 1.2Metr
Wersja: 0.0
• Tall Walk in Shed
• Quick & Easy Assembly
• Ridge Reinforced Walls
• Snow load tested max. 20lbs/sq.foot
(As per IP Standard).
• Wide Double Doors
• Available in Various Sizes
(EN)
• Promenade debout dans l’abri
• Assemblage rapide & facile
• Murs à arête renforcé
• Charge de neige testé max. 20lbs/sq.Foot
(conformément à la norme IP).
• Portes double large
• Disponible en différentes
dimensions
(FR)
• Altura primisível a andamento de pé.
• Rápida e fàcil montagem.
• Paredes reforçadas “Ridge”.
• Carga de neve testado max. 20lbs/sq.Foot
(conforme padrão IP).
• Amplas Portas Duplas.
• Disponível em diversas dimenções.
(PT)
• Se puede estar de pie en su interior
• Montaje fácil y rápido
• Paneles corrugados reforzados.
• Carga de nieve probado max. 20LBS/sq.Foot
(según el estándar de IP).
• Amplia puerta de doble hoja
• Varios tamaños disponibles
(ES)
• Wysokie wejście do magazynka
• Szybki i łatwy montaż
• Wzmocnione ściany profilowane
• Obciążenia śniegiem testowałem max.
20lbs/sq.Foot (jak na IP Standard).
• Szerokie dwuskrzydłowe drzwi
• Dostępne w różnych rozmiarach
(PL)
• Walk-in schuurtje
• Makkelijke en snelle montage
• Versterkte geribbelde platen
• Sneeuw belasting getest max. 20lbs/sq.Foot (volgens het
standaard IP-).
• Brede dubbele deur
• Beschikbaar in verschillende afmetingen
(NL)
(DE) • Begehbares Gerätehaus
• Leichter Aufbau
• Wände mit Verstärkungsrippen
• Schneelast max. getestet. 20lbs/sq.Foot
(gem. Standard IP).
• Breite Doppeltüren
• Verfügbar in verschiedenen Größen
ALL PURPOSE METAL GARDEN SHEDS
(EN) Customer Service Hotline.
(FR) Service Hotline Client.
(PT) Linha de apoio ao cliente.
(ES) La Línea Directa del Servicio del cliente.
(DE) Kundendienst Hotline.
(PL) Linia telefoniczna dla klientów.
(NL) Directe servicelijn.
(800) 483-4674
www.duramaxbp.com
(EN) Call us for any missing or damaged parts.
Do not return to the store.
(FR) Appelez-nous pour toute les pièces manquantes ou endommagées.
Ne pas retourner au magasin.
(PT) Contacta-nos para qualquer falta ou partes danificadas.
Não devolver à loja.
(ES) Llámenos para cualquier perder o partes dañadas.
No vuelva a la tienda.
(DE) Bitte melden sie sich bei uns, wenn Teile fehlen oder beschädigt
sind. Senden Sie nichts an das Geschäft zurück.
(PL) Zadzwoń do nas w przypadku braku części lub ich zniszczenia.
Nie zwracaj towaru do sklepu.
(NL) Bel ons als er onderdelen missen of beschadigd zijn.
Niet terug naar de winkel.
(DE) Eco Metallgerätehaus mit Pultdach
(PL) Eco Wysuniętych Metal Roof Garden Shed
(NL) Eco Tinnen dak Metalen tuinschuur
(EN) Eco Pent Roof Type Metal Garden Shed
(FR) Eco Abri de jardin Metal Monopente
(PT) Eco Pent Roof Abrigo de Jardim em Metal
(ES) Eco Pent Roof Cobertizo Metálico
(DE) Eco Metallgerätehaus mit Pultdach
(PL) Eco Wysuniętych Metal Roof Garden Shed
(NL) Eco Tinnen dak Metalen tuinschuur

(EN) Building Dimensions :
Approximate
Size
Storage Exterior Dimension Interior Dimension
8 Ft x 4 Ft 27 1/4 Sq. Ft 148 5/8 Cu.Ft
Roof Edge to Edge
Base Dimension Door Opening
2.6 m x 1.2 m 2.5 Sq.m 4.2 Cu.m
Width
Depth
Height
inch cm
99 1/4 252.0
inch cm
44 1/2 113.2
103 1/2 263.0
48 5/8 123.4
71 1/4 181.0
inch cm
97 1/2 247.6
inch cm
41 104.0
41 3/4 106
63 160
64 7/8 164.8
(Wall to Wall)
Area Volume
(PL) Wymiary budowlane:
Przybliżone
wymiary
Magazynowa Wymiary zewnętrzne
Wymiary wewnętrzne
8 Stopy x
4 Stopy 27 1/4 Stopy
kwadratowy 148 5/8 Stopy
sześcienny
Dachu od krawędzi do krawędzi
Wymiary fundamentów
Otwieranie drzwi
2.6 Metr x
1.2 Metr 2.5 Metr
kwadratowy 4.2 Metr
sześcienny
Szerokość
Głębokość
Wysokość
Cal cm
99 1/4 252.0
Cal cm
44 113.2
103 1/2 263.0
48 5/8 123.4
71 1/4 181.0
Cal cm
97 1/2 247.6
Cal cm
41 104.0
41 3/4 106
63 160
64 7/8 164.8
(od ściany do ściany)
Powierzchnia Kubatura
(FR) Dimensions du bâtiment :
Taille
approximative Stockage Dimension extérieure Dimension intérieure
8 Pieds x
4 Pieds
27 1/4 Carré
pieds 148 5/8 Pieds
cube
Toit de bord au bord
Dimension de base
Ouverture de
porte
2.6 Mètre x
1.2 Mètre
2.5 Mètre
carré
4.2 Mètre
cube
Largeur
Profondeur
Hauteur
pouce cm
99 1/4 252.0
cm
113.2
103 1/2 263.0
123.4
71 1/4 181.0
cm
97 1/2 247.6
cm
41 104.0
41 3/4 106
63 160164.8
(Mur à mur)
Secteur Volume
48 5/8
64 7/8
44 1/2
Dimensión interior
8 Pies x 4Pies 27 1/4 Pies
cuadrados 148 5/8 Pies
Cúbicos
2.6 Metros x
1.2 Metros
2.5 Metros
cuadrados
4.2 Metros
Cúbicos
cm
99 1/4 252.0
cm
44 113.2
103 1/2 263.0
48 5/8 123.4
71 1/4 181.0
cm
97 1/2 247.6
cm
41 104.0
41 3/4 106
63 160164.8
(pared a pared)
Área Volume
El Tamaño a
proximado
Área de almacenaje
Dimensión de la base Borde de la azotea al borde
Abertura de la
puerta
Anchura
Profundidad
Altura
Pulgada Pulgada Pulgada Pulgada
Dimensión exterior
(ES) Dimensiones del edificio
(PT) Área de Construção:
Dimensão
aproximada Área de Arrumação Dimensão Exterior Dimensão Interior
8 pés x 4 pés 27 1/4 Pies
quadrado 148 5/8 Pies
cúbico
Amplitude do Telhado
Dimensão da base Abertura da Porta
2.6 Metro x
1.2 Metro 2.5 Metro
quadrado 4.2 Metro
cúbico
Comprimento
Profundidade
Altura
Polegada
99 1/4 252.0
Polegada
44 113.2
103 1/2 263.0
48 5/8 123.4
71 1/4 181.0
Polegada
97 1/2 247.6
Polegada
41 104.0
41 3/4 106
63 160
64 7/8 164.8
(Parede a Parede)
Área Volume
centímetro centímetro centímetro centímetro
(DE) Gebäude Abmessung:
Ungefähre
Größe
Innen Abmessung
8 Ft x 4 Ft 27 1/4 Sq. Ft 148 5/8 Cu.Ft
Dach Kante bis Kante
Fundament Abmessung Türöffnung
2.6 m x 1.2 m 2.5 Sq.m 4.2 Cu.m
Breite
Tiefe
Höhe
inch cm
99 1/4 252.0
inch cm
44 113.2
103 1/2 263.0
48 5/8 123.4
71 1/4 181.0
inch cm
97 1/2 247.6
inch cm
41 104.0
41 3/4 106
63 160
64 7/8 164.8
(von Wand zu Wand)
Außen Abmessung
(NL) Gebouw afmeting:
Benadering
Maat
Opslag Buitenkant afmeting Binnenkant afmeting
8 Voet x 4 Voet 27 1/4
Vierkante voet 148 5/8
Kubieke voet
Dakrand tot rand
Basis afmeting Deur opening
2.6 m x 1.2 m 2.5 Vierkante
meter 4.2 Kubieke
meter
Wijdte
Diepte
Hoogte
inch cm
99 1/4 252.0
inch cm
44 113.2
103 1/2 263.0
48 5/8 123.4
71 1/4 181.0
inch cm
97 1/2 247.6
inch cm
41 104.0
41 3/4 106
63 160
64 7/8 164.8
(Muur tot muur)
Gebied Volume
pouce pouce pouce
Speicher
Bereich Volumen
64 7/8

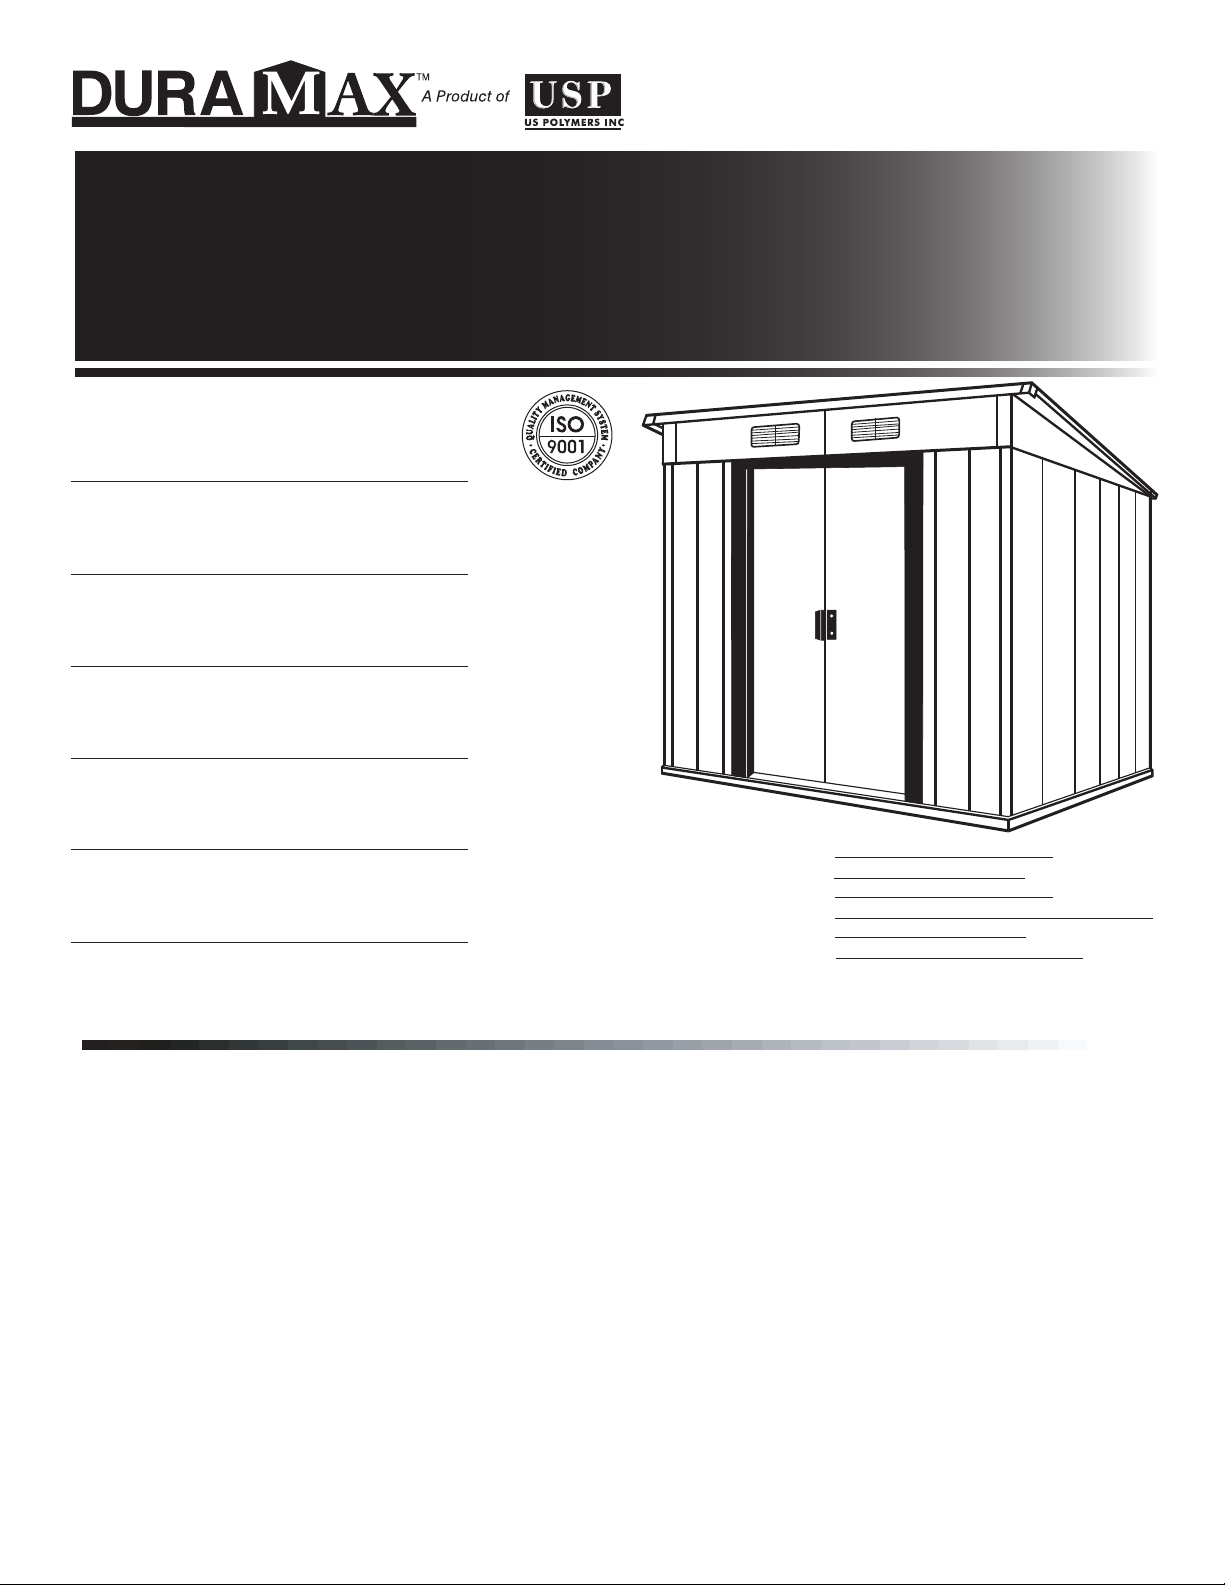
(EN) Duramax Storage Shed
Limited 15 Year Warranty
U.S. Polymer Inc. will send a replacement part free of charge, in the event of material defects and or workmanship for a period of 15 years from
the date of purchase.
This warranty is extended only to the original purchaser. Apurchase receipt or other proof of date of original purchase will be required before
warranty service is rendered. In no event shall we pay the cost of flooring, labor, installation or any other costs related thereto.
This warranty only covers failures due to defects in material or workmanship which occurs during normal use and does not extend to color change
arising due to normal weathering or to damage resulting from misuse or neglect, commercial use, failure to follow assembly instructions and the
owner’s manual (including proper anchoring of the shed), painting, forces of nature and other causes which is beyond our control.
Claims under this warranty must be made within the warranty period by calling 1-800-483-4674 or mail in a dated sales slip and clear photograph
of the part to:
U.S. Polymers Inc.1057 S. Vail Ave Montebello, CA90640, United States of America.
We reserve the right to discontinue or change components. If a component has been discontinued or is not available,
U.S. Polymers, Inc. reserves the right to substitute a component of equal quality as may be compatible.
Limits and Exclusions
There are no express warranties except as listed above. The warrantor shall not be liable for incidental or consequential damages resulting from
the use of this product, or arising out of any breach of this warranty. All express warranties are limited to the warranty period set forth above. Some
states do not allow the exclusion or limitation on how long an implied warranty lasts, so the above limitations may not apply to you.
This warranty gives you specific legal rights and you may also have other rights which vary from state to state or country to country.
(PT) Abrigo De Jardim Duramax
Garantia Limitada a 15 Anos
E.U. Polymer Inc. enviará peças de substituição sem custos adicionais, em caso de defeitos de materiais e /ou mão-de-obra, durante um
período de 15 anos desde a data da compra.
Esta garantia é estendida apenas ao comprador original. Um recibo de compra ou outra prova da data de compra original, será necessário
antes de a garantia ser activada. Em nenhuma situação pagaremos o custo da pavimentação, mão-de-obra, instalação ou qualquer outras despesas
relacionadas com o mesmo.
Esta garantia só abrange defeitos de material ou mão-de-obra que ocorra durante o uso normal e não abrange mudanças de cor devido a
condições meteorológicas ou dano resultante de mau uso negligencia, uso comercial, não seguimento das instruções no manual do utilizador (
incluindo a fixação correcta do abrigo), pinturas, forças da natureza e outras causas que estão fora do nosso control.
As reclamações no seu âmbito devem ser feitas dentro do período da garantia, ligando 1-800-483-4674 ou por Correio com o recibo datado e uma
defotografia clara da parte para:
U.S. Polymers Inc.1057 S. Vail Ave Montebello, CA90640, United States of America.
Reservamos o direito de descontinuar ou alterar componentes. Se um component for descontinuado, ou já não está disponível, U.S. Polimeros,
Inc. reserva-se ou direito de substituir um componente de igual qualidade e compatível ao mesmo.
Limites e Exclusões
Não existem garantias expressas, exceto conforme listado acima. O “warrantor” não será responsabilizado por danos acidentais ou
consquentes resultantes do uso deste produto, ou decorrentes de qualquer violação da presente garantia. Todas as garantias são limitadas,
experessas para o período de garantia definido acima. Alguns estados não permiten a exclusão ou a limitação da duração da garantia implícita,
então as limitações acima podem não se aplicar a vosê.
Esta garantia dá-lhe direitos legais específicos e poderá ter ainda outros direitos que variam de estado para estado ou de país para país.
(FR) Duramax Abri D’ entreposage
Garantie Limitée de 15 ans
US Polymer Inc enverra une pièce de remplacement sans frais, en cas de défaut du matériel ou de fabrication pour une période de 15 ans à
compter de la date d’achat.
Cette garantie couvre uniquement l'acheteur initial. Un reçu d'achat ou une autre preuve de la date d'achat original sera exigé avant que la
garantie de service soit rendue. En aucun cas, nous ne payons le coût du revêtement de sol, de main-d'oeuvre, d'installation ou d'autres frais y
afférents.
Cette garantie ne couvre que les défaillances dues à des défauts de matériel ou de fabrication qui surviennent lors d'une utilisation normale et
ne s'étend pas aux changements de couleur dus à l'altération normale ou aux dommages résultant de l'utilisation abusive ou par négligence, par
l’utilisation commerciale, le non-respect des instructions de montage et le manuel d'emploi du propriétaire (y compris le bon ancrage de l'abri), la
peinture, les forces de la nature et à d'autres causes qui sont hors de notre contrôle.
Les réclamations sous cette garantie doivent être faites dans la période de garantie en composant le
numéro 1-800-483-4674 ou par courrier par un ticket de caisse daté et photographie claire de la part à:
U.S. Polymers Inc.1057 S. Vail Ave Montebello, CA90640, United States of America.
Nous nous réservons le droit de supprimer ou de modifier des composants. Si un élément a été supprimé ou n'est pas disponible, US Polymers,
Inc se réserve le droit de substituer un élément de qualité égale comme ça peut être compatibles.
Limites et exclusions
Il n'y a pas de garantie expresse, sauf comme indiqué ci-dessus. Le garant ne doit pas être tenu responsable des dommages fortuits ou
consécutifs resultant de l'utilisation de ce produit, ou découlant de toute violation de cette garantie. Toutes les garanties expresses sont limitées à la
période de garantie énoncée ci-dessus. Certains états n'autorisent pas l'exclusion ou la limitation de la durée d'une garantie implicite, de sorte que les
limitations ci-dessus peuvent ne pas s'appliquer à vous.
Cette garantie vous donne des droits légaux spécifiques et vous pouvez également avoir d'autr es droits qui varient d'un État à l'autre ou d'un
pays à l'autre.
(ES) Cobertizo para Herramientas Duramax
Garantía Limitada durante 15 años
U.S. Polymer Inc. enviará una pieza de recambio sin coste alguno en caso de defectos de fábrica o en los materiales durante un periodo de
15 años a partir de la fecha de adquisición.
Esta garantía se aplica oenicamente al comprador original. Es necesario presentar un recibo u otra prueba de compra antes de prestar los
servicios especificados en esta garantía. En ningoen caso se sufragará el coste de la instalación de suelos, mano de obra, instalación o cualquier
otro gasto relacionado.
Esta garantía cubre exclusivamente los defectos de fabricación o en los materiales que aparezcan durante el uso habitual y no se aplica a los
cambios de color causados por la exposición normal a los elementos o a daños ocasionados por un uso inapropiado o negligente, usos comerciales,
no seguir las instrucciones de montaje o el manual del propietario (incluyendo el correcto anclaje del cobertizo), aplicación de pintura, causas
naturales o cualquier otra ajena a nuestro control.
Las reclamaciones cubiertas por la presente garant’a pueden efectuarse dentro del periodo de garantía llamando al teléfono 1-800- 483-4674 o
por correo postal con una prueba de compra fechada y una fotografía nítida de la pieza dañada a:
U.S. Polymers Inc.1057 S. Vail Ave Montebello, CA90640, United States of America.
Nos reservamos el derecho a abandonar la fabricación de un componente o cambiarlo. En caso de no continuar fabricando un componente o
no estar éste disponible, U.S. Polymers, Inc. se reserva el derecho a sustituirlo por otro componente de idéntica calidad que sea compatible
Límites y Exclusiones
No existe ninguna garantía expresa más alla de las indicadas anteriormente. El garante no aceptará ninguna responsabilidad por daños
incidentales o emergentes ocasionados por el uso de este producto o por cualquier infringimiento de esta garantía. Todas las garantías expresadas
se aplican al periodo de garantía anteriormente señalado. Algunos estados no aceptan exclusiones o limitaciones en la duración de las garantías
implícitas, por lo que las limitaciones anteriormente expresadas pueden no ser de aplicación para usted.
Esta garantía otorga derechos legales específicos. Usted puede disfrutar también de otros derechos que pueden ser diferentes para cada
estado o país.
1

2
(DE) Duramax Gerätehaus
15 Jahre beschränkte Garantie
U.S. Polymer Inc. liefert im Falle von Material- oder Verarbeitungsfehlern kostenlos Ersatzteile für einen Zeitraum von 15 Jahren ab dem
Kaufdatum.
Diese Garantie gilt nur für den Erstkäufer. Für die Inanspruchnahme der Garantieleistungen ist eine Kaufquittung oder ein sonstiger
Kaufnachweis vorzulegen. Wir übernehmen keinesfalls die Kosten für Bodenbeläge, Stundenlohn, Montage oder andere damit zusammenhängende
Kosten.
Diese Garantie deckt nur Material- oder Verarbeitungsfehler, welche beim normalen Gebrauch auftreten, jedoch nicht Verfärbungen aufgrund von
normalen Witterungseinflüssen, Beschädigung aufgrund von Missbrauch oder Vernachlässigung, gewerblichen Gebrauch, Nichtbeachtung der
Montageanleitung und des Benutzerhandbuchs (einschl. angemessener Verankerung des Schuppens), Anstrich, Naturgewalt und sonstigen
Ursachen außerhalb unserer Kontrolle.
Garantieansprüche sind innerhalb der Garantiezeit anzumelden, und zwar telefonisch unter 1-800-483-4674 oder auf dem Postweg mit einer
datierten Verkaufsquittung und einem deutlichen Foto des zu ersetzenden Teils, gerichtet an:
U.S. Polymers Inc.1057 S. Vail Ave Montebello, CA 90640, United States ofAmerica.
Wir behalten uns das Recht vor, die Herstellung bestimmter Teile einzustellen oder zu verändern. Wenn ein Teil nicht mehr hergestellt wird oder
nicht verfügbar ist, behält U.S. Polymers, Inc. sich das Recht vor, es durch ein kompatibles Teil von gleicher Qualität zu ersetzen.
Haftungsbeschränkungen und –ausschlüsse
Außer der oben angegebenen Garantie werden keine ausdrücklichen Garantien übernommen. Der Garantiegeber haftet nicht für Neben- oder
Folgeschäden, die sich aus der Benutzung des Produkts oder aus einem Verstoß gegen diese Garantiebedingungen ergeben.
Alle ausdrücklichen Garantien sind auf die oben angebene Garantiezeit beschränkt. In einigen Staaten sind Ausschlüsse oder Beschränkung
einer Garantiezeit nicht gestattet. Daher ist es möglich, dass die oben genannten Beschränkungen für Sie nicht zutreffen.
Diese Garantie gibt Ihnen spezifische Rechte und womöglich haben Sie weitere Rechte, die von Staat zu Staat und von Land zu Land
verschieden sind.
(PL) Magazynek do przechowywania Duramax
Gwarancja na 15 lat
U.S. Polymer Inc. wyśle za darmo części zamienne w przypadku wad materiałowych i produkcyjnych stwierdzonych w ciągu 15 lat od daty
zakupu.
Gwarancja dotyczy bezpośredniego kupującego. Zanim gwarancja zostanie zrealizowana, należy przedstawić paragon lub inny dowód z datą
zakupu. W żadnym przypadku nie będą zwracane koszty budowy podłogi, montażu i żadne inne powiązane z tym koszty.
Niniejsza gwarancja pokrywa tylko wady materiałowe i produkcyjne, stwierdzone podczas normalnego użytkowania nie obejmuje zmiany koloru,
powstałej w wyniku naturalnego starzenia się pod wpływem warunków atmosferycznych albo zniszczeń powstałych w wyniku użytkowania
niezgodnego z przeznaczeniem, użytkowania komercyjnego, instalacji niezgodnej z zaleceniami i instrukcją dla użytkownika (w tym prawidłowe
posadowienie magazynka), malowania, sił natury i innych przyczyn niezależnych od producenta.
Reklamacje na podstawie niniejszej gwarancji powinny być złożone w ciągu okresu gwarancyjnego telefonicznie pod numerem 1-800-483-4674
albo listownie z dołączeniem paragonu z datą i wyraźną fotografią wadliwej części na adres:
U.S. Polymers Inc.1057 S. Vail Ave Montebello, CA 90640, United States ofAmerica.
Pozostawiamy sobie prawo do wycofania ze sprzedaży lub zmiany części. Jeżeli część była wycofana ze sprzedaży lub nie jest dostępna, U.S.
Polymers, Inc. pozostawia sobie prawo do jej zamiany na odpowiednią część o identycznej jakości.
Ograniczenia i wyjątki
Producent nie daje innej gwarancji poza wyżej wymienioną . Gwarant nie ponosi odpowiedzialności za przypadkowe lub celowe zniszczenia w
wyniku użytkowania tego produktu albo powstałe na skutek naruszenia warunków tej gwarancji. Wszystkie gwarancje umowne ograniczone są do
wyżej wspomnianego okresu. W niektórych państwach nie ma wyjątków albo ograniczeń w czasie obowiązywania gwarancji, więc powyższe
ograniczenia mogą Cię nie dotyczyć.
Niniejsza gwarancja daje ci szczególne prawa, oprócz tego możesz mieć inne prawa wynikające z obowiązujących przepisów prawnych.
(NL) Duramax Opbergschuur
Beperkte garantie voor 15 jaar
US Polymer Inc zal elk onderdeel dat fabricagefouten of materiaalfouten vertoont gratis vervangen tijdens een periode van 15 jaar vanaf de
aankoopdatum.
De garantie geldt enkel voor de oorspronkelijke koper. Om recht te hebben op de garantie moet er wel een origineel aankoopbewijs worden
voorgelegd. In geen geval betalen wij kosten die werden gemaakt voor vloerwerk, arbeid, montage of andere kosten die daarmee te maken hebben.
De garantie dekt enkel problemen veroorzaakt door fabricage- of materiaalfouten die zich voordoen tijdens het normale gebruik van de schuur en
slaan niet op kleurveranderingen tengevolge van weersomstandigheden of schade aan de schuur door een gebrek aan onderhoud, omdat de schuur
voor commerciële doeleinden is gebruikt of omdat de montage-instructies en de handleiding niet werden gerespecteerd (met inbegrip van een
behoorlijke verankering van de schuur), tengevolge van schilderwerken, natuurkrachten of andere oorzaken waarover wij geen controle hebben.
De garantie kan enkel worden ingeroepen worden tijdens de garantieperiode door het nummer 1-800-483-4674 op te bellen of een gedateerde
aankoopbon en een duidelijke foto te sturen naar het volgende adres:
U.S. Polymers Inc. 1057 S. Vail Ave Montebello, CA90640, United States of America.
Wij behouden ons het recht voor de productie van bepaalde onderdelen op te schorten of onderdelen te veranderen. Als een onderdeel niet
meer wordt aangemaakt of niet meer voorhanden is, dan behoudt U.S. Polymers Inc. zich het recht voor een gepast onderdeel aan te bieden van
vergelijkbare kwaliteit.
Limitaciones y Exclusiones
De garantie is beperkt tot wat hierboven is vermeld. De garantiegever kan niet aansprakelijk worden gesteld voor schade die het gevolg is van
het gebruik van dit product of die het gevolg is van een inbreuk op de garantie. De garantie kan enkel worden ingeroepen worden tijdens
bovenvermelde garantieperiode. In sommige staten kan een garantieperiode niet worden beperkt en dus is het mogelijk dat bovenstaande beperking
op u niet van toepassing is.
De garantie verleent u speciale rechten en het is mogelijk dat u over nog andere rechten beschikt die van staat tot staat en van land tot land
verschillen.

3
CAUTION
Sharp
Edges
1. Check your local building codes regarding footings, location, etc.
2. Select a site that allows enough working space around the shed.
3. Determine building foundation and anchor system.
4. Read and understand the Owner’s manual enclosed in the package.
5. Follow all directions and dimensions thoroughly.
6. Follow the steps given in the manual carefully for correct assembly.
7. Make sure all parts are present before you start assembling.
8. BE SAFE : Follow safety instructions and avoid injury.
(See inside page).
9. GROUND MUST BE EVEN : Make sure the foundation frame lies flat on the ground. If the earth bed is uneven, remove
sod and other debris and level it with a flat shoval.
10. Separate contents of the carton by the part number and review the list. Be sure you have all the necessary parts for your shed.
Refer Owner’s manual for part list.
(EN) SAFETY & PRECAUTIONS
For your own safety, please read and follow these instructions during the shed assembly.
Safety First !
1. Always wear work gloves, long sleeves and eye protection during assembly of the shed. Some
pieces of the shed contain sharp edges and can cause injury.
2. Be cautious with the tools used for the assembly of the shed.
Familiarize yourself with the operation of all the power tools.
3.Children and pets should be kept away from the assembly site to avoid any
distractions and accidents.
4. When using a step ladder, make sure it is on even ground and
fully open with the safety latch in place. Never concentrate your full
weight on the roof or any part of the shed.
5. Do not attempt to assemble the shed on a windy day.
Shed panels can be whipped across by the wind making the
worksite difficult and dangerous.
Although this unit does not require any maintenance, care should be taken to prolong the life of your shed.
It is for once time assembling and set up, no purpose of re-using.
ROOF : Keep roof clean of leaves and snow with long handled, soft bristled broom. Heavy amounts of snow on the roof can
damage the shed making it unsafe.“Do not walk on roof surfaces! Risk of falling!”.
WALLS : Do not rest any object against the wall panels of the shed.
DOORS : Keep doors closed to prevent wind damage.
FASTENERS : Regularly check your shed for loose screws, bolts, nuts, etc. And retighten them as necessary.
MOISTURE : With changing temperatures, condensation will accumulate inside the shed. Good ventilation will help in
regulating and avoid moisture.
TIP : A noncorrosive caulking is helpful to seal the shed.
Wear eye protection when using any form of power tools. Do not use voltage power tools in a wet or damp
enviornment to avoid electric shock.
Do not use any part of the shed as a means of personal support while attaching components during assembly.
The shed must be constructed on a solid base foundation. A concrete pad or a large size concrete patio
stone squares is recommended for suitable floor base. Make sure it is firm and level and will allow drainage
away from the site. The base foundation should be at least 4 inches (100mm) larger than the shed dimensions.
Please refer to the front page of your owner’s manual for the exterior dimensions of the shed. Manufacturer is
not responsible for the choice and construction of the foundation.
For a concrete pad base, prepare a level bed for a firm footing layer of crushed stone. The concrete pad
should then be poured to a thickness of 4 inches (100mm) to 5 inches (125mm). Allow to dry thoroughly
for at least 48 hours.
Your shed must be firmly anchored to the concrete pad or large concrete patio stone squares, to help protect
against damage in high winds.
Important
Care & Maintenance
Before You Begin...
DO NOT store Inflammable, Hazardous and Swimming pool
chemicals in your building. Combustibles and corrosive must
be stored in air tight containers. Enforce NO SMOKING.

4
1. Vérifiez vos codes de la construction et de l'habitation concernant la pose, l'emplacement, etc.
2. Choisissez un site qui laisse assez d'espace de travail autour de l'abri.
3. Déterminez la surface de l'abri et fixez les système d'ancrage aux fondations.
4. Lisez et analysez le manuel de l'abri glissez dans le paquet.
5. Suivez scrupuleusement toutes les consignes et les dimensions.
6. Suivez les étapes scrupuleusement les étapes de montage afin de monter correctement votre abri.
7. Assurez-vous que toutes les pièces sont présentes avant de débuter le montage.
8. ATTENTION : Suivez les consignes de sécurité afin d'évitez tous dommages physiques ou corporels.
9. LA SURFACE DE POSE DOIT PLANE ET DE NIVEAU : Assurez-vous que les fondations sont posées sur un sol plan et de
niveau. Si le lit de sol est inégal, enlevez le gazon et autres débris et nivelez-la avec une pelle.
10. Classez l'ensemble des pièces par numéro et confrontez -les à la liste de la notice. Soyez sûr que vous avez toutes les pièces
nécessaires pour le montage de votre abri.
(FR) SÉCURITÉ ET PRÉCAUTIONS
Pour votre propre sûreté, svp lisez et suivez ces instructions avant et pendant le montage.
Safety Premier !
1. Portez toujours des gants de travail, de longues manches et des lunettes de protection des yeux
pendant le montage de l'abri Quelques morceaux de l'abri contiennent des bords agressifs et peuvent
causer des dommages.
2. Soyez prudent avec les outils utilisés pour le montage de l'abri.
Familiarisez-vous avec le fonctionnement de toutes machines-outils.
3. Ne laissez pas les enfants et les animaux jouer autour de l'abri lors du
montage, afin d'éviter tous risques d'accidents.
4. Si vous utilisez une échelle, assurez-vous qu'elle soit posée sur un sol plan et de niveau.
Ouvrez-là entiérement et assurez-vous que les verrous de sécurité des charnières sont bien
enclenchés. Ne jamais marcher sur le toit ou tout autre partie de l'abri.
5. N'essayez pas d'assembler l'abri en cas de vent fort. Les panneaux de
l'abri peuvent s'envoler rendant le montage dangeureux.
Bien que cette unité n'exige aucun entretien, le soin devrait être pris afin de prolonger la vie de votre hangar.il est
temps pour une fois le montage et mis en place, aucun objectif de réutilisation.
TOIT : Le toit doit être nettoyé avec un balai mou et à long manche afin de le débarrasser des feuilles et de la neige.
Une grande quantité de neige sur le toit peuvent endommager le hangar le rendant peu sûr. “Ne pas marcher sur des
surfaces de toit ! Risque de tomber! ”.
MURS : Ne mettez aucun objet contre les panneaux de mur
PORTES: Assurez-vous que les portes sont fermées afin d’empêcher les risques de dommages liés aux vents forts
PIÈCES DE FIXATION : Examinez régulièrement votre les vis, boulons, écrous, de votre abri. En cas de doute
resserez-les
HUMIDITÉ : Avec les températures changeantes, la condensation s'accumulera à l'intérieur de l'abri. La bonne
ventilation aidera à l'évacuation de l'humidité.
CONSEIL : Un calfeutrage non corrosif est utile afin de renforcer la durée de vie de l'abri.
Portez des lunettes de protection lors de l'utilisation de machine-outils. N'utilisez pas de machine-outils éléctriques
dans un environnement humide afin d’éviter tous chocs éléctriques.
N'utilisez pas de composant de l'abri en tant qu'échelle lors du montage de l'abri.
L'abri doit être construit sur des fondations solides. Une dalle de béton armé ou de dalles de béton de
grandes dimensions est recommandé. S'assurer qu'elle est plane et de niveau et permettra le drainage de l'eau. La
dalle devra faire 10 cm de plus que le s dimensions extérieures de l'abri. Veuillez vousréférer à la première page de
votre manuel pour les dimensions extérieures de l'abri. Le fabricant n'est pas responsable du choix et de la
construction des fondations.
Le tampon de béton doit ensuite être coulé sur une épaisseur de 4 pouces (100 mm) à 5 pouces (125 mm).
Laisser sécher complètement pendant au moins 48 heures.
Votre abri doit être fermement ancré à la dalle, pour se protéger contre les risques de dommages liés aux vents forts.
Important
Soin et entretien
Avant de commencer...
NE pas stocker de produits chimiques inĐammables, dangereux et piscine
dans votre immeuble. Les combustibles et les produits chimiques doivent être
stockés dans des armoires étanches et isolées. N'appliquer fuvmeur.
ATTENTION
Bords
agressifs

5
1. Cheque os detalhes da construção local relacionados à fundação, localização, etc.
2. Escolha um local espaçoso que permita a realização de trabalho ao redor do galpão.
3. Defina o sistema de fixação e fundação da construção.
4. Leia e entenda o Manual do Proprietário incluso nesta embalagem.
5. Siga atentamente todas as instruções e dimensões.
6. Siga cuidadosamente os passos descritos neste manual para correta montagem.
7. Certifique-se de que todas as peças estejam presentes antes de iniciar a montagem.
8. FIQUE SEGURO : Siga as instruções de segurança e evite ferimentos.
(Veja na pagina).
9. O TERRENO DEVE ESTAR PLANO : Certifique-se de que a base assenta-se de forma plana ao solo. Se o
mesmo estiver irregular, remova protuberâncias e detritos e nivele-o com uma pá.
10. Separe o conteúdo da caixa pelo número da peça e revise a lista. Certifique-se de que você tem todas as
peças necessárias para o seu galpão. Consulte o Manual do Proprietário para lista de peças.
(PT) SEGURANÇA E CUIDADOS
Para sua própria segurança, leia e siga as instruções durante a instalação do galpão.
Segurança em primeiro lugar !
1. Utilize sempre luvas, roupas de mangas compridas e proteção para os olhos durante
a instalação do abrigo. Algumas peças contêm arestas que podem causar ferimentos..
2. Use as ferramentas para a instalação do galpão com cuidado.
Familiarize-se com o uso e funcionamento de todas as ferramentas elétricas.
3. Crianças e animais de estimação devem ser mantidos afastados do local de instalação para
evitar distrações e possíveis acidentes.
4. Ao utilizar escadas, certifique-se de que o local seja espaçoso, que o chão seja plano e que a trava de
segurança esteja acionada. Nunca concentre todo o peso do seu corpo no telhado ou em qualquer
outra parte do galpão.
5. Não monte o galpão num dia de muito vento. Partes do mesmo poderão ser levadas
pelo vento tornando o local de trabalho difícil e perigoso.
Embora essa unidade não requeira nenhum tipo de manutenção, cuidados devem ser tomados para prolongar a
vida útil do galpão. É pela primeira vez vez montar e configurar, nenhum propósito de re-uso.
TELHADO : Mantenha o telhado limpo de folhas e neve com uma vassoura de cerdas macias e cabo longo.
Grande quantidade de neve pode danificar o galpão, tornando-o um lugar perigoso. “Não ande em superfícies do
telhado! Risco de queda”!.
PAREDES: Não apóie nenhum objeto nos painéis de parede do galpão.
PORTAS: Mantenha as portas fechadas para evitar danos causados pelo vento.
FIXADORES: Procure regularmente possíveis parafusos e porcas frouxas. Regule-os sempre que necessário.
UMIDADE: Com mudanças de temperatura, poderá haver acúmulo de condensação dentro do galpão. Boa
ventilação ajudará a evitar umidade.
DICA: Calafetagem não corrosiva pode ser útil no selamento do galpão.
Use óculos de proteção ao utilizar qualquer ferramenta elétrica. Não use ferramentas elétricas em ambiente
molhado ou úmido para evitar choque elétrico.
Não utilize qualquer parte do galpão como um meio de suporte para o corpo durante a montagem.
A vertente deve ser construída em uma fundação baixa contínua. Uma almofada concreta ou uns quadrados
concretos de uma pedra do patio do tamanho grande são recomendados para a base apropriada do assoalho.
Certifique-se que é empresa e nível e permitirá a drenagem longe do local. A fundação baixa deve ter pelo menos
4 polegadas (100mm) maior do que as dimensões da vertente. Consulte por favor à página dianteira do manual do
seu proprietário para as dimensões exteriores da vertente. O fabricante não é responsável para a escolha e a
construção da nota
Para uma base concreta da almofada, prepare uma cama do nível para uma camada de fundamento da empresa
de pedra esmagada. A almofada concreta deve então ser derramada a uma espessura de 4 polegadas (100mm) a
5 polegadas (125mm). Reserve para secar completamente no mínimo 48 horas
Seu galpão deverá estar firmemente fixado a um pavimento de concreto ou em pedras de concreto para evitar
qualquer dano durante ventos fortes.
Importante
Cuidado e Manutenção
Antes de iniciar a montagem...
Não guarde produtos químicos inĐamáveis, perigosos e piscina no
seu prédio. Combustíveis e corrosivos devem ser armazenados em
recipientes herméticos. Impor a não fumar.
CUIDADO
Arestas

6
1. Consulte los códigos de construcción locales relativos a cimentación, localización etc.
2. Seleccione un sitio que permite suficiente espacio para trabajar alrededor de la nave.
3. Determinar la la fundación de la construcción y sistema de anclaje.
4. Lea y entienda el manual de instrucciones incluido en el paquete.
5. Siga las indicaciones y dimensiones exhaustivamente.
6. Siga los pasos indicados en el manual para un montaje correcto.
7. Asegúrese de que no le falte ninguna pieza antes de empezar el montaje.
8. SEA SEGURA : Para evitar lesiones siga las instrucciones de seguridad.(Véase pagina interior ).
9. El SUELO DEBE SER NIVELADO : Asegúrese de que el marco de la base quede plano en el suelo .Si la base del suelo esta
desnivelado se recomienda que quite césped y otros escombros y lo nivele con una pala plana.
10. Disponga del contenido de la caja según numeración de las partes , revisando la lista.Asegúrese de que no le
falte ninguna pieza para el montaje de su cobertizo. Consulte el manual del propietario para revisar el nombre de las piezas.
(ES) SEGURIDAD Y PRECAUCIONES
Para su propia seguridad, lea y siga las instrucciones durante el ensamblaje del cobertizo.
Safety Primero !
1. Use siempre guantes de trabajo, mangas largas protección ocular durante el montaje de la nave .
Algunas piezas de la nave tienen bordes afilados y pueden causar lesiones.
2. Tenga cuidado con las herramientas utilizadas para el montaje de la nave.
Familiarícese con el funcionamiento de todas las herramientas eléctricas.
3. Los niños y los animales domésticos deben mantenerse alejados de las instalaciones
de ensamblaje para evitar cualquier distracción o accidente.
4. Cuando se utiliza una escalera de tijera , asegúrese de que este sobre
un fondo plano y completamente abierto con el pasador de seguridad en su lugar.
Nunca concentre todo su peso sobre el techo o cualquier parte de la nave.
5. No intente montar el cobertizo durante un día ventoso. Los paneles
de cobertizo pueden ser azotados a través por el viento que hace
las obras difíciles y peligrosas.
Aunque esta unidad no requiere mantenimiento, se debe tener cuidado para prolongar la vida de su caseta.Es tiempo
por una vez ensamblar y configurar, sin propósito de volver a usar.
CUBIERTA: Mantenga el techo limpio de hojas y la nieve con mango largo y cerdas suaves escoba. Grandes cantidades de
nieve en el techo pueden dañar el cobertizo y hacer peligrosa. “No camine sobre superficies de techo! Riesgo de caer”!.
PAREDES: No apoye ningún objeto contra los paneles de la pared del cobertizo.
PUERTAS: Mantenga las puertas cerradas para prevenir daños por el viento.
SUJETADORES: Verifique periódicamente su cobertizo para los tornillos, pernos, tuercas, etc, y volver a apretarlo en caso
necesario.
HUMEDAD: Con los cambios de temperatura, la condensación se acumulará en el interior del cobertizo. Una buena
ventilación ayudará en la regulación y evitar la humedad.
SUGERENCIA: Un sellador no corrosivo ayudaría a sellar la nave.
Use protección ocular cuando utilice cualquier tipo de herramientas eléctricas. No utilice herramientas de tensión
en un ambiente húmedo o mojado para evitar descargas eléctricas.
No utilice ninguna parte de la nave como un medio de apoyo personal mientras coloca los componentes durante el montaje.
La vertiente se debe construir en una fundación sólida. Un cojín concreto o los cuadrados concretos del tamaño
grande de una piedra del patio se recomiendan para la base conveniente para el suelo. Asegúrese de que sea firme y
llana y que permita drenaje lejos del sitio. La fundación baja debe ser por lo menos de 4 pulgadas (100m m) más grande
que las dimensiones de la vertiente. Refiera por favor a la página delantera del manual de su dueño para las dimensiones
exteriores de la vertiente. El fabricante no es responsable de la opción y de la construcción de la fundación.
Para una base concreta del cojín, prepare una cama llana para una capa de pie firme de la piedra machacada. El cojín
concreto se debe entonces verter a un grueso de 4 pulgadas (100m m) a 5 pulgadas (125mm). Permita secarse a fondo
por lo menos 48 horas.
Su cobertizo debe ser firmemente anclado al bloc de concreta o cuadrados(plazas) de piedra de patio g randes concretos,
ayudando a proteger contra el daño del viento fuertes.
Importante
Cuidado & Mantenimiento
Antes de comenzar ...
No guarde productos químicos inflamables, peligrosos y piscina en el
edificio. Combustibles y corrosivos deben guardarse en recipientes
herméticos un aire. No aplicar el fumar.
PRECAUCION
Bordes
Afilados

7
VORSICHT
Scharfe
kanten
1. Überprüfen Sie die lokalen Bauvorschriften hinsichtlich des Fundaments, des Standorts usw.
2. Wählen Sie einen Standort, der genügend Arbeitsraum um den Schuppen erlaubt, aus.
3. Stellen Sie das Baufundament und das Ankersystem sicher.
4. Lesen Sie das der Verpackung beigefügte Benutzerhandbuch durch.
5. Befolgen Sie alle Anweisungen und Abmessungen mit höchster Sorgfalt.
6. Befolgen Sie die in der Anleitungen vorgeschriebenen Schritte mit Sorgfalt,
um eine korrekte Zusammenstellung ( Montage ) zu gewährleisten.
7. Stellen Sie gleich vor dem Beginn der Montage sicher, dass alle Teile vorhanden sind.
8. BITTE VORSICHTIG AUFBAUEN. Befolgen Sie die Sicherheitsvorschriften, um persönliche Gefärdungen zu
vermeiden.(Siehe das Einlageblatt).
9. DER BODEN MUSS EBEN SEIN: Stellen Sie sicher, dass der Fundamentrahmen flach auf dem Boden liegt. Falls der Boden
uneben sein sollte, nivellieren Sie ihn mit Hilfe einer flachen Schaufel.
10. Entnehmen Sie die Inhalte des Kartons nach Teilennummern und überprüfen Sie die Liste. Sorgen Sie dafür, dass alle
notwendigen Teile für den Schuppen vorliegen. Beziehen Sie sich auf das Benutzerhandbuch für die Liste der Teile.
(DE) SICHERHEITS U.- VORSICHTSMASSNAHMEN
Um für Ihre eigene Sicherheit zu sorgen, bitte lesen Sie die folgenden Anweisungen durch und befolgen Sie siewährend
der Schuppenmontage.
1. Bitte tragen Sie immer Sicherheitshandschuhe, lange Ärmel und Augenschutz während
derSchuppenmontage.Einige Teile des Schuppens können möglicherweise scharfe Kanten
besitzen,und können Verletzungen verursachen.
2. Bitte seien Sie vorsichtig, hinsichtlich der Benutzung der Werkzeuge
während des Aubaus des Gerätehauses.
Befolgen Sie die Bedienungsanleitungen aller Elektrowerkzeuge.
3. Kinder und Haustiere müssen vom Standort der Montage ferngehalten werden, um
jegliche Ablenkungen und Verletzungen zu vermeiden.
4. Wenn eine Trittleiter benutzt wird, stellen Sie sicher, dass sie auf ebenem Boden steht und völlig
geöffnet ist und gesperrt. Bitte niemals mit vollem Gewicht auf irgendein Teil des Dachs oder
Schuppens stehen..
5. Bitte vermeiden Sie, den Schuppen an einem windigen Tag zusamenzustellen. Die
Schuppenpaneele können durch den W ind weggeschleudert werden, wodurch die
Arbeit erschwert und gefährlich wird.
Obwohl diese Einheit keine Wartung benötigt, sollten Sie für eine lange Lebensdauer des Gerätehauses folgendes
beachten.É pela primeira vez vez montar e configurar, nenhum propósito de re-uso.
DACH: Halten Sie Ihr Dach frei von Baumblättern und Schnee mit H ilfe eines langen weichen Besens. Hohe Mengen
Schnee auf dem Dach können Ihr Gerätehaus beschädigen und unsicher machen. “Gehe nicht auf Dachflächen!
Absturzgefahr”! .
WÄNDE: Bitte stellen Sie keinerlei Gegenstände gegen die Wandpaneele d es Schuppen.
TÜREN: Halten Sie die Türen immer geschlossen, um mögliche Beschädigungen durch Wind zu vermeiden
VERSCHLÜSSE: Überprüfen Sie die Schrauben, Riegel, Muttern usw, regelmäßig und befestigen Sie diese falls notwendig.
FEUCHTIGKEIT: Wegen der wechselnden Temperaturen, kann es im Gerätehaus feucht werden. Gute Belüftung kann bei der
Regulierung der Temperatur und der Vermeidung der Feuchtigkeit behilflich se in.
HINWEIS: Korrosionsfreies Abdichtungsmaterial zum Abdichten des Schuppen kann verwendet werden.
Bitte tragen Sie einen Augenschutz, während Sie die Elektrowerkzeuge benutzen. Bitte v erwenden Sie die
elektrischen W erkzeuge nicht in einer nassen oder feuchten Umgebung, um einen Stromschlag zu vermeiden.
Bitte benutzen Sie kein Teil des Schuppens als Hilfsmittel für den Zusammenbau der Kompo nenten.
Das Gerätehaus muss auf einem festen Fundament errichtet werden. Eine Betonauflage oder grosse quadratische Betonhofsteine
werden als Bodenkonstruktion empfohlen. Stellen Sie sicher, dass das Fundament fest und waagerecht ausgerichtet ist und die
Entwaesserung weg vom Aufstellungsort ermoeglicht. Die Abmessung des Fundamentes sollte mindestens 4 Zoll (100 mm) grösser sein
als die Abmessung des Gerätehauses. Beachten Sie bitte die Aussenabmessungen des Gerätehauses (siehe Vorderseite Ihres
Bedienerhandbuches). Der Hersteller des Grätehauses ist nicht fuer die Wahl und den Aufbau des Fundamentes verantwortlich.
Fuer eine Betonauflage bereiten Sie ein waagerecht ausgerichtetes Bett vor. Die Betonauflage sollte eine Staerke von
4 Zoll (100 mm) bis 5 Zoll (125 mm) aufweisen. Darunter sollten Sie fuer eine frostfeste Kiesschicht nach ortsueblichen
Vorgaben sorgen.
Ihr Gerätehaus muss an der Betonunterlage oder den großen quadratischen Innenhofsteine fest verankert sein,um
Beschädigung durch starken W ind zu verhindern.
WICHTIG
Pflege & Wartung
Bevor Sie anfangen......
Speichern Sie keine brennbaren, Swimmingpool und gefährliche
Chemikalien in Ihrem Gebäude. Brenn- und Korrosionsstoffe müssen in
luftdichten Containern gelagert werden. Erzwingen Sie nicht rauchen.
Sicherheit an erster stelle !

8
UWAGA
Ostre
krawędzie
1. Sprawdź lokalne przepisy budowlane dotyczące fundamentów, lokalizacji, itd.
2. Wybierz miejsce, które zapewnia wystarczająco dużo przestrzeni do pracy.
3. Wybierz rodzaj fundamentów oraz system mocowania.
4. Przeczytaj ze zrozumieniem załączony podręcznik użytkownika.
5. Dokładnie stosuj się do wskazówek i podanych wymiarów.
6. W celu wykonania prawidłowego montażu postępuj zgodnie z zaleceniami podanymi w podręczniku.
7. Zanim rozpoczniesz montaż, upewnij się, że wszystkie części są na miejscu.
8. ZACHOWAJ OSTROŻNOŚĆ : Aby uniknąć zranienia, postępuj zgodnie ze wskazówkami dotyczącymi
bezpieczeństwa
(Zob. strona wewnętrzna).
9. PODŁOŻE MUSI BYĆ WYRÓWNANE : Upewnij się, że rama fundamentowa leży płasko na podłożu. Jeśli
podłoże jest nierówne, usuń darń oraz inne odpady i wyrównaj powierzchnię łopatą.
10. Rozdziel zawartość opakowania zgodnie z numerami części i przejrzyj listę. Upewnij się, że posiadasz wszystkie
elementy potrzebne do budowy magazynka. W celu sprawdzenia listy części zajrzyj do podręcznika użytkownika
(PL) ŚRODKÓW OSTROŻNOŚCI
Dla własnego bezpieczeństwa przeczytaj poniższe instrukcje i podczas montażu magazynka postępuj zgodnie z nimi.
Bezpieczeństwo przede wszystkim!
1. Podczas montażu magazynka zawsze miej na sobie rękawice ochronne, długie rękawy i okulary
ochronne. Niektóre części magazynka mają ostre krawędzie i mogą spowodować zranienia.
2. W trakcie montażu magazynka ostrożnie używaj narzędzi.
Zapoznaj się z obsługą narzędzi elektrycznych.
3.Aby zapobiec wypadkom nie należy dopuszczać dzieci ani zwierząt domowych w pobliże
miejsca montażu.
4. Korzystając z drabiny, upewnij się, że stoi na równym podłożu i jest
całkowicie rozłożona i zamknięta na zatrzask.
Pod żadnym pozorem nie należy opierać całego ciężaru ciała na dachu
lub innej części magazynka.
5. Nie należy montować magazynka, gdy wieje silny wiatr.
Panele magazynka mogą zostaćporozrzucane po całym miejscu budowy,
czyniąc je trudnym do opanowania i niebezpiecznym.
Pomimo tego, że produkt ten nie wymaga konserwacji, należy jednak go czyścić, aby przedłużyć okres jego
użytkowania.To jest raz na czas montażu i umieszczać w górze, nie celem ponownego wykorzystywania.
DACH: Usuwaj z dachu liście i śnieg przy pomocy długiej szczotki z miękkim włosiem. Duże ilości śniegu mogą
spowodować uszkodzenie magazynka, co może okazać się niebezpieczne dla użytkownika.
“Nie wchodź na powierzchni dachu! Ryzyko upadku”!
ŚCIANY: Nie opieraj żadnych przedmiotów o panele ścienne magazynka.
DRZWI: Zamykaj drzwi, by zapobiec uszkodzeniom wywołanym przez wiatr.
ELEMENTY ŁĄCZĄCE: Regularnie sprawdzaj, czy nie obluzowały się śruby, wkręty, nakrętki, itd. W razie
konieczności dokręcaj elementy łączące.
WILGOĆ: Pod wpływem zmieniającej się temperatury powietrze w magazynku może się skraplać. Dobra wentylacja
pomoże uregulować poziom wilgoci i jej unikać.
WSKAZÓWKA: Odporny na korozję uszczelniacz pomoże zakonserwować magazynek.
Używając elektronarzędzi zawsze zakładaj okulary ochronne. Aby uniknąć porażenia, nie używaj elektronarzędzi
zasilanych z sieci, gdy jest mokro.
Nie używaj żadnej części magazynka jako oparcia podczas składania elementów.
Magazynek należy zbudować na trwałej podstawie. Ława fundamentowa lub duża betonowa płyta tarasowa w kształcie
kwadratu to odpowiednie materiały na jego fundamenty. Upewnij się, że są one stabilne i wyrównane oraz że umożliwią
odpływ wody z miejsca budowy. Wymiary podstawy powinny być co najmniej o 100 mm większe niż wymiary
magazynka. W celu zapoznania się z zewnętrznymi wymiarami magazynka zajrzyj na pierwszą stronę podręcznika
użytkownika. Producent nie odpowiada za wybór i budowę podstawy.
W przypadku wylewania ławy fundamentowej przygotuj podłoże z warstwy kamiennego tłucznia. Następnie wylej ławę
fundamentową na grubość od 100 do 125 mm i zostaw do związania na co najmniej 48 godzin
W celu ochrony przed zniszczeniem przez silne wiatry, magazynek musi być mocno przymocowany do betonowej ławy lub
dużych kwadratowych betonowych płyt tarasowych.
WAŻNE
Konserwacja i czyszczenie
Przed rozpoczęciem montażu...
NIE przechowywania chemikaliów palne, niebezpiecznych i basen w
budynku. Brandbare en bijtende stoffen moeten worden opgeslagen
in een luchtdichte container. Egzekwować zakaz palenia.

9
VOORZICHTIG
Scherpe
randen
1. Controleer uw locale woning code in verband met bodem, locatie enz.
2. Selecteer een zijde die voor genoeg werkruimte om het schuurtje zorgt.
3. Bepaal gebouw fundering en anker systeem.
4. Lees en begrijp de handleiding bijgesloten in het pakket.
5. Volg alle richtingen en afmetingen grondig.
6. Volg de stappen beschreven in de handleiding goed voor een correcte montage.
7. Zorg ervoor dat alle onderdelen aanwezig zijn voor u begint met monteren.
8. VEILIGHEID : Volg de veiligheidsvoorschriften om ongelukken te voorkomen.
(zie binnenzijde pagine).
9. BODEM MOET GELIJK ZIJN : Zorg ervoor dat de fundering frame vlak op de grond ligt. Als de bodem ongelijk is, verwijder
zode en andere puin en maak het gelijk met een vlakke schop.
10. Haal onderdelen uit het karton per onderdeel nummer en herzie de lijst. Zorg ervoor dat u alle nodige onderdelen voor het
schuurtje heeft. Verwijzing naar eigenaars onderdelen lijst.
(NL) VEILIGHEIDSVOORSCHRIFTEN
Voor uw eigen veiligheid, lees en volg deze instructies gedurende de bouw van het schuurtje.
Veiligheid eerst !
1. Draag werk handschoenen. Sommige stukken van de schuur kunnen scherpe randjes bevatten en
voor ongelukken zorgen
2. Wees voorzichtig met het gereedschap die gebruikt word voor de bouw
van het schuurtje. Maak uw zelf vertrouwd met het gebruik van alle
elektrische gereedschappen
3. Kinderen en dieren moeten worden weggehouden van het bouwterrein om
afleiding en ongelukken te voorkomen.
4. Als u een ladder gebruikt, zorg er dan voor dat deze op gelijke grond
staat en dat de veiligheidsklink helemaal openstaat.
5. Probeer het schuurtje niet op een winderige dag te bouwen. Schuur panelen
kunnen worden weggewaaid welke het bouwen moeilijk en gevaarlijk maken.
Ondanks dat deze delen geen onderhoud vergen, zorg moet worden gedragen voor een lange levensduur van
het schuurtje.Het is voor een keer tijd monteren en instellen, geen doel van het opnieuw gebruik.
DAK : houd het dak vrij van bladeren en sneeuw met lange steel, zachte bezem. Hevige sneeuwval kan het dak
beschadigen en gevaarlijk maken. “Wandel niet over dakoppervlakken! Gevaar van vallen”!
MUREN : leg geen enkele voorwerp tegen de muurpanelen van de schuur.
DEUREN: houd de deuren gesloten om windschade te voorkomen.
VOCHT : bij veranderingen van temperaturen zal er vocht aanwezig zijn in het schuurtje. Goede ventilatie help bij het
reguleren en voorkoming van vocht.
TIP : Een niet bijtende pakking maakt de schuur lek en windvrij.
Gebruik veiligheidsbril wanneer u breek of elektrische gereedschap gebruikt. Gebruik geen voltage elektrische
gereedschap in een vochtige omgeving, dit om elektrische schokken te voorkomen.
Gebruik geen enkele kant van de schuur als persoonlijke leuning tijdens het aanbrengen van onderdelen tijdens de bouw.
De schuur moet gebouwd worden op een sterke basis fundering. Een betonnen blok of een grote betonnen patio vierkante steen
is aanbevolen voor de geschikte vloer basis. Zorg ervoor dat het stevig en vlak en het goede afwatering toelaat vanuit de plaats.
De basis fundering moet zeker 4 inches ( 100 mm) groter zijn dan de afmeting van het schuurtje. Verwijzing naar de voorpagina
van uw beschrijving voor afmeting buitenkant van het schuurtje.
De bouwer is niet verantwoordelijk voor de keuze van constructie van de fundering.
voor betonnen blok basis, bereid een gelijke vlakte voor een vlak ondergrondslaag van keistenen. De betonnen
blok moet dan worden gegoten tot een dikte van 4 inches (100 mm) tot 5 inches ( 125 mm). Laat het drogen
tenminste 48uren..
Uw schuurtje moet goed geankerd zijn aan de betonnen blok of een grote betonnen patio vierkante steen, dit
voorkomt beschadiging tijdens harde wind..
BELANGRIJK
Zorg en onderhoud
Voordat u begint...
Bewaar niet ontvlambaar, gevaarlijke en zwembad chemicaliën in uw
gebouw. Brandbare en bijtende stoffen moeten worden opgeslagen in een
luchtdichte container. Handhaven van roken.

10
(EN) IMPORTANT: USE HAND GLOVES TO PREVENT INJURY.
(FR) IMPORTANT: UTILISER LES GANTS POUR PREVENIR LES ACCIDENTS.
(PT) IMPORTANTE: USAR LUVAS PARA EVITAR LESÕES.
(ES) IMPORTANTE: GUANTES DE MANO DE USO PARA PREVENIR LA HERIDA.
(DE) WICHTIG: BENUTZEN SIE HANDSCHUHE, UM VERLETZUNGEN ZU VERMEIDEN.
(PL) WAŻNE: UŻYWAJ RĘKAWIC, ABY ZAPOBIEC URAZOM.
(NL) BELANGRIJK: GEBRUIK HANDSCHOENEN OM VERWONDINGEN TE VERMIJDEN.
(EN) Note : Before starting installation, please refer Safety & Precautions.
(FR) Note: Avant de commencer l'installation, référez-vous svp à Sécurité et Précautions.
(PT) Nota: Antes de iniciar a instalação, cheque item “Segurança e Cuidados”.
(ES) Pozor : Antes de comenzar la instalación, consulte Seguridad y Precauciones.
(DE) Anmerkung: Lesen Sie vor dem Aufbau die Sicherheitsanweisungen.
(PL) Uwaga: Przed rozpoczęciem instalacji należy przeczytać rozdział Bezpieczeństwo i środki ostrożności.
(NL) Notitie: Voordat u begint met installeren, verwijzing naar veiligheid vovorschriften.
8’ Step Ladder
Level - 3ft.
Tape Measure
Box Spanner-7 mm
(EN) Tools You Will Need
Hand Gloves
Cordless Drill
Screw driver
Carpenter’s Square
Eye Protector
(PL) Potrzebne narzędzia
Ladder met acht treden
Waterpas
Meetlint
Vak spanner-7mm
(NL) Equipar con herramienta Usted Necesitará
Handschoenen
Snoerloze boormachine
Snoerloze
schroevendraaier
Winkelhaak
Oogbescherming
Escabeau
Niveau - 91.5cm
Mètre à ruban
Clé de serrage de boîte-7mm
(FR) Outils dont vous aurez besoin
Gants
Visseuse sans fil
Tournevis
Equerre
Lunettes de protection
Guantes de la mano
Taladro inalámbrico
Destornillador
Carpinteros Plaza
Protector de ojo
(ES) Equipar con herramienta Usted Necesitará
Escalera de 8 '
Nivelan - 3ft.
Cinta métrica
Llave de tuerca de caja-7mm
Handschuhe
Akku-Bohrschrauber
Schraubenzieher
Winkelmaß
Schutzbrille
(DE) Equipar con herramienta Usted Necesitará
8’ Leiter
Wasserwaage – 1 m
Maßband
Kasten Schraubenschlüssel-7mm
Luvas
Berbequim de bateria
Chave de fenda
Esquadro de
carpinteiro
Protector Ocular
Escadote 8”
3ft. Nível
Fita Métrica
Chave de parafuso de caixa-7mm
(PT) Ferramentas que irá necessitar
R ę k a w i c e o c h r o n n e
Bezprzewodowa wkrętarka
Śrubokręt
K ą t o w n i k s t o l a r s k i
Okulary ochronne
8’ Drabina składana
Poziomica – 91,4 cm
Taśma miernicza
Klucz-Box 7mm

11
(EN) IMPORTANT: USE HAND GLOVES TO PREVENT INJURY.
(FR) IMPORTANT: UTILISER LES GANTS POUR PREVENIR LES ACCIDENTS.
(PT) IMPORTANTE: USAR LUVAS PARA EVITAR LESÕES.
(ES) IMPORTANTE: GUANTES DE MANO DE USO PARA PREVENIR LA HERIDA.
(DE) WICHTIG: BENUTZEN SIE HANDSCHUHE, UM VERLETZUNGEN ZU VERMEIDEN.
(PL) WAŻNE: UŻYWAJ RĘKAWIC, ABY ZAPOBIEC URAZOM.
(NL) BELANGRIJK: GEBRUIK HANDSCHOENEN OM VERWONDINGEN TE VERMIJDEN.
(EN) Parts List (DE) Teileliste
(FR) Liste des pièces (PL) Lista części
(PT) Lista de Peças (NL) Onderdelenlijst
(ES) La Lista de partes
(EN) Note: Check all parts prior to installation.
(FR) Note: Vérifier toutes les pièces avant l’installation.
(PT) Nota: Confirme todas as peças antes da instalação.
(ES) Nota: Verifica todo despide antes de instalación.
(DE) Anmerkung: Prüfen Sie alle Teile vor der Montage.
(PL) UWAGA: Sprawdź wszystkie części zanim przystąpisz do montażu.
(NL) Notitie: Controleer vooraf of alle onderdelen aanwezig zijn.
WCFE 2
WCBE 2
WSE 4
WFE 2
GPSL 1
GPSR 1
FB1B 1
FB2B 1
RPSO 2
RPCO 3
DPLB 1
DPRB 1
(EN) CODE
(FR) CODE
(PT) CÒDIGO
(ES) CODE
(DE) CODE
(PL) KOD
(NL) CODE
(EN) QTY
(FR) QTÉ
(PT) QTDE
(ES) QTY
(DE) STCK
(PL) ILOŚĆ
(NL) AANTAL
BLB 1
BRB 1
BSC 2
BBF 2
ECG 1
DCL 1
DCR 1
ABBLR 2
ASLR 2
SCB 1
SSB 1
SLB 1
SRB 1
RSLRB 2
RSM 1
SBSLR 3
FBSLR 8
RFRO 2
RFLO 2
RFSLR 2
TSLB 1
TSRB 1
BSLB 1
BSRB 1
DSS 2
DSCB 4
(EN) PROFILES
(FR) PROFILES
(PT) PERFILS
(ES) PERFILES
(DE) PROFILE
(PL) PROFILES
(NL) PROFILES
BS 4
DH 2
TC 4
TS 4
VC 2
PW 2Slabs
PC 5Slabs
F1 20
S1 156
S2 32
S8 20
S3 93
(EN) CODE
(FR) CODE
(PT) CÒDIGO
(ES) CODE
(DE) CODE
(PL) KOD
(NL) CODE
(EN) QTY
(FR) QTÉ
(PT) QTDE
(ES) QTY
(DE) STCK
(PL) ILOŚĆ
(NL) AANTAL
(EN) PROFILES
(FR) PROFILES
(PT) PERFILS
(ES) PERFILES
(DE) PROFILE
(PL) PROFILES
(NL) PROFILES
(EN) CODE
(FR) CODE
(PT) CÒDIGO
(ES) CODE
(DE) CODE
(PL) KOD
(NL) CODE
(EN) QTY
(FR) QTÉ
(PT) QTDE
(ES) QTY
(DE) STCK
(PL) ILOŚĆ
(NL) AANTAL
(EN) PROFILES
(FR) PROFILES
(PT) PERFILS
(ES) PERFILES
(DE) PROFILE
(PL) PROFILES
(NL) PROFILES
(DE) ZUBEHÖR
(PL) AKCESORIA
(NL) ACCESORIOS
(EN) ACCESSORIES
(FR) ACCESSORIES
(PT) ACESSÒRIOS
(ES) ACCESORIOS

12
(EN) IMPORTANT: USE HAND GLOVES TO PREVENT INJURY.
(FR) IMPORTANT: UTILISER LES GANTS POUR PREVENIR LES ACCIDENTS.
(PT) IMPORTANTE: USAR LUVAS PARA EVITAR LESÕES.
(ES) IMPORTANTE: GUANTES DE MANO DE USO PARA PREVENIR LA HERIDA.
(DE) WICHTIG: BENUTZEN SIE HANDSCHUHE, UM VERLETZUNGEN ZU VERMEIDEN.
(PL) WAŻNE: UŻYWAJ RĘKAWIC, ABY ZAPOBIEC URAZOM.
(NL) BELANGRIJK: GEBRUIK HANDSCHOENEN OM VERWONDINGEN TE VERMIJDEN.
(EN) Exploded View
(FR) Vue Explosée
(PT) Vista esplodida
(ES) El Panorama estallado
(DE) Explosionszeichnung
(PL) Rysunek złożeniowy
(NL) Barsten bekijken
RFSLR
RFSLR
RFLO
RFRO
RFRO
RFLO
FBSLR
SBSLR
GPSL
GPSR
RSM
ASLR
ASLR
SLB
ABBLR
ABBLR
SRB
BSC
BRB
BLB
BSC
WFE
WFE
DCR
DCL
SCB
DPRB
DPLB
FB1B
FB2B
FBSLR
SBSLR
RSLRB
SSB
BBF
ECG
BBF
RPSO
RPSO
RPCO
RPCO
RPCO
WSE
WSE WSE
WSE
WCFE
WCFE
WCBE
WCBE
TC
TC
TC
TC

13
(EN) IMPORTANT: USE HAND GLOVES TO PREVENT INJURY.
(FR) IMPORTANT: UTILISER LES GANTS POUR PREVENIR LES ACCIDENTS.
(PT) IMPORTANTE: USAR LUVAS PARA EVITAR LESÕES.
(ES) IMPORTANTE: GUANTES DE MANO DE USO PARA PREVENIR LA HERIDA.
(DE) WICHTIG: BENUTZEN SIE HANDSCHUHE, UM VERLETZUNGEN ZU VERMEIDEN.
(PL) WAŻNE: UŻYWAJ RĘKAWIC, ABY ZAPOBIEC URAZOM.
(NL) BELANGRIJK: GEBRUIK HANDSCHOENEN OM VERWONDINGEN TE VERMIJDEN.
(EN) Quick Start
(FR) Démarrage rapide
(PT) Início Rápido
(ES) Inicio rápido
(DE) Schnellstart
(PL) Szybaki start
(NL) Snabbstart
1
2# 22-33
3# 34-44
4# 45-53
# 18-22
3
2
1
4

14
(EN) IMPORTANT: USE HAND GLOVES TO PREVENT INJURY.
(FR) IMPORTANT: UTILISER LES GANTS POUR PREVENIR LES ACCIDENTS.
(PT) IMPORTANTE: USAR LUVAS PARA EVITAR LESÕES.
(ES) IMPORTANTE: GUANTES DE MANO DE USO PARA PREVENIR LA HERIDA.
(DE) WICHTIG: BENUTZEN SIE HANDSCHUHE, UM VERLETZUNGEN ZU VERMEIDEN.
(PL) WAŻNE: UŻYWAJ RĘKAWIC, ABY ZAPOBIEC URAZOM.
(NL) BELANGRIJK: GEBRUIK HANDSCHOENEN OM VERWONDINGEN TE VERMIJDEN.
(EN) DuraMax must be installed on a Duramax Foundation, level wooden platform or a level concrete foundation.
(FR) Duramax doit être installé sur une fondation Duramax ou une plate-forme en bois de niveau ou une fondation en béton de niveau.
(PT) Duramax deve ser instalado sobre uma base Duramax ou uma plataforma de madeira nível ou uma fundação de concreto nível.
(ES) Duramax debe estar instalado en una base Duramax o una plataforma de madera de nivel o una base de hormigón nivelada.
(DE) Duramax muss auf einem Duramax Stiftung oder ein Niveau hölzernen Plattform oder einem Niveau Betonfundament
montiert werden.
(PL) Duramax musi być zainstalowana na fundamencie Duramax lub poziom drewnianej platformie lub poziomu fundamencie betonowym.
(NL) Duramax moet op een Duramax stichting of een vlakke houten platform of een vlakke betonnen fundering worden geïnstalleerd.
(EN) Lay 2 x 4 Flat
(Actual size 2”x 3 1/2”, 50mm x 88.9mm)
(FR) Aire Plate 2” x 4”mm
(taille réelle 2”x 3 1/2”, 50mm x 88.9mm)
(PT) Deitare 2” x 4”mm Plano
(tamanho atual 2”x 3 1/2”, 50mm x 88.9mm)
(ES) Colocar 50 x 88.9 mm en llano
(Tamaño real 2” x 3 1/2”, 50mm x 88.9mm)
(DE) 2 x 4 Latten flachlegen
(Aktuelle Größe 2”x 3 1/2”,50 x 88.9)
(PL) Połóż płasko słupki 2x4
(Rzeczywisty rozmiar 2”x 3 1/2”, 50mm x 88,9mm)
(NL) Laag 2 x 4 Vlak
(Precieze maat 2 x 3 1/2”, 50 mm x 88.9 mm)
50
88.9
(EN)Note
(FR)Note
(PT)Nota
(ES)Nota
(DE)Anmerkung
(PL)Uwaga
(NL)Notitie
(EN) Note : If you have DURAMAX Foundation, please follow instruction manual in that package. If not, follow the below OPTION 1
or OPTION 2.
(FR) Remarque : Si vous avez DURAMAX Foundation, veuillez suivre manuel dans ce paquet. Si non, suivez le ci-dessous OPTION 1 ou
OPTION 2.
(PT) Nota: Se você tiver DURAMAX Foundation, siga o manual de instruções no pacote. Se não, siga a opção 1 ou a opção 2 abaixo.
(ES) Nota : Si tienes Fundación DURAMAX, siga instrucciones en ese paquete. Si no, siga la siguiente opción 1 u opción 2
(DE) Hinweis: Wenn Sie DURAMAX-Stiftung haben, folgen Sie bitte Gebrauchsanweisung in diesem Paket. Wenn nicht, führen Sie
die unten OPTION 1 oder OPTION 2.
(PL) Uwaga: Jeśli masz DURAMAX Fundacji, postępuj zgodnie z instrukcją obsługi w tym pakiecie. Jeśli nie, wykonaj poniżej opcję 1 lub 2
opcję.
(NL) Opmerking: Hebt u DURAMAX Foundation, volg handleiding in dat pakket. Als niet, volgt u de onderstaande optie 1 of optie 2.
(EN)OPTION : 1 - ASSEMBLY ON WOODEN FOUNDATION
(FR)OPTION: 1- L'ASSEMBLÉE SUR BASE EN BOIS
(PT)OPÇÃO: 1- MONTAGEM EM BASE DE MADEIRA.
(ES)OPCIÓN: 1-MONTAJE SOBRE BASE DE MADERA
(DE)OPTION: 1-MONTAGE AUF HOLZ-FUNDAMENT.
(PL)OPCJA: 1-MONTAZ NA DREWNIANE FUNDACJI.
(NL)OPTIE: 1-VERGADERING OP HOUTEN FOUNDATION.
(EN) 1. It is important that these instructions are followed step by step.
2. Don’t install under windy conditions.
3. If you are building the shed against a wall, build it 2.5 ft. away then slide it in.
(Only for Duramax foundation & Wooden foundation)
(FR) 1.Il est important que ces instructions soient suivies pas à pas.
2.Ne pas installer sous conditions de vent.
3. Si vous générez l'abri contre un mur, générez-le 2,5 pieds de distance puis déplacez-le po
(ceci n'est applicable pour la Fondation Duramax Fondation en bois).
(PT) 1. É importante que estas instruções sejam seguidas passo a passo.
2. Não instale sob condições com forças ventanosas.
3. Se você estiver criando o galpão contra uma parede, construí-lo 2,5 pés de distância, em seguida,
deslize-pol. (isso só é aplicável para Fundação Duramax Fundação de madeira).
(ES) 1. es importante que estas instrucciones se sigan paso a paso.
2. No instale las condiciones abajo de mucho viento.
3. Si usted está construyendo la nave contra una pared, construir 2,5 pies lejos luego deslícelo pulg
(esto sólo es aplicable para la Fundación de Duramax Fundación madera).
(DE) 1. Diese Anleitung muss unbedingt Schritt für Schritt befolgt werden.
2. Die Montage nicht bei windigem Wetter vornehmen.
3. Wenn Sie den Schuppen gegen eine Wand erstellen, bauen es 2,5 Fuß entfernt, dann schieben Sie es Zoll
(Dies gilt nur für Duramax-Stiftung Holz-Stiftung).
(PL) 1. Bardzo ważne jest, by dokładnie stosować się do niniejszej instrukcji.
2. Nie należy montować w przypadku silnego wiatru.
3.Jeśli tworzysz rzucić o ścianę, budować to 2,5 ft. od, a następnie przesuń go w.
(to jest tylko stosowana dla Duramax Fundacja drewniane Fundacji).
(NL) 1. Het is belangrijk dat volgende instructies stap voor stap worden gerespecteerd.
2. Nooit de schuur installeren onder winderige omstandigheden.
3. Als u de schuur tegen een muur bouwt, bouwt 2.5 ft. weg en schuif het in.
(dit is alleen van toepassing voor Duramax Stichting houten Stichting).
(EN) Foundation
(FR) Fondation
(PT) Fundação
(ES) Fundacion
(DE) Fundament
(PL) Podstawa
(NL) Fundering

15
(EN) IMPORTANT: USE HAND GLOVES TO PREVENT INJURY.
(FR) IMPORTANT: UTILISER LES GANTS POUR PREVENIR LES ACCIDENTS.
(PT) IMPORTANTE: USAR LUVAS PARA EVITAR LESÕES.
(ES) IMPORTANTE: GUANTES DE MANO DE USO PARA PREVENIR LA HERIDA.
(DE) WICHTIG: BENUTZEN SIE HANDSCHUHE, UM VERLETZUNGEN ZU VERMEIDEN.
(PL) WAŻNE: UŻYWAJ RĘKAWIC, ABY ZAPOBIEC URAZOM.
(NL) BELANGRIJK: GEBRUIK HANDSCHOENEN OM VERWONDINGEN TE VERMIJDEN.
(DE) Verwenden Sie Druck behandelt Beweis-Holz-Stollen-Wetter (Actual size 2 'x 3 1/2', 50mm x 88,9 mm) 2” x 4”, einen Plattform-Rahmen
zu erstellen, der eine externe Dimension der 47” x 102” (1193.8mm x 2590.8mm) hat.
Wetterbeständige Sperrholzplatten, CDX 3/4” (19 mm), zurechtschneiden und wie gezeigt zu einem festen
Fundament zusammensetzen. Das Fundament muss rechtwinklig und eben sein.
Holzplattform (nicht im Lieferumfang)
Liste von benötigten Holzteilen und –größen.
Druck behandelt wetterfestes Holz-Stollen:
3St 2” x 3 1/2” x 91 1/2” (50mm x 88.9mm x 2324.1 mm)
3St 2” x 3 1/2” x 47” (50mm x 88.9mm x 1193.8 mm)
Aussenansicht Grade (CDX) - 3/4'(19mm) Wetter Beweis Marine Grade Sperrholz.
1St 3/4” x 47” x 96” (19mm x 1193.8mm x 2438.4mm)
1St 3/4” x 6” x 47” (19mm x 152.4mm x 1193.8mm)
L-Klammern: 4 St.
(EN) Use pressure treated weather proof wood studs 2” x 4” (Actual size 2” x 3 1/2”, 50mm x 88.9mm) to create a platform frame that has an
outside dimension of 47” x 102” (1193.8mm x 2590.8mm).
Using exterior grade CDX 3/4” (19mm) weather proof marine grade plywood, cut and fit together the sheets to form solid foundation as
shown. Foundation must be square and level.
Wooden Platform (Not Included)
The following are the list of lumber and sizes you will need.
Pressure Treated Weather proof Wood Studs:
3ea 2” x 3 1/2” x 91 1/2” (50mm x 88.9mm x 2324.1 mm)
3ea 2” x 3 1/2” x 47” (50mm x 88.9mm x 1193.8 mm)
Exterior Grade (CDX) - 3/4” (19mm)Weather proof Marine grade plywood
1ea 3/4” x 47” x 96” (19mm x 1193.8mm x 2438.4mm)
1ea 3/4” x 6” x 47” (19mm x 152.4mm x 1193.8mm)
L-Brackets: 4ea
(FR) Traité sous pression météo preuve montants en bois 2” x 4” (Taille réelle 2” x 3 1/2”, 50mm x 88.9mm) permet de créer un cadre de la
plate-forme qui a une dimension extérieure de 47” x 102” (1193.8mm x 2590.8mm).
En utilisant CDX 3/4 po (19mm) météo preuve V4A contreplaqué extérieur, couper et assembler les feuilles à la base solide de forme
comme illustré. La Fondation doit être d'équerre et de niveau.
Plate-forme en bois (non incluse)
Voici une liste de bois et de tailles que vous aurez besoin.
Pression de l'épreuve des intempéries traités goujons de bois:
3ea 2” x 3 1/2” x 91 1/2” (50mm x 88.9mm x 2324.1 mm)
3ea 2” x 3 1/2” x 47” (50mm x 88.9mm x 1193.8 mm)
ualité extérieure (CDX) - 3/4 po (19mm) météo preuve Marine grade contreplaqué.
1ea 3/4” x 47” x 96” (19mm x 1193.8mm x 2438.4mm)
1ea 3/4” x 6” x 47” (19mm x 152.4mm x 1193.8mm)
Crochets L: 4EA
(PT) Use o tratamento de pressão atmosféricas escoras de madeira prova 2” x 4” (Actual tamanho 2” x 3 1/2”, 50mm x 88.9mm) para criar
um quadro de plataforma que tem uma dimensão exterior de 47” x 102” (1193.8mm x 2590.8mm).
Usando o exterior CDX 3/4 po (19mm) tempo prova marinho da classe madeira compensada da classe, cortar e se encaixam as folhas a
base sólida do formulário como mostrado. Fundação deve ser quadrada e nível.
Plataforma de madeira (Não incluida)
As seguites, são uma lista do número e tamanho do material que vosê irá precisar.
Pressão à prova de intempéries tratados parafusos prisioneiros de madeira:
3ea 2” x 3 1/2” x 91 1/2” (50mm x 88.9mm x 2324.1 mm)
3ea 2” x 3 1/2” x 47” (50mm x 88.9mm x 1193.8 mm)
Grade exterior (CDX) - 3/4'(19mm) tempo prova da classe madeira compensada marinha:
1ea 3/4” x 47” x 96” (19mm x 1193.8mm x 2438.4mm)
1ea 3/4” x 6” x 47” (19mm x 152.4mm x 1193.8mm)
L-Suportes: 4ea
(ES) Use presión tiempo prueba los barrotes de madera 2” x 4” (Real tamaño 2” x 3 1/2”, 50mm x 88.9mm) para crear un marco de
plataforma que tiene una dimensión exterior de 47” x 102” (1193.8mm x 2590.8mm).
Usando CDX 3/4'(19mm) tiempo prueba grado marino madera contrachapada grado exterior, cortar y ensamblar las hojas de la base
sólida de la forma como se muestra. Fundación debe estar a escuadra y nivel.
La Plataforma de madera (no Incluyó)
El siguiente es una lista de madera y lo calibra necesitará.
Presión de prueba del tiempo tratar vigas de madera:
3ea 2” x 3 1/2” x 91 1/2” (50mm x 88.9mm x 2324.1 mm)
3ea 2” x 3 1/2” x 47” (50mm x 88.9mm x 1193.8 mm)
Calidad para exteriores (CDX) - 3/4'(19mm) de madera contrachapada grado tiempo de prueba Marina:
1ea 3/4” x 47” x 96” (19mm x 1193.8mm x 2438.4mm)
1ea 3/4” x 6” x 47” (19mm x 152.4mm x 1193.8mm)
L-Brackets: 4ea

16
(EN) IMPORTANT: USE HAND GLOVES TO PREVENT INJURY.
(FR) IMPORTANT: UTILISER LES GANTS POUR PREVENIR LES ACCIDENTS.
(PT) IMPORTANTE: USAR LUVAS PARA EVITAR LESÕES.
(ES) IMPORTANTE: GUANTES DE MANO DE USO PARA PREVENIR LA HERIDA.
(DE) WICHTIG: BENUTZEN SIE HANDSCHUHE, UM VERLETZUNGEN ZU VERMEIDEN.
(PL) WAŻNE: UŻYWAJ RĘKAWIC, ABY ZAPOBIEC URAZOM.
(NL) BELANGRIJK: GEBRUIK HANDSCHOENEN OM VERWONDINGEN TE VERMIJDEN.
(EN) Note: If the shed is assembled with wooden foundation on soil, use the soil anchor kit.
(FR) Note: Si le hangar est monté avec la base en bois sur le sol, employez le kit d'ancre de sol.
(PT) Nota: Se o galpão for montado com fundação de madeira no solo, use o kit de fixação ao solo.
(ES) Note: Si la caseta está montada con base de madera sobre suelo, use el kit de anclaje.
(DE) Anmerkung: Bei Montage auf Holzboden, muss das Boden-Verankerungsset verwendet werden.
(PL) Uwaga: Jeśli magazynek jest montowany na drewnianej podstawie na gruncie, należy użyć zestawu do mocowania do gruntu.
(NL) Notitie: Als het schuurtje is gebouwd met houten vloer, gebruik gereedschap om de bodem te verankeren.
Platforma drewniana (nie objęte)
Poniżej opisano niezbędne elementy konstrukcji drewnianej i ich rozmiary.
Ciśnienia traktowane pogoda dowód drewna stadniny :
3szt 2” x 3 1/2” x 91 1/2” (50mm x 88.9mm x 2324.1 mm)
szt 2” x 3 1/2” x 47” (50mm x 88.9mm x 1193.8 mm)
Zewnętrznego stopień (CDX) - 3/4'(19mm) pogoda dowód Marine sklejkę :
1
szt
3/4” x 47” x 96” (19mm x 1193.8mm x 2438.4mm)
1
szt
3/4” x 6” x 47” (19mm x 152.4mm x 1193.8mm)
Wsporniki w kształcie L: 4 szt.
(NL) Gebruik druk behandeld weer bewijs hout hengsten 2”x 4” (werkelijke grootte 2”x 3 1/2”, aantal plaatsen 50mm x 88,9 mm) om
te maken een platform-frame met een externe dimensie van 94 ”x 125” (2387.6 mm x 3175 mm).
Met behulp van exterieur rang CDX 3/4”(19mm) weer bewijs marine grade multiplex, knippen en elkaar passen de bladen naar formulier
solide basis zoals. Stichting moet vierkante en niveau
Houten platform (niet inbegrepen)
Dit is wat u nodig heeft voor de constructie van een houten platform:
Druk behandeld weer bewijs hout hengsten
:
3
stuks
2” x 3 1/2” x 91 1/2” (50mm x 88.9mm x 2324.1 mm)
3
stuks
2” x 3 1/2” x 47” (50mm x 88.9mm x 1193.8 mm)
Exterieur Grade (CDX) - 3/4'(19mm) weer bewijs Marine grade multiplex.
1stuks 3/4” x 47” x 96” (19mm x 1193.8mm x 2438.4mm)
1stuks 3/4” x 6” x 47” (19mm x 152.4mm x 1193.8mm)
4 stuks L-beugels
12
96’’ (2438.4mm)
47’’ (1193.80mm)
6”
=
=
(152.4mm)
102” (2590.8mm)
91 1/2” (2324.1mm)
96” (2438.4mm)
47’’ (1193.80mm)
6” (152.4mm)
(EN)L- Bracket
(FR)Crochets-L
(PT)L-Suportes
(ES)L- Bracket
(DE) L-Klammern
(PL)Wspornikiw
kształcie L
(NL)L-beugels
(PL) Umożliwia utworzenie platformy ramka, która ma wymiar zewnętrzny 94”x 125” (2387.6 mm x 3175 mm) traktowane ciśnienia pogoda
dowód drewna stadniny 2” x 4” (rzeczywisty rozmiar 2 ”x 3 1/2”, 50mm x 88,9 mm).
Za pomocą zewnętrznego stopień CDX 3/4'(19mm) pogoda dowód morskich sklejkę, wyciąć i pasują do siebie arkusze do postaci solidne
podstawy jak pokazano. Fundacja musi być kwadratowy i poziom.

17
(EN) IMPORTANT: USE HAND GLOVES TO PREVENT INJURY.
(FR) IMPORTANT: UTILISER LES GANTS POUR PREVENIR LES ACCIDENTS.
(PT) IMPORTANTE: USAR LUVAS PARA EVITAR LESÕES.
(ES) IMPORTANTE: GUANTES DE MANO DE USO PARA PREVENIR LA HERIDA.
(DE) WICHTIG: BENUTZEN SIE HANDSCHUHE, UM VERLETZUNGEN ZU VERMEIDEN.
(PL) WAŻNE: UŻYWAJ RĘKAWIC, ABY ZAPOBIEC URAZOM.
(NL) BELANGRIJK: GEBRUIK HANDSCHOENEN OM VERWONDINGEN TE VERMIJDEN.
(EN) OPTION : 2- ASSEMBLY ON CONCRETE FOUNDATION.
(FR) OPTION: 2-MONTAGE SUR UNE FONDATION EN BÉTON.
(PT) OPÇÃO: 2-MONTAGEM EM BASE DE CONCRETO.
(ES) OPCIÓN: 2-MONTAJE SOBRE BASE DE HORMIGÓN.
(DE) OPTION: 2-MONTAGE AUF BETONFUNDAMENT.
(PL) OPCJA: 2-MONTAZ NA FUNDAMENTY BETONOWE.
(NL) OPTIE: 2-VERGADERING OVER CONCRETE STICHTING.
A concrete pad or a large size concrete patio stone squares is recommended for suitable floor base. Make sure it is firm and level and will
allow drainage away from the site.Make a level concrete foundation,that has an outside dimension of 48 1/2”x 103 1/8”(1232mm x 2620mm).
For a concrete pad base, prepare a level bed for a firm footing layer of crushed stone. The concrete pad should then be poured to a
thickness of 4 inches (100mm) to 5 inches (125mm). Allow to dry thoroughly for at least 48 hours.Manufacturer is not responsible for the
choice and construction of the foundation.
(EN) Concrete Platform (Not Included)
Une dalle de béton ou une pierre carrés de taille grand patio en béton est recommandée pour la base convenable étage. Assurez-vous qu'il
est ferme et de niveau et permettra de drainage en dehors du site. Faire une fondation en béton niveau, qui a une dimension extérieure de
48 1/2”x 103 1/8”(1232mm x 2620mm).
Pour une dalle de béton de base, préparez un lit de niveau pour une couche de base solide de pierres concassées. On verse ensuite la dalle
en béton d'une épaisseur de 4 pouces (100mm) à 5 pouces (125mm). Laisser pour sécher complètement pendant au moins 48 heures.
Référence du fabricant n'est pas responsable du choix et la construction de la Fondation.
(FR)Plate-forme en béton armé (Non incluse)
Um bloco de concreto ou um quadrados de pedra de pátio de concreto de tamanho grande é recomendado para base apropriado do
assoalho. Certifique-se que é firme e nivelada e permitirá drenagem longe do local. Fazer base de uma fundação de concreto nível, que tem uma
dimensão exterior de 48 1/2”x 103 1/8”(1232mm x 2620mm).
Em um bloco de concreto, preparar uma cama de nível para uma camada firme de brita. O base de concreto deve ser derramado em seguida
a uma espessura de 4 polegadas (100mm), 5 polegadas (125mm). Deixe para secar completamente pelo menos 48 horas. Fabricante não é
responsável pela escolha e construção da Fundação.
(PT)Plataforma concreta (Não incluida)
Una plataforma de concreto o un plazas piedra de hormigón patio de gran tamaño se recomienda para base de piso adecuado. Asegúrese
de que esté firme y nivelado y permitirá el drenaje lejos del sitio. Hacer la base de una nivel base de hormigón, que tiene una dimensión exterior de 48
1/2”x 103 1/8”(1232mm x 2620mm).
Para una plataforma de concreto, preparar una cama de nivel para una capa de apoyo firme de piedra machacada. La plataforma de concreto
debe ser vertida luego en un espesor de 4 pulgadas (100mm) a 5 pulgadas (125mm). Deje para secar durante al menos 48 horas. Fabricante
no es responsable de la elección y la construcción de la Fundación.
(ES) Plataforma Concreta (No Incluyó)
Eine konkrete Auflage oder eine große Größe konkreten Patio Stein Quadrate wird empfohlen für die geeignete Standring. Stellen Sie
sicher, es ist fest und Ebene und Entwässerung von der Website ermöglicht. Machen Sie eine Ebene Betonfundament, die eine externe Dimension von
48 1/2”x 103 1/8”(1232mm x 2620mm).
für eine konkrete Auflage hat base, einer soliden Basis Schicht aus Schotter ein Niveau Bett vorzubereiten. Die konkrete Auflage sollte dann
zu einer Dicke von 4 Zoll (100 mm) bis 5 Zoll (125 mm) gegossen werden. Gründlich mindestens 48 Stunden trocknen lassen. Hersteller ist
nicht verantwortlich für die Auswahl und Konstruktion der Stiftung.
(DE) Betonauflage plattform (Nicht im Lieferumfang)
Betonu pad lub duży rozmiar konkretne patio kamień kwadratów jest zalecane dla odpowiedniej bazy piętro. Upewnij się, że to jest prosto i
stabilnie i pozwoli drenaż witryny. Zrobić fundamencie betonowym poziom, który ma wymiar zewnętrzny 48 1/2”x 103 1/8”(1232mm x 2620mm).
Do betonu pad podstawy, przygotować łóżko poziom dla firmy stopie warstwę tłucznia. Betonu pad powinien być następnie przelewa się do
grubości 4 cali (100mm) do 5 cali (125mm). Pozostawić do wyschnięcia dokładnie na co najmniej 48 godzin. Producent nie jest
odpowiedzialny za wybór i budowie fundamentów.
( PL) Platforma betonowa (Nie objęte)
Een concrete pad of een groot formaat concrete patio stenen pleinen wordt aanbevolen voor geschikt woord basis. Zorg ervoor dat het is
stevig en niveau en drainage zal toestaan weg van de site. Een niveau concrete stichting, die een externe dimensie van
48 1/2”x 103 1/8”(1232mm x 2620mm).
Voor een concrete pad heeft base maken, een niveau bed voor te bereiden voor een stevige voet laag van steenslag. De concrete pad moet
vervolgens worden gegoten met een dikte van 4 inch (100mm) op 5 inch (125mm). Laten drogen grondig gedurende ten minste 48 uur. De
fabrikant is niet verantwoordelijk voor de keuze en de bouw van de Stichting.
( NL) Betonnen plaat (Niet inbegrepen)
1232mm (48 1/2”)
90O
2620mm (103 1/8”)
(EN) CONCRETE FOUNDATION.
(FR) FONDATION EN BÉTON.
(PT) BASE DE CONCRETO.
(ES) BASE DE HORMIGÓN.
(DE) BETONFUNDAMENT.
(PL) FUNDAMENTY BETONOWE.
(NL) CONCRETE STICHTING.

18
(EN) IMPORTANT: USE HAND GLOVES TO PREVENT INJURY.
(FR) IMPORTANT: UTILISER LES GANTS POUR PREVENIR LES ACCIDENTS.
(PT) IMPORTANTE: USAR LUVAS PARA EVITAR LESÕES.
(ES) IMPORTANTE: GUANTES DE MANO DE USO PARA PREVENIR LA HERIDA.
(DE) WICHTIG: BENUTZEN SIE HANDSCHUHE, UM VERLETZUNGEN ZU VERMEIDEN.
(PL) WAŻNE: UŻYWAJ RĘKAWIC, ABY ZAPOBIEC URAZOM.
(NL) BELANGRIJK: GEBRUIK HANDSCHOENEN OM VERWONDINGEN TE VERMIJDEN.
(EN) Note: Take care of sharp edges.
Use screws with plastic washers on top of prepainted surface only.
(FR) Nota: Prenez soin des arêtes vives.
Utilisez des vis avec des rondelles en plastique sur le dessus de la surface pré peinte seulement
(PT) Note: Tome cuidado com arestas vivas.
Utilize parafusos com anilhas plásticas em cima da superfície prepainted apenas.
(ES) Nota: Cuide de las orillas agudas.
Use los tornillos con las arandelas plásticas encima pre pintadas en la superficie solamente.
(DE) Anmerkung: Vorsicht mit scharfen Kanten. Benutzen Sie bei lackierten Oberflaechen nur Schrauben mit
Plastikunterlegscheiben.
(PL) Uwaga: Uważaj na ostre krawędzie
Używaj śrub z plastikowymi uszczelkami wyłącznie na wcześniej pomalowanej powierzchni.
(NL) Notitie: let op de scherpe kanten
Gebruik schroeven met plastieken ring aan de bovenkant of voor gelakt ondergrond.
(EN) Parts needed
(FR) Pièces nécessaires
(PT) Peças Necessárias
(ES) Las partes necesitaron
(DE) Benötigte Teile
(PL) Niezbędne elementy
(NL) Onderdelen nodig
S1 (x4)
1
BLB (x1)
BRB (x1)
1 & 2
BLB
BRB
1
BRB
BLB
2
S1
(EN) Set the Torque limit of your Screw drill to #3 or #4 to en sure the Screws do not
strip the Metal reinforcements
(FR) Réglez la limite de couple de votre perceuse Vis à n # 3 o u n # 4 pour s'assurer que les
vis ne supprime pas les renforts métalliques.
(PT) Defina o limite de Torque de sua broca parafuso para # 3 ou # 4 para garantir
que os parafusos não tira os reforços de metal
(ES) Establecer el límite de par de su taladro tornillo de # 3 y # 4 para asegurar los tornillos
no tira los refuerzos metálicos
(DE) Stellen Sie die Torque Limit Ihres Schraube Bohrer # 3 ode r # 4, um die Schrauben
sicher nicht strippen die Metallverstärkungen
(PL) Zestaw limit momentu obrotowego twój śruby wiercenia do # 3 lub # 4, aby upewnić
się,że śruby nie taśmy wzmocnień
(NL) Stel de Torque limiet van uw Schroef boormachine op # 3 en # 4 om de schroeven
zorgen niet strip de Metal versterkingen
(EN) CODE
(FR) CODE
(PT) CÒDIGO
(ES) CODE
(DE) CODE
(PL) KOD
(NL) CODE
(EN) QTY
(FR) QTÉ
(PT) QTDE
(ES) QTY
(DE) STCK
(PL) ILOŚĆ
(NL) AANTAL
BLB 1
BRB 1
BSC 2
BBF 2
ECG 1
S1 12
S2 20
1(EN) Base Frame
(FR) Canaux de base
(PT) Base de armação
(ES) Armazón de la base
(DE) Bodenrahmen
(PL) Rama fundamentowa
(NL) Basis frame
This manual suits for next models
1
Table of contents
Other USP Storage manuals