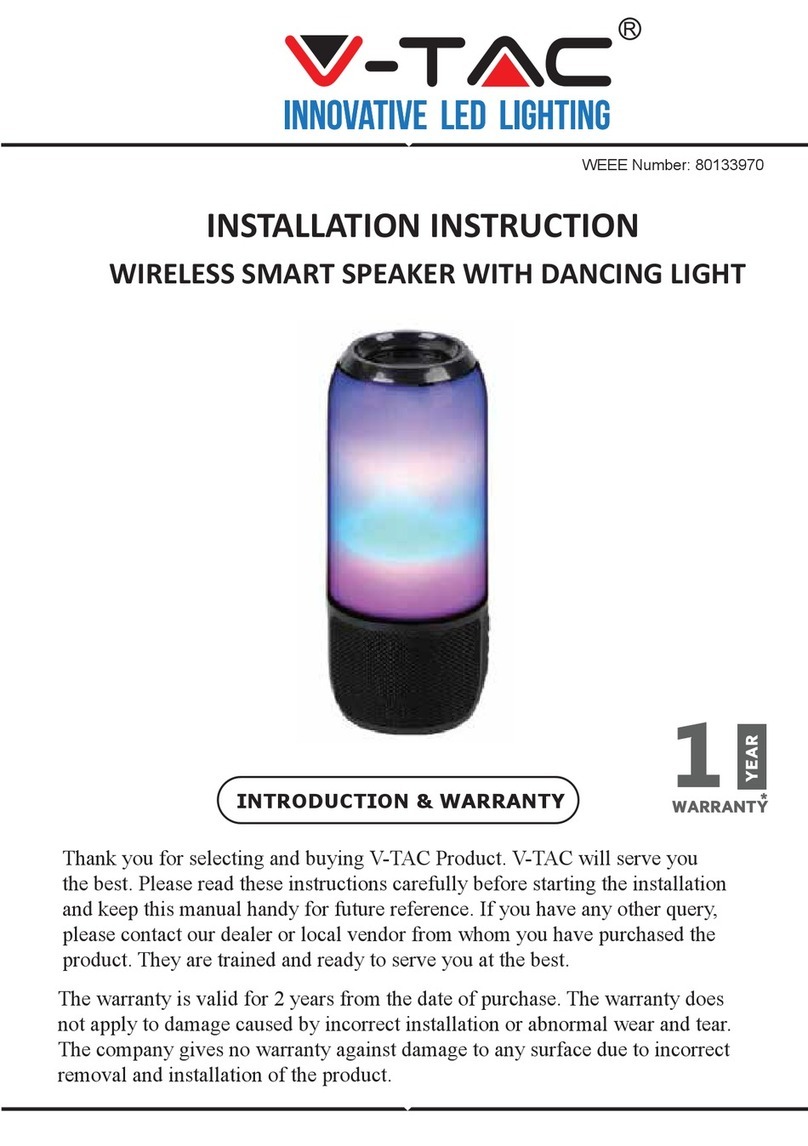
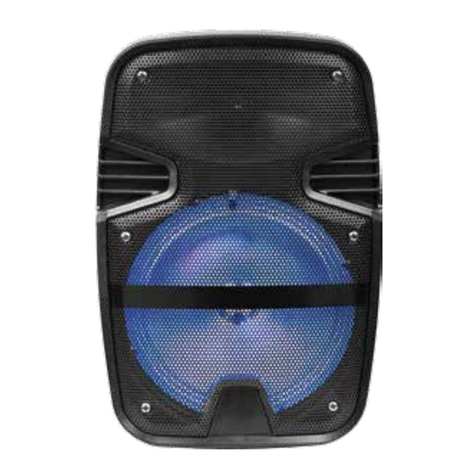
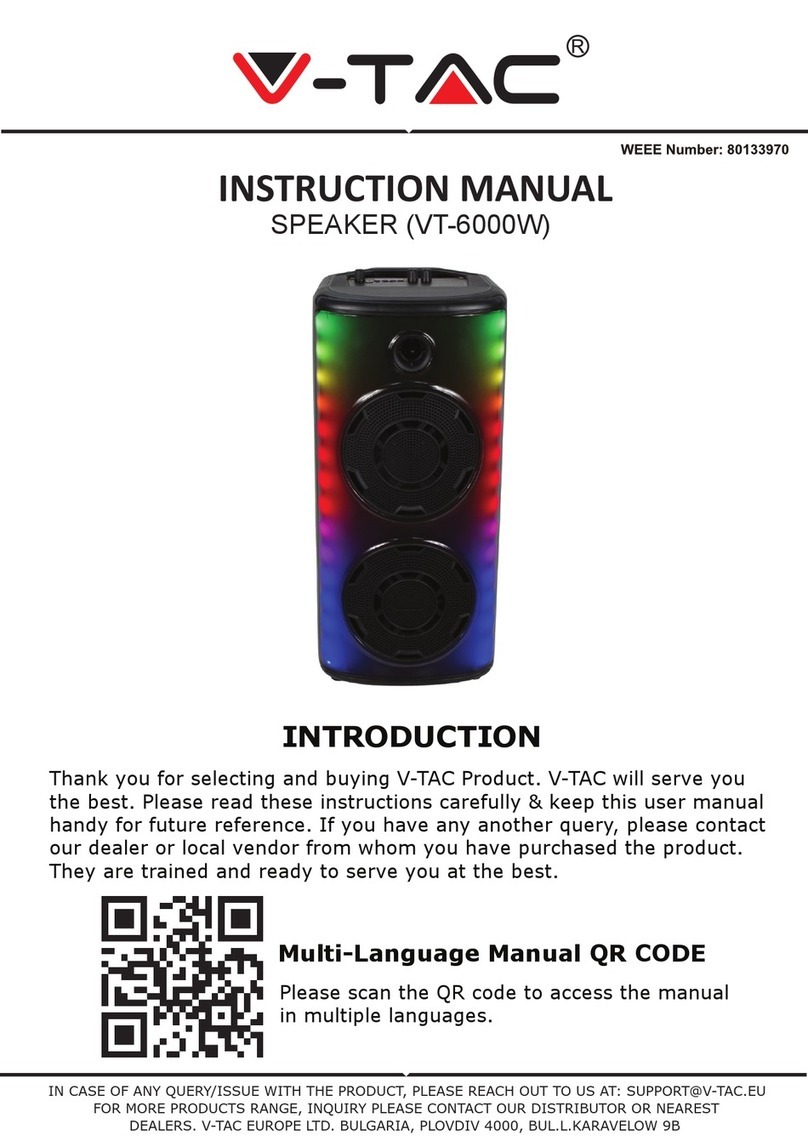
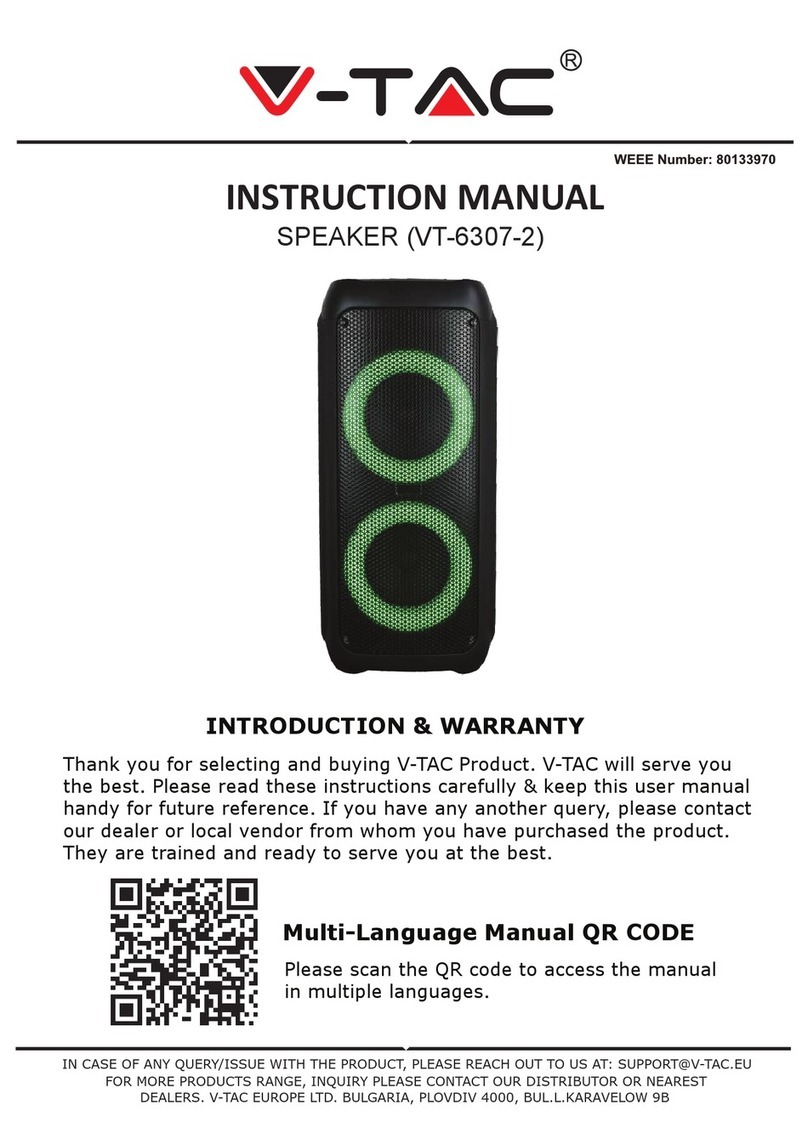
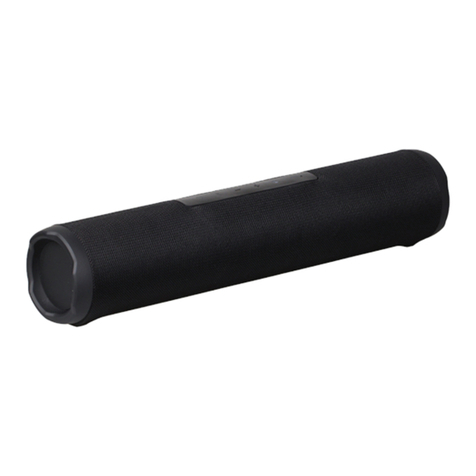
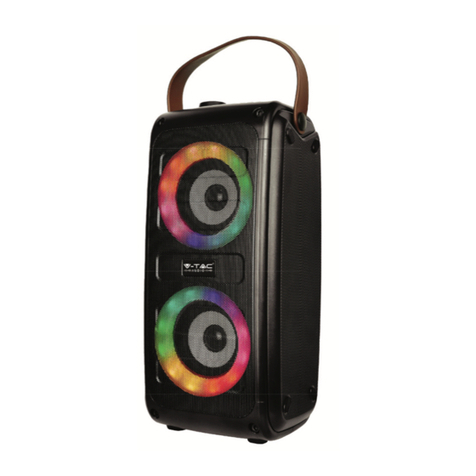
V-TAC VT-6133-O User manual

R
TABLE OF CONTENTS
ENGLISH........................................................................5-8
FRENCH.........................................................................9-12
GERMAN........................................................................13-16
BULGARIAN...................................................................17-20
CROATIAN......................................................................21-24
SPANISH.........................................................................29-32
HUNGARIAN...................................................................33-36
ITALIAN...........................................................................37-40
POLISH ..........................................................................45-48
ROMANIAN.....................................................................49-52
CZECH............................................................................53-56
GREEK ...........................................................................41-44
PORTUGUESE...............................................................25-28

BLUETOOTH SPEAKER
WITH TOUCH BUTTON
Thank you for selecting and buying V-TAC Product. V-TAC will serve you
the best. Please read these instructions carefully & keep this user manual
handy for future reference. If you have any another query, please contact
our dealer or local vendor from whom you have purchased the product.
They are trained and ready to serve you at the best.
INTRODUCTION & WARRANTY
Multi-Language Manual QR CODE
Please scan the QR code to access the manual
in multiple languages.
1

2
(HU) BEVEZETÉS
Köszönjük, hogy választotta és megvásárolta a V-TAC terméket. V-TAC nyújtja Önnek a
legjobb szolgáltatást. Kérjük, a szerelés előtt figyelmesen olvassa el ezeket az utasításokat
és óvja ezt a kézikönyvet későbbi használatra. Ha további kérdései vannak, kérjük, forduljon
forgalmazójához vagy helyi eladójához, akitől megvásárolta a terméket. Ők képzettek és
készek a legjobb szolgálatra.
(IT) INTRODUZIONE
Grazie per aver scelto e acquistato il prodotto della V-TAC. La V-TAC Le servirà nel miglior
modo possibile. Si prega di leggere attentamente queste istruzioni prima di iniziare
l’installazione e di conservare questo manuale a portata di mano per riferimenti futuri. In
caso di qualunque altra domanda si prega di contattare il nostro rivenditore o il distributore
locale da chi è stato acquistato il prodotto. Loro sono addestrati e pronti a servirla nel
miglior modo possibile.
(EL) ΕΙΣΑΓΩΓΗ
ας ευχαριστούμε για το ότι επιλέξατε και αγοράσατε το προϊόν της Βι-ΤΑΚ(V-TAC). Η Βι-ΤΑΚ
(V-TAC) θα σας εξυπηρετήσει με τον καλύτερο δυνατό τρόπο. Παρακαλούμε να διαβάσετε
προσεκτικά τις οδηγίες μας προτού τοποθετήσετε και διατηρήστε τις οδηγίες για τη μετέπειτα
ενημέρωσή σας. Αν έχετε άλλα ερωτήματα και απορίες, παρακαλούμε να έλθετε σε επαφή με
τον προμηθευτή μας ή με τον εγχώριο έμπορο από τον οποίο αγοράσατε το προϊόν. Αυτοί
εκπαιδεύτηκαν κατάλληλα και είναι πρόθυμοι να σας εξυπηρετήσουν με τον καλύτερο τρόπο.
(PL) WSTĘP
Dziękujemy za wybór i zakup produktu V-TAC. V-TAC będzie Ci służył najlepiej. Prosze
przeczytać tę instrukcje uważnie przed przystąpieniem do zainstalowania i zachować ją do
użytku w przyszłości. Jeśli masz jakieś pytania, proszę skontaktować się z naszym Przedst-
awicielem lub z dystrybutorem, od którego kupiłeś produkt. Oni sa przeszkoleni i gotowi
udzielić Ci pomocy.
(RO) INTRODUCERE
Vă mulţumim că aţi ales şi v-aţi cumpărat acest produs de V-TAC. V-TAC vă va fi de un mare
folos, utilizându-l în modul cel mai potrivit posibil. Vă rugăm să citiţi .aceste instrucţiuni cu
atenţie, înainte să începeţi instalarea, şi păstraţi-le pentru că s-ar putea să fie necesar să le
recitiţi. Dacă aveţi şi alte întrebări, luaţi legătură cu dealer-ul nostru sau cu comerciantul de
la care v-aţi achiziţionat produsul. Aceştia sunt bine instruiţi şi întotdeauna sunt disponibili
să vă servească în modul cel mai bun posibil.
(CZ) ÚVOD
Děkujeme, že jste si vybrali a koupili výrobek firmy V-TEK (V-TAC). V-TEK (V-TAC) vám
nabízí ty nejlepší výrobky. Před zahájením instalace si prosím pečlivě přečtěte tyto pokyny a
uschovejte si tento návod pro budoucí použití. Pokud máte další dotazy, obraťte se na
našeho prodejce nebo místního obchodního zástupce, od kterého jste výrobek zakoupili. Oni
jsou vyškoleni a jsou vám k dispozici pro všechny vaše potřeby.
2

(FR) INTRODUCTION
Merci d’avoir choisi et acheté un produit à V-TAC. V-TAC vous offrira le meilleur. Veuillez lire
attentivement ces instructions avant de commencer l’installation et conservez ce manuel à
portée de main pour référence ultérieure. Si vous avez d’autres questions, veuillez contacter
notre distributeur ou le fournisseur local auprès duquel vous avez acheté le produit. Ils sont
formés et prêts à vous server au mieux.
(DE) GEBRAUCHSANWEISUNG
Wir danken Ihnen, dass Sie ein V-TAC ausgesucht und gekauft haben. V-TAC wird Ihnen die
besten Dienste erweisen. Lesen Sie, bitte, diese Gebrauchsanweisung vor der Montage
aufmerksam durch und halten Sie sie für Auskünfte in der Zukunft parat. Sollten Sie weitere
Fragen haben, kontaktieren Sie, bitte, unseren lokalen Händler oderVerkäufer, von dem Sie
das Produkt gekauft haben. Sie sind ausgebildet und bereit Sie auf die bestmögliche Art und
Weise zu unterstützen.
(BG) ВЪВЕДЕНИЕ
Благодарим ви, че избрахте и закупихте продукт на Ви-Тек (V-TAC). Ви-Тек (V-TAC) ще ви
послужи по най-добрия възможен начин. Моля прочетете тези инструкции внимателно
преди инсталация и съхранявайте ръководството за бъдещи справки. Ако имате други
въпроси, моля свържете се с нашия дилър или с местния търговец, от който сте закупили
продукта. Те са обучени и са готови да ви послужат по най-добрия начин.
(HR) UVOD
Hvala vam, što ste odabrali i kupili tvrtke Vi-Tek (V-TAC). Vi-Tek (V-TAC) će va poslužiti na
najbolji mogući način. Molimo, pažljivo pročitajte ove upute prije instalacije i spremite upute
za buduću uporabu. Ako imate dodatnih pitanja, molimo obratite se našemprodavaču ili
lokalnom trgovcu gdje ste kupili ovaj proizvod. Oni su osposobljeni i spremni vam pomognu
na najbolji način.
(PT) INTRODUÇÃO
Agradecemos que escolheu e adquiriu o produto da V-TAC. A V-TAC irá servir-lhe da melhor
maneira possível. Por favor, leia atentamente estas instruções antes da instalação e
mantenha este manual para referência no futuro. Se tiver outras dúvidas, entre em contacto
com o nosso revendedor ou comerciante local de quem adquiriu o produto. Eles são formados
e estão prontos para lhe serem úteis da melhor maneira possível.
(ES) INTRODUCCIÓN
Le agradecemos que ha elegido y adquirido la V-TAC. V-TAC le servirá del mejor modo
posible. Pedimos que antes de comenzar la instalación lea atentamente las presentes instruc-
ciones y las guarde en un lugar adecuado para consultas próximas. En caso de dudas o
preguntas, póngase, por favor, en contacto con el representante o suministrador más cercano
de quien ha comprado el producto. Él será debidamente instruido y dispuesto para atenderle
de la mejor manera posible.
3

GETTING STARTED
FEATURES
SPECIFICATIONS
PACKAGE CONTENTS
• Bluetooth Speaker (1pc)
• USB Cable (1pc)
• Auxiliary cable (1pc)
• Instruction Manual (1pc)
• Bluetooth® Version: 5.0
• Wireless Streaming Range Distance: 10
meter
• Speaker output: 5W
• Unit Size:120x60x230 mm
• Power Input: DC 5V
• Built-In Rechargeable Battery: 3.7V /
1200mAh
• Soft Touch Buttons for Smooth Operation with Blue light.
• Supports TWS function for better sound effect.
• Compatible with wireless products featuring Bluetooth® technology
• AUX Input Function
• Supports TF Card
• Built-in Mic for Hands Free Calls
• With FM Radio Function
• Micro USB charging cable included
• Operation distance: Up to 10 meters
SAFETY INSTRUCTIONS
• Read these instructions carefully.
• Do not use this apparatus near water.
• Clean only with dry cloth.
• Do not block any ventilation openings.
• Do not use near any heat sources such as radiators, heat registers, stoves, or
other apparatus (including amplifiers) that produce
• Protect the power cord from being walked on or pinched particularly at plugs.
• Only use attachments/accessories specified by the manufacturer.
• Unplug this apparatus during lightning storms or when unused for long periods of
time.
• Remove the speaker from the box.
• Please retain all packaging until after
you have checked and counted all the
parts and the contents against the
Package Contents list.
4

ENGLISH
DESCRIPTION OF PARTS
CHARGING THE SPEAKER
TURNING ON/OFF THE SPEAKER
TWS FUNCTION
The speaker has built-in rechargeable battery. When the battery is drained out, speaker
would turn OFF automatically. Please recharge the battery every time it drains out.
Plug the Micro USB end of the included USB charging cable into the charging port.
Plug the other end into a USB port on your computer or other devices made for USB
charging. Red LED Light illuminates indicating that the device is being charged.
It takes 3 - 4 hours to fully charge the speaker. Once the speaker is fully charged, LED Light
would turn OFF.
It is recommended to fully charge the speaker before its first use.
Before Turning ON the speaker, please ensure that it is fully charged.
Press ON/OFF button to turn the device ON/OFF.
It is possible to use two copies of this speaker, paired together, to benefit from a stereo sound.
To do this, turn on both speakers, then press the M button on one of them once.
The two speaker will connect to each other.
You can then pair your device with the stereo unit by following the procedure below.
Ensure that both speakers are spaced less than 10 meters
1. LED indicator
2. Mode/TWS button
3. Skip Backward /Volume Decrease -
Button
4. ON/OFF/ Play/Pause/Phone Button
5. Skip Forward /Volume Increase +
Button
6. ON/OFF button
7. Micro SD (TF) Card Slot
8. Charging Port
9. Auxiliary port
1 2 3 4 5 6 76 8
5

ENGLISH
CONNECT USING BLUETOOTH TECHNOLOGY
TALKING USING THE BLUETOOTH SPEAKER
LISTENING TO MUSIC WIRELESSLY
• Turn on ON/OFF button. You would hear an indication tone, indicating that you are now in
Bluetooth Pairing Mode.
• Activate the Bluetooth function on your source device (Mobile Phone or Tablet).
Please refer to manufacturer’s instructions for instructions on enabling Bluetooth on your device.
• Search for available Bluetooth devices and you would find “SKU-7725” – Pair it with this
device.
• If required, enter the password “0000” to pair with the device.
• Once paired successfully, you will hear another indication tone.
• You can now stream wireless music on your speaker through your source device.
(Note: Battery life & charging time may vary based on usage, types of devices connected &
wireless distance.)
Please ensure that your cell phone is paired with the Bluetooth Speaker to use the below
functions.
Answer
Incoming Call Incoming Call
Incoming Call
During a call
During a call
Standby mode
and connected
to a device
Press the Phone button once to answer an
incoming call.
After your phone conversation, short press the
Phone button
Long press on the + button will increase the
volume
Long press on the - button will decrease the
volume
Short press the Phone button twice
End Call
Volume
Increase
Volume
Decrease
Redial
last number
FUNCTION OPERATION BUTTON
Please ensure that your device (iPhone, Tablet or Other Smart Phone) is paired with the
Bluetooth Speaker to stream music wirelessly. Once it is paired, play music from your
device.
6

ENGLISH
STREAM MUSIC FROM MICRO SD (TF) CARD
Increase
Volume Playing music
Playing music
Pausing
Press and hold the + button to increase the
volume
Press and hold the - button to decrease the
volume
Short press the Play/Pause button will pause the
music
Decrease
Volume
Pause
FUNCTION OPERATION BUTTON
Play Playing music
Playing music
Playing music
Short press the Play/Pause button will resume
the music
Short press the Skip Backward button will return
you to the previous track
Short press the Skip Forward button will take
you to the next track
Previous track
Next track
(Note: The above functions only can be used in Bluetooth mode only. An indication tone
will alert you when the volume is adjusted to maximum level. In Aux mode, besides the
volume increase/decrease, you will need to control through your source device.)
• Turn ON the speaker.
• Insert the Micro SD (TF) Card into the Micro SD (TF) Card Slot of the speaker
respectively and Blue LED indicator would flash.
• Speaker would automatically start playing songs from the Micro SD (TF) Card.
• To Skip Track Forward – Short press the button.
• To Skip Track Backwards – Short press the button.
• To Pause the Track – Short press the Play/Pause button
• To Play the Track – Short press the Play/Pause button.
• Long press + to increase the volume or - to decrease the volume.
Note: Micro SD Card not included
7

ENGLISH
LISTENING TO FM RADIO
• Turn ON the speaker.
• Insert the Auxiliary cable into the Auxiliary port, and leave the other end of the cable
open. Auxiliary cable serves as FM Antenna while in FM Radio mode.
• Press the Mode button shift to FM radio mode and Blue LED indicator would flash.
• To AUTO-SCAN the stations, press Play/Pause button once.
• It will take few minutes to search all the stations. Once all the stations are scanned,
they get registered in memory, automatically.
• Press or to skip selected stations.
• Long press + to increase the volume or - to decrease the volume.
PLAY MUSIC THROUGH “AUXILIARY” MODE
• Insert one end of the Auxiliary cable (included) into the Auxiliary port, and the other
end to the audio device (such as phone / MP3 Player / computer / tablet / …..Etc.).
• Select your favorite song at the source device to play.
• Long press Volume Increase button to increase the volume or Volume Decrease Button
to decrease the volume.
Note: Play, Pause, Skip Forward, Skip Backward etc. can only be controlled through the
source devices, while playing music in Auxiliary mode.
LED LIGHTS
• Turn ON the speaker.
• The blue LED light will be stay on.
• Turn off the speaker and the Blue LED light will be gone out.
TIPS!!
When the speaker is not in use, turn it OFF in order to save the battery power.
8

FRENCH
DESCRIPTION DES PIÈCES
RECHARGEMENT DU HAUT-PARLEUR
METTRE EN MARCHE/ARRÊT LE HAUT-PARLEUR
FONCTION TWS
Le haut-parleur a une pile rechargeable intégrée. Quand la pile est épuisée, le haut-parleur
s'éteindra automatiquement. Veuillez recharger la pile chaque fois qu’elle est épuisée.
Insérez l’extrémité du Micro USB du câble de chargement USB inclus dans le port de recharge.
Insérez l’autre extrémité à un port USB sur votre ordinateur ou autres dispositifs de recharge
USB.
Le voyant LED rouge s’allume pour indiquer que l’appareil est en charge.
Il faut 3-4 heures pour recharger complètement le haut-parleur. Lorsque le haut-parleur est
complètement rechargé, le voyant LED serait éteint.
Il est recommandé de charger complètement le haut-parleur avant sa première utilisation
Avant de mettre en marche le haut-parleur, veuillez vous assurer qu'il est entièrement
rechargé.
Appuyez sur le bouton «MARCHE/ARRÊT» et maintenez pour mettre en marche/arrêt le
dispositif.
Il est possible d’utiliser deux haut-parleurs, jumelés l’un à l’autre pour bénéficier d’un son stéréo.
Pour ce faire, mettez en marche les deux haut-parleurs, puis appuyez une fois sur le bouton M
sur l’un d’eux.
Les deux haut-parleurs se connecteront l’un à l’autre.
Vous pouvez ensuite appairer votre appareil avec l’unité stéréo en suivant la procédure ci-des-
sous.
Assurez-vous que les deux haut-parleurs sont espacés de moins de 10 mètres
1. Voyant LED
2. Bouton de mode/TWS
3. Bouton saut en arrière /diminution
du volume
4. Bouton Mise en marche/-
Jeu/Pause/Téléphone
5. Bouton saut en avant /augmentation
du volume
6. Bouton Marche/Arrêt
7. Slot pour microcarte à mémoire flash
(TF)
8. Port de recharge t
9. Port auxiliaire
1 2 3 4 5 6 76 8
9

FRENCH
CONNEXION À L’AIDE DE LA TECHNOLOGIE BLUETOOTH
PARLER EN UTILISANT LE HAUT-PARLEUR BLUETOOTH
ÉCOUTER DE LA MUSIQUE SANS FIL
• Allumez le bouton MARCHE/ARRÊT. Vous entendrez une tonalité d’indication que vous êtes
maintenant en Mode d’appairement via Bluetooth.
• Activez la fonction Bluetooth sur votre appareil source (téléphone portable ou tablette).
Veuillez vous référer aux consignes du fabricant pour activer Bluetooth sur votre appareil.
• Recherchez des dispositifs Bluetooth disponibles et vous devrez trouver « SKU-7725 » –
appairez-le à votre appareil.
• Si nécessaire, entrez le mot de passe « 0000 » pour appairer l’appareil.
• Une fois appairé avec succès, vous entendrez une autre tonalité d’indication.
• Vous pouvez maintenant diffuser de la musique sans fil sur votre haut-parleur via votre
appareil source.
(Nota: La durée de vie et le temps de recharge de la pile varient en fonction de l’utilisation,
du type des dispositifs connectés et de la distance de la connexion sans fil)
Veuillez vous assurer que votre téléphone portable est appairé avec le haut-parleur
Bluetooth pour utiliser les fonctions ci-dessous.
Répondre à un
appel entrant Appel entrant
Appel entrant
Pendant un
appel
Pendant un
appel
Mode veille et
appairement à
un dispositif
Appuyez sur le téléphone une fois pour répondre
à un appel entrant.
Après avoir terminé l’appel, appuyez briève-
ment sur le bouton téléphone
Appuyer longuement sur le bouton + pour
augmenter le volume
Appuyer longuement sur le bouton – pour
diminuer le volume
Appuyez brièvement sur le bouton de
téléphone deux fois
Terminer un
appel
Augmenter
le volume
Diminuer le
volume
Recomposer le
dernier numéro
FONCTION OPÉRATION BOUTON
Veuillez vous assurer que votre appareil (iPhone, tablette ou autre Smart Phone) est
appairé avec le haut-parleur Bluetooth pour diffuser de la musique sans fil. Une fois
qu’il est appairé, vous pouvez écouter de la musique depuis votre appareil.
10

FRENCH
DIFFUSER DE LA MUSIQUE À PARTIR D’UNE CARTE MICRO SD (TF)
Augmentation
du volume Jouer de la
musique
Jouer de la
musique
Jouer de la
musique
Appuyez et maintenez le bouton + pour
augmenter le volume
Appuyez et maintenez le bouton - pour
baisser le volume
Appuyer brièvement sur le bouton Jeu/Pause
pour mettre en pause la musique
Diminution du
volume
Pause
Jeu
Pause
Jouer de la
musique
Jouer de la
musique
Appuyer brièvement sur le bouton Jeu/Pause
pour redémarrer la musique
Appuyer brièvement sur le bouton saut en
arrière pour revenir au morceau précédent
Appuyer brièvement sur le bouton saut en
avant pour passer au morceau suivant
Morceau
précédent
Morceau
suivants
(Nota: Les fonctions ci-dessus ne peuvent être utilisées qu’en mode Bluetooth. Une
tonalité d’indication vous avertira lorsque le volume est réglé au niveau maximum. En
mode auxiliaire, outre l’augmentation/diminution de volume, la commande est effectuée
à partir de l’appareil source.)
• Activez le haut-parleur.
• Insérez la carte Micro SD (TF) dans le pour carte Micro SD (TF) du haut-parleur et le
voyant LED bleu commence à clignoter
• Le haut-parleur commencera automatiquement la lecture de musique de la carte Micro
SD (TF).
• Pour sauter au morceau suivant – Appuyez brièvement sur le bouton.
• Pour sauter au morceau précédent – Appuyez brièvement sur le bouton.
• Pour mettre en pause le morceau – Appuyez brièvement sur le bouton Mise en
marche/Pause.
• Pour faire jouer le morceau – Appuyez brièvement sur le bouton Mise en
marche/Pause.
• Appuyer longuement sur le bouton + pour augmenter le volume ou le bouton - pour
diminuer le volume.
Remarque: carte Micro SD non incluse
FONCTION OPÉRATION BOUTON
11

FRENCH
ÉCOUTE DE RADIO FM
• Activez le haut-parleur.
• Insérez le câble auxiliaire dans le port de auxiliaire et laissez l’autre extrémité du câble
libre. Le câble auxiliaire sert d’antenne FM en mode Radio FM.
• Appuyez le bouton de mode pour sélectionner le mode radio – le voyant LED bleu
commence à clignoter.
• Pour balayer automatiquement les stations, appuyez une fois sur le bouton lecture/Pause.
• Il prendra quelques minutes pour trouver toutes les stations. Une fois que toutes les
stations sont scannées, celles-ci seront automatiquement enregistrées dans la mémoire,
• Appuyez sur .. pour passer à certaines stations.
• Appuyer longuement sur le bouton + pour augmenter le volume ou le bouton - pour
diminuer le volume.
JOUER DE LA MUSIQUE VIA LE MODE «AUXILIAIRE»
• Insérez une extrémité du câble auxiliaire (incluse) dans le port auxiliaire et l’autre
extrémité sur un dispositif audio (tels que téléphone / lecteur MP3 / ordinateur / tablette
/... etc.).
• Sélectionnez votre morceau préféré sur l’appareil source à jouer.
• Appuyez longuement sur le bouton d’augmentation du volume pour augmenter le
volume ou le bouton de diminution du volume pour diminuer le volume.
Nota: Lorsqu’on écoute de la musique en mode auxiliaire les fonctions Lecture, Pause,
Saut en avant, Saut en arrière etc. peuvent être commandées uniquement à partir du
dispositif source.
VOYANTS LED
• Mettez en marche le haut-parleur.
• Le voyant LED bleu s’allume.
• Désactivez le haut-parleur et le voyant LED bleu s’éteindra.
CONSEILS!!
Lorsque le haut-parleur n’est pas en cours d’utilisation, mettez-le hors tension afin
d’économiser la batterie.
12

GERMAN
BESCHREIBUNG DER TEILE
LAUTSPRECHER AUFLADEN
EIN- UND AUSSCHALTEN DES LAUTSPRECHERS
TWS FUNKTION
Der Lautsprecher verfügt über einen integrierten Akku. Wenn der Akku leer ist, schaltet sich
der Lautsprecher automatisch aus. Laden Sie den Akku jedes Mal auf, wenn er leer ist.
Stecken Sie das Micro-USB-Ende des mitgelieferten USB-Ladekabels in den Ladeanschluß.
Schließen Sie das andere Ende an einen USB-Anschluß Ihres Computers oder an andere
Geräte an, die zum Aufladen über USB vorgesehen sind. Rote LED leuchtet auf, um anzuzei-
gen, daß das Gerät geladen wird.
Es dauert 3 bis 4 Stunden, um den Lautsprecher vollständig aufzuladen. Sobald der
Lautsprecher vollständig aufgeladen ist, wird das LED-Licht ausgeschaltet.
Es wird empfohlen, den Lautsprecher vor dem ersten Gebrauch vollständig aufzuladen.
Stellen Sie vor dem Einschalten des Lautsprechers sicher, daß er vollständig aufgeladen ist.
Drücken Sie die ON / OFF-Taste, um das Gerät ein- oder auszuschalten.
Es ist möglich, zwei Exemplare dieses Lautsprechers paarweise zu verwenden, um von einem
Stereoton zu profitieren.
Schalten Sie dazu beide Lautsprecher ein und drücken Sie einmal die M-Taste.
Die beiden Lautsprecher verbinden sich miteinander.
Sie können Ihr Gerät dann mit der Stereoanlage koppeln, indem Sie die folgenden Schritte
ausführen.
Stellen Sie sicher, daß beide Lautsprecher einen Abstand von weniger als 10 Metern haben
1. LED-Anzeige
2. Modus/TWS-Taste
3. Rückwärts springen / Lautstärke
verringern - Taste
4. Button EIN / AUS / Wiedergabe /
Pause / Telefontaste
5. Vorwärts springen / Lautstärkeregler
+ Taste
6. EIN/AUS - Taste
7. Micro SD (TF) -Kartensteckplatz
8. Ladeanschluß
9. AUX-Anschluß
1 2 3 4 5 6 76 8
13

GERMAN
VERBINDEN SIE SICH MITHILFE DER BLUETOOTH-TECHNOLOGIE
SPRECHEN MIT DEM BLUETOOTH-LAUTSPRECHER
MUSIK DRAHTLOS HÖREN
• ON / OFF-Taste einschalten. Sie hören einen Hinweiston, der anzeigt, daß Sie sich jetzt im
Bluetooth-Pairing-Modus befinden.
• Aktivieren Sie die Bluetooth-Funktion an Ihrem Quellgerät (Mobiltelefon oder Tablet).
Anweisungen zum Aktivieren von Bluetooth auf Ihrem Gerät finden Sie in den Anweisungen
des Herstellers.
• Suchen Sie nach verfügbaren Bluetooth-Geräten und Sie würden „SKU-7725“ finden -
Koppeln Sie es mit diesem Gerät.
• Geben Sie bei Bedarf das Passwort „0000“ ein, um das Gerät zu koppeln.
• Nach erfolgreichem Pairing hören Sie einen weiteren Signalton.
• Sie können jetzt drahtlose Musik über Ihr Quellgerät über Ihren Lautsprecher streamen.
(Hinweis: Die Lebensdauer und die Ladezeit des Akkus können je nach Nutzung, Art der
angeschlossenen Geräte und der Entfernung zum drahtlosen Gerät variieren.)
Es ist möglich, zwei Exemplare dieses Lautsprechers paarweise zu verwenden, um von einem
Stereoton zu profitieren.
Schalten Sie dazu beide Lautsprecher ein und drücken Sie einmal die M-Taste.
Die beiden Lautsprecher verbinden sich miteinander.
Sie können Ihr Gerät dann mit der Stereoanlage koppeln, indem Sie die folgenden Schritte
ausführen.
Stellen Sie sicher, daß beide Lautsprecher einen Abstand von weniger als 10 Metern haben
Stellen Sie sicher, dass Ihr Mobiltelefon mit dem Bluetooth-Lautsprecher gekoppelt ist, um
die folgenden Funktionen zu verwenden.
Beantworten Sie
den eingehen-
den Anruf
Eingehender
Anruf
Eingehender
Anruf
During a call
Während eines
Anrufs
Standby-Mo-
dus und an ein
Gerät anges-
chlossen
Drücken Sie die Telefontaste einmal, um
einen eingehenden Anruf anzunehmen..
Drücken Sie nach Ihrem Telefongespräch kurz
die Telefontaste
Durch langes Drücken der Taste + wird die
Lautstärke erhöht
Durch langes Drücken der Taste - wird die
Lautstärke verringert
Drücken Sie die Telefontaste zweimal kurz
Anruf
beenden
Lautstärke
erhöhen
Lautstärke
verringern
Wahlwiederhol-
ung der letzten
Nummer
FUNKTION BEDIENUNG TASTE
Stellen Sie sicher, daß Ihr Gerät (iPhone, Tablet oder anderes Smartphone) mit dem
Bluetooth-Lautsprecher gekoppelt ist, um Musik drahtlos zu streamen. Sobald es
gekoppelt ist, spielen Sie Musik von Ihrem Gerät ab.
14

GERMAN
STREAMEN SIE MUSIK VON DER MICRO SD (TF) –KARTE
Lautstärke
erhöhen Musik spielen
Musik spielen
Musik spielen
Halten Sie die Taste + gedrückt, um die
Lautstärke zu erhöhen
Halten Sie die Taste - gedrückt, um die
Lautstärke zu verringern
Short press the Play/Pause button will pause the
music
Lautstärke
verringern
Pause
Abspielen
Pause
Musik spielen
Musik spielen
Durch kurzes Drücken der Play / Pause-Taste
wird die Musik angehalten
Durch kurzes Drücken der Taste Rückwärts
springen kehren Sie zum vorherigen Titel zurück
Durch kurzes Drücken der Taste Skip Forward
springen Sie zum nächsten Titel
Vorheriger
Titel
Nächster
Titel
(Hinweis: Die oben genannten Funktionen können nur im Bluetooth-Modus verwendet
werden. Ein Signalton macht Sie darauf aufmerksam, wenn die Lautstärke auf den
maximalen Pegel eingestellt ist.) Im AUX-Modus müssen Sie neben dem Erhöhen /
Verringern der Lautstärke Ihr Quellgerät steuern .)
• Schalten Sie den Lautsprecher ein.
• Setzen Sie die Micro SD (TF) -Karte in den Micro SD (TF) -Kartensteckplatz des
Lautsprechers ein und die blaue LED-Anzeige blinkt.
• Der Lautsprecher beginnt automatisch mit der Wiedergabe von Songs von der Micro SD
(TF) -Karte.
• Titel überspringen - Drücken Sie kurz die Taste.
• Zum Anhalten des Titels - Drücken Sie kurz die Wiedergabe / Pause-Taste
• Zum Abspielen des Titels - Drücken Sie kurz die Play / Pause-Taste.
• Halten Sie + gedrückt, um die Lautstärke zu erhöhen, oder -, um die Lautstärke zu
verringern.
Anmerkung: Micro SD Card nicht enthalten
FUNKTION BEDIENUNG TASTE
15

GERMAN
UKW-RADIO HÖREN
• Schalten Sie den Lautsprecher ein.
• Stecken Sie das Zusatzkabel in den Hilfsanschluß und lassen Sie das andere Ende des
Kabels offen. Das Hilfskabel dient im UKW-Radiomodus als UKW-Antenne.
• Drücken Sie die Modustaste, um in den UKW-Radiomodus zu wechseln. Die blaue LED-An-
zeige blinkt.
• Um die Sender automatisch zu scannen, drücken Sie einmal die Play / Pause-Taste.
• Die Suche nach allen Sendern dauert einige Minuten. Sobald alle Sender gescannt wurden,
werden sie automatisch im Speicher registriert.
• Drücken Sie ... oder..., um ausgewählte Sender zu überspringen.
• Halten Sie + gedrückt, um die Lautstärke zu erhöhen, oder -, um die Lautstärke zu
verringern.
MUSIKWIEDERGABE ÜBER DEN ZUSATZMODUS (AUX-MODUS)
• Stecken Sie ein Ende des Zusatzkabels (mitgeliefert) in den Zusatzanschluß und das
andere Ende in das Audiogerät (z. B. Telefon / MP3-Player / Computer / Tablet /… usw.).
• Wählen Sie Ihren Lieblingssong auf dem Quellgerät zur Wiedergabe aus.
• Halten Sie die Volume Increase Taste gedrückt, um die Lautstärke zu erhöhen, oder
dieVolume DecreaseTaste, um die Lautstärke zu verringern.
Hinweis: Wiedergabe, Pause, Vorwärtsspringen, Rückwärtsspringen usw. können nur über
die Quellgeräte gesteuert werden, während Musik im AUX-Modus abgespielt wird.
LED LAMPEN
• Schalten Sie den Lautsprecher ein.
• Die blaue LED bleibt an.
• Schalten Sie den Lautsprecher aus und die blaue LED erlischt.
TIPPS!!
Wenn der Lautsprecher nicht verwendet wird, schalten Sie ihn aus, um den Akku zu
schonen
16

BULGARIAN
ОПИСАНИЕ НА ЧАСТИТЕ
ЗАРЕЖДАНЕ НА КОЛОНКАТА
ВКЛЮЧВАНЕ/ИЗКЛЮЧВАНЕ НА КОЛОНКАТА
ФУНКЦИЯТА TWS
Колонката е оборудвана с вградена презаредима батерия. Когато батерията се разреди
напълно, колонката се изключва автоматично. Моля презареждайте батерията всеки
път, когато тя се разреди напълно.
Включете Micro USB края на включения в доставката USB заряден кабел в порта за
зареждане.
Включете другия край в USB порт на Вашия компютър или други устройства, способни
да презареждат през USB. Червената LED лампа светва, за да укаже, че устройството се
зарежда.
Зареждането на колонката до 100% отнема 3 – 4 часа. След като колонката се зареди
напълно, LED лампата угасва.
Преди използването за първи път, е препоръчително да заредите колонката до 100%.
Преди да включите колонката, се уверете, че тя е напълно заредена.
Натиснете бутона на захранването, за да включите/изключите устройството.
Можете да използвате две такива колонки, свързани една с друга, за да постигнете
стерео звук.
За целта включете двете колонки и натиснете бутона M на едната от тях.
Двете колонки се свързват една с друга.
След това можете да свържете Вашето устройство със стерео блок, като следвате
долната процедура.
Уверете се, че двете колонки са на разстояние, не по-голямо от 10 метра.
1. LED индикатор
2. Бутон за режим/TWS
3. Бутон за превъртане
назад/намаляване на силата на звука
4. Бутон за включване/изключване
/Възпроизвеждане/Пауза/Телефон
5. Бутон за превъртане
напред/увеличаване на силата на
звука +
6. Бутон за включване/изключване
7. Слот за Micro SD (TF) карта
8. Порт за зареждане
9. AUX порт
1 2 3 4 5 6 76 8
17

BULGARIAN
СВЪРЗВАНЕ С ПОМОЩТА НА BLUETOOTH ТЕХНОЛОГИЯ
РАЗГОВОРИ ПРЕЗ BLUETOOTH КОЛОНКАТА
СЛУШАНЕ НА МУЗИКА ПРЕЗ БЕЗЖИЧНА ВРЪЗКА
• Завъртете бутона за включване/изключване. Ще чуете звукова индикация за това, че
вече сте в режим на свързване през Bluetooth.
• Активирайте функцията Bluetooth на устройството-източник (мобилен телефон или
таблет).
Моля вж. инструкциите на производителя за активиране на Bluetooth на Вашето
устройство.
• Потърсете налични Bluetooth устройства и би трябвало да намерите “SKU-7725” –
свържете го с Вашето устройство.
• Ако е необходимо, въведете паролата “0000”, за да свържете устройството.
• След като се свържете успешно, ще чуете друга звукова индикация.
• Вече можете да предавате музика безжично към колонката през Вашето
устройство-източник.
(Забележка: Животът на батерията и времето на зареждане варират в зависимост от
употребата, типа на свързаните устройства и разстоянието на безжичната връзка).
Уверете се, че Вашият мобилен телефон е свързан с Bluetooth колонката, за да
използвате долуописаните функции.
Отговор на
входящо
повикване
Входящо
повикване
Входящо
повикване
По време на
разговор
По време на
разговор
Повторно
набиране на
последния
набран номер
Натиснете веднъж бутона за телефон, за да
отговорите на входящо повикване.
След като приключите разговора, Натиснете
за кратко бутона за телефон.
Натиснете и задръжте бутона +, за да
увеличите силата на звука.
Натиснете и задръжте бутона -, за да
намалите силата на звука.
Натиснете два пъти за кратко бутона за
телефон.
Завършва
не на
разговор
Увеличаване
на силата на
звука
Намаляване
на силата
на звука
Повторно
набиране на
последния
набран номер
ФУНКЦИЯ ОПЕРАЦИЯ БУТОН
Уверете се, че Вашето устройство (iPhone, таблет или друг смартфон) е свързано с
Bluetooth колонката, за да предавате музика през безжична връзка. След като ги
свържете, слушайте музиката от Вашето устройство.
18

BULGARAIN
ПРЕДАВАНЕ НА МУЗИКА ОТ MICRO SD (TF) КАРТА
Увеличаване
на силата на
звука
Възпроизвежд
ане на музика
Възпроизвежд
ане на музика
Възпроизвежд
ане на музика
Натиснете и задръжте бутона +, за да
увеличите силата на звука.
Натиснете и задръжте бутона -, за да
намалите силата на звука.
Натиснете за кратко бутона за
Възпроизвеждане/Пауза, за да паузирате
музиката.
Намаляване
на силата на
звука
Пауза
ФУНКЦИЯ ОПЕРАЦИЯ БУТОН
Възпроизв
еждане
Пауза
Възпроизвежд
ане на музика
Възпроизвежд
ане на музика
Натиснете за кратко бутона за
Възпроизвеждане/Пауза, за да възобновите
музиката.
Натиснете за кратко бутона за превъртане назад,
за да се върнете към предишното парче.
Натиснете за кратко бутона за превъртане
напред, за да преминете към следващото
парче.
Предишно
парче
Следващо
парче
(Забележка: Горните функции могат да се използват само в режим Bluetooth.
Звукова индикация ще Ви предупреди, когато силата на звука е настроена на
максимум. В AUX режим, като се изключи увеличаването/намаляването на силата на
звука, управлението се извършва от устройството-източник.)
Предаване на музика от Micro SD (TF) карта
• Включете колонката.
• Въведете Micro SD (TF) картата съответно в слота за Micro SD (TF) карта на
колонката и синият LED индикатор започва да мига.
• Колонката автоматично започва да възпроизвежда музика от Micro SD (TF) картата.
• За превъртане към следващото парче – натиснете за кратко бутона.
• За превъртане към предишното парче – натиснете за кратко бутона.
• За пауза на парчето – натиснете за кратко бутона за Възпроизвеждане/Пауза.
• За възпроизвеждане на парчето – натиснете за кратко бутона за
Възпроизвеждане/Пауза.
• Натиснете и задръжте +, за да увеличите, или -, за да намалите силата на звука.
Забележка: Micro SD карта не е включена в доставката.
19
Table of contents
Languages:
Other V-TAC Speakers manuals

V-TAC
V-TAC VT-6215-2 User manual

V-TAC
V-TAC VT-6203-2 User manual

V-TAC
V-TAC VT-6310-2 User manual

V-TAC
V-TAC VT-6212 User manual

V-TAC
V-TAC VT-6308-2 User manual

V-TAC
V-TAC 80133970 User manual

V-TAC
V-TAC VT-6208 User manual

V-TAC
V-TAC VT-6204-2 User manual

V-TAC
V-TAC VT-6210-2 User manual

V-TAC
V-TAC VT-4000W User manual