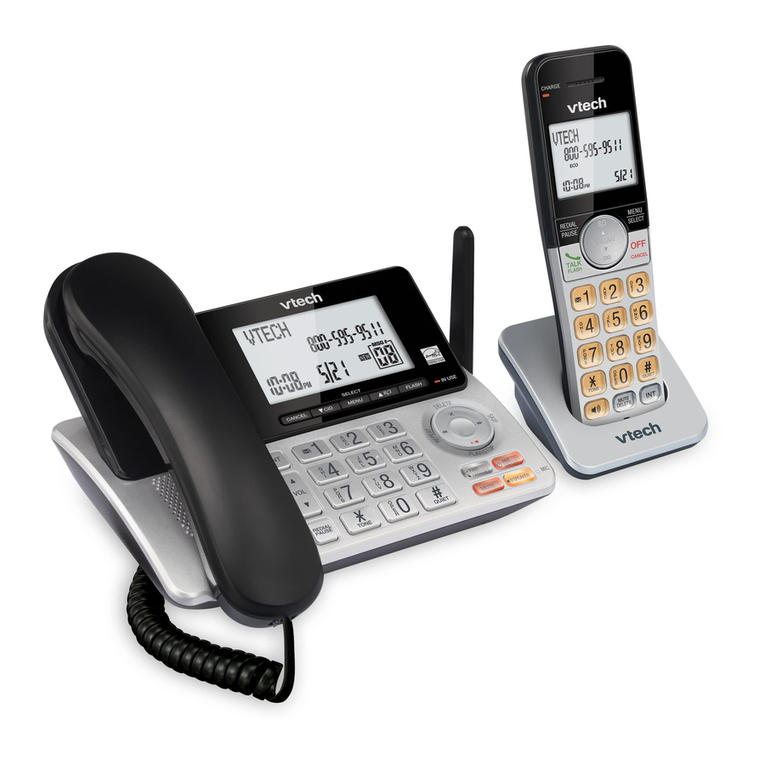
V-tech Tropez 1064 XL User manual

I@STRUCTION
MANUAL
WziI
VlDEO TECHNOLOGY ENGINEERINGLTD.
@
TROPEZ
Is a trademark of VlDEO TECHNOLOGY ENGINEERING LTD., a member
of
THE VlDEO TECHNOLOGY GROUP OF COMPANIES.
Distributedinthe U.S.A. by VTECH Communications,8770
SW
Nimbus Avenue
/
Beaverton,Oregon, 97005
DistributedinCanada by VTECH Electronics Canada Ltd., Richmond, B.C. V7C 4V4.
Copyright 1992for VlDEO TECHNOLOGY ENGINEERING LTD.
I
1
.
VIDEOTECHNOLOGY ENGINEERINGLTD

When usingyour telephone equipment
,
indicatedon the markinglabel. If
basic safety precautionsshould always
befollowed to reducethe risk of fire,
electric shock and injuryto perl
includingthe following:
I
1.
Readand understandall
instructions.
I'
2.
Followallwarnings and instk-
-
tions markedonthe product.
3.
Unplugthis productfrom the wall
outletbefore cleaning. Do not
use liquid cleanersor aerosol
cleaners. Use a damp clothfor
cleaning.
4.
Do notusethis productnear
water, for example, neara bath
tub, wash bowl, kitchensink, or
laundrytub, ina wet basement,
or neara swimmingpool.
5.
Donotplace this producton an
unstablecart, stand, or table.
The productmayfall, causing
seriousdamage to the product.
6.
Slots and openingsinthe cabinet
andthe back or bottomare
. providedfor ventilation,to protect
itfrom overheating, these open-
ingsmust not be blocked or cover-
ed. The openings should never
be blockedby placingthe product
on the bed, sofa, rug, or other
similarsurface. This product
should never be placed near or
over a radiatoror heat register.
This productshouldnotbe placed
ina built-ininstallationunless
properventilation is provided.
7.
This productshouldbeoperated
onlyfrom the type of power source
you are not sure of the type of
power supglyto your home,
pnr-r~lt
jealer or local
:any.
-
-
-
-
with a groundedtype
'
~g)
---
This product
*4,h athree wire
-
-amuLii~mg~ypeplug, a plug
havingathird (grounding)pin.
This plugwill only fit into a
groundingtype power outlet.
This is a safety feature. If you
are unable to insertthe plug into
the outlet,contact your electri-
cian to replace your obsolete
outlet. Do not defeatthe safety
purposeof the groundingtype
plug.
(If providedwith a polarized
attachment plug)
---
This product
is equippedwith a polarized line
plug(aplug havingone blade
wider than the other). This plug
will fit into the power outlet only
one way. This is asafety
feature. If you are unable to
insertthe plugfully intothe outlet
try reversingthe plug. If the plug
should still not fit, contactyour
electricianto replace your
obsolete outlet. Do not defeat
the safety purpose of the polariz-
ed plug.
9. Do not allow anythingto rest on
the power cord. Do not locate
this productwhere the cordwill
be abused by personswalking
on it.
10.
Do not overloadwall outlets and
extensioncords as this can result
inthe risk of fire or electric shock.
11. Neverpush odjects of any kind
intothis produdt through cabinet
slots as they ~y touch danger-
ous voltage points or short out
parts that could result ina risk of
fire or electric ghock. Never spill
liquid of any kied on the product.
12.
To reduce the risk of electric
shock, do not disassemblethis
product,buttake it to a qualified
servicemanwhen some service
or repairwork is required. Open-
ing or removingcovers may
expose you to dangerousvolt-
ages or other risks. Incorrect
reassemblyca cause electric
shock when th appliance issub-
sequentlyuse
.
13.
Unplugthis pr duct from the wall
outletand refe
1
servicingto
the product.
I
C.
Ifthe prod ct has been ex-
posedto rain Jr water.
I
D. If the prodyctdoes not
operate normally by followingthe
operatinginstructions. Adjust
E.
If the product has beendrop-
pedor the cabinet has been
damaged.
F.
If the product exhibits a
distinct change in performance.
14.
Avoid usinga telephone (other
thana cordlesstype) during an
electricalstorm. There may bea
remote risk of electric shock from
lightning.
15.Do not use the telephone to re-
port a gas leak inthe vicinity of
the leak.
SAVE THESE
INSTRUCTIONS

1.
Automatic Security Code Reset
One of morethan 65 thousands
possibledigitalsecuritycodes is
randomly selectedevery time
when the handsetisplaced inthe
baseunit. The handset and base
unitcanthen recognizeeach
other based on this securitycode
which minimizesthe chances of
other cordlessphone usingyour
telephoneline.
When the base unit is first power
up,the CHARGE LEDwill flash
to signalthe user to initializethe
handset. The CHARGEDLED
will stop flashing once initializsa-
tion iscompleted.
2.
Automatic FreeChannel
Selection
An unoccupiedchannelout of 10
possiblechannels isselected
every time when the handsetis
placedinthe base unit. A
channel button isavailableto
switchchannelto yet another
unoccupiedchannelif interfer-
ence occurs during phone
conversation.
3.
Memory Dialand Last Number
Redial
10
telephonenumbersup to 16-
digit each can be programmedin
memory and recalledlater for
automatic dialing. Last number
redialis also available.
4.
Tone
l
Pulse Dialing Capability
Tropez 1064XLcan be selectedto
generateeithertone or pulse
dialing sequence compatiblewith
your telephone line.
5.
Battery Saver and LowVolt
The handsetis equipped with a
batterysavingfeature instandby
mode
,
so that you can use the
handsetfor a longerperiods
without charging. The handset
will also alarmthe user for
rechargingwhen the battery
voltage is low.
6.
Speakerphone
The speakerphone plus the extra
keypadallow the userto initiate
or answer a phone conversation
without using the handset. This
makes the base unit function like
an extra phone unit. Tropez
1064XLalso allows switching
phoneconversationbetweenthe
handsetand the base, or holding
phone conversationwith boththe
handsetand the base.
7.
Two Way Intercom
This feature allows conversation
betweenthe handsetand the
base unit. The handset and the
basecan page each other to
initiate a conversation.
8.
Out of RangeIndicator
When the handset is operated
beyondits operatingrange, the
LOW
BAT
LEDwill flash to
warn the user with the IN
USE
LED on.
9.
Privacy
This feature enables the handset
to disconnectthe speakerphone
from listeningor speakingwhile
the handset is engaged ina
phoneconversation.
10. HoldRelease1
This feature epablesthe tele-
phone,linebeipg puton holdby
HANDSET
FE

SPECIALFUNCTION BUTTONS:
PHONE -Tomake or answer a call.
INTCOM
-
To pagethe base or
answer
a
pagefrom the
base.
OFF
-
To end a call or discon-
necta line.
t
-
Usedas a pause code in
programminga call in
memory.
PGMI
-
To programme a phone
p~l numberwhen the phone
isidle.
Toodisablethe speaker-
phonefeature when the
phone is inuse.
MEM
-
To recalla phone number
for memorydialing.
REDIAL
-
To redialthe last number.
HOLD
-
To holda telephone line.
FLASH
-
To switchbetween
2
telephonelineswhen call-
alert or call-waiting
'
serviceisavailable.
CHAN
-
To change the current
channelto another one.
SWITCH:
VOLUME
-
To control the volume of
the earpiece. This is a
two positionsslide switch
for highor low volume.
LEDS:
TALK
INTCOM
LO BAT
-
To indicateconnectionto
the base unitwhen
steady on. To indicates
the phone line is on hold
when flashing at a rate
of
1
sec. To indicatethe
phone is in PROGRAM
modewhen flashing at a
rateof
2
sec.
-
To indicatethe phone is
in INTERCOMmode
when steady on. To
indicatesthe base is
currentlypagingwhen
flashing.
-
To indicate low battery
conditionand charging
IS
necessary.
-
To indicateout of range
condition.
b
SPECIALFUNCTI N BUTTONS:
!
MEM
-
To recall
answer a pagefrom
I
the qase.
MUTE
-
To mutethe microphonein
the basel
SPEAKERPH~NE~-
To enablethe
speakerphone.
FLASH
-
To switch between
2
tele-
phone lideswhen call-alert
loudnessof
the speaker-
phone.
LEDS:
INUSE
-
To indicate ringingor tele-
phone lineconnection.
CHARGE
-
To indicatethe handset
ischarging.
HOLD
-
To indicatethe phone is on
hold(flashing only).
INTERCOM-Toindicatethe base is
in INTERCOMmode
when steady on. To
indicatethe baseis
pagingthe handset
when flashing.
MUTE
-
To indicatethe microphone
inthe baseis mutedwhen
on.
SPEAKERPHONE
-
To indicatethe
speakerphone
status.

NOTES:
1.
All button keyswill be referred
hereafterby their names within
square brackets
([...I)
[PHONE] isalways active.
[PGMIPRI
I
isactive only in
'
standby mode only.
All other keysare active in
PHONE/TALKmode only.
2.
All switcheswill be referred here-
after by their names incapital
letter.
3.
All LEDswill be referredhereafter
bytheir names underlined.
BASE UNITFEATURES
7
.-
2.
Plugthe
l2V,
C
adaptor intoa
/1
wall outlet,
120i
AC.
1
3,
lnserta modularplugof the tele-
4
phonecable inlo a wall telephone
jack.
I
!
4.
lnsertthe other plugof the tele-
phonecable intothe modular tele-
phonejack of the base unit.
?
5.
Wall Mounting(optional)
Choosea conbfenientlocation
preferablyneat
a
wall AC outlet
and atelepho~jack. Notethe
mountingscrews should be
screwed into arwallstudfor
secure mounting.
CAUTION:
I
1
locations.
Never touch u insulatedtele-
phone wires o terminals unless
t.
the telephone.line has been
disconnectedat the network
interfa&
1

1.
Setthe TONUPULSEswitch
Set this switchaccordingto your
phone line dialing system. For
touchtone phone line, set switch
to TONE. For dial pulse (rotary)
phone line, set switchto Pulse.
Pleasecheck with your localtele-
phone company
if
you are not
sure.
2.
Set the RINGERswitch
Set this switchto ON, the handset
andthe basewill ring. When the
switch isset to OFF, the handset
andbasewill not ring. Notethat
the TALWPROG ledonthe
handset, andthe
IN
USF
LEDon
the basewill always flash
when ringingis detected.
3.
Fillthetelephone number card
(handset)
Use a sharp or pointedobjectto
gently pry up the plasticwindow
until it pops out. Writeyour tele-
phonenumber onthe cardand
replacethe window.
4.
Power Up
Everytime when the base unit is
powerup, the CHARGE LED will
flash to signal the user to
initializethe handset. Itwill
continueto flash until the
handsetis placedinthe cradle.
Once'the handset is initialized,
the LEDwill stop flashing andthe
phoneis ready to use if the
batteriesischarged.
5.
Chargethe handset batteries
Placethe handset in the base
unitfor chargingfor
16
hours
beforeusing. The CHARGE led
will light to indicatethe battery
is being charged.
6.
Check dial tone
After the batteriesare fully
charged,pick up the handset and
extendboth antennas fully. To get
a dial tone, press [PHONE]until
you hear a beep.The TALK
I
PROG led will turn on to indicate
the phone line is connected. You
should hear a dial tone now.
IMPORTANT
EVERYTIMEWHEN THE BASE
UNIT IS POWER UP, THE CHARGE
LED WILL FLASHTO INDICATEAN
INCORRECTSEC,URITY CODE
CONDITION. PLACETHE HANDSET
ON THE
CRADLE~FOR
A FEW
SECONDSTO REPETTHE
SECURITY CODE:
IN ORDER TO EN UREA KEY IS
PRESSEDCORR CTLY, A KEY
MUST BE PRESS D DOWN
FIRMLYTILL THE HANDSET
BEEPS.
i
1.
MAKINGCAL
S
F
You can makeballs by usingthe
handsetor thejspeakerphone at
the base.
j
I
1
.I
MAKINGCALLS FROMTHE
HANDSET
j
i
Manual Dial
f
Press [PHONtj]
.
When you hear
a dialtone,dial.the number.
If
The IN-.USE
I
inthe basewill
turn on to indi ate the phone is
connected. T eTALWPROG led
will turn on to ndicatethe hand-
set is now rea y for dialing.
T
If the communication link between
the handsetandthe base unit
cannot be established properly,
the handsetwill beep as a
warning signal and will notturn
theTALWPROGledon.
If you arefar away from the base
,
walk closer andtry again. If you
are close to the base, place the
the handsetinthe basefor a few
secondsto resetthe security
code and try again.
Redial
To redialthe last phonenumber
you dialed, press [PHONE] to get
dialtonethen press[REDIAL].
Memory Dial
To dial a phone number in
memory, Press[PHONE] to get
dialtone then press[MEM]anda
digit key(0-9).You canstore
10
phone numbers inmemory(see
PROGRAM PHONE NUMBER).
A
warningtone isgenerated if
[
*
]
or
[
#
] ispressed. The
phonewill thenexit from memory
dialing and returnto normal
manualdialing mode.
1.2
Making calls onthe
speakerphone
ManualDial
Press[SPEAKERPHONE].
When you hear a dial tone, dial
the number. If you makea mis-
take, press [SPEAKERPHONE]
to hang up andthen [SPEAKER-
PHONE]againto get dialtone.
Rememberyou must hear the
dialtone beforeyou dial.

The
M
USEled inthe base will
turn onto indicatethe phone line
isconnected. The SPEAKER-
PHONE ledwill turn on to
indicatethe base is now in
speakerphone mode.
Redial
To redialthe last phonenumber
you dialed, press [PHONE]to get
dialtone then press [REDIAL].
Memory Dial
To diala phone number in
memory, Press[PHONE] to get.
dialtone then press [MEMORY]
and a digit key (0to
9).
2.
ANSWERING CALLS
When you receivea call, the
handset and the base unitwill ring
when the RINGERswitch is set
to ON position.However, the
handset will not ringif it isplaced
on cradle. To makesure your
phoneringswhen the handsetis
away from the base, please keep
bothantennas fully extended.
USEandTALWPROG leds
flashwhenever a call comes in.
2.1
Answering calls usingthe
handset
To answer a call when the hand-
set isinthe base,just pick up the
handset.
To answer a call when the hand-
set is away from the base, just
press[PHONE].
Both IN USE and TALWPROG
ledswill be on steady when the
call is answered.
2.2
Answering calk onthe
speakerphone
To answer a call, press
[SPEAKERPHONE]on the base
unit, and speak towardthe
microphone. You can use the
speakerphone regardlesswhether
the handset is on the cradle or not.
Both
JN
USE and SPEAKER-
PHONE leds will turn on.
3.
FLASH
If your phone line has call-alert or
call-waitingservice, you will hear a
tone when
a
second partycall
comes inwhile you are talking on
the phone. You can answer the
secondcaller and putthe first
caller on hold.
Press [FLASH]buttonon the
handset or on the basewill place
the first call on hold and answer
the second call. Press[FLASH]
again will enable you to talk to the
first caller and placethe second
caller on hold.
4.
THREE-WAY CONFERENCE
Three-wayconferenceis referred
as a phone conversationbetween
the handset, the speakerphone,
and the line.
While the handset is engaged ina
phone conversation,the speaker-
phonecanjoin the phone conver-
sation by pressing [SPEAKER-
PHONE]. However,the handset
can prohibitthei speakerphone
from enteringthe conversation by
pressing[PGMIPRI]buttonafter a
call has beenset up. By pressing
[PGMIPRI]again during phone con-
versationor hanging up, the phone
will go back to its default condition
which allowsth,espeakerophone
to enterthree-way conference.
This feature allgws privacyfor
the handset during
a
phone
conversation.
/
The handsetcintinue after a
speaker phon6conversation
5.
ON HOLD
I
Pressing[HO Dleither inthe
handsetor in he basewill put a
call on HOLD TheHOLD LED
in the base a d the TALWPROG
LED inthe ha
1
dsetwill flash at a
rate of everysec. This HOLD
'.:
status can only be releasedby
pressing[PH NE] inthe handset
or [SPEAKE PHONE] inthe
base, oioff-h okedby another
telephpneco nectingto the
same telepho e line.
f
6.
HANG
UP
I
Duringa thre -way conference,
I
the handset and speakerphone
can be independentlydiscon-
nectedfrom the line. To endthe
conference,both handsetand
speakerphone.must beturn off
independently. The basewill
then disconnectthe phone line
and the
lN
USEledwill turn off.
6.1
Hangingupfrom the handset
(not in9wayconference)
If you are nearthe base unit, you
can simply place the handset
back on the base unit to hang
UP.
If you are away from the base
unit, press[OFF]to hang up. A
warningtone is generated if the
hang up is not successful. Press
[OFF]again.
6.2
Hanginguponthespeaker-
phone
(not in9wayconference)
Press [SPEAKERPHONE]to
enda call. SPEAKERPHONE
and INUSELEDs will turn off.
7.
PROGRAMPHONE NUMBER
Your phone has memoryto store
10upto 16-digit phone num-
bers. You must use the handset
to program phone memory. To
enter the PROGRAMmode, the
handset and the speakerphone
MUST be inOFF (standby)
mode.
Press[PGMIPRI]. When the
phone is in PROGRAMmode,
the TALWPROG LEDflashes.
12

Then pressa numeric key from 0
to
9.
Pressing[MEM], or-
[PHONE]keywill cause the
phoneto terminate PROGRAM
mode.
Entera phone number up to 16
digits.
Use
[*I
or
[#]
to add a3.5
seconds pause between digits
duringdialing. Note a
[
*
] or
[
#
]
isconsidered as a digit in
memory.
Press[MEM]to complete pro-
gramming..If number is more
than 16digits, the phone will
generatea warning tone and
terminatePROGRAMmode
automatically (TALWPROGLED
off). To erase a stored number,
press [PGMIPRI],a numeric key
(1to lo), and [MEM].
All memory is stored inthe base
unit. A power loss in Base Unit
will cause phone memorylost.
8.
BATTERY LOW
LOWBAT will turn on steady in
TALK mode.
9.
INTERCOM
You can useTropez 1064XLas a
two-way intercom between the
baseandthe handset.This does
nottie your telephone line. While
you are usingthe intercom.The
LEDwillflash when an in-
comingcall isreceived. There
will be no indicationinthe
handset. To answerthe call,
simply pressing
[SPEAKERPHONE]or [PHONE].
The phonewill exit from intercom
mode automatically.
13
:
To page the base unit, press
[INTCOM]on to handset. The
handset INTCOMLED will flash
andthe base will sound and flash
the INTERCOMLED. The base
can answerthe page by simply
pressing[INTERCOM]on the
base. If the base does not
answerwithin
5
page alarm, the
phone will cancelthe page.
To page the handset, press
[INTERCOM]on the base. The
base INTERCOM LEDwill flash
and the handset will sound and
flash the INTCOMLED. The
handset can answer the page by
simply pressing [INTCOM]on the
handset. If the handset does not
answerwithin
5
pagealarm, the
phonewill cancel the page.
When the handset or the
speakerphone is engaged in a
phone conversation, its paging
function ([INTCOM]on handset,
[INTERCOM]on the speaker-
phone is disabled. If you wish to
pagethe other end, you must put
the phone on holdfirst before its
pagingfunction is enabled again.
However,the paging function of
the one that is not engaged in a
phone conversation is still en-
abled. When the other end
receives a pagingsignal, it will
sound once only insteadof
5
times.
10. OUT OF RANGE
Duringa phone conversation,the
handset will continueto monitor
the basetransmittingsignal
strength. Whqn this signal
strength is below a certainlevel,
the handsetwill flash the
LOW
BATT
LEDto signalan out of
range condition. The channel
switching feature is disabled.
I

Tropez 1064XLoperates at maximum
transmittingpower allowedby the
FederalCommunication Commission
(FCC). This meansthe operating
rangeof the handset andthe base unit
is limitedovera certain range which
dependson the locationof the base
unit, your homeconstruction, the
weather, localinterferingsourcesetc.
For bestperformance,make sure
bothantennas arefully extended
especiallywhen the handsetisaway
fromthe base unit. Try to placethe
base unitindifferent locations inyour
homein order to optimizethe operat-
ing range.
If you hear increasing noiseandstatic
when you walk further away from the
base unit. Movecloser to the base
unitwill improveyour reception.
When you walk out of the range, the
handsetwill not be ableto get a line,
disconnect
a
line, or receivea call.
Movecloser to the base unit.
If you are not out of the range and
you hear a lotof noise andstatic,
press [CHAN]to switchto another
channel.
1.
Removethe batteries cover by
pressingon the lines and sliding
downward.
2.
Liftout the battery pack and un-
plugit from the handset.
,
.
3.
Plugthe new battery pack into the
connectorcorrectly and firmly.
Placethe battery pack inside the
batterycompartmentnicely.
4.
Replacethe cover by sliding it
on itstrack up until it isfirmly in
place.
5.
For best performance,make sure
to chargethe new battery for 10
hoursbefore using.
CAUTION:
To Reducethe Risk of Fireor Injuryto
Persons, Read and Followthese
Instructions:
Use only VTECH Battery
PIN:
29-1007;
tions.

1. Frequency Control:
Phase LockedLoop (PLL)
2. Transmit Frequency:
Handset
-
49.67 MHz to 49.97
MHz (10-channel)
Base Unit
-
46.61 MHzto 46.97
MHz (10-channel)
3.
'
Receive Frequency:
Handset
-
46.61 MHzto 46.97
MHz (10-channel)
Base Unit
-
49.67 MHz to 49.97
MHz (10-channel)
4. Modulation:
FM(FrequencyModulation)
5.
NominalEffectiveRange:
Maximumpower allowed by FCC.
Actual operating range mayvary
accordingto the environmental
conditionsat the time of use.
However, automatic channel
selectionis usedto minimizethis
effect.
6. MicroprocessorControlled
7. Size:
Handset
-
2lcm(L) x 6.5cm(W)
x 4.5cm(H)
Base Unit
-
21.5cm(L) x 14cm(W)
x 5cm(H)
9. Power Requirements:
Handset
-
Self-contained
Nickel-Cadmium
rechargeablebattery
Base Unit
-
120V60Hz AC
+
12V DC, 200mA
adaptor
I
NOTE: Specificationsare typical
and may change without
notice.
'8.
Weight:
Handset
-
Approx. 29Og (incl.
batteries)
Base Unit
-
Approx. 6OOg

IMPORTAN
CHANGES TO THE
OPERATING
MANUAL
OF
YOUR
TROPEZ
1064
CORDLESS TELEPHONE.
MAKE SURE THE TROPEZ
1064
CORDLESS TELEPHONE IS
OFF
BEFORE YOU PROGRAM THE MEMORY DIAL FUNCTION.
STEP
1:
PRESS
THE "PROG"
KEY.
STEP
2:
ENTER THE WHOLE PHONE NUMBER
TO
BE
STORED INMEMORY. MAKESURE
TO
INCLUDE
THE AREA AND LONG DISTANCE CODES IF
'
NECESSARY.
STEP
3:
PRESS
"MEM"
KEY,
FOLLOWED
BY
THE DIGIT
KEY
(
1,2,3,4,
OR
5)
WHERE THE NUMBER IS TO
BE
STORED..
e-.
IF THE NUMBER
WAS
PRO~R~MMED
PROPERL?,
YOU WILL
,
HEAR
A
3
LEVEL
TONE.
-,
.
8.
.
.
P
w.:
4
.&'
t
IF
YOU
STILL
HAVE
PROBLEMS
PROGRAMIN~
YOUR
TELE-
,
i
PHONE, PLEASE CALL OUR
CUSTOMER SERVICE DEPART-
i
I
MENT
AT
1-800-624-5688.
1
June
1,1994
Table of contents
Other V-tech Cordless Telephone manuals

V-tech
V-tech CS6120-2 User manual

V-tech
V-tech IA5874 User guide

V-tech
V-tech DS6641 User manual

V-tech
V-tech i6717 User manual

V-tech
V-tech DS6751 User manual

V-tech
V-tech i6775 User manual

V-tech
V-tech CS6419 User manual

V-tech
V-tech ES1810A User manual

V-tech
V-tech LS6185-13 User manual

V-tech
V-tech VT1923 User manual

V-tech
V-tech LS6113-BK User manual

V-tech
V-tech vz2652 User manual

V-tech
V-tech LS640V-1F User manual

V-tech
V-tech vt9127 User manual

V-tech
V-tech Cordless Telephone User manual

V-tech
V-tech CS1100-O User manual

V-tech
V-tech DS6121 User manual

V-tech
V-tech gz 2334 User manual

V-tech
V-tech LS6245 User manual

V-tech
V-tech DS6600 User manual