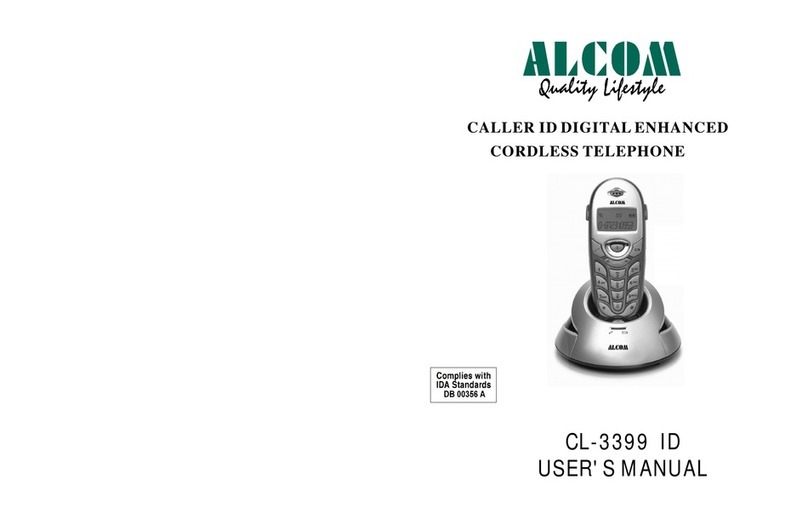
ALcom CL-3332 IDM User manual

Troubleshooting
59
Symptom Check & Remedy
No
operation
Check that the power adapter is properly connected.
Check that the telephone line cord is properly connected.
Check that the handset batteries are fully charged.
Check that the handset batteries are installed properly.
No dial
tone
Check that the telephone line cord is properly connected.
Check that the power adapter is properly connected.
Nothing
appears
on the
display
Check that the handset batteries are installed properly.
Check that the handset batteries are fully charged.
Check that the handset is on.
Cordless handset
seems to have very
shortbattery life
Check the charge contacts.
Consistently short battery life may indicate that
replacement of the batteries is necessary.
Cordless
handset
Base
phone
Check that the power adapter is properly connected.
Check that the telephone line cord is properly connected.
Cordless
handset
Base
phone Check that the telephone line cord is properly connected.
Cordless
handset
Base
phone Check that the power adapter is properly connected.
CL-3332 IDM
USER' S MANUAL
2 in 1 Combo DIGITAL ENHANCED CORDLESS PHONE
with caller ID function

Safety Precautions
To reduce the risk of electrical shock and injury, please follow these basic safety precautions
before using the phone.
1. Carefully read and observe the instructions in this manual.
2. Follow all warnings marked on the unit.
3. When cleaning, unplug the phone first, then use a damp cloth to wipe. Do not use liquid or
aerosol cleaners.
4. Do not place objects on the line cord that may cause damage.
5. Do not use this phone in wet surroundings and environments where there is a risk of
explosion.
6. Avoid spilling any liquid on the phone.
7. Unplug this phone from the wall outlet and refer servicing to qualified service personnel.
8. Take care for polarity of batteries, insert the rechargeable batteries in accordance with
polarity symbols ( this instruction is found in the installing batteries section.)
9. Only use Never use other ordinary
batteries or conventional alkaline batteries. Otherwise health risks and personal injuries
cannot be excluded.
10. Do not mix exhausted batteries and full batteries. Exhausted batteries shall not be
removed to usually household waste and fire.
11. If you are sure you will not be going to use the handset for a long time, please take out
the batteries from battery compartment.
12.
13. Keep the phone only under supervision of adults or out of the reach from children.
14. Use the phone only in the described manner.
15. Stop using if the phone is damaged.
16. The phone is designed for working with a temperature range from 5 to 45 only.
the batteries indicated in the User's Manual.
Use only the power supply indicated in the User's Manual.
Congratulations
on purchasing our high quality product.
Please read the manual carefully to find out all features and how your telephone
works, so you can get the best out of your new phone.
Cordless Handset
Stores up to 50 calling numbers, up to 16 digits for each number
Stores up to 10 last dialed numbers, up to 24 digits for each
number
Stores up to 50 phonebook numbers, up to 12 characters for
each name and 16 digits for each number
Key lock setting
Direct call setting
Call transfer of external calls (when using two or more handsets)
Internal calls
Ringer melody selection(9kinds of melodies and 16 kinds of
polyphonic ringtones)
Ringer volume adjusting(9levels for melody and 4 levels for
polyphonic ringtones)
Handset earpiece volume setting (up to 9 levels)
Silence & microphone mute functions
Delete single or all records in phonebook
Clicking key tone on or off
Dialing mode selection
Storing Caller ID number to phonebook
Battery low indicator
58
Date / Hour format setting
LCD contrast selection
Tone dialing mode
Polyphonic ringtones selection (up to 11 kinds and 1 normal ring)
Speaker volume selection (up to 4 levels)
Ringer volume selection
Contents
Package Contents
Location and Function of Controls
Using Handset Carrying Clip
Using Headset ( optional )
Display
Installing Batteries
Connecting Lines
Charging Handset
Turning Handset On/Off
Making a Call
Receiving a Call
Last Number Redial
Using Speakerphone
Adjusting Voice Volume
Setting External Ring Melody and Volume
Setting Internal Ring Melody and Volume
Setting Key Tone
Paging
Key Lock
Muting Microphone
Setting Silence Function
Out of Range Operation
9
5
1
Before Using
Basic Function
1
12
6
6
7
7
8
14
15
17
18
18
19
20
21
21
22
22
22
Feature List
FSK and DTMF dual system Caller ID
LCD displays calling and dialling number
Redialing and preparation dialing functions
Delete single or all records
Page on base unit to look for the handset easily
Talk time display
Speakerphone
Message waiting function
Flash and pause functions
Call back function
LCD back light
Supports GAP function
Time setting
LCD displays date and time
VIP function
Language selection
Base Phone and Cordless Handset
Base Phone
Stores minimum 76 calling numbers, date & time
Stores up to 10 last dialed numbers
Store up to 70 names & numbers in phonebook
Stores up to 6 one-touch memory numbers
Stores up to 10 two-touch memory numbers
Area & long distance code setting
57

Menu Navigation
Menu Map
Storing a Phone Number
Viewing Stored Entries
Erasing Numbers from Phonebook
Dialing a Number in Phonebook
Updating Your Phonebook
Setting VIP Numbers from Phonebook
Character Map
Viewing Caller ID Numbers
Erasing All Caller ID Numbers
Erasing a single Caller ID Number
Storing a Caller ID Number to Phonebook
Dialing a Caller ID Number
Making an Internal Call
Transferring an External Call
Registering a New Handset
De-registering a Handset
Choosing a Base Phone
Setting Handset Name
Changing Handset PIN
25
A Multi-handsets System
Handset Setting
Phone Book
Caller ID
26
27
28
28
29
35
35
36
37
39
39
40
42
43
44
44
Menu
23
23
31
36
7ClearBase
9 Clear All
Special Function
To clear the information of base phone
All information of base phone has been
cleared and the in use indicator on the base phone
starts to blink.
To clear the information of handset
While connecting adapter, press and hold the
button more than 10 seconds.
Note:
You can do the same steps 2~5 as " to register a
new handset with the base " to register again.
While inserting the batteries, press and hold the
and buttons until the display shows as
below:
Press the button to clear the base register
information.
Or
Press the button to clear all the handset
information.
Result:
Clearing the
Information
of Base and
Handset
1.
2.
1.
2.
If you press and hold the button less than 10
seconds while connecting the adapter, the phone
will perform the function.PAGING
56
page page
1
0
7
PQRS
9
WXYZ
1
7
PQRS
9
WXYZ
0
page

Setting Hot Call
Choosing Language
Setting Date & Time
Resetting Handset
Choosing Dialing Mode
Changing Flash Time
Changing Pause Time
Setting Ring
Setting LCD Contrast
Setting Date & Time
Setting Language
Setting Area & Long Distance Code
Setting Flash Time
Setting Hour Format
Setting Date Format
Storing One-Touch Memory Numbers
Dialing a Number form One-Touch Memory
Storing Two-Touch Memory Numbers
Dialing a Number form Two-Touch Memory
Reviwing a Number form Two-Touch Memory
Changing Base PIN
Base Phone Setting
Feature List
Troubleshooting
48
48
52
49
50
50
51
51
57
59
47
47
46
45
46
Special Function
56
55
53
53
54
54
52
52
53
55
The default PIN is . You can do the following steps to
change the in standby mode.
1590
Base PIN
Press the or button to choose
and press the button.
The display shows " ", then " Base PIN: ".
Enter the Base PIN ( The default Base PIN is 1590),
and press the button.
Press the or button to choose
and press the button.
The display shows " ", enter the new PIN ,
and press the button.
The display shows " ", enter the new
PIN again, and press the button to confirm. A
confirmation tone will be heard.
Note:
BS
Setting ,
Change
PIN,
Waitng...
New PIN:
Retype PIN:
Result:
1.
2.
Changing
Base
PIN
If you enter the wrong PIN, your phone sounds a
rejective warning tone.
If there are several handset registered to the base
phone, the other handset users can't access the
menu without having the newly changed
.
BS
setting BS
PIN
3.
The display show " " to maintain secrecy.
*
4.
5.
INT
INT INT
INT
INT
INT
INT
INT
INT
INT
1
0
2ABC
3
DEF
4GHI
5JKL
6
MNO
7
PQRS
8TUV
9WXYZ
1
0
2ABC
3
DEF
4GHI
5JKL
6
MNO
7
PQRS
8TUV
9WXYZ
1
0
2ABC
3
DEF
4GHI
5JKL
6
MNO
7
PQRS
8TUV
9WXYZ

Package Contents
Once you have unpacked your phone, check to make sure that you have all the
parts shown below. If any piece is missing or broken, please call your dealer.
Location and Function of Controls
Power adapter*(two) Line cord*
*The shape of the plugs vary according to each country's specification.
Charger
Power Jack
Rear View
User's manual
User's manual
Before Using
Three AAA batteries
(Rechargeable Ni-MH
batteries)
Charge indicator
lights steadily
while the handset
is charging
1
Charger
Phone Base Carrying clips
Handset
Charge pins
redial page
ABC
2
WXYZ
9
TUV
8
GHI
PQRS
DEF
3
MNO
6
JKL
5
m1
m4
m2
m5
m3
m6
pause
flash
4
7
0
1
store auto
m
u
t
e
d
i
a
l
s
e
t
d
e
l
R
INT
C
1
0
2ABC
3
DEF
DEF
4GHI
5JKL
6
MNO
MNO
7
PQRS
PQRS
8TUV
9WXYZWXYZ
Pick up the handset or press the button.
Press the button followed by the location button
(0~9) to dial out the matching number.
1.
Dialing
a Number
From
Two-Touch
Memory
2.
auto auto
In the state of on-hook, press and hold the location
button (0~9).
or
Press the button followed by the location button
(0~9) .
Result: The match stored number will show on the LCD.
Reviewing
a Number
From
Two-Touch
Memory
auto auto
54
POWER

2
Handset
Earpiece Display
INT button: Confirms a
programming
Activates intercom
communication. During
a call, transfers a call
to another handset.
step.
Microphone
button:
Redials the last number
you dialled.
When entering a number,
inserts a pause between
numbers.
In standby mode,
press repeatedly to view the
outgoing numbers.
During a call, press to
get a new dial tone or
switch to call waiting caller.
C button: Clears characters
from the display. Also used to
go to
mode. a
the previous menu or
standby During call,
press to mute the microphone.
In standby mode, press and
hold to turn the handset
On or Off.
button: Makes or answers
a call.
During a call, press and hold
to activate the speakerphone.
button:In the standby mode,
press to enter the menu and
scroll through the items. Also
adjust volume during a call.
R button: In standby mode
press to enter phonebook.
Turns on/off
function. Changes a
character from upper case
to lower case or vice versa.
button: silence
key
lock
button: Turns on/off
funciton.
Location and Function of Controls (continued)
R
INT
C
1
0
2ABC
3
DEF
4
GHI
5JKL
6
MNO
7
PQRS
8TUV
9
WXYZ
Charge pins
Carrying clip
Battery cover
Rear View
1abc 2
ghi4jkl 5
tuv 8
0
wxyz 9
mno 6
pqrs 7
def 3
2
In standby mode, you can store 6 frequently used numbers
in one-touch memory so that you can dial the 6 numbers
easily.
.Press the button and the LCD shows
Input the number you want to store.
Press the button to store the number and the
LCD will display SAVE OK.
-- >
1.
Storing
One-Touch
Memory
Numbers
2.
3.
m1 m6
store store
0
TUV
8
PQRS
7
GHI
4JKL
5MNO
6
DEF
3
ABC
2
1
WXYZ
9
~
Pick up the handset or press the button.
Press the button to dial the matching stored
number.
1.
Dialing
a Number
From
One-Touch
Memory
2.
m1 m6
~
m1 m6
~
m1 m6
~
1abc 2
ghi4jkl 5
tuv 8
0
wxyz 9
mno 6
pqrs 7
def 3
2
In standby mode, you can store 10 frequently used
numbers in two-touch memory so that you can dial the 10
numbers easily.
.
.
Press the button and the LCD shows
Input the number you want to store.
Press the button again and the LCD shows
Enter desired location number (0~9) and the LCD will
display SAVE OK.
-- >
-- >?
1.
Storing
Two-Touch
Memory
Numbers
2.
3.
store store
0
TUV
8
PQRS
7
GHI
4JKL
5MNO
6
DEF
3
ABC
2
1
WXYZ
9
store store
4.
53

Base Phone
Location and Function of Controls(continued)
3
0
TUV
8
PQRS
7
GHI
4JKL
5MNO
6
DEF
3
ABC
2
1
WXYZ
9
redial
page
pause
flash
d
i
a
l
m1
m5 m6
d
e
l
1
store
auto
m
u
t
e
s
e
t
m2 m3
m4
+
-
2
3
4
58
7
6
13
910 11 12
14
15
16
17
18
19
20
21
22
23
Press the button when the LCD shows
Press the or button to set the flash time (100
ms / 120ms /300ms / 600ms ).
Press button to confirm and exit.
SET
FLASH.
1.
Setting
FlashTime
2.
3.
d
i
a
l
d
i
a
l
d
i
a
l
d
i
a
l
Press the button when the LCD shows
Press the or button to select the hour format
( 24 HOUR / 12 HOUR).
Press button to confirm and exit.
HOUR
FORMAT.
1.
Setting
Hour
Format
2.
3.
d
i
a
l
d
i
a
l
d
i
a
l
d
i
a
l
Press the button when the LCD shows
Press the or button to select the date format
( DD-MM / MM-DD).
Press button to confirm and exit.
Note:
DATE
FORMAT.
In the DD-MM mode, the time display sequence is day-
month and in the MM-DD mode, the sequence is month
- day.
1.
Setting
Date
Format 2.
3.
d
i
a
l
d
i
a
l
d
i
a
l
d
i
a
l
52
1. Handset
2. Coil cord
3. Speaker
4. Hook switch
5. LCD display
6. Used to quickly redial
the last dialed number.
7. To get a new dial tone or
switch between 2 callers ( call waiting ).
8. Press to insert a pause
time during dialing a number.
9. Paging
10. In standby mode, press
and hold to enter the time setting,
press once more to enter the LCD
contrast setting.
11. Clears characters or
numbers from the display. In standby
mode, press twice to enter the base
phone setting.
12. Performs page-up function.
13. Performs call back
function. Confirms a programming
step.
redial
flash
Pause
Page
set
del
dial
button:
button:
button:
button:
button:
button:
button:
button:
SPK USE
14. Press to enter the
phonebook directly
15. Used to dial two-touch
memory numbers .
16. Used to store memory
numbers in standby mode.
17. Press to deactivate the
microphone.
18. Performs page-down
function.
19. Adjust volume higher.
20. Adjust volume lower.
21.One green and one red LED
indicators:
In standby mode, the red indicator
glows and mildly blinks at the same
time even if all the caller ID
information is cleared. When the
corded handset is picked, the mild
blink in the red light stops.
The green indicator is on when
speakerphone is used.
22. Speaker button
23. Stores 6 one-touch
memory numbers
auto
store
mute
m1~m6
button:
button:
button:
button:
button:
button:
button:
button:
button:
-
+

Location and Function of Controls(continued)
4
Ringer
volume
(OFF/LO/HI)
switch
Dialing mode
switch(P/T)
Line cord
Jack for
coil cord
Adaptor
socket
Jack for
line cord
The unit supports 16 kinds of language, including English1,
Greek, Australian, English2,
Spanish, Dutch, French, German, Polish, Swedish, Danish,
Finnish and Norwegian.
Press the button when the LCD shows
Press the or button to select the language.
Press button to confirm and exit.
SET
LANGUAGE.
Czech, Slovak, Turkish,
1.
Setting
Language
2.
3.
Setting
Area &
Long
Distance
Code
d
i
a
l
d
i
a
l
d
i
a
l
d
i
a
l
Only under "English1", "English2", "Greek", "Australian",
" "Polish
When you use this
phone first time, or move to an area that has different area
code, you must enter your area code. This is necessary
because the phone must distinguish local or long distance
calls to properly dial calls from the caller ID list.
" languages and in on-
hook state, the setting can be done.
Press the button when the LCD shows
Press the or button to select the correct digit.
Press button to confirm and enter the next digit
setting.
When the area code setting has been completed, press
the button enter the long distance code setting.
Repeat the step 2~3 to finish the setting for LDS code
and press the button to exit.
SET AREA
& LDS.
Czech", "Slovak", "Turkish",
1.
2.
3.
d
i
a
l
d
i
a
l
d
i
a
l
d
i
a
l
4.
d
i
a
l
d
i
a
l
d
e
l
5.
d
e
l
51

Installing Batteries
Slide the battery cover in the
direction of the arrow and pull it out.
The rechargeable Ni-MH batteries (AAA
size) come with your phone. Install the
batteries before using your phone.
2. Insert new batteries as indicated,
matching correct polarity (+, ).
NOTE: Reversing the orientation may
damage the handset.
1.
-
3.Replace the battery cover, slide the
cover up until it snaps shut. The battery needs to be replaced if
it does not recover its full storage
capacity after recharging.
When replacing batteries, always
use good quality Ni-MH re-
chargeable AAA size batteries.
Never use other batteries or
conventional alkaline batteries.
Notes:
550
Press the button when the LCD shows
Press the or button to make selection.
Press the button to confirm and exit.
LCD
CONTRAST.
Result: The current contrast level ( HI/LO ) will show on
the LCD.
1.
Setting
LCD
Contrast
2.
3.
d
i
a
l
d
i
a
l
d
i
a
l
d
i
a
l
Press the button to enter the date & time setting,
and the digits of hour blink.
Press the or button to select the correct number.
Press the button to confirm and the digits of minute
blink.
Repeat steps 2~3 to set the minute, month, day, year
and week.
Note:
In FSK standard state, the date and time will be
automatically set when you receive a call to this unit.
After the year setting, the cursor for week will flash, you
can use the or button to activate/deactivat this
setting, if it is activated, the week will set automatically,
or in stead of showing the week day, the LCD will only
show the in the standby state.
You need to select the year to ensure the week display
correctly.
TOTAL CALLS XX
1.
Setting
Date &
Time 2.
3.
4.
d
i
a
l
d
i
a
l
d
i
a
l
d
i
a
l

6
Connecting Lines
Connect one end of the phone line
cord to the phone line jack on the rear
of the base phone, and the other end
to a standard phone wall jack.
Connect the modular ends of the
power adapters to the power jacks of
the phon and charger, and
plug the other end into a standard AC
wall outlet.
base e
1.
2.
To AC wall outlet
To phone wall jack
To AC wall outlet
Using Handset Carrying Clip
The supplied handset carrying clip
allows you to conveniently carry the
handset with you. It clips easily to your
belt, waist band, or shirt pocket.
If you want to remove the carrying clip:
Insert a screw driver along the edge
of one of its arms and release the clip.
Then lift it off.
If you want to attach the carrying clip:
Attach the carrying clip to the back of
the handset. Make sure that the
carrying clip locks into place.
49
Base Phone Setting
The base phone contains some special functions: Press the button twice to enter
the setting mode and press the or button to select one. The setting sequence
is:
Press the button to confirm or press the button to exit. You can also press and
hold the button to enter the , press the button once more to
enter the .
In additional, you need to change the Base PIN to protect the default
all options under menu against changing.
PHONE BOOK- SET RING - LCD CONTRAST - SET TIME - SET LANGUAGE -
SET AREA & LDS - SET FLASH - HOUR FORMAT - DATE FORMAT
TIME SETTING
LCD CONTRAST SETTING
BS Setting
.
Base PIN and
Press the button when the LCD shows
Press the or button to select the sub-menu.
Press the button to select the or
.
Press the or button to select the desired ringer
melody (11 kinds of polyphonic and 1 kind of standard
ring), ring volume (up to 4 levels) or you can select
to deactivate the function.
Press the button to confirm.
Note:
SET RING.
RING TYPE
RING VOLUME
RING OFF
You need to connect the adaptor for the polyphonic
ringtone. If your phone doesn't connect to the adaptor,
you need to set the ringer to RING 1. Otherwise, the
phone will not ring when it receives a call.
1.
Setting
Ring 2.
3.
4.
5.
d
e
l
d
i
a
l
d
e
l
d
i
a
l
d
i
a
l
d
i
a
l
d
i
a
l
d
i
a
l
d
i
a
l
POWER
s
e
t
s
e
t

7
Using Headset (optional)
The headset jack is located in the
middle right side of the handset
and is standard plug.
Simply plug the into the
jack and the will be
activated.
2.5mm
headset
headset
Note:
Earphone
Microphone
Clip
Headset plug
Headset jack
When the headset is plugged
into the headset jack, the
microphone on the handset will
be deactivated.
Charging Handset
Before initial operation, YOU SHOULD
FULLY CHARGE THE HANDSET for 24
hours.
When you are not using the handset,
you can put the handset on the charger.
Result: When charging, the handset is
automatically turned on and the
icon on the display will blinks.
R
INT
C
1
0
2ABC
3
DEF
DEF
4
GHI
5JKL
6
MNO
MNO
7
PQRS
8TUV
9
WXYZ
48
Result: The current setting displays.
Press the or button to choose your desired
dialing mode, and press the button to confirm.
A confirmation tone will be heard.
2.
During a call, the button allows you to transfer a call to
another extension such as call waiting caller. The flash time
varies in different country, please check with your local
telephone office before setting.
The current setting displays.
You can choose or
Press the or button to choose
and press the button.
Press the or button to choose your desired
flash time, and press the button to confirm. A
confirmation tone will be heard.
Note:
100ms, 120ms, 300ms 600ms.
Flash
Time,
Result:
Changing
Flash
Time
1.
2.
Choosing
Dialing
Mode
(continued)
The function allows adequate time for the phone number
to register with the telephone company's system and
complete the call.
The current setting displays.
You can choose or
Press the or button to choose
and press the button.
Press the or button to choose your desired
pause time, and press the button to confirm.
A confirmation tone will be heard.
Note:
2sec, 3sec 4sec.
Pause
Time,
Result:
Changing
Pause
Time 1.
2.
INT
INT INT
INT
INT
INT INT
INT
INT
INT
R

Turning Handset On/Off
When you place the handset on the
charger to charge, the handset
turns on. The handset is
now ready for use.
The first time the handset turns on, the
display shows the handset number, the
date and time.
You can set the handset to display your
name and the handset number. See
page 44.
automatically To turn the handset on when the
display is off, press and hold the
button.
To turn the handset off, press and
hold the button until "
displays. Then the display will
turn off.
Note:
Good
Bye"
To turn the handset on or off in standby
mode.
1.
2.
Nothing will appear on the display
when the battery power is very low.
You should fully charge the handset
before using it.
8
47
After resetting the handset, the follow items will return to
the default mode.
Redial Memory, External Melody/Volume, Internal
Melody/Volume, Receiving Volume, All Caller ID and
Phone Book Numbers.
To reset the handset
Press the or button to choose
and press the button.
The display shows " " , enter the handset
PIN (the default PIN is 1590), and press the
button.
The display shows " ", press the button
to confirm or press the button to cancel.
Set Default,
HS PIN:
Sure ?
Resetting
Handset
1.
2.
3.
Sure ?
Except for using the menu, you can use the to customize the
following settings for the handset, such as choosing dialing mode, changing pause
time and changing flash time. The base pin is required to access menu.
In standby mode, press the or button to access the menu, then
press the button to confirm. The display shows" " then " ",
enter the last valid base PIN (The default PIN is ). Press the button to
confirm.
Then:
HS Setting BS Setting
BS Setting
BS Setting
Waiting... Base PIN :
1590
In order to provide compatibility with other telephone
systems, your handset can be set to either pulse-dialing
(rotary), or tone dialing (DTMF).
The cursor is in front of press the
button.
Dial Mode,
Choosing
Dialing
Mode
1.
INT
INT
INT
INT INT
INT
INT
INT
INT INT
1
0
2ABC
3
DEF
4GHI
5JKL
6
MNO
7
PQRS
8TUV
9WXYZ
C
C

Display
9
This area displays in-use information such
as the caller's number, menus, call duration,
etc.
In standby mode, the display will show the
signal strength icon, handset number,
battery status icon,date and time.
INT
Signal strength icon
This icon is always displayed when your phone is
on, and shows the current signal strength. More
bars indicate more signal strength.
Lock icon
In use icon
Speakerphone icon
Mute icon
Line icon
Intercom icon
This icon indicates that the key lock function is
activated. See page 21.
This icon indicates that the phone is in use mode.
This icon indicates that the phone is in
speakerphone mode.
This icon indicates that the phone is in mute
conversation mode.
The icon is displayed when the line is engaged.
This icon indicates that the phone is in the intercom
conversation mode.
L1
INT
L1
12:00 01-Jan
HS 1
Handset
46
You can select a display language. 12 different languages
are available. They are English, French, German, Spanish,
Dutch, Italian, Greek, Turkish, Polish, Russian, Hungarian
and portuguese.
The current setting displays.
Press the or button to choose
and press the button.
Press the or button to select the language
and press the button to confirm. A confirma-
tion tone will be heard.
Language,
,
Result:
Choosing
Language
After setting the date and time, the phone will display the
date & time and record automatically when you receive a
call.
.
Press the or button to choose
Press the button to confirm and the display
shows
Enter the date and press button to confirm.
Then a confirmation tone will be heard.
Set Clock.
""
Enter the time and press the button to confirm
then the display shows " ".
Note:
Input Time:
Input Date:
Setting
Date & Time
1.
2.
3.
4.
The time setting sequence is Hour-Minute-Day-
Month-Year.
In FSK standard state, the date and time will be
automatically set when you receive a call to this unit.
1.
2.
INT
INT
INT INT
INT
INT
INT
INT
INT
INT
1
0
2ABC
3
DEF
4GHI
5JKL
6
MNO
7
PQRS
8TUV
9WXYZ
1
0
2ABC
3
DEF
4GHI
5JKL
6
MNO
7
PQRS
8TUV
9WXYZ

Display (continued)
10
New Caller ID icon
Battery icon
This icon indicates that there is a new call. To view
the call, access the Caller ID menu.
This icon is displayed at all times when your phone
is on, and shows the levels of your battery charge.
The more bars, the greater the charge. During
charging, the icon will flash.
When battery is low, the display will show the low
battery icon.
When the battery is very low, the handset turns off
automatically.
REPEAT
Base phone
This area displays in-use information
such as the caller's number, name,
menus, call duration, etc.
In standby mode, the display will
show the number of the total calls,
the date and time, etc.
In use and speaker icon
REPEAT icon
REPEAT
This icon indicates that the phone is in use mode or in
speaker mode.
If a call comes repeatedly, the display will show
icon in the upper right corner of the LCD.
REPEAT
45
4.
5.
The display shows " New PIN: ", enter the desired
new PIN , and press the button.
The display shows " Retype PIN: ", enter the new
PIN once more, and press the button.
A confirmation tone will be heard.
Changing
Handset
PIN
(continued)
You can set one specific number that will be dialled
automatically no matter which key has been pressed.
Press the or button to choose
Press the button, and enter the number you
want.
Press button to confirm.
Note:
Hot call.
Result:
Setting
Hot Call
1.
2.
3.
One hot call number can be set per handset.
If you wish, press the button twice quickly in standby
mode, this function will be deactivated.
A confirmation tone will be heard and the
displayshowsasfollow:
Direct Call
INT
INT
INT
INT
INT
INT
INT
INT
1
0
2ABC
3
DEF
4GHI
5JKL
6
MNO
7
PQRS
8TUV
9WXYZ
1
0
2ABC
3
DEF
4GHI
5JKL
6
MNO
7
PQRS
8TUV
9WXYZ
1
0
2ABC
3
DEF
4GHI
5JKL
6
MNO
7
PQRS
8TUV
9WXYZ
RR

Display (continued)
MESSAGE WAITING message
waiting
MESSAGE
WAITING
PRIVATE
PRIVATE
OUT OF AREA
-Ifyouhavesubscribeto
function from your local telephone company, when a
voice message is left, the screen will display
.
- If the caller has exercised the option to prevent
his name and number from being sent, will show
on the screen.
- This message will display when some one
calls from an area where the telephone company is not
offering the caller identification services or is not yet
providing number delivery to your area via the long distance
net work.
11 44
Handset Setting
Using the menu, you can customize the various settings for the handset
such as the handset name, display language, hot call etc.
HS setting
In standby mode, press the or button to access , and press the
button to enter the submenu.
Then:
HS Setting
This option allows you to set your handset name. The
handset name displays in standby mode.
Press the or button to choose
Press the button to confirm and the display
shows "
Enter the name, up to 8 characters.
Press the button to confirm and a confirmation
tone will be heard and the LCD shows .
User name
Store!
Name: ".
(see p.31).
Setting
Handset
Name 1.
2.
4.
A handset PIN is required to protect your handset against
unauthorized reset. The default PIN is 1590, you can
change the handset PIN.
Press the or button to choose
Press the button to confirm and the display
shows "
Enter the current handset PIN (the default PIN is
1590), and press the button.
Set PIN .
HS PIN: ".
Changing
Handset
PIN
1.
3.
2.
3.
John
1
12:00 01-Jan
INT
INT
INT
INT
INT
INT
INT
INT
INT
1
0
2ABC
3
DEF
4GHI
5JKL
6
MNO
7
PQRS
8TUV
9WXYZ
1
0
2ABC
3
DEF
4GHI
5JKL
6
MNO
7
PQRS
8TUV
9WXYZ

Basic Function
Pick up the handset and press the button.
Result:
Result: The display shows the number as you enter it.
You can enter the desired phone number in standby
mode, which allows you to make corrections before
dialing. Follow these steps.
Dial a phone number.
To end the call, either press the button or
replace the handset on the charger.
Note:
Enter a phone number. Check the number on the
display.
Making a
Call 1.
2.
Standby is the initial screen that appears when you first turn on the handset. When
your phone is in standby mode, you will see the handset number or the handset name
on the LCD display of cordless handset , if you have one saved. On the LCD display
of base phone you will see the total calls, the date and time.
When your telephone is in standby mode, you can use the telephone to make or
receive calls, or to use the menu functions.
3.
1.
You hear a dial tone and the and L1 icons
appear on the display.
To make a call to the last number you dialed, use the
Redial feature. For details, refer to
on page15 .
Last Number
Redial
12
012345
Cordless Handset
1
0
2ABC
3
DEF
4GHI
5JKL
6
MNO
7
PQRS
8TUV
9WXYZ
1
0
2ABC
3
DEF
4GHI
5JKL
6
MNO
7
PQRS
8TUV
9WXYZ
43
Your handset can be used with up to four different base
phones. This menu option allows you to select the base
phone you want to use.
To select the base phone automatically:
To select the base phone manually:
Note:
Press the or button to choose
and press the button.
Then:
Press the or button to choose
and press the button.
Note:
Press the or button to select your desired
base phone number, and press the button to
confirm.
Select BS,
Base auto,
1.
2.
Choosing a
Base Phone
Press the button to confirm and a confirmation
tone will be heard. The display of the de-
registered handset shows " " or "
Searching...".
No Base
5.
De-Registering
a Handset
(continued)
To use the handset with more than one base phone, you
must register the handset to each base phone. ( See p.
40 ).
2.
In this mode, the handset will automatically select
the base phone that gives the strongest connection.
No Base Searching...
Note:
If you de-register the handset whose power is off, you
must repeat steps 3~5 once time to de-register the
handset.
INT INT
INT
INT
INT
INT
INT
INT

Note:
When the number appears correctly, press the
button.
Making a
Call
(continued)
2.
If you make a mistake while entering a number,
press the button to clear the last digit and
correct the number.
If you press and hold the button for more than
one second, all digits you have entered will be
cleared and the phone returns to standby mode.
You can press the button to insert a pause to a
dialing sequence.
Pick up the handset or press the button.
Result:
Result: The display shows the number as you enter it.
You can enter the desired phone number in standby
mode, which allows you to make corrections before
dialing. Follow these steps.
Dial a telephone number.
To end the call, hang up the handset or press the
button.
Note:
Enter a phone number. Check the number on the
LCD display.
1.
2.
3.
1.
You hear a dial tone and the icon .
To make a call to the last number you dialed, use the
Redial feature. For details, refer to
on page15 .
Last Number
Redial
13
Base Phone
C
C
C
C
0
TUV
8
PQRS
7
GHI
4JKL
5MNO
6
DEF
3
ABC
2
1
WXYZ
9
0
TUV
8
PQRS
7
GHI
4JKL
5MNO
6
DEF
3
ABC
2
1
WXYZ
9
42
You can de-register a handset with the registered
handset. (All handsets be in standby mode.)
The display shows as follow:
must
Press or button to choose
and press the button.
Enter the base pin ( the default pin is 1590), and
press the button.
Press the or button to choose
, and press the button.
Note:
Enter the handset number you want to de-register,
or press the button to exit.
BS Setting,
Remove
HS
Result:
Result:
Result:
1.
2.
3.
De-Registering
a Handset
The current status will be shown as the following format:
"----".Each position of the cursor stands for the status
of the matching handset working with the base." "
means this handset is in setting mode. " " means not
registered yet.(For example: " " means: There are
up to 3 handsets working with this base phone and the
HS 1 is in setting mode.)
The handset in setting can not be de-registered.
M
-
M23- -
A confirmation tone is heard, and the display
shows the submenu.
The display shows " "then "
"
Waiting... Base
PIN .
4.
INT
INT INT
INT
INT
INT
Remove HS: ?
M----
1
0
2ABC
3
DEF
4GHI
5JKL
6
MNO
7
PQRS
8TUV
9WXYZ
C
1
0
2ABC
3
DEF
4GHI
5JKL
6
MNO
7
PQRS
8TUV
9WXYZ
C

Note:
When the number appears correctly, pick up the
handset or press the button.
Making a
Call
(continued)
2.
If you make a mistake while entering a number,
press the button to clear the last digit and correct
the number.
You can press the button to insert a pause to
a dialing sequence.
When a call is received, the handset rings and the
icon on the display blinks.
If the caller can be identified, the caller's phone
number displays. If the caller name is currently stored
in your internal phonebook, the caller name displays
while the handset rings.
L1
When a call is received, press the button to
answer it.
Result:
Receiving
aCall
1.
During the conversation, the timer is
displayed in the follow sequence hours-
minutes-seconds.
14
Cordless Handset
To end the call, either press the button or
replace the handset on the charger.
2.
00:03:05
L1
d
e
l
d
e
l
pause pause
41
Note:
Press or button to choose
and press the button.
Enter the base pin ( the default pin is 1590), and
press the button.
Press the or button to choose ,
and press the button.
Subsc PIN:
Enter the sub pin you want to set, and press the
button.
Pick up the new handset you want to register, then
do the same steps 2~5 as "To register a new
handset with the base phone" to register it.
Note:
To register a new handset with the registered handset.
The display shows " ".
The in use indicator on the base phone blinks.
BS Setting,
New HS
Result:
Result:
Result:
Result:
In the step 4, you need to enter the you
have set.
Subsc PIN
Registering
aNew
Handset
(continued)
*
If this is not the first base phone you are registering
to, there is a " " in front of the base number, you had
better to select another base number.
1.
2.
3.
4.
The display shows " "then "
"
Waiting... Base
PIN .
A confirmation tone is heard, and display
shows the submenu.
5.
INT
INT INT
INT
INT
INT
INT
INT
1
0
2ABC
3
DEF
4GHI
5JKL
6
MNO
7
PQRS
8TUV
9WXYZ
1
0
2ABC
3
DEF
4GHI
5JKL
6
MNO
7
PQRS
8TUV
9WXYZ

15
Receiving
aCall
(continued)
If the caller can be identified, the caller's name and
phone number displays.
When a call is received, pick up the handset or
press the button to answer it.
Result:
1.
During the conversation, the timer is displayed
in the follow sequence minutes-seconds.
To end the call, hang up the handset or press the
button.
2.
The handset allows you to retrieve the last 10
numbers you have dialed.
To view and dial the numbers:
Press the button in standby mode.
If you want to scroll through the memory, press
the button repeatedly to view and find the
number you want to call.
Press the button to dial the number.
Note:
1.
2.
Last
Number
Redial
Cordless Handset
Base Phone
3.
Each time you dial a new number, the oldest
number stored in the redial memory is automatically
erased, and the redial memory is updated.
40
The supplied handset with the base phone is already
registered as the handset number 1. Each additional
handset with GAP compatible you purchased must be
registered to the base phone.
To register a new handset with the base phone:
The display shows the base number.
The display shows the register code it receives.
Note:
Note:
Press and hold the button on the base phone
until the in use indicator on the base phone blinks,
then release it.
Press the or button to choose
and press the button.
Press the or button to choose a base
number, and press the button.
Press the button and the display shows "
".
Enter the base pin ( the default base pin is 1590 ).
Please ensure the telephone line is connected.
HS Regi-
ster,
Result:
Result:
PIN :
Registering
aNew
Handset
1.
2.
A handset can be registered to up to 4 different
base phones. And a base phone can be used with
up to 5 handsets.
GAP is the standard for the interworking of
handsets and base stations of different
manufacturers.
This model digital phone supports GAP. However,
when it is used with other manufacture GAP-
supported phones, functions except for
conversation could not always be available.
3.
4.
5.
INT
INT
INT
INT
INT
INT
INT
INT
page page
1
0
2ABC
3
DEF
4GHI
5JKL
6
MNO
7
PQRS
8TUV
9WXYZ
Table of contents
Other ALcom Cordless Telephone manuals

ALcom
ALcom CL-3375 User manual

ALcom
ALcom BL100 User manual

ALcom
ALcom DT-830 User manual

ALcom
ALcom SYMPHONY 2200 User manual

ALcom
ALcom ADT1047 User manual

ALcom
ALcom Lifestyle 1900 User manual

ALcom
ALcom Colombo Combo User manual

ALcom
ALcom AT6128 User manual

ALcom
ALcom CL-3350 INF User manual

ALcom
ALcom SN200 User manual